I was standing in the grocery store parking lot last October, fumbling for my keys, when the smell of a nearby pumpkin patch—damp hay, cold air, a hint of cinnamon—hit me. And suddenly I was six years old, sitting cross-legged on my Aunt Maggie’s linoleum kitchen floor, watching her arrange carrot sticks into a spider web on a plastic tray. She was humming something off-key, and I was supposed to be “helping,” but mostly I was just eating the black olives she kept sneaking me under the counter.
Aunt Maggie passed away a few years back, and I haven’t thought about that veggie tray in forever. But there in that parking lot, I could almost feel the cold floor under my legs and hear her say, “Eat your colors, kiddo. The spiders are watching.” Honestly, I laughed out loud. And then I got a little choked up. You know that feeling when a memory just ambushes you in the middle of a Tuesday? That was it.
So I decided to make my own version. Not for a party, not for a school function—just for me and my kids on a random October evening. I wanted to recreate that weird, wonderful moment: a veggie tray that looked like a spider web, loaded with ranch dip, and somehow made eating vegetables feel like an adventure. This Kid-Approved Spider Web Veggie Tray with Ranch Dip is the result. It’s simple, it’s fun, and it’s exactly the kind of thing that turns a regular Tuesday into a memory.
And let me tell you, my kids went absolutely bonkers for it. They fought over who got to eat the “spider” (a black olive with cream cheese legs). I mean, they never fight over broccoli. Ever. So this felt like a win.
Why You’ll Love This Recipe
I’ve tested this veggie tray about six times now, trying different arrangements and dips, and I can say with confidence: this is the version that works. It’s not just cute—it’s smart. Here’s why you’ll want to make it for your family:
- Quick & Easy: Comes together in under 20 minutes, which is a lifesaver when you’ve got a hungry crew staring at you after school. No cooking required.
- Simple Ingredients: Everything is a standard grocery store find. No chasing down weird specialty items. You probably already have the ranch mix in your pantry.
- Perfect for Halloween or Any Fall Gathering: Great for classroom parties, potlucks, or just a fun weeknight snack. The spider web design is a total crowd-pleaser.
- Crowd-Pleaser: I’ve served this to kids ages 3 to 12, and every single one of them ate their vegetables without complaint. The presentation does the heavy lifting.
- Unbelievably Delicious: The ranch dip is made from scratch with sour cream and buttermilk—way better than the bottled stuff. It’s creamy, tangy, and perfectly seasoned.
What makes this recipe different from the rest? It’s the combination of a fun, spooky design with a dip that actually tastes homemade. Most veggie trays rely on store-bought ranch that’s thin and bland. Not this one. I’ve tested the ratios until the dip is thick enough to hold a carrot stick upright. Plus, the spider web pattern is deceptively easy to create—no artistic skills needed. I promise.
This isn’t just a veggie tray. It’s the kind of snack that makes your kids say, “Can we have vegetables again tomorrow?” And as a parent feeding a family on a sensible budget, that’s a sentence I never thought I’d hear.
What Ingredients You Will Need
This recipe uses simple, wholesome ingredients to deliver bold flavor and satisfying crunch without the fuss. Most of these are pantry staples or easy to find at any grocery store.
For the Ranch Dip
- 1 cup sour cream (full-fat works best for thickness; I use Daisy brand)
- 1/2 cup buttermilk (adds tanginess; shake it well before measuring)
- 1 packet ranch seasoning mix (I prefer Hidden Valley for consistent flavor)
- 1/2 teaspoon garlic powder (optional, but adds a nice kick)
- Fresh chives, chopped (for garnish; optional but pretty)
For the Veggie Tray
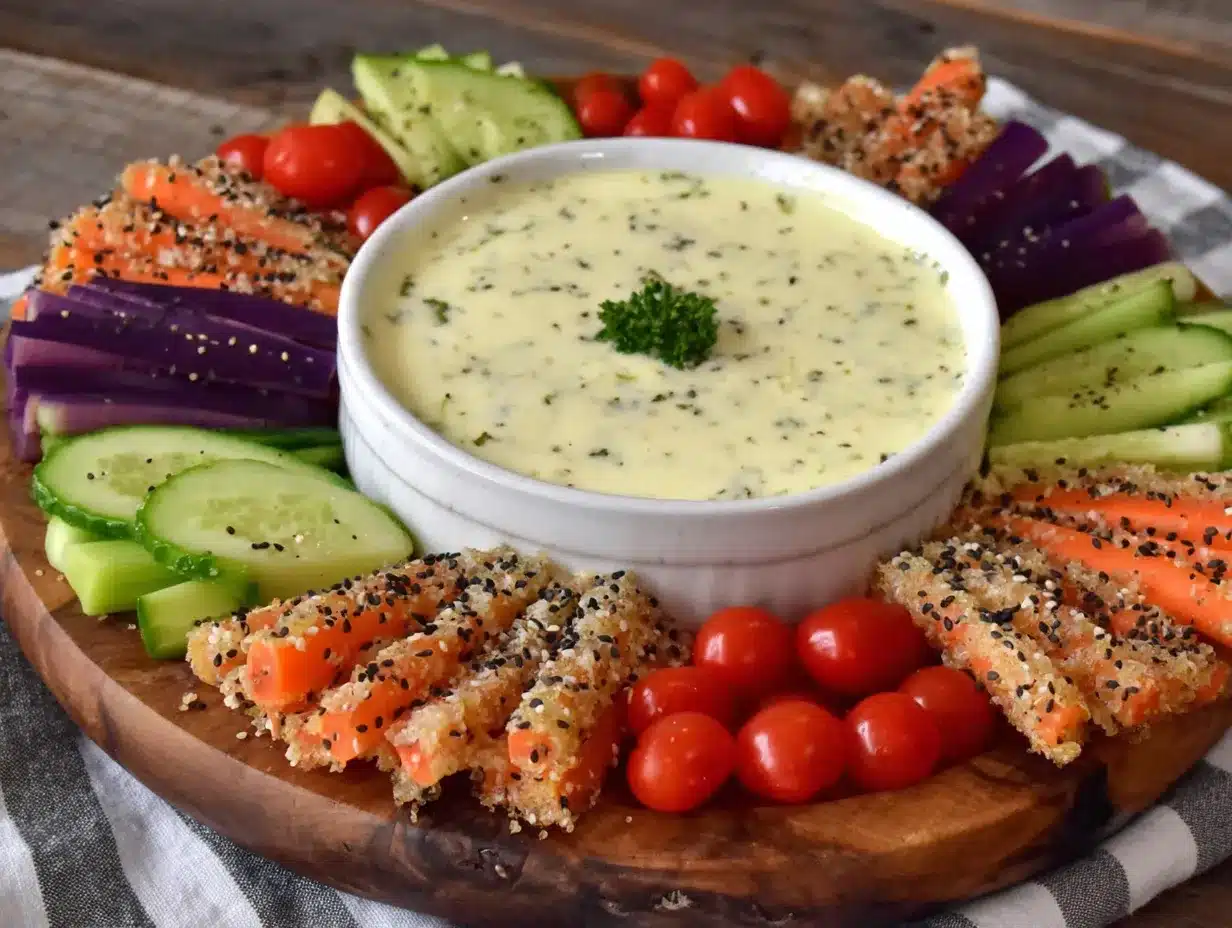
- 1 large round platter or pizza pan (12-14 inches wide, preferably white for contrast)
- 1 cup broccoli florets (cut into small, bite-sized pieces)
- 1 cup cauliflower florets (same size as broccoli for uniformity)
- 1 cup carrot sticks (about 2-3 inches long, thin matchsticks)
- 1 cup cucumber slices (cut into half-moons or rounds)
- 1 cup cherry tomatoes (halved if large)
- 1/2 cup black olives (whole, for the spider decoration)
- 2 tablespoons cream cheese (softened, for spider legs)
Ingredient selection tips: For the best crunch, pick firm, brightly colored vegetables. Avoid limp or bruised produce—it will show in the tray. If you’re making this ahead, blanch the broccoli and cauliflower in boiling water for 30 seconds, then plunge into ice water. This keeps them bright green and crisp for hours. For the dip, I’ve found that using full-fat sour cream makes a noticeable difference. Low-fat versions can turn watery after sitting in the fridge.
Substitution guidance: Use Greek yogurt instead of sour cream for a lighter dip. For a dairy-free version, swap the sour cream for a plant-based alternative and use a vegan ranch packet. You can also swap out any vegetable based on what your kids like—bell pepper strips, snap peas, or celery all work beautifully.
Equipment Needed
You don’t need fancy tools for this recipe, which is part of the beauty. Here’s what you’ll want on hand:
- Large round platter or pizza pan (12-14 inches wide; a white surface makes the spider web pop)
- Small mixing bowl (for the ranch dip)
- Whisk (for combining dip ingredients smoothly)
- Cutting board and sharp knife (for prepping vegetables)
- Small piping bag or zip-top bag (for drawing the spider web with ranch dip)
- Paring knife or toothpick (for making spider legs from cream cheese)
- Measuring cups and spoons
If you don’t have a round platter, a large dinner plate works fine. Just make sure it’s flat. I’ve used a rimmed baking sheet in a pinch—not as pretty, but it gets the job done. For the piping bag, a simple zip-top bag with the corner snipped off is perfect. Budget-friendly tip: you can find large white platters at dollar stores for under $5.
Preparation Method
This recipe is more about assembly than actual cooking, but the order matters. Follow these steps for the best results.
Step 1: Make the Ranch Dip (5 minutes)
In a small mixing bowl, combine 1 cup sour cream, 1/2 cup buttermilk, 1 packet ranch seasoning mix, and 1/2 teaspoon garlic powder (if using). Whisk until smooth and creamy. The mixture should be thick but pourable—think pancake batter consistency. If it’s too thick, add buttermilk a tablespoon at a time. Cover and refrigerate while you prep the vegetables. This allows the flavors to meld.
Step 2: Prep the Vegetables (10 minutes)
Wash all vegetables thoroughly. Cut broccoli and cauliflower into small florets—about 1 inch across. Slice carrot sticks into thin matchsticks, about 2-3 inches long. Cut cucumber into half-moons or rounds. Halve cherry tomatoes if they’re large. The key is uniform sizes so the tray looks intentional. Pro tip: if you’re using a crinkle cutter for the carrots, kids love the wavy edges. It makes them feel fancy.
Step 3: Assemble the Spider Web Base (5 minutes)
Place your round platter on a flat surface. Spoon the ranch dip into a small piping bag or a zip-top bag with a tiny corner snipped off. Starting from the center of the platter, pipe a small circle of dip (about 2 inches in diameter). Then pipe a larger circle around it, about 2 inches away. Repeat until you have 4-5 concentric circles, like a target. The outermost circle should be about 1 inch from the edge of the platter.
Step 4: Create the Web Lines (3 minutes)
Using the same piping bag, pipe 6-8 straight lines radiating from the center circle outward to the edge of the platter, like spokes on a wheel. These lines should cross over the concentric circles, creating a web pattern. Don’t worry about perfection—spider webs are naturally imperfect. If you mess up, just wipe the dip off with a paper towel and try again. The dip is forgiving.
Step 5: Arrange the Vegetables (10 minutes)
Now the fun part. Place the vegetables in the spaces between the web lines. Start with the outer ring: arrange broccoli florets along the edge of the platter, following the curve. Move inward to the next ring, using cauliflower. Then carrot sticks, then cucumber slices, then cherry tomatoes in the center ring. The goal is to fill the spaces completely, leaving the web lines visible. Press the vegetables gently into the dip to keep them in place.
Step 6: Make the Spider Decoration (5 minutes)
Take a whole black olive for the spider body. Using a paring knife or toothpick, make small holes on each side of the olive. Insert thin strips of cream cheese into the holes to form legs—four on each side. You can also use thin carrot strips for legs if you prefer. Place the spider in the center of the web, right on the small dip circle. For extra creepiness, make 2-3 small spiders scattered around the tray.
Step 7: Chill and Serve (optional, 30 minutes)
For best results, refrigerate the assembled tray for 30 minutes before serving. This firms up the dip and chills the vegetables, making them extra crisp. If you’re serving immediately, that’s fine too. The web will hold its shape for about an hour at room temperature.
Cooking Tips & Techniques
I’ve made this tray about a dozen times now, and I’ve learned a few things the hard way. Here are my best tips for success:
- Don’t overfill the piping bag. Ranch dip is thinner than frosting, so if you fill the bag too much, it will leak out the top. Fill it halfway and twist the top closed.
- Use a cold platter. If your platter is warm, the dip will spread too quickly and lose its shape. Pop the platter in the fridge for 10 minutes before you start.
- Blanch the broccoli and cauliflower if making ahead. I learned this after a soggy tray incident at a school party. Blanching for 30 seconds sets the color and keeps them crunchy for hours.
- Keep the dip thick. If your ranch is too thin, it won’t hold the web pattern. Add an extra tablespoon of sour cream if needed.
- Let the kids help. This is a great recipe for little hands. My five-year-old loves arranging the vegetables, even if they end up in weird places. It’s fine—it adds character.
- Prep vegetables the night before. Store them in separate zip-top bags in the fridge. Then assembly takes only 15 minutes the next day.
One mistake I made early on: I used a piping tip for the web, and it was too small. The dip kept clogging. Now I just snip a corner off a zip-top bag—way easier and less cleanup.
Variations & Adaptations
This recipe is endlessly adaptable. Here are some ways to make it your own:
Dietary Variations
- Dairy-Free: Use a plant-based sour cream and vegan ranch seasoning. The web pattern works the same.
- Low-Carb/Keto: Swap carrots for bell pepper strips and cherry tomatoes for cucumber rounds. Use full-fat sour cream for the dip.
- Gluten-Free: This recipe is naturally gluten-free, but double-check your ranch seasoning packet.
Flavor Twists
- Spicy Ranch: Add 1/2 teaspoon cayenne pepper or a dash of hot sauce to the dip for adults who want a kick.
- Herb Garden: Stir in fresh dill, parsley, or basil into the ranch dip for a brighter flavor.
- Bacon Ranch: Crumble cooked bacon over the vegetables before serving. My kids call this the “fancy version.”
Seasonal Adaptations
- Spring: Use asparagus spears and sugar snap peas instead of broccoli and cauliflower.
- Summer: Add grilled zucchini slices and fresh corn kernels for a BBQ-friendly tray.
- Winter: Roast the broccoli and cauliflower for 10 minutes at 400°F before assembling. Adds warmth and depth.
I once made a version with all purple vegetables—purple cauliflower, purple carrots, and radicchio—for a “witch’s garden” theme. It looked amazing, and the kids thought it was magical. Don’t be afraid to get creative with colors.
Serving & Storage Suggestions
This veggie tray is best served chilled, straight from the fridge. The contrast between the cold, crisp vegetables and the creamy ranch dip is what makes it so satisfying. For a Halloween party, arrange it on a black platter for extra drama. You can also serve it alongside other spooky snacks like “mummy” hot dogs (crescent roll-wrapped hot dogs with mustard eyes) or “witch’s fingers” (almond-shaped cookies with a slivered almond nail).
Storage: If you have leftovers (unlikely in my house, but possible), transfer the vegetables and dip to separate containers. The vegetables will keep in the fridge for 2-3 days. The ranch dip lasts up to 5 days in an airtight container. Do not freeze the dip—it will separate and become watery.
Reheating: There’s no reheating needed for this recipe, but if you’ve roasted vegetables for a winter version, simply reheat them in a 350°F oven for 5 minutes before arranging on the tray.
Flavor development: The ranch dip actually tastes better after sitting in the fridge for a few hours. The herbs and spices meld together beautifully. Make it a day ahead if you can.
Nutritional Information & Benefits
This veggie tray is a nutrient powerhouse disguised as a fun snack. Here’s an approximate breakdown per serving (assuming 8 servings):
- Calories: 180
- Fat: 12g
- Carbohydrates: 14g
- Fiber: 4g
- Protein: 5g
- Sugar: 6g
Key health benefits: Broccoli and cauliflower are packed with vitamin C and fiber, supporting immune health and digestion. Carrots provide beta-carotene for eye health. The sour cream in the dip adds calcium and probiotics (if using live culture). This is a great way to get picky eaters to consume a variety of vegetables in one sitting.
Dietary considerations: This recipe is gluten-free and can be made dairy-free with simple substitutions. It’s also nut-free and egg-free. The only potential allergen is dairy from the sour cream and buttermilk in the dip.
My personal take: I love that this recipe makes vegetables feel like a treat, not a chore. It’s a win for parents who want to feed their families well without the battle.
Conclusion
This Kid-Approved Spider Web Veggie Tray with Ranch Dip is proof that eating vegetables can be fun, affordable, and genuinely delicious. It takes less than 30 minutes to put together, uses ingredients you probably already have, and turns a simple snack into a memorable moment. Whether you’re making it for a Halloween party, a classroom celebration, or just a random Tuesday night, it’s the kind of recipe that makes everyone smile.
I love this recipe because it reminds me of Aunt Maggie’s kitchen—the laughter, the sneaky olives, the feeling that food was an adventure. And now I get to share that feeling with my own kids. They don’t know about Aunt Maggie yet, but they know that vegetables can be shaped into spider webs, and that’s enough for now.
I’d love to hear how yours turns out. Did your kids help arrange the vegetables? Did you add any creative twists? Drop a comment below or tag me in your photos—I’m always looking for new ideas. And if you make this for a party, let me know how fast it disappeared. (Spoiler: very fast.) Happy snacking, friends!
Frequently Asked Questions
Can I make this veggie tray the night before?
Yes, but with one caveat: assemble the tray without the ranch dip web. Store the vegetables and dip separately in the fridge. Pipe the web and arrange the vegetables just before serving to keep everything crisp and fresh.
What if I don’t have a round platter?
No problem! Use a large dinner plate, a rectangular baking sheet, or even a clean pizza pan. The web pattern will still work—just adjust the shape of your circles to fit the surface.
How do I keep the vegetables from sliding off the dip?
Press them gently into the dip so they stick. If the dip is thick enough, it will hold them in place. You can also add a thin layer of dip under the vegetables for extra adhesion.
Can I use store-bought ranch instead of homemade?
Absolutely. But store-bought ranch is thinner, so the web pattern won’t hold as well. If you use bottled ranch, pipe it carefully and serve immediately. Homemade is thicker and more stable.
My kids are picky eaters—will they eat this?
I can’t promise, but I’ve had great success with picky eaters. The spider web design makes vegetables feel like a game. Let your kids help arrange the tray, and they’re more likely to eat what they’ve “built.” Start with familiar vegetables and add new ones slowly.
Pin This Recipe!
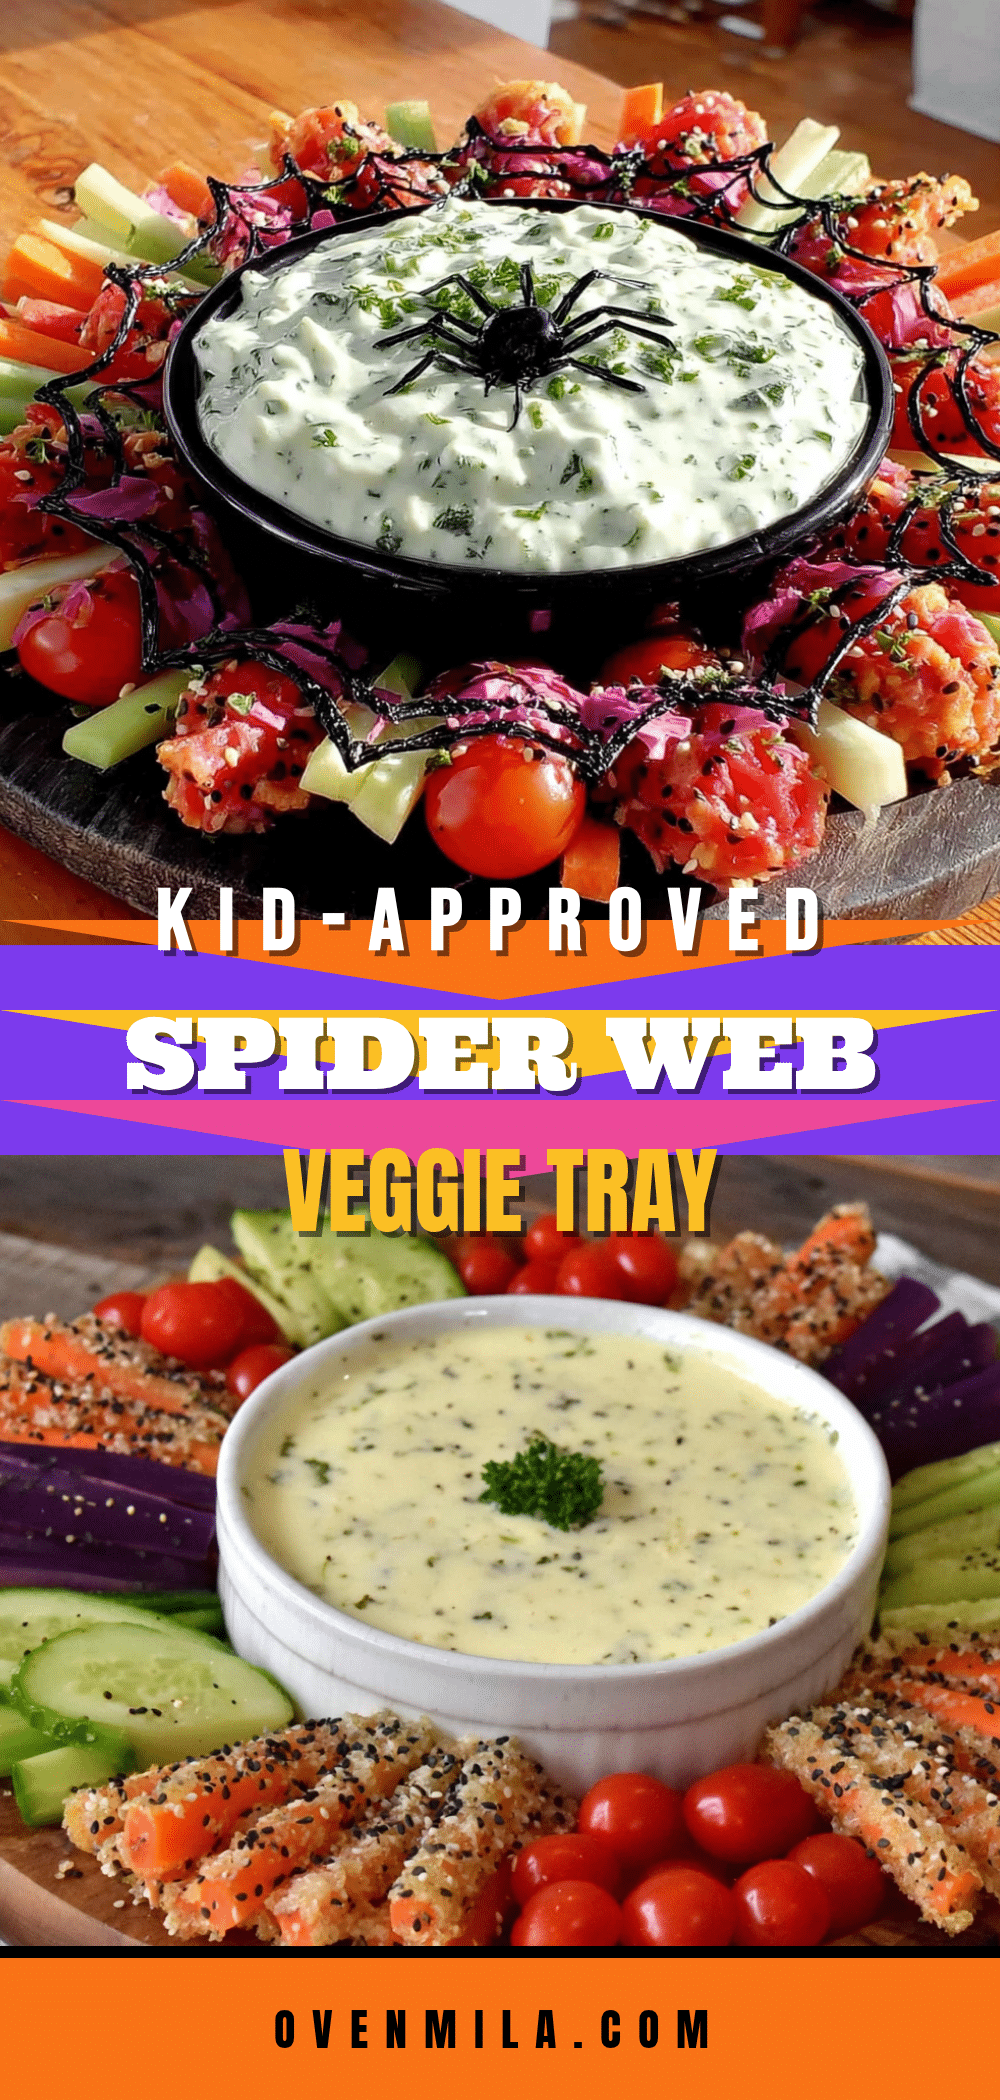
Easy Spider Web Veggie Tray with Ranch Dip Recipe
A fun and spooky veggie tray shaped like a spider web, served with a creamy homemade ranch dip. Perfect for Halloween parties or a creative weeknight snack that kids will love.
- Prep Time: 20 minutes
- Cook Time: 0 minutes
- Total Time: 20 minutes
- Yield: 8 servings 1x
- Category: Appetizer
- Cuisine: American
Ingredients
- 1 cup sour cream (full-fat recommended)
- 1/2 cup buttermilk
- 1 packet ranch seasoning mix
- 1/2 teaspoon garlic powder (optional)
- Fresh chives, chopped (for garnish, optional)
- 1 large round platter or pizza pan (12–14 inches wide)
- 1 cup broccoli florets (bite-sized)
- 1 cup cauliflower florets (bite-sized)
- 1 cup carrot sticks (2–3 inches long, thin matchsticks)
- 1 cup cucumber slices (half-moons or rounds)
- 1 cup cherry tomatoes (halved if large)
- 1/2 cup black olives (whole, for spider decoration)
- 2 tablespoons cream cheese (softened, for spider legs)
Instructions
- Make the Ranch Dip: In a small mixing bowl, combine 1 cup sour cream, 1/2 cup buttermilk, 1 packet ranch seasoning mix, and 1/2 teaspoon garlic powder (if using). Whisk until smooth and creamy. Cover and refrigerate while prepping vegetables.
- Prep the Vegetables: Wash all vegetables. Cut broccoli and cauliflower into small florets (about 1 inch across). Slice carrot sticks into thin matchsticks (2-3 inches long). Cut cucumber into half-moons or rounds. Halve cherry tomatoes if large.
- Assemble the Spider Web Base: Place a round platter on a flat surface. Spoon ranch dip into a piping bag or zip-top bag with a tiny corner snipped off. Starting from the center, pipe a small circle of dip (about 2 inches in diameter). Pipe larger concentric circles around it, each about 2 inches apart, until you have 4-5 circles. The outermost circle should be about 1 inch from the edge.
- Create the Web Lines: Using the same piping bag, pipe 6-8 straight lines radiating from the center circle outward to the edge, like spokes on a wheel. These lines should cross over the concentric circles to create a web pattern.
- Arrange the Vegetables: Place vegetables in the spaces between the web lines. Start with the outer ring: broccoli florets along the edge. Move inward: cauliflower, then carrot sticks, then cucumber slices, then cherry tomatoes in the center ring. Press vegetables gently into the dip to keep them in place.
- Make the Spider Decoration: Take a whole black olive for the spider body. Using a paring knife or toothpick, make small holes on each side. Insert thin strips of cream cheese into the holes to form legs (four on each side). Place the spider in the center of the web. Optionally, make 2-3 small spiders scattered around.
- Chill and Serve: For best results, refrigerate the assembled tray for 30 minutes before serving to firm up the dip and crisp the vegetables. Serve immediately if desired.
Notes
For best results, use full-fat sour cream for a thicker dip. If making ahead, blanch broccoli and cauliflower for 30 seconds to keep them crisp. The dip can be made a day in advance for better flavor. Store leftovers separately: vegetables keep 2-3 days, dip up to 5 days in the fridge.
Nutrition
- Serving Size: 1 serving (about 1 c
- Calories: 180
- Sugar: 6
- Sodium: 480
- Fat: 12
- Saturated Fat: 7
- Carbohydrates: 14
- Fiber: 4
- Protein: 5
Keywords: spider web veggie tray, Halloween veggie tray, ranch dip, kid-friendly snack, easy appetizer, vegetable platter


