It was 10:47 PM on a random Tuesday in late September, and a very specific, almost gothic craving hit me. I wanted something black. Not just dark chocolate brown, but truly, deeply, spookily black for cookies. I didn’t have any gel food coloring, which is what normal recipes call for, but I had a dusty jar of black cocoa powder I bought on a whim last spring and the sudden, slightly unhinged idea that it might just work on its own. Honestly, I was tired, the kitchen was a mess from dinner, and my usual baking rules felt like they could take the night off.
Maybe you’ve been there—standing in your kitchen at an hour when most sensible people are in bed, possessed by the need to make something that doesn’t make sense for the time of day. I grabbed the butter, which was still a little cold, and decided I didn’t care. I was going to make these Quick Black Cocoa Halloween Sugar Cookies work if it was the last thing I did before collapsing. I didn’t have parchment paper either, so I just greased the pan with a butter wrapper. Let me tell you, that first batch came out looking like charcoal discs, but the flavor? It was this deep, dark, almost Oreo-like richness that was completely unexpected. The late hour just loosened all the rules, and something about the quiet made the whole mess feel like a secret I was keeping from the world.
Why You’ll Love This Recipe
Let’s be real for a second. Weeknight baking is a whole different beast. You’re tired, you’re hungry, and you don’t have time for a project that takes over the entire kitchen. That’s exactly why I kept coming back to this particular recipe. It’s not just another sugar cookie—it’s the one that saves your sanity when you need a Halloween treat now.
- Quick & Easy: From start to finish, these cookies are on your counter in under 30 minutes. No chilling dough, no complicated steps. Just mix, scoop, and bake.
- Simple Ingredients: You probably already have everything except the black cocoa powder, and that’s one easy Amazon or specialty store purchase that lasts forever.
- Perfect for Weeknight Cravings: When the kids suddenly need a class treat tomorrow or you just want something spooky without the all-day affair, this is your go-to.
- Crowd-Pleaser: I’ve brought these to potlucks and watched adults do a double-take. They taste like the chocolate cookie of your dreams but look like they came from a haunted bakery.
- Unbelievably Delicious: The texture is soft in the middle with slightly crisp edges, and the flavor is this deep, dark cocoa that isn’t overly sweet. It’s next-level comfort food disguised as a Halloween novelty.
What makes this different from every other black cookie recipe? It’s the technique of using black cocoa powder as the only colorant. No artificial dyes, no waiting for colors to develop. The cocoa does all the heavy lifting, giving you that dramatic black color and a flavor that’s intensely rich. This isn’t just another version—it’s the best version for anyone who wants results without the fuss.
What Ingredients You Will Need
This recipe uses simple, pantry-friendly ingredients to deliver that dramatic black color and rich flavor without any fuss. Most of these are staples you’ll already have on hand, making it perfect for those last-minute Halloween cravings.
- Unsalted butter, 1 cup (2 sticks or 226g), softened to room temperature. I prefer using Land O’Lakes for consistent results. (Adds richness and tenderness)
- Granulated sugar, 1 cup (200g). Regular white sugar gives the cookies that classic crisp edge.
- Large egg, 1, at room temperature. This helps bind everything together and adds moisture.
- Vanilla extract, 1 teaspoon. Use pure vanilla if you have it—it rounds out the deep cocoa flavor beautifully.
- All-purpose flour, 1 ¾ cups (220g). Spoon and level it for accuracy; don’t scoop directly from the bag.
- Black cocoa powder, ½ cup (50g). This is the star of the show. I recommend the brand from King Arthur Flour or Rodelle for the deepest color. Regular cocoa won’t give you that black hue.
- Baking powder, ½ teaspoon. Just enough to give them a little lift without spreading too much.
- Salt, ¼ teaspoon. Don’t skip this—it balances the bitterness of the black cocoa.
- Powdered sugar (optional), for dusting or for making a simple royal icing. If you want to decorate, you’ll need about 1 cup (120g) mixed with a tablespoon of milk.
For a dairy-free option, you can swap the butter with a high-quality vegan butter stick, like the one from Miyoko’s. Just make sure it’s the stick form, not the spreadable tub. If you want a gluten-free version, use a 1:1 gluten-free baking flour blend, like the one from Bob’s Red Mill. The texture will be slightly more tender, but the color and flavor will still be spot on.
Equipment Needed
You don’t need a fancy bakery setup for these cookies, which is exactly how I like it. Here’s what you’ll need to pull this off.
- Mixing bowls: One large and one medium. I use my grandmother’s old Pyrex bowls, but any set will do.
- Electric hand mixer or stand mixer: A hand mixer works perfectly fine. I’ve made these with a whisk in a pinch, but your arm will thank you for the mixer.
- Measuring cups and spoons: For accuracy. Baking is a science, even when it’s fast.
- Baking sheet: A standard half-sheet pan works great. If you have a dark non-stick pan, keep an eye on the bake time—they can brown faster.
- Parchment paper or silicone baking mat: Highly recommended for easy cleanup and even baking. If you don’t have it, just grease the pan well.
- Cookie scoop or tablespoon: A 1.5-tablespoon scoop gives you uniform cookies that bake evenly. I learned this the hard way after making misshapen blobs for years.
- Wire cooling rack: Essential for getting those crispy edges. If you let them cool on the pan, the bottoms can get soggy.
Preparation Method
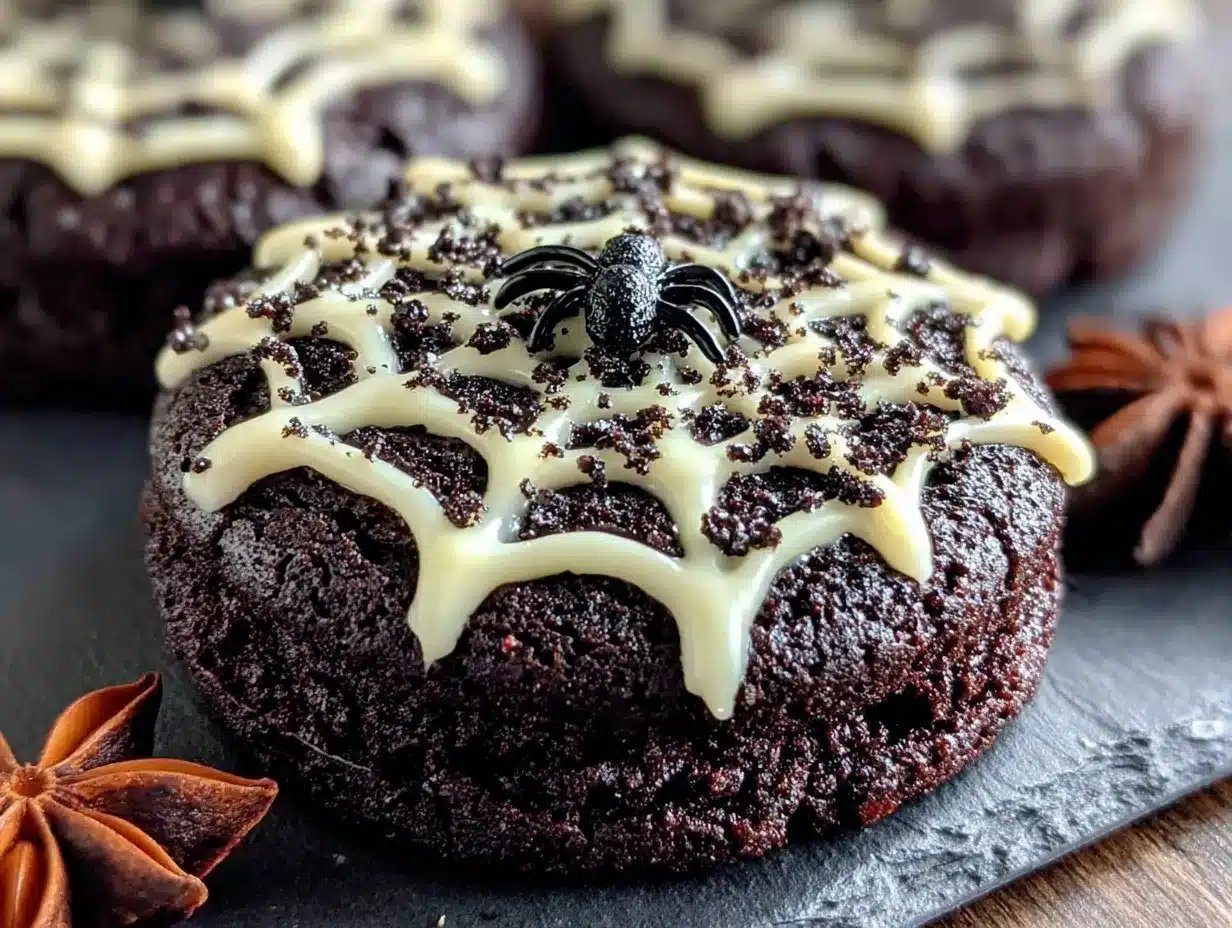
Alright, let’s get into it. This whole process takes about 25 minutes from start to finish, so preheat your oven to 350°F (175°C) right now. Trust me, you don’t want to be waiting around later.
- Cream the butter and sugar. In your large mixing bowl, beat the softened butter and granulated sugar together on medium speed until it’s light and fluffy. This takes about 2-3 minutes. You’re looking for a pale, almost whipped texture. If your butter is still a little cold, don’t panic—just beat it a minute longer. It’ll come together.
- Add the wet ingredients. Crack in the egg and pour in the vanilla extract. Beat on low until just combined. Don’t overmix here, or the cookies can get tough. Scrape down the sides of the bowl with a spatula. You’ll see the mixture look a little curdled at this point—that’s totally normal.
- Whisk the dry ingredients separately. In your medium bowl, whisk together the flour, black cocoa powder, baking powder, and salt. This step is crucial because black cocoa is clumpier than regular cocoa. Whisking breaks up those lumps so you don’t get bitter pockets in your cookies.
- Combine wet and dry. Gradually add the dry ingredients to the wet mixture, mixing on low speed. Stop as soon as the flour disappears. The dough will look very dark and almost like soft play-dough. It should be slightly sticky but hold together when pressed. If it feels too dry, add a teaspoon of milk. If it’s too sticky, add a tablespoon of flour.
- Scoop and shape. Using your cookie scoop or a tablespoon, scoop out rounded balls of dough (about 1.5 tablespoons each). Place them on your prepared baking sheet about 2 inches apart. They will spread a little, but not much. If you want perfectly round cookies, roll each ball between your palms for a few seconds. I sometimes skip this step when I’m in a hurry, and they still turn out great.
- Bake. Pop the sheet into the preheated oven and bake for 8-10 minutes. At 8 minutes, the cookies will look puffed and slightly cracked on top. The edges should be set but the centers will still look a little soft. This is exactly what you want. For a crisper cookie, go the full 10 minutes. For a softer, chewier cookie, pull them at 8 minutes.
- Cool. Let the cookies rest on the baking sheet for 5 minutes. This is important—they’re fragile when hot. After 5 minutes, transfer them to a wire cooling rack to cool completely. If you’re decorating with icing, wait until they’re fully cool, about 20 minutes.
Cooking Tips & Techniques
I’ve made these cookies at least a dozen times now, and I’ve definitely learned a few things the hard way. Here’s what I wish someone had told me.
The biggest mistake is overmixing the dough. I did this once when I was distracted by a phone call, and the cookies came out tough and flat. The gluten develops too much, and you lose that tender, soft texture. Mix just until the flour disappears—no more.
Another common issue is using regular cocoa powder instead of black cocoa. Regular cocoa will give you a dark brown cookie, not the dramatic black you’re after. Black cocoa is more alkalized and has a distinct Oreo-like flavor. It’s worth the extra effort to find it.
Watch your bake time closely. These cookies are so dark that it’s hard to tell when they’re done by color alone. Instead, look for the edges to be set and the tops to have a few tiny cracks. If you press lightly on the center, it should spring back slightly. I once left them in for 12 minutes thinking they needed more time, and they turned into hockey pucks. Don’t be like me.
For the best texture, make sure your butter is truly softened. Cold butter won’t cream properly with the sugar, leading to dense cookies. If you forgot to take it out of the fridge, cut it into small cubes and microwave it in 5-second bursts until it’s soft but not melted.
Variations & Adaptations
One of the best things about this recipe is how flexible it is. Here are a few ways I’ve adapted it depending on my mood or what I have on hand.
- Spooky Sandwiches: Bake the cookies flat (don’t roll them into balls, just scoop and flatten slightly) and sandwich them with a simple buttercream or cream cheese frosting. The black cookies with white filling look incredible for Halloween parties.
- Gluten-Free Version: I swapped the all-purpose flour for a 1:1 gluten-free baking blend when a friend with celiac disease came over. The cookies spread a little more, so I chilled the dough for 15 minutes before baking. They were slightly more delicate but still delicious.
- Mint Chocolate Twist: Add ½ teaspoon of peppermint extract along with the vanilla. The combination of dark cocoa and mint is like a fancy thin mint cookie, but way easier to make.
- Spiced Halloween Cookies: Mix in 1 teaspoon of pumpkin pie spice with the dry ingredients. The warmth of the spices against the dark cocoa is surprisingly good and gives them a cozy fall vibe.
- Vegan Adaptation: Use a flax egg (1 tablespoon ground flaxseed mixed with 3 tablespoons water, let sit for 5 minutes) and vegan butter sticks. The texture will be a bit more cake-like, but the color and flavor hold up perfectly.
Serving & Storage Suggestions
These cookies are best served at room temperature, but honestly, I love them straight from the fridge on a warm day. The cold makes the cocoa flavor even more intense.
For serving, arrange them on a black or white platter for maximum Halloween drama. They pair beautifully with a cold glass of milk or a hot cup of coffee. If you’re feeling fancy, dust them with a little powdered sugar right before serving to look like snow or spiderwebs. I once served them alongside a bowl of vanilla ice cream for a spooky sundae bar, and it was a hit.
For storage, keep these cookies in an airtight container at room temperature for up to 5 days. They actually get a little softer and more fudgy after a day or two. If you stack them, place a piece of parchment paper between layers to prevent sticking.
For freezing, you have two options. You can freeze the unbaked dough balls on a baking sheet, then transfer them to a freezer bag for up to 3 months. Bake directly from frozen, adding 2-3 minutes to the bake time. Or you can freeze the baked cookies in a freezer-safe container for up to 2 months. Thaw at room temperature for about 15 minutes before serving.
Nutritional Information & Benefits
Let’s be honest—these are a treat, not a health food. But here’s the estimated breakdown per cookie (based on 24 cookies):
- Calories: 145
- Fat: 8g
- Carbohydrates: 17g
- Protein: 2g
- Sugar: 9g
That said, black cocoa powder is actually rich in antioxidants, similar to dark chocolate. It contains flavonoids that can support heart health when consumed in moderation. Plus, because these cookies are intensely chocolatey, one or two is usually enough to satisfy a sweet craving—which is more than I can say for some bland sugar cookies.
If you’re watching your sugar intake, you can reduce the granulated sugar to ¾ cup. The cookies will be slightly less crisp but still delicious. For a lower-fat option, swap half the butter with unsweetened applesauce, but know that the texture will be more cake-like.
Conclusion
These Quick Black Cocoa Halloween Sugar Cookies have become my secret weapon for every October baking emergency. They’re the recipe I turn to when I need something dramatic without the drama. The deep, dark color and rich flavor make them feel special, but the 30-minute timeline keeps them firmly in the realm of “I can do this on a Tuesday night.”
I honestly love how forgiving this recipe is. You can dress them up with icing, keep them plain, or experiment with flavors. They’ve never let me down, even when I was half-asleep and eyeballing measurements. That’s the kind of recipe worth holding onto.
Now I want to hear from you—what’s your go-to Halloween treat when time is short? Have you tried making these with any wild variations? Drop a comment below and let me know how they turned out. And if you loved this recipe, share it with a friend who needs a little spooky magic in their kitchen this season. Happy baking, and may your cookies always be perfectly dark!
Frequently Asked Questions
Can I use regular cocoa powder instead of black cocoa?
You can, but your cookies will be dark brown, not black. The flavor will also be more like traditional chocolate rather than the Oreo-like taste of black cocoa. If you’re set on the color, stick with black cocoa.
Why did my cookies turn out dry?
This usually happens from overbaking or overmixing the dough. Black cocoa is very absorbent, so it’s easy to accidentally add too much flour. Measure your flour by spooning it into the cup and leveling it off, not by scooping directly from the bag.
Can I make this dough ahead of time?
Absolutely. You can refrigerate the dough for up to 3 days. Just let it sit at room temperature for 10 minutes before scooping, as it will be very firm. You can also freeze the dough balls as mentioned above.
How do I get the cookies to be perfectly round?
After scooping, roll each ball of dough between your palms for a few seconds. This smooths out any rough edges and ensures even baking. If you want them even rounder, use a round cookie cutter to “scoot” the edges right after they come out of the oven while they’re still warm.
Can I add food coloring to make them even blacker?
You can, but it’s not necessary. The black cocoa powder does a fantastic job on its own. If you want an ultra-black cookie, add a tiny drop of black gel food coloring (not liquid) to the wet ingredients. Just be careful—a little goes a long way, and it can stain your hands and countertops.
Pin This Recipe!
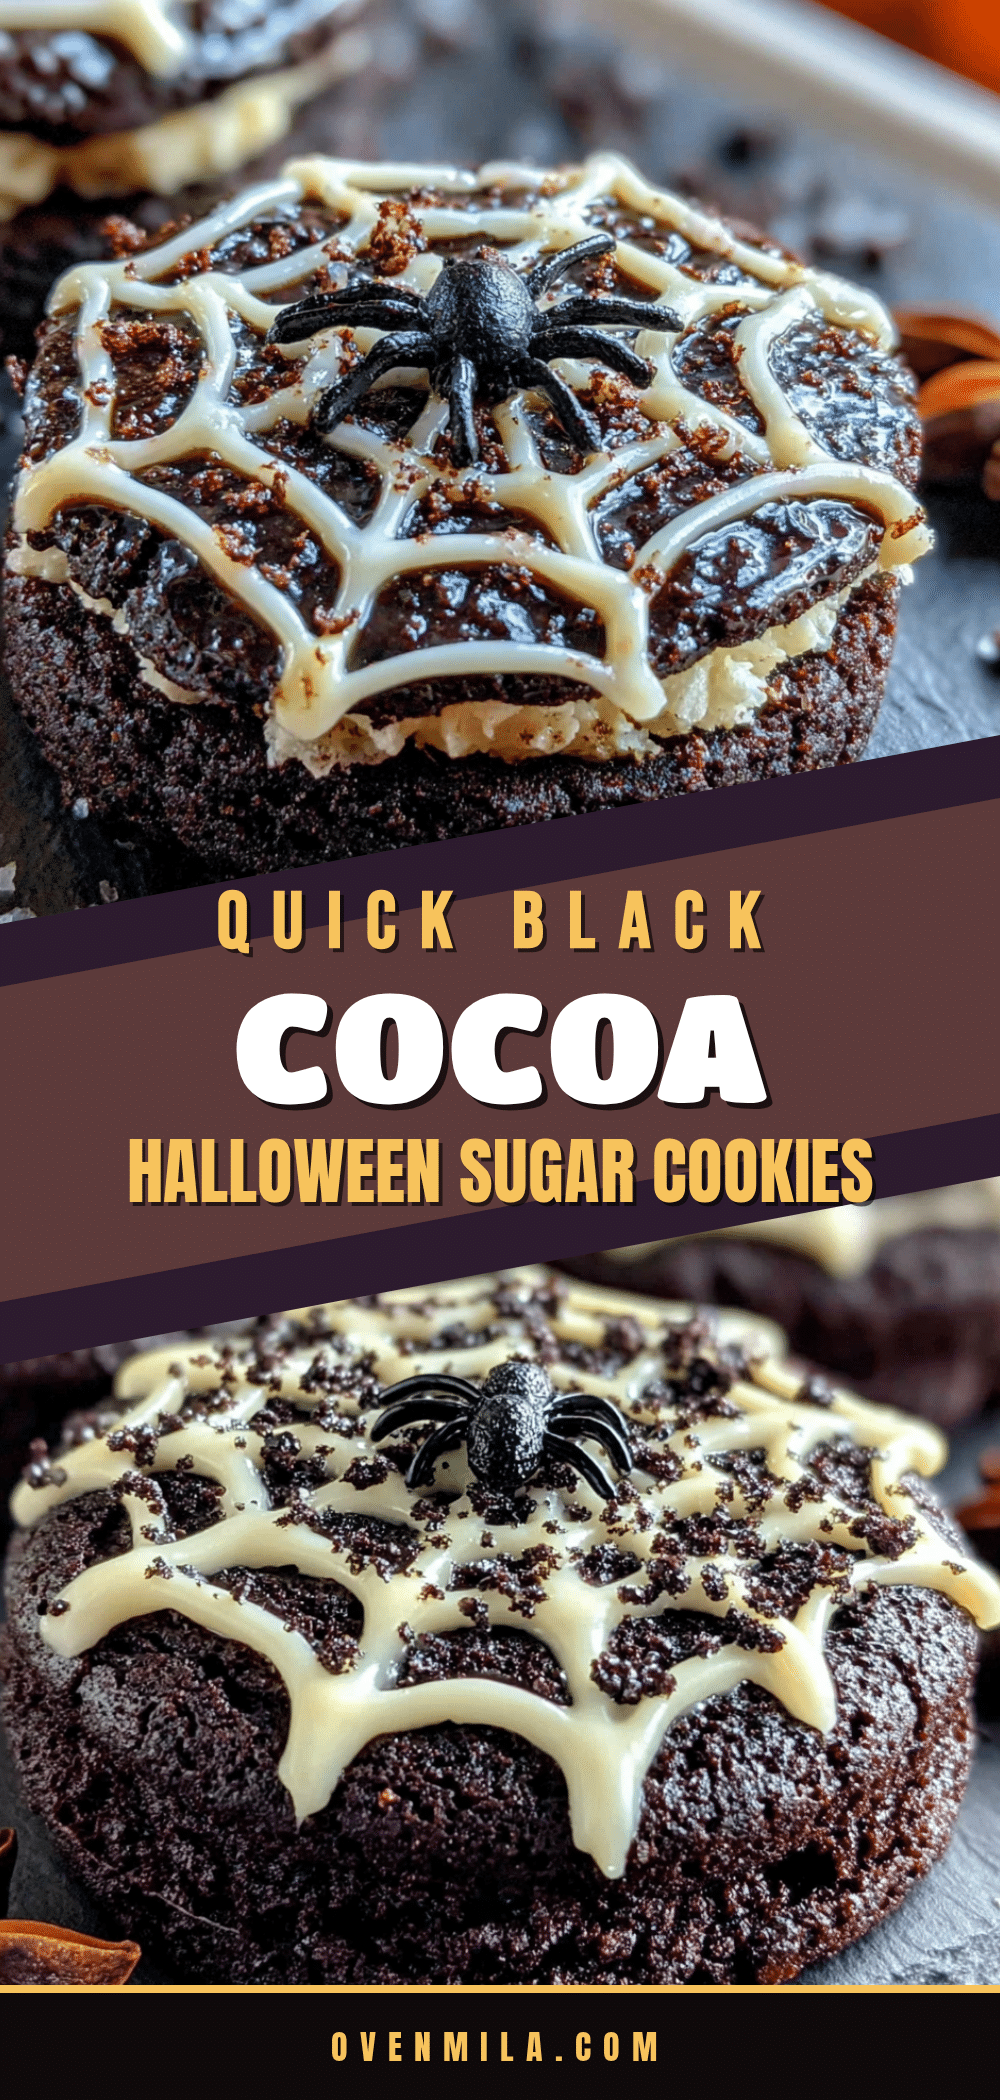
Best Black Cocoa Halloween Cookies – Easy 30-Min Recipe
These quick and easy black cocoa Halloween cookies are made without artificial dyes, using black cocoa powder for a dramatic black color and rich Oreo-like flavor. Ready in under 30 minutes, they’re perfect for weeknight baking and Halloween parties.
- Prep Time: 15 minutes
- Cook Time: 10 minutes
- Total Time: 25 minutes
- Yield: 24 servings 1x
- Category: Dessert
- Cuisine: American
Ingredients
- 1 cup (2 sticks or 226g) unsalted butter, softened to room temperature
- 1 cup (200g) granulated sugar
- 1 large egg, at room temperature
- 1 teaspoon vanilla extract
- 1 ¾ cups (220g) all-purpose flour, spooned and leveled
- ½ cup (50g) black cocoa powder (recommended: King Arthur Flour or Rodelle)
- ½ teaspoon baking powder
- ¼ teaspoon salt
- Powdered sugar (optional), for dusting or royal icing
Instructions
- Preheat oven to 350°F (175°C). Line a baking sheet with parchment paper or a silicone baking mat.
- In a large mixing bowl, beat the softened butter and granulated sugar together on medium speed until light and fluffy, about 2-3 minutes.
- Add the egg and vanilla extract, beating on low until just combined. Scrape down the sides of the bowl.
- In a medium bowl, whisk together the flour, black cocoa powder, baking powder, and salt to break up any lumps.
- Gradually add the dry ingredients to the wet mixture, mixing on low speed until just combined. The dough should be soft and slightly sticky.
- Using a cookie scoop or tablespoon, scoop rounded balls of dough (about 1.5 tablespoons each) and place them 2 inches apart on the prepared baking sheet. Optionally, roll each ball between your palms for perfectly round cookies.
- Bake for 8-10 minutes. At 8 minutes, the cookies will be puffed and slightly cracked on top with soft centers. For crisper cookies, bake 10 minutes.
- Let the cookies rest on the baking sheet for 5 minutes, then transfer to a wire cooling rack to cool completely. If decorating with icing, wait until fully cool (about 20 minutes).
Notes
For the deepest black color, use black cocoa powder from King Arthur Flour or Rodelle. Do not overmix the dough to avoid tough cookies. Watch bake time closely as the dark color makes it hard to judge doneness; look for set edges and tiny cracks on top. For softer cookies, bake 8 minutes; for crisper, bake 10 minutes. Store in an airtight container at room temperature for up to 5 days.
Nutrition
- Serving Size: 1 cookie
- Calories: 145
- Sugar: 9
- Sodium: 75
- Fat: 8
- Saturated Fat: 5
- Carbohydrates: 17
- Fiber: 1
- Protein: 2
Keywords: black cocoa cookies, Halloween cookies, easy cookies, 30-minute recipe, no food coloring, black cookies, sugar cookies, Halloween dessert


