“These taste exactly like the ones from Starbucks—can you make them again next weekend?”
My sister said that last October, standing in my kitchen with a crumb on her chin and a look of genuine disbelief on her face. She’d watched me pull a tray of golden, craggy triangles from the oven, drizzled them with that signature white icing and maple glaze, and suddenly the idea of spending four dollars on a single scone felt almost silly. I hadn’t planned on making a copycat recipe that day. Honestly, I was just craving something warm and spiced to go with my coffee, and the pumpkin scones at the drive-thru had been calling my name all week. But when I looked at the ingredient list online—and the price tag—I thought, I can do this better at home.
So I did. And honestly? I haven’t bought one since.
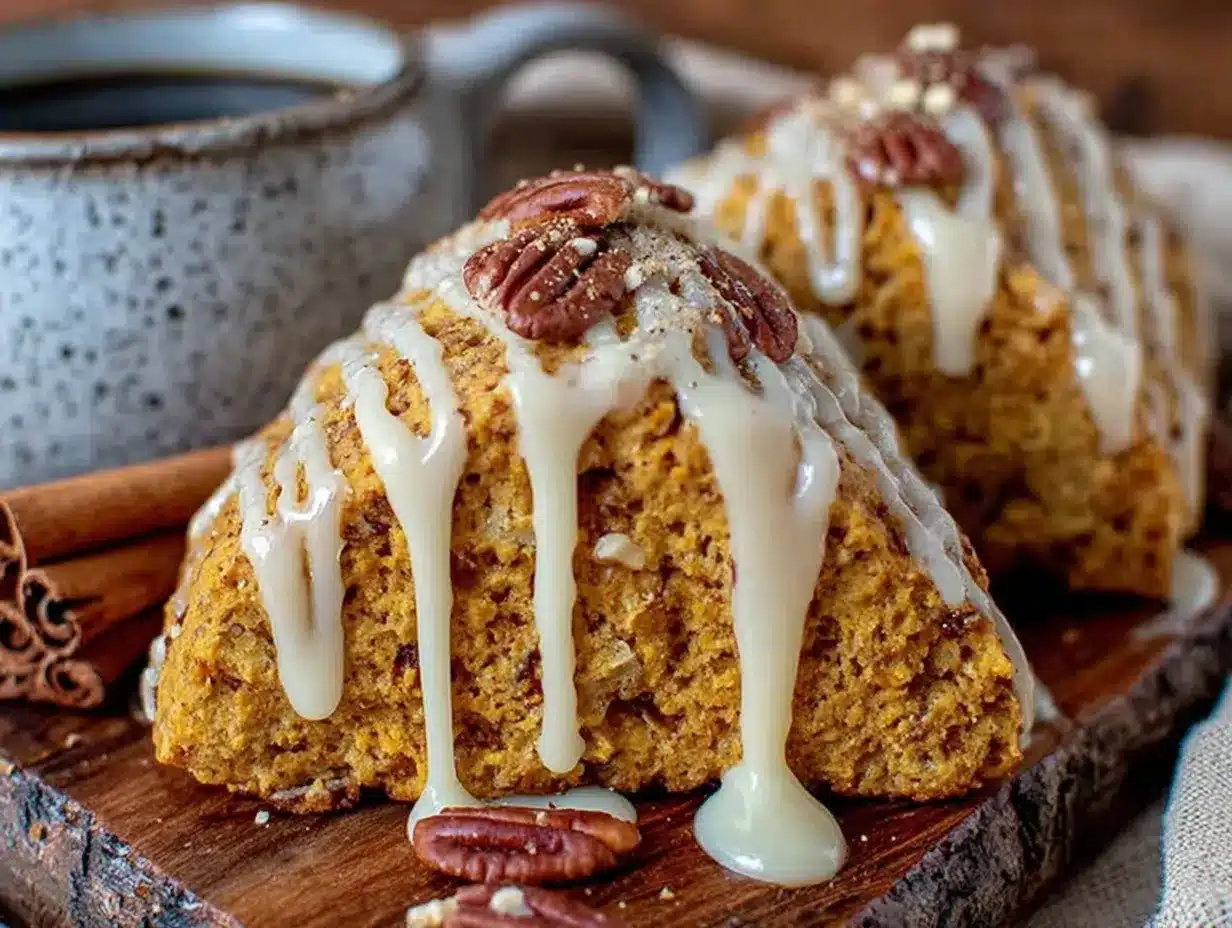
There’s something about that first bite of a perfectly spiced pumpkin scone—crispy on the edges, soft and tender in the middle, with that sweet maple glaze dripping down the sides—that just feels like fall in a single mouthful. This copycat Starbucks pumpkin scones recipe nails the texture, the spice blend, and that unmistakable maple finish. It’s the kind of thing you make on a crisp Saturday morning when the leaves are turning and you’ve got nowhere to be but the kitchen. And once you taste one fresh from the oven, you’ll understand why my sister already put in her request for next month.
Why You’ll Love This Recipe
I’ve tested this recipe at least six times to get the texture just right. The first batch came out too dense—more like a hockey puck than a scone. The second was too dry. But by batch three, I realized the secret was in how you handle the butter and how long you chill the dough. So trust me when I say this version is the one.
- Quick & Easy: From start to finish, you’re looking at about 35 minutes. Perfect for a weekend baking project or a last-minute brunch contribution.
- Simple Ingredients: No weird additives or preservatives here. You probably already have most of these in your pantry—flour, sugar, pumpkin puree, butter, and spices.
- Perfect for Fall Gatherings: Whether it’s a cozy brunch, a Halloween party, or just a quiet morning with a good book, these scones fit right in.
- Crowd-Pleaser: I brought a batch to a neighborhood potluck and three people asked for the recipe before I even sat down. Kids love them. Adults love them. Even my picky uncle loved them.
- Unbelievably Delicious: The texture is everything—crispy edges, soft center, and that maple glaze that soaks in just enough to make every bite perfect.
What makes this different from other copycat recipes? It’s the technique. Instead of cutting cold butter into the flour, I freeze my butter and grate it directly into the dry ingredients. It sounds extra, but it creates those flaky layers you expect from a bakery scone. Plus, I use a blend of maple extract and real maple syrup in the glaze, which gives it that deep, authentic flavor without being overly sweet.
This isn’t just another pumpkin scone recipe. It’s the one that makes you close your eyes after the first bite. It’s comfort food reimagined—faster, easier, and somehow even better than the original. And honestly? It’s perfect for impressing guests without any stress.
What Ingredients You Will Need
This recipe uses simple, wholesome ingredients that come together to create that iconic Starbucks flavor. Most of these are pantry staples, and the ones that aren’t are easy to find at any grocery store.
For the Scones
- All-purpose flour (2 ½ cups) – Spoon and level it for accuracy. Too much flour makes dry scones.
- Granulated sugar (⅓ cup) – Just enough sweetness without overpowering the pumpkin.
- Baking powder (1 tablespoon) – Make sure it’s fresh for the best rise.
- Pumpkin pie spice (2 teaspoons) – I use store-bought for convenience, but you can make your own with cinnamon, nutmeg, ginger, and cloves.
- Ground cinnamon (1 teaspoon) – Adds warmth and depth.
- Salt (½ teaspoon) – Balances the sweetness.
- Cold unsalted butter (6 tablespoons, frozen) – This is non-negotiable. Frozen butter creates flaky layers.
- Pumpkin puree (½ cup) – Not pumpkin pie filling. Make sure it’s 100% pure pumpkin.
- Heavy cream (¼ cup) – Adds richness and tenderness. You can substitute with whole milk if needed.
- Large egg (1) – Binds everything together.
- Vanilla extract (1 teaspoon) – Enhances the warm spices.
For the Maple Glaze
- Powdered sugar (1 ½ cups) – Sifted to avoid lumps.
- Pure maple syrup (2 tablespoons) – Use the real stuff, not pancake syrup.
- Maple extract (½ teaspoon) – This is the secret to that intense maple flavor.
- Heavy cream or milk (2–3 tablespoons) – Adjust for desired consistency.
For the White Icing Drizzle
- Powdered sugar (½ cup)
- Milk (1–2 tablespoons) – Add slowly until you get a thick, drizzling consistency.
I recommend using Libby’s pumpkin puree for consistent results—it’s reliably thick and not watery. And for the maple extract, I love the brand McCormick; it’s bold without being artificial-tasting. If you’re out of pumpkin pie spice, just mix 1 teaspoon cinnamon, ½ teaspoon nutmeg, ¼ teaspoon ginger, and ¼ teaspoon cloves.
Equipment Needed
You don’t need a professional bakery setup for these scones. Just a few basic tools you probably already own.
- Baking sheet – A half-sheet pan works perfectly. Line it with parchment paper for easy cleanup.
- Parchment paper – Non-stick and makes transferring the scones a breeze.
- Large mixing bowl – For combining dry ingredients.
- Medium mixing bowl – For whisking wet ingredients.
- Box grater – This is my secret weapon for grating frozen butter. It distributes the butter evenly without overworking the dough.
- Pastry cutter or fork – If you don’t have a box grater, use a pastry cutter to cut the butter into the flour.
- Bench scraper – Helps shape the dough and cut clean triangles. A sharp knife works too.
- Whisk – For the glaze and icing.
- Cooling rack – Essential for letting the glaze set without turning the scones soggy.
If you don’t have a box grater, you can cube the frozen butter and pulse it in a food processor with the dry ingredients. That works beautifully too. And honestly? A cheap box grater from the dollar store does the job just as well as an expensive one.
Preparation Method
Let’s get baking. I’ll walk you through every step so you get perfect scones every time.
Step 1: Preheat and Prep
Preheat your oven to 400°F (200°C). Line a baking sheet with parchment paper and set it aside. This is one of those small steps that makes a big difference—cold dough hitting a hot oven creates that initial burst of steam that makes scones rise tall and flaky.
Step 2: Mix the Dry Ingredients
In a large bowl, whisk together the flour, sugar, baking powder, pumpkin pie spice, cinnamon, and salt. Make sure there are no lumps. I like to use a whisk here instead of a spoon—it aerates the flour and ensures the spices are evenly distributed.
Step 3: Grate the Frozen Butter
Take your frozen butter and grate it directly into the flour mixture using the large holes of a box grater. Toss the grated butter with the flour using your fingers or a fork until each piece is coated. The mixture should look like coarse crumbs with some pea-sized butter bits remaining. Don’t overmix—those little butter chunks are what create flaky layers.
Step 4: Combine the Wet Ingredients
In a separate bowl, whisk together the pumpkin puree, heavy cream, egg, and vanilla extract until smooth. The mixture should be a rich, deep orange color. If your pumpkin puree looks watery, pat it dry with a paper towel before adding it—excess moisture makes scones dense.
Step 5: Bring It Together
Pour the wet ingredients into the dry ingredients and stir with a fork just until a shaggy dough forms. It will look dry and crumbly at first—that’s normal. Don’t keep mixing. Use your hands to gently bring the dough together, pressing it into a ball. If it feels too dry, add a tablespoon of heavy cream. If it’s too sticky, add a tablespoon of flour.
Step 6: Shape and Chill
Turn the dough out onto a lightly floured surface. Pat it into a ¾-inch thick rectangle, about 8 inches by 6 inches. Use a bench scraper to cut the rectangle in half lengthwise, then cut each half into 3 triangles (you’ll get 6 scones total). Place them on the prepared baking sheet, spacing them about 2 inches apart. Pop the baking sheet in the fridge for 15 minutes. This step is crucial—chilled scones hold their shape better and rise taller.
Step 7: Bake
Bake for 14–16 minutes, or until the edges are golden brown and the tops look set. The scones should feel firm to the touch but still soft in the center. Let them cool on the baking sheet for 5 minutes, then transfer to a cooling rack to cool completely before glazing.
Step 8: Make the Maple Glaze
While the scones cool, make the glaze. In a small bowl, whisk together the powdered sugar, maple syrup, maple extract, and 2 tablespoons of heavy cream. Add more cream a teaspoon at a time until you get a thick but pourable consistency. It should coat the back of a spoon.
Step 9: Make the White Icing
In another small bowl, whisk together the powdered sugar and milk until smooth. The icing should be thick enough to hold its shape when drizzled but thin enough to flow easily.
Step 10: Glaze and Serve
Once the scones are completely cool, drizzle the maple glaze over each one using a spoon or a piping bag. Let it set for 5 minutes, then drizzle the white icing in a zigzag pattern across the top. Let the glazes set for another 10 minutes before serving. The wait is worth it—I promise.
Cooking Tips & Techniques
I’ve made plenty of mistakes with scones so you don’t have to. Here’s what I’ve learned the hard way.
Don’t overwork the dough. This is the number one mistake people make. Scones get tough when you handle them too much. Mix just until the ingredients come together, and shape them gently. Think of it like making biscuits—less is more.
Cold ingredients are your best friend. Cold butter, cold cream, even a cold bowl if you can manage it. The cold butter creates steam pockets as it melts in the oven, which gives you those flaky layers. If your kitchen is warm, pop the shaped scones in the freezer for 10 minutes before baking.
Use a bench scraper, not a knife. A bench scraper cuts through the dough cleanly without compressing the edges. If you use a knife, you can seal the edges shut, which prevents the scones from rising properly.
Bake from cold. I cannot stress this enough. If you bake the scones straight from the fridge, they’ll rise taller and spread less. Room temperature scones turn into flat, sad pancakes.
Let them cool completely before glazing. I know it’s tempting to drizzle that maple glaze over warm scones, but it will just melt into a puddle. Patience pays off here. If you’re short on time, pop the scones in the fridge for 10 minutes after they cool to speed things up.
Double the batch. These scones freeze beautifully (more on that below), so I always make a double batch. One for now, one for later. Future you will be very grateful.
Variations & Adaptations
One of the best things about this recipe is how easily it adapts to different tastes and dietary needs.
Gluten-Free Version: Substitute the all-purpose flour with a 1:1 gluten-free baking flour blend. I’ve tested this with Bob’s Red Mill and King Arthur Measure for Measure, and both work well. Just add an extra tablespoon of heavy cream since gluten-free flour tends to be more absorbent.
Dairy-Free Version: Use cold vegan butter or coconut oil in place of the butter, and substitute the heavy cream with full-fat coconut cream or oat milk. The texture will be slightly different—a bit more crumbly—but still delicious.
Vegan Version: Replace the egg with a flax egg (1 tablespoon ground flaxseed mixed with 3 tablespoons water, let sit for 5 minutes). Use vegan butter and coconut cream. The scones won’t be as tender, but they’ll still taste amazing.
Spice It Up: Add ¼ teaspoon of cardamom or allspice to the dry ingredients for a more complex flavor profile. I did this once on a whim and it was incredible—like a chai-spiced pumpkin scone.
Add-Ins: Fold in ½ cup of chopped pecans, walnuts, or white chocolate chips before shaping the dough. The nuts add a lovely crunch, and the white chocolate melts into little pockets of sweetness.
Pumpkin-Free Option: Swap the pumpkin puree with mashed sweet potato or butternut squash puree. The flavor will be slightly different, but the texture works beautifully.
No Maple Glaze? If you’re out of maple syrup, use honey or agave instead. Or skip the maple glaze entirely and just use the white icing. The scones are still fantastic without it.
I once made a batch with chopped crystallized ginger folded into the dough, and it was a game-changer. The spicy-sweet ginger paired perfectly with the maple glaze. Just a thought if you’re feeling adventurous.
Serving & Storage Suggestions
These scones are best served slightly warm, but they’re also fantastic at room temperature. If you want to reheat them, pop them in a 300°F (150°C) oven for 5 minutes or microwave them for 10 seconds. The glaze will stay intact if you use the oven method.
For serving, I love pairing these with a hot cup of coffee or tea. They’re also wonderful alongside a homemade pumpkin spice latte for the ultimate fall experience. If you’re hosting brunch, arrange them on a platter with fresh fruit and a bowl of whipped cream for dipping.
These scones also make a fantastic addition to a fall dessert table. I’ve served them alongside brown butter pumpkin snickerdoodle cookies and maple pumpkin dump cake with pecan crumble for a full pumpkin-themed spread. It’s always a hit.
Storage: Store unglazed scones in an airtight container at room temperature for up to 3 days. If you’ve already glazed them, store them in a single layer in an airtight container, with parchment paper between layers, for up to 2 days. The glaze may soften slightly, but they’ll still taste amazing.
Freezing: These scones freeze beautifully. Freeze unglazed scones in a single layer on a baking sheet, then transfer them to a freezer-safe bag for up to 3 months. When you’re ready to enjoy them, thaw at room temperature and glaze as directed. You can also freeze the glazed scones, but the glaze may crack slightly when thawed.
Reheating: For best results, reheat frozen scones in a 350°F (175°C) oven for 10 minutes. The edges get crispy again, and the center stays soft. Just don’t overheat them or they’ll dry out.
One thing I love about these scones is that the flavors actually develop over time. Day-old scones taste even more pumpkin-spiced than fresh ones. So if you can resist eating them all in one sitting, you’re in for a treat.
Nutritional Information & Benefits
Here’s the approximate nutritional breakdown for one scone (with both glazes):
- Calories: 380
- Total Fat: 14g
- Saturated Fat: 8g
- Cholesterol: 55mg
- Sodium: 280mg
- Total Carbohydrates: 58g
- Dietary Fiber: 2g
- Sugars: 32g
- Protein: 5g
These numbers are estimates and will vary based on the specific ingredients you use. If you’re watching your sugar intake, you can reduce the maple glaze by half or skip the white icing drizzle entirely.
Health Benefits: Pumpkin is packed with vitamin A, which supports eye health and immune function. It’s also a good source of fiber and antioxidants. The cinnamon and pumpkin pie spice blend adds anti-inflammatory properties. And while these scones are definitely a treat, they’re made with real ingredients—no preservatives, artificial flavors, or weird additives.
Dietary Considerations: This recipe can easily be made gluten-free or dairy-free (see variations above). It’s not suitable for low-carb or keto diets due to the flour and sugar content. If you’re looking for a healthier option, try my healthy pumpkin oat muffins for a lighter fall breakfast.
Allergen Notes: Contains wheat, dairy, and eggs. May contain traces of nuts if you add the pecan variation.
Frequently Asked Questions
Can I use pumpkin pie filling instead of pumpkin puree?
No, don’t do that. Pumpkin pie filling is pre-sweetened and spiced, which will throw off the balance of this recipe. Stick with 100% pure pumpkin puree. If you only have pumpkin pie filling, reduce the sugar and spices in the recipe by half, but honestly, it’s better to just buy the right thing.
Why are my scones dry and crumbly?
You probably overworked the dough or used too much flour. Scones are delicate—mix just until the ingredients come together, and handle the dough as little as possible. Also, make sure you’re measuring your flour correctly. Spoon it into the measuring cup and level it off with a knife. Scooping directly from the bag packs in too much flour.
Can I make the dough ahead of time?
Absolutely. Shape the scones, place them on a baking sheet, and refrigerate them for up to 24 hours. You can also freeze the unbaked scones for up to 3 months. Bake from frozen, adding 2-3 minutes to the baking time. No need to thaw first.
How do I get that perfect Starbucks-style glaze?
The key is the consistency. The maple glaze should be thick but pourable—think heavy cream. The white icing should be thicker, almost like toothpaste. Drizzle the maple glaze first, let it set for 5 minutes, then drizzle the white icing in a zigzag pattern. If the white icing is too thin, add more powdered sugar. If it’s too thick, add a drop of milk.
Can I make these scones without a box grater?
Yes, you can use a pastry cutter or two knives to cut the cold butter into the flour. But honestly, the box grater method is faster and gives you more even distribution. If you don’t have a box grater, cube the frozen butter and pulse it in a food processor with the dry ingredients until it looks like coarse meal.
Conclusion
These copycat Starbucks pumpkin scones with maple glaze are everything you love about the original—but better. They’re flakier, more flavorful, and made with real ingredients you can feel good about. Plus, they’re so much easier to make than you’d think. No weird additives, no preservatives, just pure pumpkin-spiced goodness.
I love this recipe because it brings people together. Every time I make these scones, someone asks for the recipe. They’re the kind of treat that makes a regular morning feel special, that turns a simple brunch into a memorable gathering. And honestly? They make your kitchen smell incredible.
So go ahead—give these a try. Customize them with your favorite add-ins, adjust the spice level to your liking, and don’t be afraid to double the batch. If you make them, I’d love to hear how they turn out. Drop a comment below and let me know if you added any fun twists or if they reminded you of your favorite coffee shop scone. Happy baking!
Pin This Recipe!
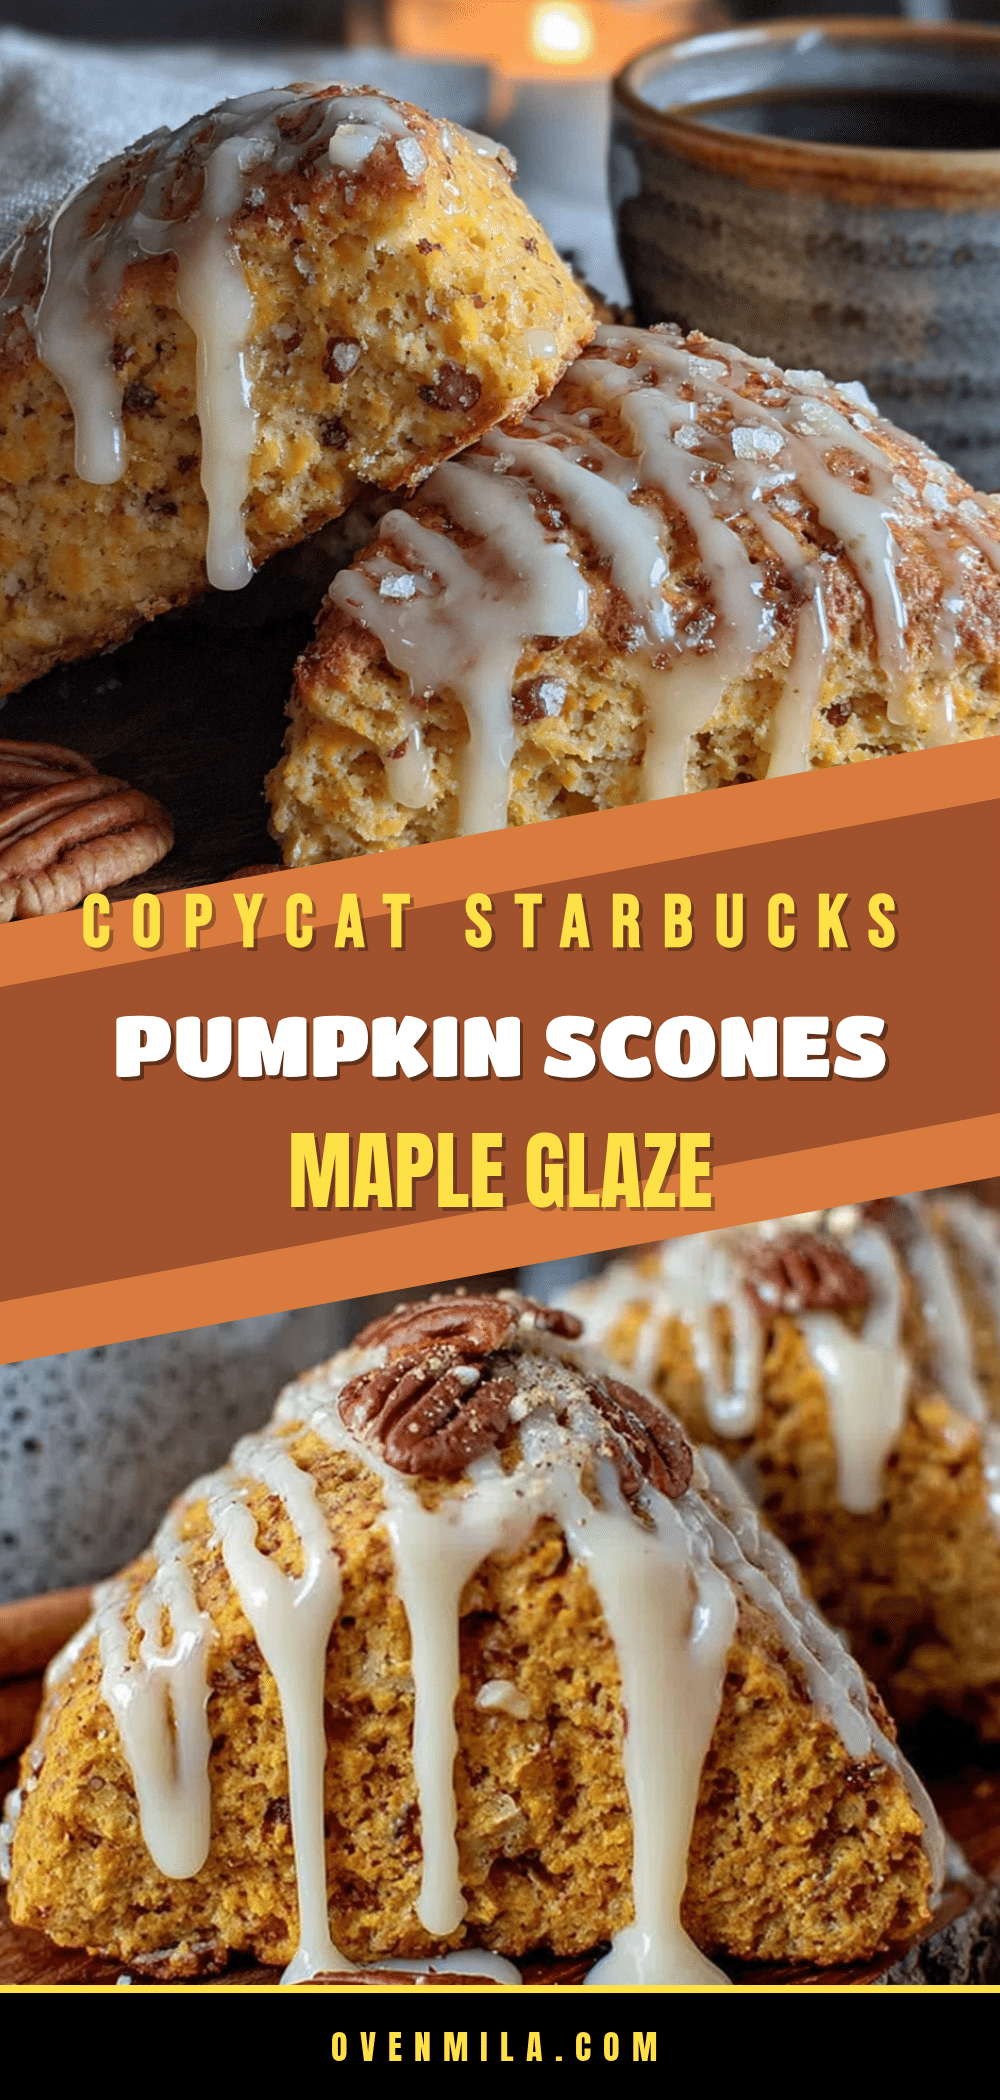
Best Copycat Starbucks Pumpkin Scones Recipe

These copycat Starbucks pumpkin scones with maple glaze are everything you love about the original—but better. They’re flakier, more flavorful, and made with real ingredients you can feel good about.
- Prep Time: 15 minutes
- Cook Time: 16 minutes
- Total Time: 35 minutes
- Yield: 6 servings 1x
- Category: Dessert
- Cuisine: American
Ingredients
- 2 ½ cups all-purpose flour
- ⅓ cup granulated sugar
- 1 tablespoon baking powder
- 2 teaspoons pumpkin pie spice
- 1 teaspoon ground cinnamon
- ½ teaspoon salt
- 6 tablespoons cold unsalted butter, frozen
- ½ cup pumpkin puree (not pumpkin pie filling)
- ¼ cup heavy cream
- 1 large egg
- 1 teaspoon vanilla extract
- 1 ½ cups powdered sugar (for maple glaze)
- 2 tablespoons pure maple syrup
- ½ teaspoon maple extract
- 2–3 tablespoons heavy cream or milk (for maple glaze)
- ½ cup powdered sugar (for white icing drizzle)
- 1–2 tablespoons milk (for white icing drizzle)
Instructions
- Preheat your oven to 400°F (200°C). Line a baking sheet with parchment paper and set aside.
- In a large bowl, whisk together the flour, sugar, baking powder, pumpkin pie spice, cinnamon, and salt.
- Grate the frozen butter directly into the flour mixture using the large holes of a box grater. Toss with your fingers or a fork until the mixture looks like coarse crumbs with some pea-sized butter bits remaining.
- In a separate bowl, whisk together the pumpkin puree, heavy cream, egg, and vanilla extract until smooth.
- Pour the wet ingredients into the dry ingredients and stir with a fork just until a shaggy dough forms. Use your hands to gently bring the dough together into a ball. If too dry, add a tablespoon of heavy cream; if too sticky, add a tablespoon of flour.
- Turn the dough out onto a lightly floured surface. Pat into a ¾-inch thick rectangle, about 8 inches by 6 inches. Use a bench scraper to cut the rectangle in half lengthwise, then cut each half into 3 triangles (6 scones total). Place on the prepared baking sheet, spacing 2 inches apart. Refrigerate for 15 minutes.
- Bake for 14–16 minutes, until edges are golden brown and tops look set. Cool on the baking sheet for 5 minutes, then transfer to a cooling rack to cool completely.
- For the maple glaze: In a small bowl, whisk together the powdered sugar, maple syrup, maple extract, and 2 tablespoons of heavy cream. Add more cream a teaspoon at a time until thick but pourable.
- For the white icing: In another small bowl, whisk together the powdered sugar and milk until smooth and thick enough to hold its shape when drizzled.
- Once scones are completely cool, drizzle the maple glaze over each one. Let set for 5 minutes, then drizzle the white icing in a zigzag pattern. Let set for another 10 minutes before serving.
Notes
Freeze the butter and grate it for flaky layers. Chill the shaped scones for 15 minutes before baking to help them rise taller. Let scones cool completely before glazing to prevent the glaze from melting. Scones can be frozen unglazed for up to 3 months.
Nutrition
- Serving Size: 1 scone
- Calories: 380
- Sugar: 32
- Sodium: 280
- Fat: 14
- Saturated Fat: 8
- Carbohydrates: 58
- Fiber: 2
- Protein: 5
Keywords: copycat Starbucks pumpkin scones, pumpkin scones, maple glaze, fall baking, easy scone recipe


