There used to be a little bakery tucked away on a cobblestone side street in downtown Charleston called “The Midnight Baker.” They only opened in October, and their specialty was a single item: a black velvet cupcake so dark, so impossibly rich, it looked like it had been baked in a witch’s oven. When they closed for good after the owner retired, I honestly felt a little lost. I mean, I’d been dreaming about those cupcakes every autumn for five years. After 12 tries — including one batch that turned out a depressing shade of gray and another that tasted like straight charcoal — I finally got it. This recipe is the one. It’s the exact deep, dark, tender crumb I’d been chasing, and let me tell you, the first bite brought back that whole Charleston October feeling. Maybe you’ve been hunting for that perfect Halloween cupcake too — the one that looks dramatic on the table but actually tastes like real, indulgent chocolate cake.
These aren’t just black food coloring with a side of cake. They’re a legitimate red velvet cousin, but made with black cocoa powder for that signature dark color and a subtle, almost Oreo-like flavor. They’re moist, they’re tender, and they’re topped with a silky cream cheese frosting that looks incredible against the dark cake. I’ve made them for three Halloweens now, and they’re always the first thing to disappear from the dessert table.
Why You’ll Love This Recipe
I’ve tested this recipe more times than I care to admit, and I can confidently say this version is the one. It’s been taste-tested by neighbors, coworkers, and my skeptical brother-in-law who “doesn’t do black food.” He ate three.
- Incredibly Dark Color: Thanks to black cocoa powder, these cupcakes are naturally dark without needing a whole bottle of food coloring. The color is deep, moody, and perfect for Halloween.
- Rich, Not Artificial Flavor: Unlike many “black” cakes that taste like chemicals, this one has a subtle chocolate-oreo flavor from the black cocoa. It’s genuinely delicious.
- Perfectly Moist Texture: The combination of buttermilk and oil keeps these cupcakes tender for days. They don’t dry out, even after a day or two.
- Simple Ingredients: You likely have most of these in your pantry already. No weird specialty items except the black cocoa powder, which is easy to find online or at well-stocked grocery stores.
- Crowd-Pleasing Drama: These cupcakes make a statement. They’re spooky, elegant, and impressive without being complicated. Perfect for Halloween parties, trunk-or-treats, or just a cozy night in.
- Easy to Decorate: The dark cake is the perfect canvas for any Halloween decorations — spiderwebs, ghosts, sprinkles, or just a simple swirl of white frosting.
This recipe is the one that makes you close your eyes after the first bite. It’s comfort food with a gothic twist — indulgent, satisfying, and just a little bit spooky.
What Ingredients You Will Need
This recipe uses simple, wholesome ingredients to deliver that dramatic dark color and rich flavor without any weird aftertaste. Most are pantry staples, with one special star ingredient.
For the Cupcakes
- All-purpose flour, 1 ½ cups (190g) — Provides structure. Spoon and level it for accuracy.
- Black cocoa powder, ½ cup (50g) — This is the magic ingredient. It’s Dutch-processed cocoa that’s been heavily alkalized, giving it that intense dark color and mild Oreo-like flavor. I recommend the brand Rodelle or King Arthur Flour.
- Granulated sugar, 1 cup (200g) — Adds sweetness and helps with tenderness.
- Baking soda, 1 teaspoon — Helps the cupcakes rise and react with the buttermilk.
- Salt, ½ teaspoon — Balances the sweetness and enhances flavor.
- Vegetable oil, ½ cup (120ml) — Keeps the cupcakes incredibly moist. You can use canola or melted coconut oil too.
- Buttermilk, 1 cup (240ml), room temperature — Adds tanginess and reacts with the baking soda for a tender crumb. No buttermilk? Add 1 tablespoon of lemon juice or vinegar to regular milk and let it sit for 5 minutes.
- Large eggs, 2, room temperature — Bind everything together and add richness.
- Vanilla extract, 2 teaspoons — Enhances the chocolate flavor.
- White vinegar, 1 teaspoon — Helps activate the baking soda for extra lift.
- Black gel food coloring, 1-2 teaspoons (optional, but recommended) — For an even deeper, more dramatic black color. The black cocoa alone gives a dark gray-black, but the gel makes it truly black. I like the Americolor brand.
For the Cream Cheese Frosting
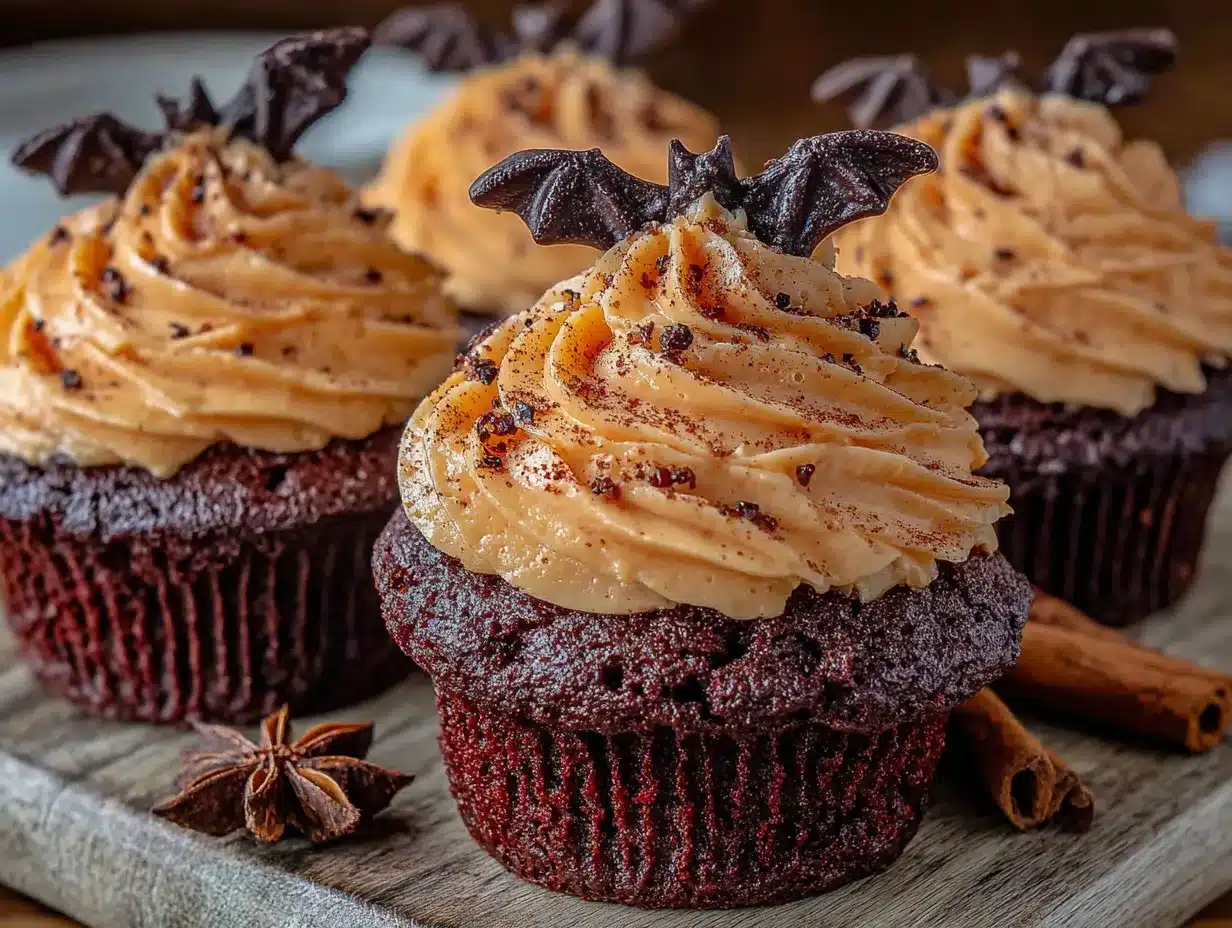
- Cream cheese, 8 ounces (226g), softened — Use full-fat for the best flavor and texture.
- Unsalted butter, ½ cup (113g), softened — Adds stability and richness.
- Powdered sugar, 3-4 cups (360-480g) — Adjust for desired sweetness and consistency.
- Vanilla extract, 1 teaspoon — For flavor.
- Pinch of salt — Balances the sweetness.
For Decoration (Optional but Fun)
- Halloween sprinkles — Ghosts, pumpkins, bats, or just orange and black jimmies.
- Black sanding sugar — For a sparkly, spooky finish.
- Edible glitter — Because Halloween deserves a little magic.
Equipment Needed
You don’t need a professional bakery setup for these, but a few specific tools make the process smoother.
- 12-cup standard muffin tin — For baking the cupcakes.
- Paper cupcake liners — Black or white liners both work, but black ones add to the spooky vibe.
- Mixing bowls — At least two medium bowls.
- Whisk — For combining dry ingredients.
- Electric hand mixer or stand mixer — For the frosting. A whisk and some elbow grease work too, but it takes longer.
- Rubber spatula — For scraping down the bowl.
- Cooling rack — Essential for even cooling.
- Piping bag with a star tip (like Wilton 1M) — For that beautiful swirled frosting look. A zip-top bag with the corner snipped off works in a pinch.
- Measuring cups and spoons — For accuracy.
- Kitchen scale (optional but recommended) — For the most precise measurements, especially with cocoa powder.
Preparation Method
- Preheat and Prep: Preheat your oven to 350°F (175°C). Line your muffin tin with 12 paper liners. This recipe makes exactly 12 standard cupcakes, so don’t try to squeeze out 13 — they’ll overflow. I learned that the hard way.
- Mix Dry Ingredients: In a medium bowl, whisk together the all-purpose flour, black cocoa powder, granulated sugar, baking soda, and salt. Make sure there are no lumps in the cocoa powder — it tends to clump. If you see any, press them through a fine-mesh sieve or just whisk vigorously. This step takes about 30 seconds.
- Combine Wet Ingredients: In a separate, larger bowl, whisk together the vegetable oil, buttermilk, eggs, vanilla extract, and white vinegar. Whisk until the eggs are fully incorporated and the mixture is smooth. It will look a little thin — that’s normal.
- Add Black Food Coloring: If you’re using the black gel food coloring, add 1 teaspoon to the wet ingredients now. Whisk it in thoroughly. The batter will look a bit like dark gray paint at this point. Don’t worry, the color deepens as it bakes. If you want it truly black, add another teaspoon and mix well.
- Combine Wet and Dry: Add the dry ingredients to the wet ingredients all at once. Gently fold them together with a rubber spatula until just combined. Do not overmix! Overmixing develops gluten and makes the cupcakes tough. A few small lumps are totally fine. The batter will be fairly thin — almost like a thick pancake batter.
- Fill the Liners: Divide the batter evenly among the 12 liners. I use a ¼-cup measuring cup or a large cookie scoop to get even portions. Fill each liner about ⅔ to ¾ full. They’ll rise nicely but won’t overflow.
- Bake: Place the muffin tin in the preheated oven and bake for 18-22 minutes. Start checking at 18 minutes — insert a toothpick into the center of a cupcake. If it comes out clean or with just a few moist crumbs, they’re done. The tops will spring back when lightly touched. Don’t overbake, or they’ll be dry.
- Cool Completely: Let the cupcakes cool in the pan for 5 minutes, then transfer them to a wire rack to cool completely. This is crucial — if you frost them while they’re even slightly warm, the frosting will melt into a sad puddle. I’ve been impatient before, and it’s not a good look. Wait the full hour.
- Make the Frosting: While the cupcakes cool, make the cream cheese frosting. In a large bowl, beat the softened cream cheese and butter together with an electric mixer on medium speed until smooth, about 2 minutes. Scrape down the sides of the bowl. Add the vanilla extract and a pinch of salt, then beat again. Gradually add the powdered sugar, 1 cup at a time, beating on low speed until incorporated. Once all the sugar is added, increase the speed to medium-high and beat for 2-3 minutes until the frosting is light, fluffy, and spreadable. If it’s too thick, add a teaspoon of milk. If it’s too thin, add a little more powdered sugar.
- Frost and Decorate: Once the cupcakes are completely cool, fit a piping bag with a star tip and fill it with the frosting. Pipe a generous swirl on each cupcake. If you don’t have a piping bag, simply spread the frosting with an offset spatula — it’ll still look beautiful. Top with Halloween sprinkles, black sanding sugar, or edible glitter immediately, before the frosting sets.
Cooking Tips & Techniques
I’ve made a lot of mistakes with black velvet cupcakes over the years, so let me save you the trouble.
Don’t Skip the Black Cocoa: Regular cocoa powder will not give you that dark color. It’ll just look like a regular chocolate cupcake. Black cocoa is the key. It’s available at most grocery stores in the baking aisle or online. I keep a stash in my pantry all year round just for these.
Room Temperature Ingredients Matter: Cold buttermilk and cold eggs won’t emulsify properly, leading to a denser, less tender crumb. Take them out of the fridge 30 minutes before you start baking. I set them on the counter while I gather my other ingredients, and by the time I’m ready, they’re perfect.
The Vinegar is Non-Negotiable: It sounds weird, I know. But the vinegar reacts with the baking soda to create carbon dioxide bubbles, which give the cupcakes their lift and tender texture. You won’t taste it at all. I promise.
Black Food Coloring: A Word of Caution: If you use liquid food coloring, you’ll need a ton of it, and it can affect the flavor and texture. Stick with gel or paste food coloring. It’s more concentrated, so you use less. Start with 1 teaspoon and add more if needed. The color deepens as the cupcakes bake, so don’t panic if the batter looks more dark gray than black.
Don’t Overmix: This is the most common mistake. Once you add the dry ingredients to the wet, mix only until you can’t see any more flour streaks. Overmixing develops gluten and makes the cupcakes tough and dense. A few lumps are your friend.
Check for Doneness Early: Ovens vary wildly. My oven runs hot, so I start checking at 16 minutes. Yours might need the full 22. Use the toothpick test, not just the timer.
Variations & Adaptations
One of the best things about this recipe is how adaptable it is. Here are a few ways I’ve changed it up over the years.
Gluten-Free Version: Substitute the all-purpose flour with a good 1:1 gluten-free baking flour blend (like Bob’s Red Mill or King Arthur). The texture will be slightly more delicate, but they’re still delicious. Add ½ teaspoon of xanthan gum if your blend doesn’t already include it.
Vegan Black Velvet Cupcakes: Replace the eggs with flax eggs (2 tablespoons ground flaxseed mixed with 6 tablespoons water, let sit for 5 minutes). Use a plant-based buttermilk (1 cup plant milk + 1 tablespoon lemon juice). Substitute the butter in the frosting with vegan butter, and use a vegan cream cheese alternative. The color might be slightly less dark, but they’re still spooky and delicious.
Spiced Pumpkin Version: For a fall twist, reduce the buttermilk to ¾ cup and add ½ cup of pumpkin puree. Add 1 teaspoon of pumpkin pie spice to the dry ingredients. The pumpkin adds moisture and a subtle earthy sweetness that pairs beautifully with the black cocoa.
Peppermint Black Velvet: Add ½ teaspoon of peppermint extract to the wet ingredients. Top the frosted cupcakes with crushed candy canes or peppermint candies. It’s a winter-holiday-meets-Halloween mashup that’s surprisingly good.
Cupcake Cake: Turn this into a layer cake! Bake the batter in two 8-inch round cake pans for 25-30 minutes. Double the frosting recipe for a gorgeous two-layer cake. It’s a showstopper for Halloween parties.
Serving & Storage Suggestions
These cupcakes are best served at room temperature, which allows the cake to be tender and the frosting to be creamy. If you’ve refrigerated them, let them sit out for about 30 minutes before serving.
Presentation Ideas: Arrange the cupcakes on a black or dark purple cake stand for maximum spooky effect. Add some fake spiderwebs, plastic spiders, or mini pumpkin decorations around the base. For a more elegant look, dust the frosted tops with a little extra black cocoa powder through a fine-mesh sieve.
What to Serve With Them: These pair beautifully with a hot cup of coffee, a glass of cold milk, or even a pumpkin spice latte. For an adult Halloween party, try them with a dark stout beer or a bourbon cocktail. The rich, slightly bitter notes of the black cocoa complement the booze perfectly.
Storage: Store unfrosted cupcakes in an airtight container at room temperature for up to 3 days. Frosted cupcakes should be stored in the refrigerator, but bring them to room temperature before serving for the best texture. They’ll keep in the fridge for up to 5 days.
Freezing: You can freeze unfrosted cupcakes for up to 3 months. Wrap each one individually in plastic wrap, then place them in a freezer bag. Thaw at room temperature before frosting. The frosting itself can also be frozen in an airtight container for up to 2 months. Thaw it in the refrigerator overnight, then re-whip it before using.
Flavor Development: Honestly, these cupcakes taste even better the next day. The flavors meld together, and the black cocoa flavor becomes more pronounced. So if you’re planning for a party, bake them a day ahead and frost them the morning of. Your future self will thank you.
Nutritional Information & Benefits
Let’s be real — these are a treat, not a health food. But they’re made with real ingredients, and that counts for something.
Estimated Nutritional Values (per cupcake with frosting):
– Calories: Approximately 420-450
– Fat: 22g
– Carbohydrates: 55g
– Protein: 5g
– Sugar: 40g
Ingredient Highlights: Black cocoa powder is rich in antioxidants (flavonoids) that can support heart health. It also contains less fat than regular cocoa powder, so it’s a little lighter. Buttermilk adds probiotics and calcium. And hey, a little indulgence is good for the soul, right?
Dietary Considerations: This recipe contains dairy (buttermilk, cream cheese, butter), eggs, and gluten. For dairy-free and vegan options, see the variations section above. For a gluten-free version, use a 1:1 gluten-free flour blend.
Allergen Notes: Contains wheat, dairy, and eggs. May contain traces of nuts depending on your cocoa powder brand.
My Take: I believe in balance. These cupcakes are a celebration — of Halloween, of autumn, of the joy of baking something beautiful. They’re not an everyday snack, and that’s okay. When you do have one, savor it. That’s the whole point.
Frequently Asked Questions
Can I use regular cocoa powder instead of black cocoa?
You can, but the color won’t be nearly as dark. It’ll look like a regular chocolate cupcake, not a black velvet one. If you’re set on that dramatic black look, stick with black cocoa. You can also use a mix of ¼ cup regular cocoa and ¼ cup black cocoa if you want a slightly milder flavor.
Why did my cupcakes turn out gray instead of black?
This usually happens when the black cocoa powder isn’t fresh or when you didn’t use enough gel food coloring. Make sure your cocoa powder is within its expiration date. Also, the color deepens as the cupcakes cool, so don’t judge them fresh out of the oven. If they’re still too light, add an extra ½ teaspoon of black gel food coloring next time.
Can I make these cupcakes ahead of time?
Absolutely! Bake the cupcakes up to 2 days in advance and store them in an airtight container at room temperature. Frost them the day you plan to serve them for the best presentation. The unfrosted cupcakes also freeze beautifully for up to 3 months.
My cream cheese frosting is too runny. What did I do wrong?
This usually happens when the cream cheese or butter is too soft, or when the frosting has been overmixed. Make sure your cream cheese and butter are softened but still cool to the touch — not melted. If the frosting is already runny, try chilling it in the refrigerator for 15-20 minutes, then re-whipping it. You can also add a little more powdered sugar to thicken it up.
Can I make these into mini cupcakes?
Yes! This recipe makes about 36-40 mini cupcakes. Bake them for 10-12 minutes at 350°F (175°C), checking for doneness with a toothpick. The frosting recipe will be more than enough for all of them. They’re perfect for Halloween parties where people want to try a little bit of everything.
Conclusion
These Dark & Spooky Black Velvet Halloween Cupcakes are more than just a recipe — they’re a little piece of that bakery magic I’ve been chasing for years. They’re dramatic enough to impress at any Halloween gathering, but simple enough to whip up on a random Tuesday night when you’re craving something a little spooky and a lot delicious.
I love that they’re not just about the color. They actually taste incredible — rich, moist, with that subtle Oreo-like flavor from the black cocoa. And the cream cheese frosting? It’s the perfect creamy, tangy counterpoint to the dark cake. Every bite feels like a little celebration.
I hope you give these a try. Play with the decorations, make them your own, and don’t be afraid to get a little messy with the frosting. That’s half the fun. And if you do make them, I’d love to hear about it. Leave a comment below, share a photo, or tell me about your own Halloween baking traditions. Happy Halloween, and happy baking!
Pin This Recipe!
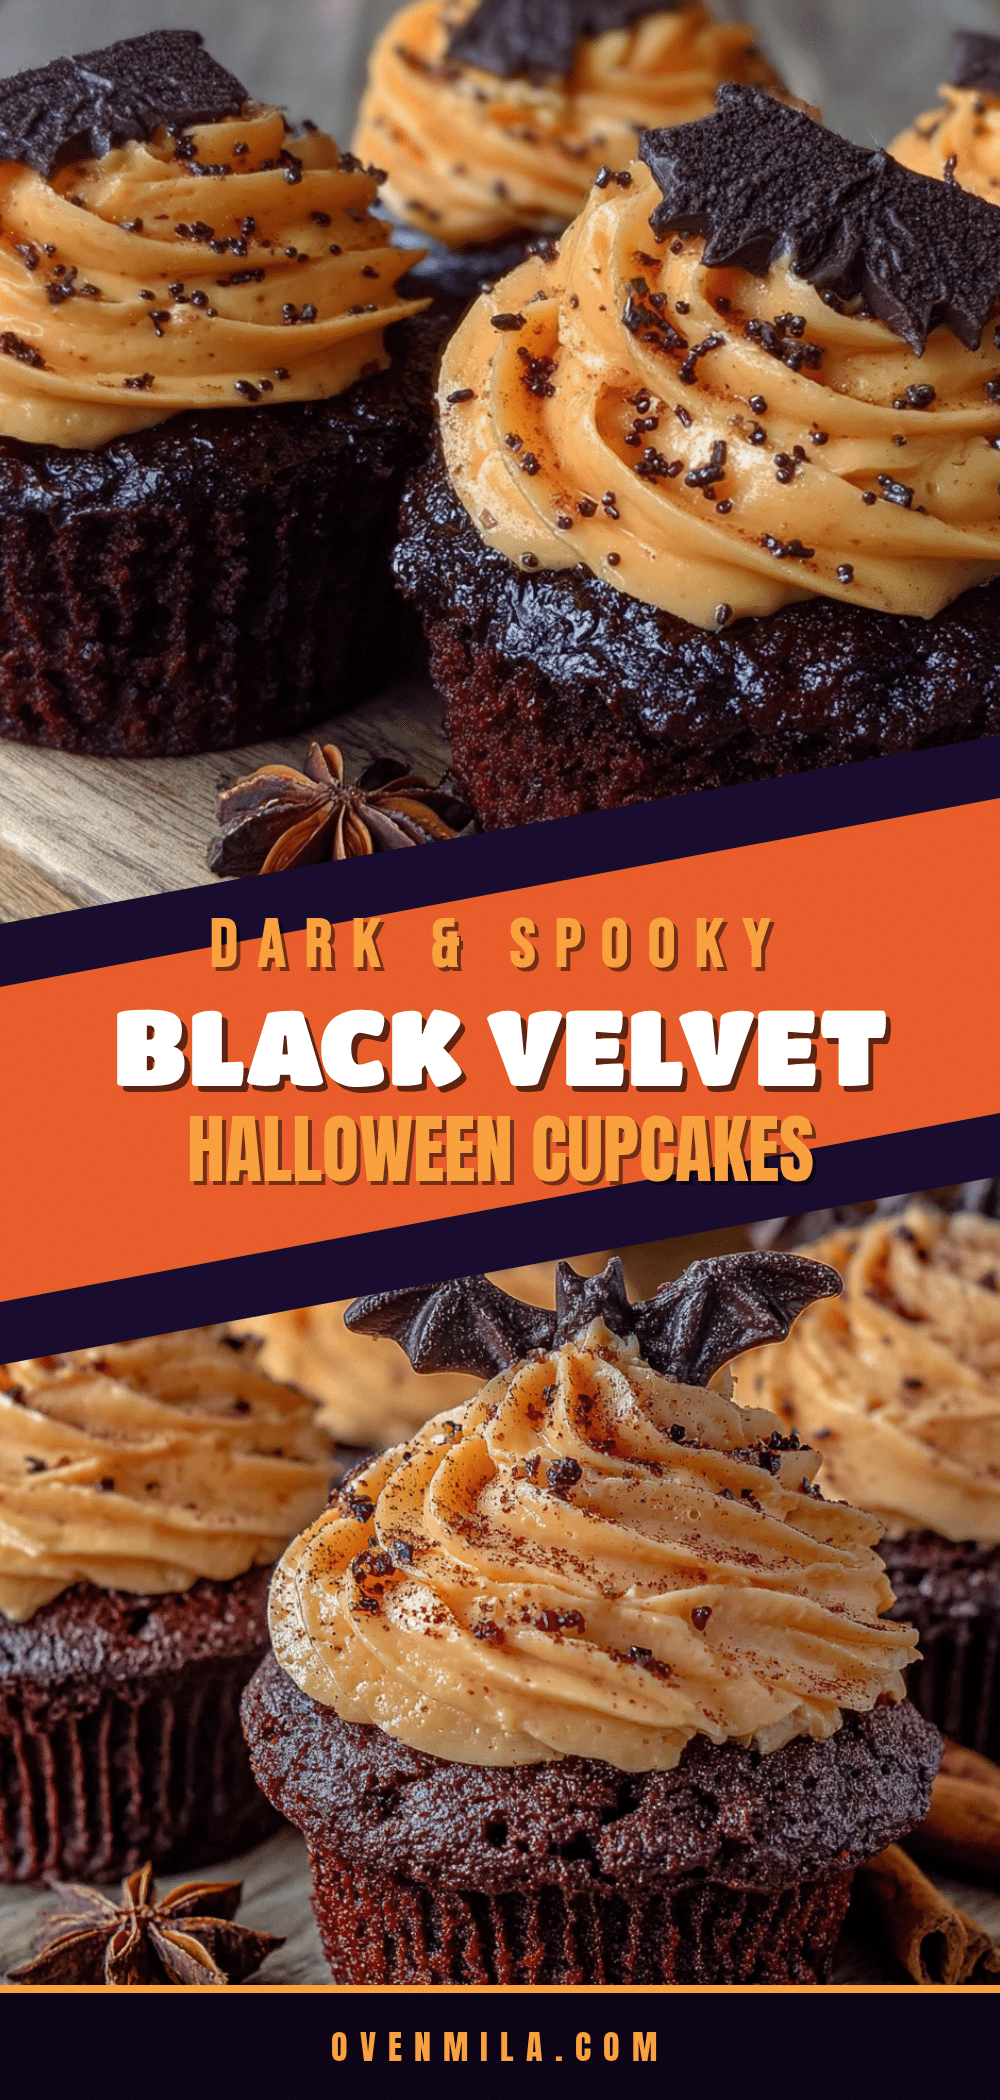
Best Dark Black Velvet Halloween Cupcakes Recipe
These incredibly dark and moist black velvet cupcakes have a subtle Oreo-like flavor from black cocoa powder, topped with silky cream cheese frosting. They’re the perfect spooky and delicious treat for Halloween parties or any autumn celebration.
- Prep Time: 20 minutes
- Cook Time: 20 minutes
- Total Time: 1 hour 40 minutes
- Yield: 12 cupcakes 1x
- Category: Dessert
- Cuisine: American
Ingredients
- 1 ½ cups (190g) all-purpose flour
- ½ cup (50g) black cocoa powder
- 1 cup (200g) granulated sugar
- 1 teaspoon baking soda
- ½ teaspoon salt
- ½ cup (120ml) vegetable oil
- 1 cup (240ml) buttermilk, room temperature
- 2 large eggs, room temperature
- 2 teaspoons vanilla extract
- 1 teaspoon white vinegar
- 1–2 teaspoons black gel food coloring (optional)
- 8 ounces (226g) cream cheese, softened
- ½ cup (113g) unsalted butter, softened
- 3–4 cups (360-480g) powdered sugar
- 1 teaspoon vanilla extract
- Pinch of salt
- Halloween sprinkles (optional)
- Black sanding sugar (optional)
- Edible glitter (optional)
Instructions
- Preheat oven to 350°F (175°C). Line a 12-cup muffin tin with paper liners.
- In a medium bowl, whisk together flour, black cocoa powder, sugar, baking soda, and salt until no lumps remain.
- In a separate larger bowl, whisk together vegetable oil, buttermilk, eggs, vanilla extract, and white vinegar until smooth.
- If using black gel food coloring, add 1-2 teaspoons to the wet ingredients and whisk thoroughly.
- Add dry ingredients to wet ingredients and fold gently with a rubber spatula until just combined. Do not overmix; a few lumps are fine.
- Divide batter evenly among the 12 liners, filling each about ⅔ to ¾ full.
- Bake for 18-22 minutes, until a toothpick inserted in the center comes out clean or with a few moist crumbs.
- Let cupcakes cool in the pan for 5 minutes, then transfer to a wire rack to cool completely (about 1 hour).
- For the frosting: In a large bowl, beat softened cream cheese and butter with an electric mixer on medium speed until smooth, about 2 minutes. Add vanilla and salt, then beat again.
- Gradually add powdered sugar, 1 cup at a time, beating on low until incorporated. Increase speed to medium-high and beat for 2-3 minutes until light and fluffy.
- Once cupcakes are completely cool, pipe or spread frosting onto each cupcake. Decorate with sprinkles, sanding sugar, or edible glitter immediately.
Notes
Black cocoa powder is essential for the dark color and Oreo-like flavor. Room temperature ingredients ensure proper emulsification. Do not overmix the batter. The vinegar reacts with baking soda for lift. For truly black color, use gel food coloring. Cupcakes taste even better the next day. Store unfrosted at room temperature for up to 3 days; frosted in refrigerator for up to 5 days. Freeze unfrosted for up to 3 months.
Nutrition
- Serving Size: 1 cupcake
- Calories: 435
- Sugar: 40
- Sodium: 280
- Fat: 22
- Saturated Fat: 9
- Carbohydrates: 55
- Fiber: 2
- Protein: 5
Keywords: black velvet cupcakes, Halloween cupcakes, black cocoa cupcakes, cream cheese frosting, spooky desserts, Halloween baking, dark chocolate cupcakes


