This was supposed to be a proper, full-sized apple pie for a Friendsgiving potluck. I had the apples peeled, the butter softening on the counter, and I was feeling pretty good about myself, honestly. Then I grabbed the bottle of apple cider instead of the apple cider vinegar for the pie filling—a mistake I didn’t realize until I’d already poured a good half cup in. The kitchen smelled incredible, sure, but I was staring at a bowl of what looked like apple soup. I was already late, the oven was preheated, and I had about twenty minutes to salvage something presentable. So I threw it in a small baking dish, cobbled together a quick oat topping, and called it a “crisp” because I didn’t know what else to do. What came out of that oven was nothing like the plan—and better. The cider had caramelized into this sticky, almost buttery sauce, and the topping was this perfect golden crust. I brought it anyway, feeling a little embarrassed, and it was the first dish to disappear. Someone even asked for the recipe, and I had to admit I made it up on the spot. Now, it’s the only version I make. Maybe you’ve been there—a kitchen disaster that somehow turns into your most-requested dish. That’s this recipe. It’s the happy accident I keep coming back to, especially when I want to impress without the pressure of a full pie.
Why You’ll Love This Recipe
I’ve tested this one more times than I care to admit, and every single time, it delivers. It’s the kind of dessert that makes you look like you spent hours in the kitchen when really, you just let the oven do the heavy lifting. Here’s why this little crisp has become my secret weapon for dinner parties and cozy nights alike.
- Made for Two: No leftovers tempting you at midnight. It’s the perfect ending for a romantic dinner or a small gathering without the commitment of a full pie.
- Pantry-Friendly: You likely have everything you need already—apples, oats, butter, sugar, and that bottle of apple cider. No special grocery run required.
- Impressively Easy: It looks and tastes like you fussed, but the method is almost laughably simple. The cider does all the work, creating a luscious caramel sauce as it bakes.
- Crowd-Pleasing Flavor: The combination of tender, spiced apples and a crunchy, buttery oat topping is pure comfort. It’s sweet but not cloying, with a little tang from the cider that keeps you going back for more.
- Stress-Free Hosting: You can prep it entirely ahead of time and pop it in the oven just as your guests arrive. The aroma alone will make them think you’ve been slaving away all afternoon.
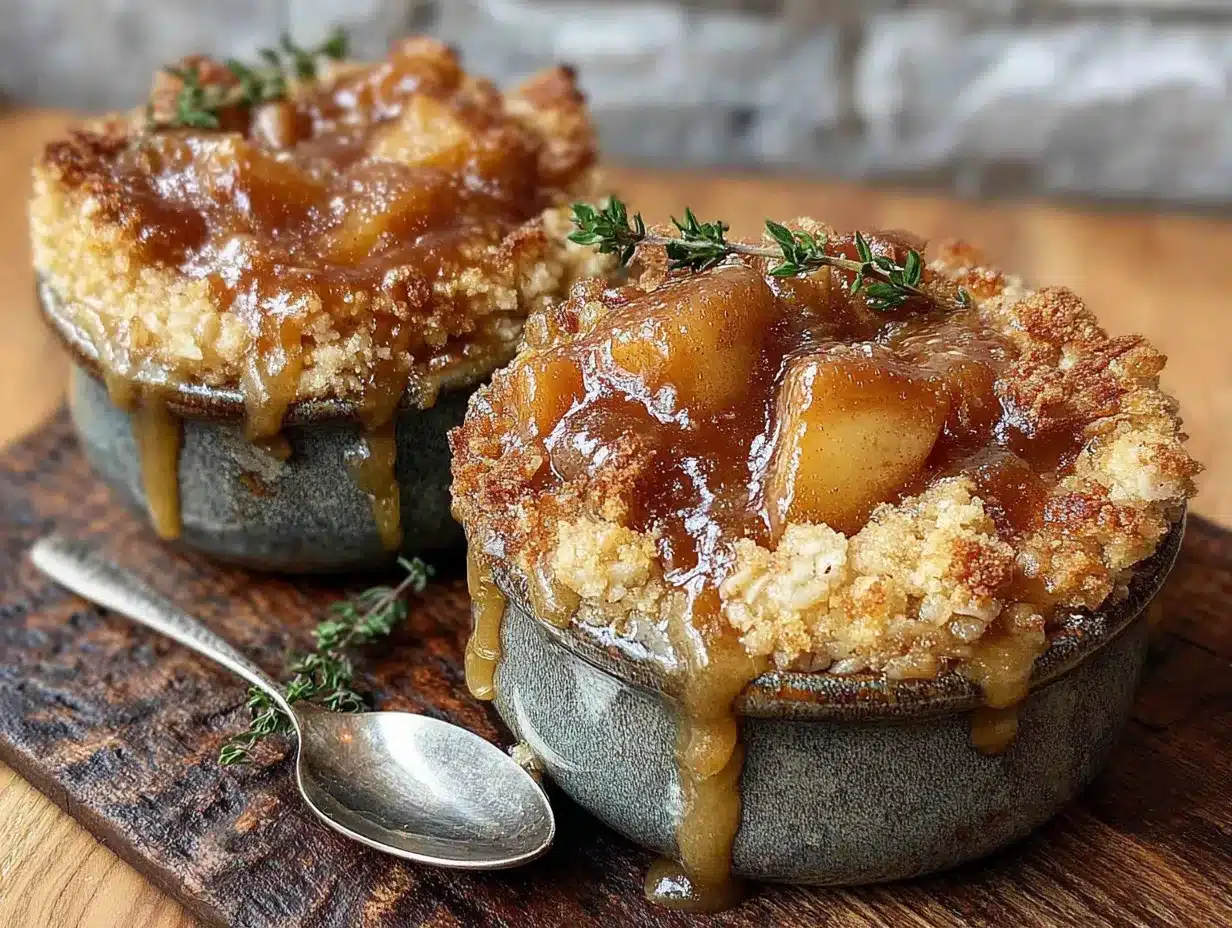
This isn’t just another crisp recipe. The trick is letting the apple cider reduce and caramelize in the oven, creating a thick, almost sticky sauce that clings to every apple slice. It’s a small technique that makes a huge difference, giving you that deep, complex flavor without standing over a stove stirring caramel. It’s comfort food, reimagined for two—faster, easier, and with the same soul-soothing satisfaction that makes everyone close their eyes after the first bite.
What Ingredients You Will Need
This recipe uses simple, wholesome ingredients to deliver a dessert that tastes far more complicated than it is. Most of these are probably already in your kitchen, which is exactly how I like it.
For the Apple Filling
- 2 medium apples, peeled, cored, and sliced (I prefer a mix of Granny Smith and Honeycrisp for that perfect balance of tart and sweet)
- 1/4 cup apple cider (unfiltered is best, it has more flavor and body)
- 2 tablespoons brown sugar, packed (light or dark both work, dark gives a deeper molasses note)
- 1 tablespoon unsalted butter, melted
- 1/2 teaspoon ground cinnamon
- 1/4 teaspoon ground nutmeg (freshly grated if you have it, it makes a difference)
- Pinch of salt (don’t skip this, it balances the sweetness)
For the Crisp Topping
- 1/3 cup old-fashioned rolled oats (not quick oats, they get mushy)
- 1/4 cup all-purpose flour
- 1/4 cup brown sugar, packed
- 1/4 teaspoon ground cinnamon
- 3 tablespoons cold unsalted butter, cut into small cubes
- Optional: 2 tablespoons chopped pecans or walnuts (adds a lovely crunch)
For the apples, I’ve learned to look for ones that feel heavy for their size—that means they’re juicy. If you only have one type of apple, go with Honeycrisp. They hold their shape beautifully during baking and have a natural sweetness that pairs perfectly with the cider. I personally recommend using a brand like Mott’s or Martinelli’s for the apple cider; they have a consistent flavor that works every time. For a gluten-free version, you can swap the all-purpose flour with a good 1-to-1 gluten-free baking blend. The topping might be a little more crumbly, but it still tastes fantastic.
Equipment Needed
You don’t need much for this one, which is part of the appeal. Here’s what you’ll want to have on hand:
- Two 10-ounce ramekins or a small 5×5-inch baking dish. I’ve used both, and the ramekins give you those lovely individual portions that feel extra special for a dinner party.
- A medium mixing bowl for the apple filling
- A small bowl for the topping
- A sharp knife and cutting board for prepping the apples
- A pastry cutter or two forks for cutting the butter into the oat mixture. If you don’t have a pastry cutter, your fingertips work just fine—just work quickly so the butter stays cold.
- A baking sheet to place the ramekins on. Trust me on this one—it catches any bubbly overflow and saves you from a messy oven cleanup.
I’ve made this with a cheap $5 baking dish from the grocery store, and it turned out just as good as the fancy stoneware ramekins I got as a wedding gift. Don’t overthink the equipment. The only non-negotiable is that your butter is cold for the topping. That’s what gives you those beautiful craggy bits of crisp.
Preparation Method
Let’s get to the good part. This comes together in under 15 minutes of active work, and then the oven does the rest. Here’s exactly how to do it.
- Preheat your oven to 375°F (190°C). Place a baking sheet on the middle rack. This preheats the pan, which helps the bottoms of the ramekins get nice and golden.
- Prepare the apples. Peel, core, and slice your apples into roughly 1/4-inch thick slices. You don’t need them to be perfect, but try to keep them uniform so they cook evenly. I usually cut each apple into about 12-16 slices.
- Make the filling. In your medium bowl, combine the apple slices, apple cider, brown sugar, melted butter, cinnamon, nutmeg, and a tiny pinch of salt. Toss everything together with a spatula until the apples are well coated. Let it sit for 5 minutes while you make the topping. This gives the apples a chance to start releasing their juices and absorbing that spiced cider flavor.
- Make the crisp topping. In your small bowl, combine the oats, flour, brown sugar, and cinnamon. Add the cold butter cubes. Use your pastry cutter or two forks to cut the butter into the dry ingredients until the mixture looks like coarse sand with a few pea-sized butter lumps remaining. If you’re adding nuts, stir them in now. Don’t overwork it—those little butter pockets are what create the crispy, crumbly texture.
- Assemble the crisps. Divide the apple mixture evenly between your two ramekins. The liquid should come about halfway up the apples. Don’t overfill them, as the filling will bubble up during baking. Sprinkle the crisp topping evenly over each ramekin, pressing it down gently with your fingers so it adheres to the apples.
- Bake. Place the ramekins on your preheated baking sheet. Bake for 25-30 minutes, or until the topping is deep golden brown and the filling is bubbly and thick. You’ll know it’s done when you can see the caramel-like sauce bubbling up around the edges of the topping. If the topping is browning too quickly, tent loosely with foil for the last 5-10 minutes.
- Rest. Let the crisps cool on a wire rack for at least 10 minutes before serving. This is crucial—the filling needs time to set up, or it will be runny. I know it’s hard to wait, but trust me, it’s worth it. The texture transforms from soupy to a luscious, spoonable sauce during this rest.
- Serve. Top with a scoop of vanilla ice cream or a dollop of whipped cream. The contrast between the warm, saucy apples and the cold, creamy ice cream is what makes this dessert sing.
A quick note: if your apples seem dry, you can add an extra tablespoon of apple cider. If they seem too juicy, you can stir in a teaspoon of cornstarch mixed with a tablespoon of water before baking. I’ve done both, and the recipe is forgiving either way.
Cooking Tips & Techniques
I’ve burned my fair share of crisps and ended up with soupy fillings more times than I’d like to admit. Here’s what I’ve learned the hard way so you don’t have to.
Don’t skip the rest time. I know, I know—you want to dig in immediately. But the filling needs those 10 minutes to thicken. If you serve it right away, it will be thin and watery. Let it sit, and the natural pectin in the apples and the reduced cider will create that gorgeous, thick caramel sauce.
Keep your butter cold. For the crisp topping, cold butter is non-negotiable. If your butter is too warm, it will melt into the flour mixture and you’ll end up with a dense, pasty topping instead of those beautiful, craggy crumbles. If your kitchen is warm, pop the topping in the fridge for 10 minutes before baking.
Use a mix of apple varieties. Granny Smith apples hold their shape well and provide a tart contrast to the sweet caramel. Honeycrisp or Fuji apples add natural sweetness and a tender texture. A 50/50 mix is my go-to. I once used only Red Delicious, and they basically dissolved into applesauce. Not great for a crisp.
Position matters. Bake the ramekins on the middle rack of your oven. Too low, and the bottoms might burn before the topping is golden. Too high, and the topping will brown while the filling stays cold. Middle rack is the sweet spot.
Make it ahead. You can assemble the crisps completely (without baking) up to 24 hours in advance. Just cover them with plastic wrap and store in the refrigerator. When you’re ready to bake, add about 5-10 minutes to the baking time since you’re starting from cold. This is a lifesaver for dinner parties.
Variations & Adaptations
One of the best things about this recipe is how easy it is to switch up. Here are a few ways I’ve adapted it depending on the season or who’s coming over.
Gluten-Free Version: Swap the all-purpose flour with a good 1-to-1 gluten-free baking blend. I’ve used Bob’s Red Mill with great results. The topping will be a little more crumbly, but the flavor is spot on. Also, make sure your oats are certified gluten-free if that’s a concern.
Dairy-Free Version: Use a high-quality vegan butter stick (I like Miyoko’s) in both the filling and the topping. It works surprisingly well. For serving, opt for a dairy-free vanilla ice cream or coconut whipped cream.
Spiced-Up Version: Add a pinch of ground cardamom or a star anise pod to the apple filling while it bakes. Remove the star anise before serving. The warm, floral notes are incredible with the apple cider caramel. I tried this on a whim one fall evening, and it’s become my go-to for holiday gatherings.
Pear-Apple Crisp: Swap one of the apples for a ripe but firm Bosc pear. The pear adds a subtle honey-like sweetness and a slightly different texture. It’s a lovely variation that feels a little more sophisticated.
Single Serving: If you’re cooking just for yourself, halve the recipe and bake it in a single ramekin. The baking time stays about the same, but start checking at 20 minutes.
Serving & Storage Suggestions
This crisp is best served warm, right out of the oven, with a generous scoop of vanilla ice cream melting into the caramel sauce. The contrast of temperatures and textures is pure magic. For a dinner party, I like to place the ramekins on small plates with a sprig of fresh thyme or a cinnamon stick for a simple, elegant presentation.
What to serve alongside: A dollop of lightly sweetened whipped cream is a lovely alternative to ice cream. For a boozy twist, a small glass of bourbon or calvados (apple brandy) pairs beautifully with the flavors. If you’re serving this as part of a larger spread, it goes wonderfully after a hearty meal like a savory herb roasted pork tenderloin or a simple roast chicken.
Storage: If you have leftovers (unlikely, but possible), cover the ramekins with plastic wrap and store them in the refrigerator for up to 3 days. The topping will soften, but it’s still delicious.
Reheating: The best way to reheat is in the oven at 350°F for about 10 minutes. This helps crisp up the topping again. You can also use the microwave in a pinch, but the topping will be soft. If you’re reheating for guests, I’d definitely go with the oven method.
Flavor development: Honestly, the flavors get even better after a day in the fridge. The apples continue to soak up that spiced caramel sauce, and the whole thing becomes even more cohesive. If you can stand to wait, make it a day ahead and reheat before serving.
Nutritional Information & Benefits
While this is definitely a treat, there are a few nutritional bright spots worth mentioning. Here’s an estimated breakdown for one serving (one ramekin without ice cream).
| Nutrient | Amount per Serving |
|---|---|
| Calories | ~380 |
| Fat | 16g |
| Saturated Fat | 10g |
| Carbohydrates | 58g |
| Fiber | 5g |
| Sugar | 38g |
| Protein | 3g |
Apples are a good source of fiber and vitamin C, and the oats in the topping provide some heart-healthy soluble fiber. The cinnamon and nutmeg aren’t just for flavor—they have anti-inflammatory properties. Of course, this is still a dessert, and I believe in enjoying it without guilt. It’s a small indulgence meant to be shared, and that’s part of its charm.
This recipe is naturally vegetarian and can easily be made gluten-free or dairy-free with the substitutions mentioned above. The main allergens are wheat (in the flour) and dairy (in the butter), so keep that in mind if you’re serving someone with sensitivities.
Conclusion
This apple cider caramel crisp for two has become my most-requested dessert, and it started as a complete accident. That’s the thing about cooking—sometimes the best recipes come from the moments when everything goes wrong. This one is forgiving, adaptable, and absolutely delicious. It’s the kind of dessert that makes you look like a hero without breaking a sweat, which is exactly what you want when you’re hosting.
I love this recipe because it feels special without being fussy. It’s for those nights when you want to end a meal on a high note, whether it’s a casual dinner with a friend or a romantic date night at home. The caramelized cider, the tender apples, the crunchy topping—it all comes together in a way that feels both familiar and surprising.
So go ahead, give it a try. Customize it with your favorite nuts or spices, serve it with your go-to ice cream, and don’t be afraid to make a mess. Cooking is supposed to be fun, and this recipe is proof that even the “mistakes” can turn into something beautiful. I’d love to hear how yours turns out—drop a comment below and let me know if this little crisp becomes one of your favorites too!
Frequently Asked Questions
Can I make this apple cider caramel crisp in advance?
Absolutely! You can assemble the crisps completely (without baking) up to 24 hours ahead. Just cover them with plastic wrap and refrigerate. When you’re ready to bake, add about 5-10 minutes to the baking time since you’re starting from a cold dish.
Can I use apple juice instead of apple cider?
You can, but the flavor won’t be as rich. Apple cider is unfiltered and has a deeper, more complex flavor that caramelizes beautifully. Apple juice is thinner and sweeter, so your filling might be a bit runnier. If you only have apple juice, consider adding a teaspoon of lemon juice to balance the sweetness.
What’s the best apple for this crisp?
I recommend a mix of Granny Smith and Honeycrisp. The Granny Smith holds its shape and provides a tart contrast, while the Honeycrisp adds natural sweetness and a tender texture. If you only have one type, go with Honeycrisp—they’re reliable and delicious.
Can I freeze the leftovers?
Yes, you can freeze the baked and cooled crisps for up to 3 months. Wrap the ramekins tightly in plastic wrap and then foil. To reheat, thaw in the refrigerator overnight and then warm in a 350°F oven for about 15 minutes. The topping won’t be quite as crispy, but it’s still wonderful.
How do I know when the crisp is done baking?
You’re looking for two things: the topping should be a deep golden brown, and you should see the filling bubbling up around the edges. The bubbles indicate that the apple cider has reduced into a thick, caramel-like sauce. If the topping is browning too quickly, tent the ramekins with foil for the last 5-10 minutes of baking.
Pin This Recipe!

Best Easy Apple Cider Caramel Crisp for Two

A happy accident turned into the most-requested dessert—tender spiced apples with a crunchy oat topping, all caramelized with apple cider into a luscious, buttery sauce. Perfect for a romantic dinner or small gathering, this easy crisp for two delivers big flavor with minimal effort.
- Prep Time: 15 minutes
- Cook Time: 30 minutes
- Total Time: 45 minutes
- Yield: 2 servings 1x
- Category: Dessert
- Cuisine: American
Ingredients
- 2 medium apples, peeled, cored, and sliced (mix of Granny Smith and Honeycrisp recommended)
- 1/4 cup apple cider (unfiltered preferred)
- 2 tablespoons brown sugar, packed
- 1 tablespoon unsalted butter, melted
- 1/2 teaspoon ground cinnamon
- 1/4 teaspoon ground nutmeg
- Pinch of salt
- 1/3 cup old-fashioned rolled oats
- 1/4 cup all-purpose flour
- 1/4 cup brown sugar, packed
- 1/4 teaspoon ground cinnamon
- 3 tablespoons cold unsalted butter, cut into small cubes
- 2 tablespoons chopped pecans or walnuts (optional)
Instructions
- Preheat your oven to 375°F (190°C). Place a baking sheet on the middle rack to preheat.
- Peel, core, and slice apples into roughly 1/4-inch thick slices (about 12-16 slices per apple).
- In a medium bowl, combine apple slices, apple cider, brown sugar, melted butter, cinnamon, nutmeg, and a pinch of salt. Toss to coat and let sit for 5 minutes.
- In a small bowl, combine oats, flour, brown sugar, and cinnamon. Add cold butter cubes and cut in with a pastry cutter or two forks until mixture resembles coarse sand with a few pea-sized butter lumps. Stir in nuts if using.
- Divide apple mixture evenly between two 10-ounce ramekins. Sprinkle crisp topping evenly over each, pressing down gently.
- Place ramekins on the preheated baking sheet. Bake for 25-30 minutes, until topping is deep golden brown and filling is bubbly and thick. Tent with foil if browning too quickly.
- Let crisps cool on a wire rack for at least 10 minutes before serving to allow filling to set.
- Serve warm with vanilla ice cream or whipped cream.
Notes
Let the crisps rest for at least 10 minutes after baking to allow the filling to thicken. Keep butter cold for the topping to ensure a crispy texture. For a gluten-free version, use a 1-to-1 gluten-free baking blend and certified gluten-free oats. For a dairy-free version, use vegan butter. You can assemble the crisps up to 24 hours in advance and refrigerate; add 5-10 minutes to baking time when baking from cold.
Nutrition
- Serving Size: 1 ramekin
- Calories: 380
- Sugar: 38
- Fat: 16
- Saturated Fat: 10
- Carbohydrates: 58
- Fiber: 5
- Protein: 3
Keywords: apple crisp, apple cider caramel, dessert for two, easy apple dessert, fall dessert, individual dessert, oat topping


