My neighbor Dave asked me why I couldn’t just dump everything in the slow cooker and walk away. I was mid-sentence, explaining the importance of browning the meat first, the layering of flavors, the whole spiel. I started to explain why that wouldn’t work—then stopped. He had a point. He was standing there with a bag of frozen venison his brother had given him, looking at my complicated, three-page recipe, and he just wanted a good dinner.
Honestly, I felt a little embarrassed. Here I was, the self-proclaimed “recipe developer” of the street, getting shown up by a guy who just wanted to use his Crock-Pot. I mean, I’d spent years perfecting my stovetop chili, insisting that slow cookers turned meat into mush and that you couldn’t get that deep, smoky flavor without a hot pan. But Dave’s logic was simple: the slow cooker is called a slow cooker for a reason. So I took his challenge. I promised him I’d make a version that was just as good as my stovetop chili—maybe even better—without dirtying a single skillet.
The first batch was a mess. The venison was dry, the spices were flat, and the whole thing tasted like watery tomato juice. I almost gave up. But Dave, ever the optimist, suggested we just throw in some extra chipotle peppers and let it go another hour. I was skeptical, but I let him do it. And you know what? It worked. That accidental addition—a little more heat, a little more smoke—was the key. It transformed the chili from a sad, pale imitation into something bold and rich. I learned more from that one “failed” batch than I had from a dozen successful ones. This recipe is the final result of that conversation—a wholesome, hearty chili that proves you don’t have to be a perfectionist to get incredible results. It’s the kind of meal that makes you feel good about eating well, without any of the fuss.
Why You’ll Love This Recipe
This isn’t just another chili recipe. It’s the one I turn to when I want a meal that feels both indulgent and nourishing. It’s the one that proves you can eat healthy without sacrificing an ounce of flavor. Let me tell you why this particular bowl of chili is going to become your new favorite.
- Set It and Forget It: This is the ultimate hands-off meal. You literally dump everything in the slow cooker and walk away. Perfect for busy weekdays, lazy weekends, or when you just don’t feel like standing over a stove.
- Wholesome & Satisfying: Packed with lean venison, fiber-rich beans, and a ton of vegetables, this chili is a nutritional powerhouse. It’s a meal that fuels your body without weighing you down.
- Big, Bold Flavor: Don’t let the “healthy” label fool you. This chili is packed with deep, smoky, and slightly spicy flavor. The slow cooking process melds the spices and meat into a rich, complex broth that tastes like it’s been simmering all day—because it has.
- Uses Simple, Real Ingredients: No weird processed ingredients or hard-to-find specialty items. Just good, honest food that you can find at any grocery store. It’s the kind of cooking that feels good.
- Perfect for Meal Prep: This chili gets even better the next day. Make a big batch on Sunday and enjoy it for lunches all week. It freezes beautifully, too.
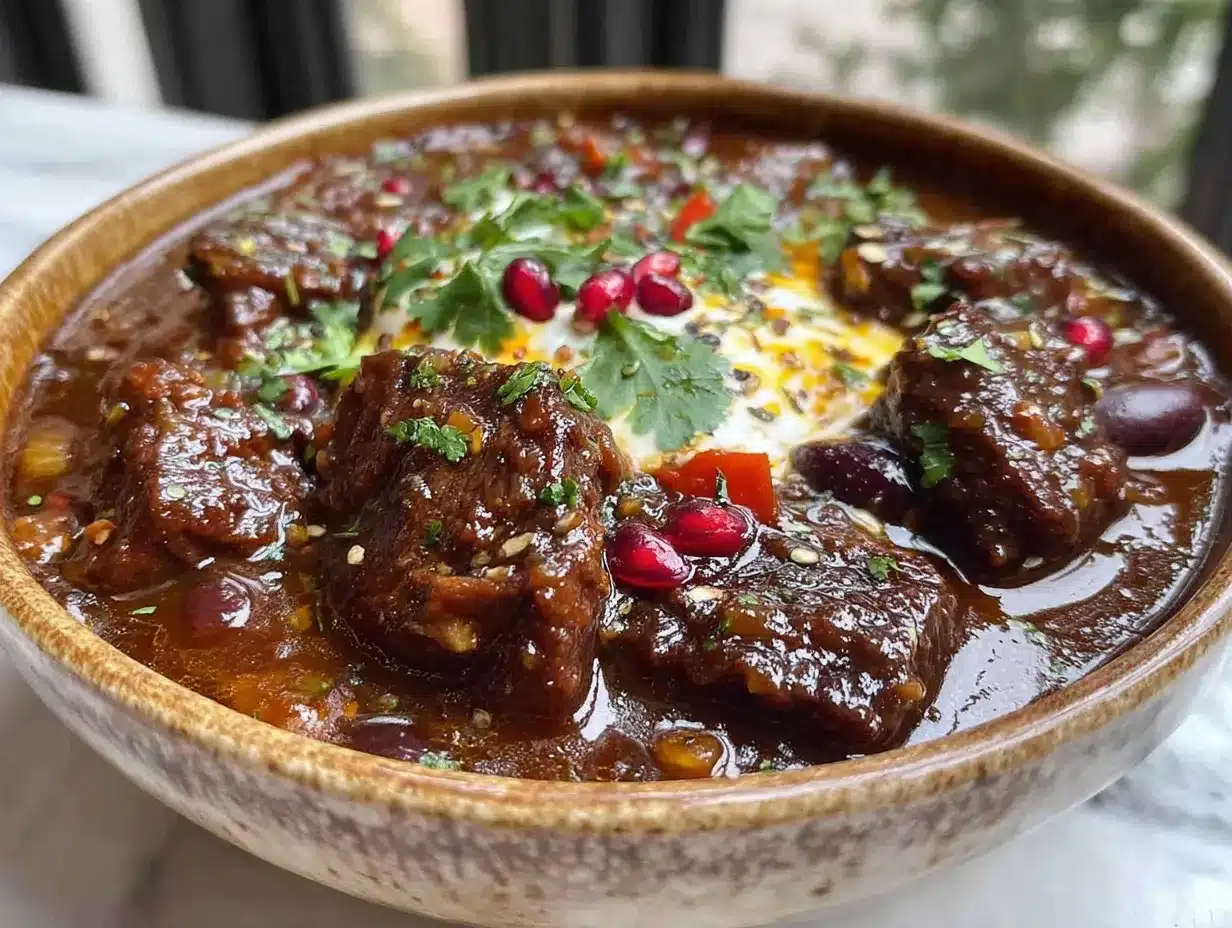
This recipe is different because it respects the integrity of the venison. It doesn’t try to hide the gamey flavor with a ton of sugar or processed sauces. Instead, it uses a careful balance of smoky chipotle, earthy cumin, and tangy tomatoes to complement the meat’s natural richness. The result is a chili that’s deeply flavorful, wonderfully textured, and completely satisfying. It’s the kind of meal that makes you close your eyes after the first bite, not because it’s fancy, but because it’s just so perfectly right.
What Ingredients You Will Need
This recipe relies on a handful of pantry staples and fresh ingredients to build a chili that’s both wholesome and deeply flavorful. Here’s everything you’ll need, along with a few notes on why each ingredient matters.
For the Chili Base
- 2 pounds ground venison (or lean ground beef). Venison is incredibly lean, which makes it perfect for chili. If you’re using beef, look for a 90/10 or 93/7 blend to keep the dish light.
- 1 large yellow onion, diced. This forms the aromatic foundation of the chili. Yellow onions are sweet and mild when cooked, adding a subtle depth.
- 4 cloves garlic, minced. Fresh garlic is non-negotiable here. It adds a pungent, savory note that powder just can’t replicate.
- 2 tablespoons tomato paste. This is a flavor bomb. Tomato paste adds a concentrated umami richness that thickens the chili and gives it a deep red color.
- 2 (14.5-ounce) cans fire-roasted diced tomatoes. Fire-roasted tomatoes add a subtle smoky sweetness that’s perfect with venison. I prefer the Muir Glen brand for their consistent quality.
- 1 (15-ounce) can kidney beans, drained and rinsed. Kidney beans are the classic chili bean. They hold their shape well during long cooking and add a creamy texture.
- 1 (15-ounce) can black beans, drained and rinsed. Black beans add a slightly earthier flavor and a beautiful dark color to the chili.
- 2 cups low-sodium beef broth. This provides the liquid base. Low-sodium is key so you can control the salt level yourself.
The Spice Blend
- 2 tablespoons chili powder. This is your backbone spice. Use a good-quality blend like Gebhardt or Morton & Bassett.
- 1 tablespoon ground cumin. Cumin adds a warm, earthy, and slightly nutty flavor that’s essential for chili.
- 1 teaspoon smoked paprika. This is where the magic happens. Smoked paprika adds that deep, campfire-like smokiness that makes the chili taste like it’s been simmering for hours.
- 1 teaspoon dried oregano. A little oregano adds a subtle, herbaceous note that brightens up the heavy flavors.
- 1/2 teaspoon chipotle chili powder. This is for heat and extra smokiness. You can adjust this to your preference—add more for a spicier chili, or leave it out for a milder version.
- 1/2 teaspoon cayenne pepper (optional). For an extra kick. I usually add this, but my wife prefers it without.
- Salt and black pepper, to taste. Don’t skimp on the salt—it’s crucial for bringing out the flavors of the spices and meat.
Optional Stir-Ins & Garnishes
- 1 tablespoon brown sugar or maple syrup. Just a touch of sweetness balances the acidity of the tomatoes and the heat of the spices. I prefer maple syrup for a more complex flavor.
- 1-2 tablespoons masa harina (corn flour). This is my secret weapon for thickening chili. It adds a subtle corn flavor and a velvety texture. Whisk it with a little water to make a slurry before adding it in.
- Fresh cilantro, chopped, for garnish.
- Diced avocado, for a creamy, healthy fat.
- Lime wedges, for a bright, acidic finish.
- Shredded cheddar cheese or sour cream, for those who want a richer topping.
Equipment Needed
The beauty of this recipe is that it doesn’t require a ton of fancy equipment. Here’s what you’ll need to get started.
- A 6-quart (or larger) slow cooker. This is your main event. A 6-quart model is the perfect size for this batch of chili. If you have a smaller cooker, you can halve the recipe.
- A large skillet or Dutch oven. While I promised a “no-fuss” recipe, we are going to quickly brown the venison. This step is non-negotiable for the best flavor. A good cast-iron skillet is perfect for this.
- A sharp chef’s knife and cutting board. For dicing the onion and mincing the garlic. A good knife makes all the difference.
- Measuring cups and spoons. For the spices and liquids. I use a set of stainless steel ones that have lasted for years.
- A wooden spoon or spatula. For stirring the chili in the slow cooker. A wooden spoon won’t scratch your pot.
- Can opener. A simple, reliable tool that you’ll use for the tomatoes and beans.
If you don’t have a slow cooker, you can absolutely make this on the stovetop. Just use a large Dutch oven, brown the meat, then add all the ingredients and simmer on low for 1.5-2 hours, stirring occasionally. The flavor will be just as good, but you’ll have to keep an eye on it.
Preparation Method
Alright, let’s get cooking. This is the part where all the magic happens. Follow these steps, and you’ll have a pot of chili that will make your whole house smell amazing.
- Brown the venison (10 minutes). Place your large skillet over medium-high heat. Add the ground venison and cook, breaking it up with a wooden spoon, until it’s nicely browned. Don’t stir it constantly—let it sit for a minute or two to get a good sear. This is where a lot of the flavor comes from. Once it’s browned, use a slotted spoon to transfer the meat to the slow cooker. Leave any rendered fat in the pan (there won’t be much, as venison is so lean).
- Sauté the aromatics (5 minutes). Reduce the heat to medium. Add the diced onion to the same skillet (with the leftover fat) and cook, stirring occasionally, until it’s softened and translucent, about 4-5 minutes. Add the minced garlic and cook for another 30 seconds until fragrant. Be careful not to burn the garlic—it will turn bitter. Scrape the onions and garlic into the slow cooker with the venison.
- Bloom the spices (1 minute). This is a pro tip that makes a huge difference. Add the chili powder, cumin, smoked paprika, oregano, chipotle powder, and cayenne (if using) to the now-empty skillet. Toast them over medium heat for about 30-60 seconds, stirring constantly. You’ll know they’re ready when they smell incredibly fragrant. This step wakes up the oils in the spices, making them more flavorful. Immediately pour the spices into the slow cooker.
- Deglaze the pan (1 minute). Pour about 1/2 cup of the beef broth into the hot skillet. Use your wooden spoon to scrape up all the browned bits from the bottom of the pan. This is called “deglazing,” and those browned bits are pure flavor. Pour this liquid into the slow cooker as well.
- Add the remaining ingredients (5 minutes). To the slow cooker, add the fire-roasted tomatoes (with their juices), the drained and rinsed kidney beans and black beans, the remaining beef broth, and the tomato paste. Give everything a very good stir to combine. Make sure the tomato paste is fully dissolved.
- Season and cook (6-8 hours on LOW or 3-4 hours on HIGH). Add a generous pinch of salt and a few grinds of black pepper. Stir again. Put the lid on your slow cooker and cook on LOW for 6-8 hours, or on HIGH for 3-4 hours. The longer it cooks, the more the flavors will meld together. I prefer the low and slow method for the best results.
- Finish and adjust (10 minutes). About 30 minutes before serving, taste the chili. This is your chance to adjust the seasonings. Add more salt, pepper, or chipotle powder if you want more heat. If you want a touch of sweetness, stir in the brown sugar or maple syrup. If you want a thicker chili, make a slurry by whisking 1-2 tablespoons of masa harina with 3 tablespoons of water until smooth, then stir it into the chili. Let it cook for another 20-30 minutes to thicken up.
- Serve (5 minutes). Ladle the chili into bowls and top with your favorite garnishes. I love a big dollop of Greek yogurt (instead of sour cream), some diced avocado, a sprinkle of fresh cilantro, and a squeeze of lime juice.
Cooking Tips & Techniques
Over the years, I’ve made this chili more times than I can count, and I’ve learned a few things the hard way. Here are my best tips to ensure your chili is perfect every single time.
Don’t skip the browning step. I know, I know. The whole point of a slow cooker recipe is to dump and go. But trust me on this one. Browning the venison is the single most important step for building flavor. That deep, savory, “cooked-all-day” taste comes from the Maillard reaction, which only happens at high heat. If you skip it, your chili will be bland, no matter how many spices you add.
Toast your spices. This is another game-changer. Dry spices are full of volatile oils that need heat to release their full potential. By toasting them in the skillet for just 30 seconds, you wake them up. The difference between a chili made with toasted spices and one made with raw spices is night and day. The toasted version will be exponentially more aromatic and flavorful.
Watch your salt. Venison is naturally very lean and low in sodium. You need to add salt to bring out its flavor. But don’t add it all at once. Start with a teaspoon, taste, and then add more. Remember that the beans and broth also contain sodium, so it’s easy to over-salt if you’re not careful. I like to add salt at the beginning and then adjust at the end.
Let it rest. This is a tip I learned from making stews. After the chili is done cooking, let it sit in the slow cooker (turned off) with the lid on for about 15-20 minutes before serving. This allows the flavors to settle and meld together even more. The texture also improves, becoming slightly thicker and more cohesive.
Make it ahead. This chili is one of those rare dishes that genuinely tastes better the next day. The flavors have time to marry and deepen overnight in the refrigerator. So if you have the time, make it a day ahead. Just reheat it gently on the stovetop or in the slow cooker.
Variations & Adaptations
One of the best things about chili is how versatile it is. You can adapt it to fit any dietary need or flavor preference. Here are a few of my favorite variations.
- Make it Vegetarian: Simply leave out the venison and double the beans. Use a mix of kidney, black, and pinto beans. You can also add a bag of frozen corn or some diced sweet potatoes for extra texture and sweetness. The smoky chipotle flavor will still be amazing.
- Add More Veggies: This is a great way to sneak in extra nutrients. Diced bell peppers (any color), zucchini, or even shredded carrots work beautifully. Add them at the same time as the tomatoes. I once added a whole diced sweet potato, and it was incredible—it broke down and thickened the chili naturally.
- Spice It Up (or Down): This recipe is moderately spicy. For a milder chili, skip the chipotle powder and cayenne. For a fiery version, add a finely chopped jalapeño or serrano pepper with the onions, or stir in a tablespoon of your favorite hot sauce at the end.
- Switch the Meat: Don’t have venison? No problem. Ground turkey, chicken, or lean beef all work perfectly. If using a very lean meat like turkey, you might want to add a tablespoon of olive oil to the pan when browning to prevent it from drying out.
- Try a Different Bean: Not a fan of kidney beans? Use pinto beans, cannellini beans, or even chickpeas. Each will give the chili a slightly different texture and flavor.
My personal favorite variation is to add a can of pumpkin puree. I know it sounds weird, but trust me. It adds a velvety texture and a subtle sweetness that’s incredible with the smoky chipotle. It also makes the chili incredibly creamy without any dairy. Just stir in a cup of pumpkin puree along with the tomatoes.
Serving & Storage Suggestions
This chili is a meal in itself, but the right accompaniments can make it even better. Here’s how to serve, store, and reheat it like a pro.
Serving Suggestions: Ladle the chili into deep bowls. I love serving it with a side of warm, crusty bread or cornbread for dipping. A simple green salad with a tangy vinaigrette is a perfect counterpoint to the rich, heavy chili. For toppings, set out a “chili bar” with bowls of shredded cheese, diced onion, sour cream (or Greek yogurt), sliced jalapeños, fresh cilantro, and lime wedges. Let everyone build their own perfect bowl.
Storage: This chili stores incredibly well. Let it cool completely to room temperature before transferring it to an airtight container. It will keep in the refrigerator for up to 5 days. The flavors will actually continue to develop, making it even more delicious on day two or three.
Freezing: This chili is a freezer hero. It freezes beautifully for up to 3 months. Portion it into individual serving-sized containers or freezer bags. I like to freeze it flat in zip-top bags for easy stacking. To thaw, simply transfer a bag to the refrigerator overnight.
Reheating: The best way to reheat chili is on the stovetop over medium-low heat, stirring occasionally. If it’s too thick, add a splash of beef broth or water to loosen it up. You can also reheat it in the microwave in 30-second bursts, stirring in between. The flavor will be just as good as the day you made it.
Nutritional Information & Benefits
This chili is not just delicious; it’s genuinely good for you. It’s packed with lean protein, fiber, and a ton of vitamins and minerals. Here’s a rough breakdown per serving (based on 8 servings).
Estimated Nutritional Values (per serving):
- Calories: ~350-400
- Protein: ~35g
- Fat: ~10g
- Carbohydrates: ~35g
- Fiber: ~12g
- Sugar: ~8g
Health Benefits: Venison is one of the leanest red meats you can eat, packed with iron and B vitamins. The beans are a fantastic source of soluble fiber, which helps lower cholesterol and keeps you feeling full. The tomatoes are rich in lycopene, a powerful antioxidant. And the spices, like cumin and chili powder, have anti-inflammatory properties. This is a meal that truly nourishes your body from the inside out.
Dietary Considerations: This recipe is naturally gluten-free (just be sure to use a gluten-free broth) and dairy-free (as written). It’s also low in added sugar, relying on the natural sweetness of the tomatoes and vegetables. It’s a fantastic option for anyone following a Paleo or Whole30 diet (just omit the beans).
Allergens: This recipe is free from the top eight allergens (dairy, eggs, peanuts, tree nuts, fish, shellfish, soy, and wheat). However, always double-check your ingredient labels, especially for broth and spices, which can sometimes contain hidden additives.
Conclusion
This wholesome slow cooker venison chili is more than just a recipe; it’s a testament to the fact that eating well doesn’t have to be complicated or boring. It’s proof that you can create a deeply satisfying, incredibly flavorful meal with minimal effort and simple, honest ingredients. Every time I make this chili, I think of my neighbor Dave and his simple question. It was a reminder that sometimes the best cooking advice comes from the most unexpected places.
I hope you give this recipe a try. Don’t be afraid to make it your own—tweak the spices, add your favorite veggies, or load it up with all the toppings. That’s the beauty of chili. It’s forgiving, it’s flexible, and it’s always, always delicious. When you make it, I’d love to hear about it. Leave a comment below and let me know how it turned out, or share your own twist on the recipe. Happy cooking!
Frequently Asked Questions
Can I use a different type of meat?
Absolutely! Ground beef, turkey, or chicken all work great. Just keep in mind that leaner meats like turkey may benefit from a little olive oil when browning to prevent them from drying out.
Do I really have to brown the meat first?
Yes, I strongly recommend it. While you can technically skip it, browning the meat creates a deep, savory flavor that you just can’t get from a slow cooker alone. It takes less than 10 minutes and makes a huge difference.
Can I make this chili in an Instant Pot?
Yes, you can! Use the sauté function to brown the meat and aromatics, then add all the remaining ingredients. Pressure cook on high for 15 minutes, then let the pressure release naturally for 10 minutes before quick-releasing the rest.
How can I thicken my chili?
The easiest way is to stir in a slurry made from 1-2 tablespoons of masa harina (corn flour) mixed with an equal amount of water. Let it cook for 20-30 minutes, and it will thicken beautifully. You can also mash some of the beans against the side of the pot to release their starches.
Can I freeze the leftovers?
Yes, this chili freezes wonderfully. Let it cool completely, then transfer it to freezer-safe containers or bags. It will keep for up to 3 months. Thaw overnight in the refrigerator and reheat gently on the stovetop or in the microwave.
PrintBest Easy Wholesome Slow Cooker Venison Chili
A wholesome, hearty chili that proves you don’t have to be a perfectionist to get incredible results. Packed with lean venison, fiber-rich beans, and a ton of vegetables, this chili is a nutritional powerhouse with deep, smoky, and slightly spicy flavor.
- Prep Time: 15 minutes
- Cook Time: 6 hours (LOW) or 3 hours (HIGH)
- Total Time: 6 hours 15 minutes (LOW) or 3 hours 15 minutes (HIGH)
- Yield: 8 servings 1x
- Category: Main Course
- Cuisine: American
Ingredients
- 2 pounds ground venison (or lean ground beef)
- 1 large yellow onion, diced
- 4 cloves garlic, minced
- 2 tablespoons tomato paste
- 2 (14.5-ounce) cans fire-roasted diced tomatoes
- 1 (15-ounce) can kidney beans, drained and rinsed
- 1 (15-ounce) can black beans, drained and rinsed
- 2 cups low-sodium beef broth
- 2 tablespoons chili powder
- 1 tablespoon ground cumin
- 1 teaspoon smoked paprika
- 1 teaspoon dried oregano
- 1/2 teaspoon chipotle chili powder
- 1/2 teaspoon cayenne pepper (optional)
- Salt and black pepper, to taste
- 1 tablespoon brown sugar or maple syrup (optional)
- 1–2 tablespoons masa harina (corn flour) (optional, for thickening)
- Fresh cilantro, chopped (for garnish)
- Diced avocado (for garnish)
- Lime wedges (for garnish)
- Shredded cheddar cheese or sour cream (optional, for garnish)
Instructions
- Brown the venison (10 minutes). Place a large skillet over medium-high heat. Add the ground venison and cook, breaking it up with a wooden spoon, until nicely browned. Use a slotted spoon to transfer the meat to the slow cooker.
- Sauté the aromatics (5 minutes). Reduce heat to medium. Add the diced onion to the same skillet and cook until softened and translucent, about 4-5 minutes. Add the minced garlic and cook for another 30 seconds until fragrant. Scrape the onions and garlic into the slow cooker.
- Bloom the spices (1 minute). Add the chili powder, cumin, smoked paprika, oregano, chipotle powder, and cayenne (if using) to the now-empty skillet. Toast over medium heat for 30-60 seconds, stirring constantly, until fragrant. Immediately pour the spices into the slow cooker.
- Deglaze the pan (1 minute). Pour about 1/2 cup of the beef broth into the hot skillet. Use a wooden spoon to scrape up all the browned bits from the bottom. Pour this liquid into the slow cooker.
- Add the remaining ingredients (5 minutes). To the slow cooker, add the fire-roasted tomatoes (with their juices), the drained and rinsed kidney beans and black beans, the remaining beef broth, and the tomato paste. Stir well to combine, ensuring the tomato paste is fully dissolved.
- Season and cook (6-8 hours on LOW or 3-4 hours on HIGH). Add a generous pinch of salt and a few grinds of black pepper. Stir again. Cover and cook on LOW for 6-8 hours or on HIGH for 3-4 hours.
- Finish and adjust (10 minutes). About 30 minutes before serving, taste the chili. Adjust seasonings as desired. If using, stir in brown sugar or maple syrup. For a thicker chili, make a slurry with 1-2 tablespoons masa harina and 3 tablespoons water, then stir into the chili and cook for another 20-30 minutes.
- Serve (5 minutes). Ladle the chili into bowls and top with your favorite garnishes.
Notes
Browning the venison is crucial for flavor. Toasting the spices enhances their aroma. Let the chili rest for 15-20 minutes after cooking for better texture. This chili tastes even better the next day.
Nutrition
- Serving Size: 1 serving (about 1.5
- Calories: 375
- Sugar: 8
- Sodium: 600
- Fat: 10
- Saturated Fat: 3
- Carbohydrates: 35
- Fiber: 12
- Protein: 35
Keywords: venison chili, slow cooker chili, healthy chili, easy chili, wholesome chili, game meat chili, gluten-free chili, dairy-free chili


