This was supposed to be a simple pumpkin roll. I had the cream cheese filling ready, the powdered sugar sifted for dusting, and my grandmother’s old jelly roll pan greased and waiting. But somewhere between answering the door for a package and my toddler deciding the dog needed a “snack” of flour, I lost track of the eggs. The cake came out of the oven looking more like a flat, dense pancake than the light, airy spiral I had planned. Honestly, I was ready to toss the whole thing in the trash. I mean, who wants a pumpkin-flavored frisbee for Thanksgiving?
But my husband walked in, saw my frustrated face, and said, “Just crumble it up.” He had this memory from a party years ago of cake balls—little rounds of crumbled cake mixed with frosting. I grabbed the cream cheese frosting I had already made, crumbled that sad cake into a bowl, and started mixing. It felt like a total Hail Mary, you know? The texture was soft and sticky, and I rolled it into little balls without much hope. Then I looked at the candy melts I had bought for another project, and the idea hit me: what if I made them look like little turkeys?
That first batch of Festive Turkey Thanksgiving Cake Pops was ugly in the best way. Some had crooked candy eyes, others had too much orange beak, and a few looked more like mutant chickens. But my kids devoured them. My neighbor, Carol from across the street, stopped by and asked for the recipe. And I realized—sometimes the best things come from a complete disaster. These cake pops are now my signature Thanksgiving treat, and I make them every year. It’s the dish that reminds me to stop panicking when things go wrong in the kitchen. Let me tell you, there’s something deeply satisfying about turning a failed cake into the cutest thing on the dessert table.
Why You’ll Love This Recipe
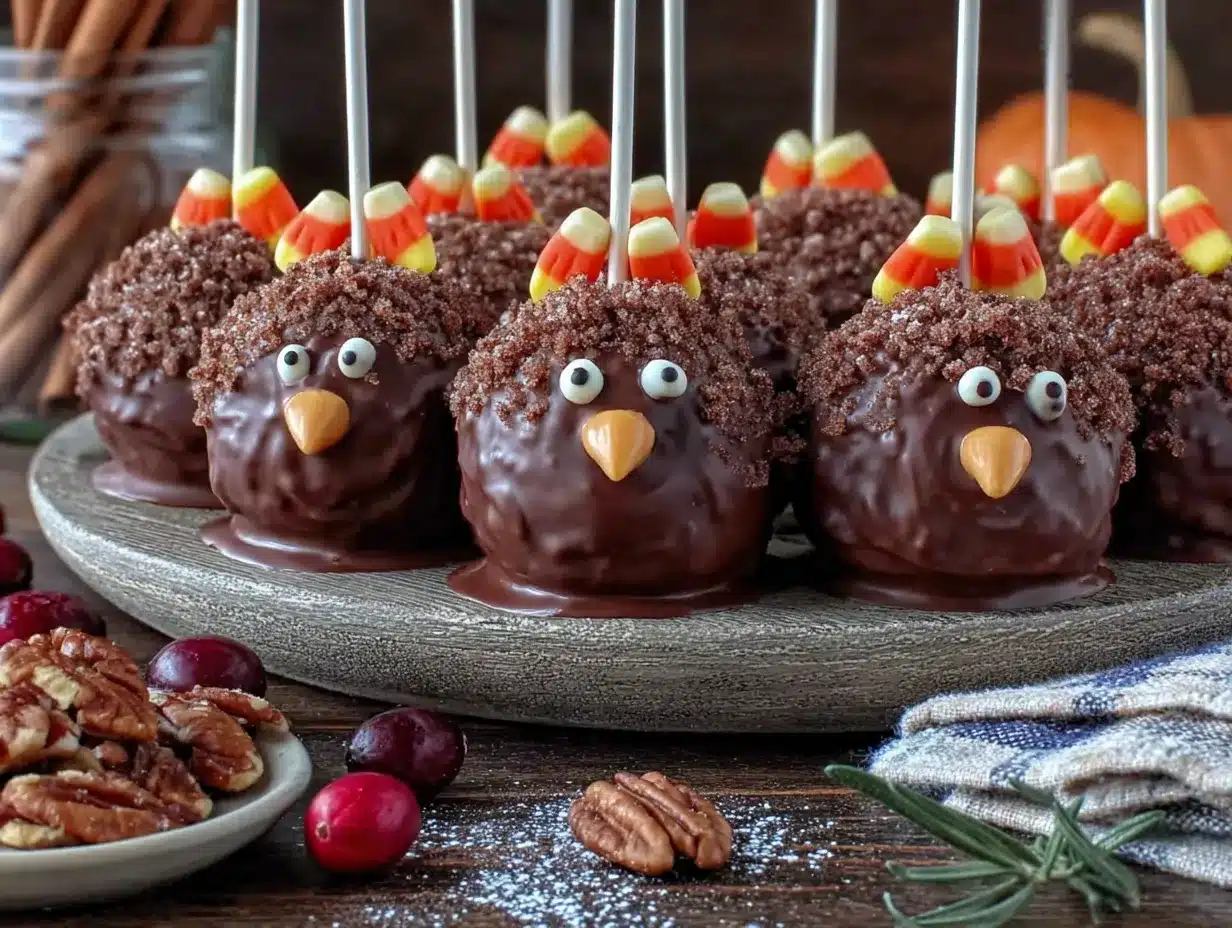
These Festive Turkey Thanksgiving Cake Pops are the kind of treat that makes people stop and smile. I have made them for three Thanksgivings now, and they always disappear before the pumpkin pie. Here is why they work so well:
- Adorable Presentation: These little turkey faces are a showstopper on any dessert table. Kids love them, and adults cannot resist snapping a photo before taking a bite.
- No-Bake Assembly: After you bake the cake, there is no more oven time. This frees up your oven for the turkey and sides on the big day.
- Great Make-Ahead Option: You can prep the cake balls a week in advance and decorate them the night before Thanksgiving. It takes so much stress off your plate.
- Uses Simple Ingredients: Nothing fancy here. You likely have most of these ingredients in your pantry already, which is exactly what you need during the chaos of holiday cooking.
- Perfect for Leftover Cake: This recipe was born from a failed cake, and it is the perfect way to use up a dry or slightly overbaked cake. No waste, just delicious little bites.
What makes these different from other cake pop recipes is the texture. I use a specific ratio of cake to frosting that keeps the inside soft but not mushy, and the outside stays perfectly crisp after dipping. The candy eyes and pretzel stick feathers give them that undeniable turkey charm. Honestly, every time I serve these, someone asks if I bought them from a bakery. That is the best compliment, because they taste even better than they look.
What Ingredients You Will Need
This recipe uses simple, wholesome ingredients to deliver bold flavor and satisfying texture without the fuss. Most of these are pantry staples, especially if you are already baking for Thanksgiving.
For the Cake Base
- 1 box yellow cake mix (I prefer Betty Crocker or Duncan Hines for consistent texture)
- 3 large eggs, room temperature (cold eggs can make the batter lumpy)
- 1/2 cup vegetable oil (adds moisture without overpowering the flavor)
- 1 cup water (or substitute with milk for a richer cake)
- 1 teaspoon pumpkin pie spice (optional, but gives it that Thanksgiving vibe)
For the Frosting Binder
- 1/2 cup cream cheese frosting, store-bought or homemade (use a thick frosting, not whipped)
- 1/4 cup powdered sugar (helps stiffen the mixture if it feels too sticky)
For the Coating and Decorations
- 12 ounces orange candy melts (Wilton brand works great; look for bright orange for that pumpkin-like color)
- 12 ounces brown candy melts (for the turkey body base)
- 1 tablespoon coconut oil or shortening (thins the candy melts for smoother dipping)
- 48 candy eyeballs (the small ones, about 6mm size)
- 1/4 cup candy corn (for the turkey beak and wattle)
- 24 mini pretzel sticks (broken in half for feathers)
- Red candy melts or red frosting (for the wattle, the red dangly bit under the beak)
- Lollipop sticks (I use 6-inch sticks for easy handling)
Substitution Guidance
If you are gluten-sensitive, use a gluten-free yellow cake mix—I have tried King Arthur brand and it worked perfectly. For a dairy-free version, swap the cream cheese frosting with a vegan buttercream and use dairy-free candy melts. If you cannot find orange candy melts, white chocolate with orange food coloring works, but be careful not to overheat the chocolate or it will seize. I learned that the hard way last year and had to start over.
Equipment Needed
- 9×13 baking pan (standard size for the cake base)
- Large mixing bowl (for crumbling the cake)
- Electric hand mixer or stand mixer (for mixing the cake batter)
- Small cookie scoop (1-tablespoon size, makes uniform cake balls)
- Baking sheet lined with parchment paper (for chilling the cake balls)
- Microwave-safe bowls (for melting candy melts)
- Lollipop sticks (6-inch size)
- Styrofoam block or cake pop stand (for drying the finished pops)
- Piping bags or small zip-top bags (for applying red wattle details)
If you do not have a cookie scoop, just use a tablespoon measure and roll the cake balls by hand. A Styrofoam block can be replaced with a cardboard box with holes poked in it—I have used that trick many times. For the candy melts, a double boiler works if you do not have a microwave, but the microwave is faster and easier.
Preparation Method
- Bake the cake: Preheat your oven to 350°F (175°C). Grease your 9×13 pan with butter or non-stick spray. In a large bowl, combine the yellow cake mix, eggs, vegetable oil, and water. Beat with an electric mixer on medium speed for 2 minutes until smooth. If using pumpkin pie spice, stir it in now. Pour the batter into the prepared pan and bake for 28-32 minutes, or until a toothpick inserted in the center comes out clean. Let the cake cool completely in the pan on a wire rack. Do not rush this—warm cake will make the frosting melt and the mixture will be too sticky to handle.
- Crumble the cake: Once the cake is completely cool, break it into large chunks and transfer them to a large mixing bowl. Use your hands to crumble the cake into fine crumbs. There should be no large pieces left—you want it to look like wet sand. This takes about 3-4 minutes of rubbing the cake between your fingers.
- Add the frosting: Add the cream cheese frosting to the crumbled cake. Use a spatula or your hands to mix it thoroughly. The mixture should hold together when you squeeze a handful. If it feels too dry, add another tablespoon of frosting. If it feels too sticky, add a tablespoon of powdered sugar. I usually end up adding about 1/4 cup of powdered sugar to get the perfect texture—firm but not crumbly.
- Form the cake balls: Using your cookie scoop or a tablespoon, portion out the cake mixture. Roll each portion into a smooth ball between your palms. You should get about 24 balls, each roughly 1.5 inches in diameter. Place them on the parchment-lined baking sheet. If the mixture sticks to your hands, lightly wet your palms with water.
- Chill the cake balls: Place the baking sheet in the refrigerator for at least 1 hour, or up to 24 hours. Chilling is crucial—cold cake balls hold their shape when dipped and do not fall off the sticks. If you are in a hurry, pop them in the freezer for 20 minutes, but do not freeze them solid or the candy coating will crack.
- Prepare the candy melts: In a microwave-safe bowl, combine the brown candy melts with 1 teaspoon of coconut oil. Microwave in 30-second intervals, stirring after each, until completely smooth. Do not overheat or the candy will seize. Repeat with the orange candy melts in a separate bowl.
- Dip the cake balls: Remove the cake balls from the refrigerator. Dip the tip of a lollipop stick into the melted brown candy, then insert it about halfway into a cake ball. This acts like glue and prevents the pop from sliding off. Let it set for 2 minutes. Then, dip the entire cake ball into the brown candy melt, covering it completely. Gently tap the stick on the edge of the bowl to remove excess coating. Stick the pop into your Styrofoam block to dry. Repeat with all cake balls.
- Add the turkey details: Once the brown coating is set (about 15 minutes), dip the top third of each cake pop into the orange candy melts. This creates the turkey’s head and beak area. Let that set for 10 minutes. Then, use a tiny dot of melted candy to attach two candy eyeballs to each pop. Cut the candy corn in half horizontally—the wider end becomes the beak, the pointed end is the wattle. Attach the beak with a dot of candy melt. For the wattle, use red candy melts or red frosting in a piping bag to draw a small teardrop shape under the beak.
- Add the feathers: Break the mini pretzel sticks in half. Insert 3-4 halves into the back of the cake pop (the part not dipped in orange) to create the turkey’s tail feathers. Press them in gently so they stay secure. Let everything set completely for 30 minutes before serving.
Cooking Tips & Techniques
Let me save you from my biggest mistake: do not skip the chilling step. I once tried to dip room-temperature cake balls and watched in horror as half of them slid off the sticks into the bowl of melted candy. It was a mess. Cold cake balls are non-negotiable for success here.
Another thing I learned the hard way—thin your candy melts. Straight out of the bag, they are often too thick for smooth dipping. Adding a teaspoon of coconut oil or shortening makes a world of difference. The coating becomes silky and coats the cake ball evenly without clumping. If your candy melts start to thicken while you work, pop the bowl back in the microwave for 10 seconds and stir.
For the prettiest turkey faces, work in small batches. Dip and decorate 4-6 pops at a time, then move on. If you try to dip all 24 at once, the first ones will be fully set before you add the eyes and beaks, and the candy melts will not stick as well. Trust me, I have a batch of eyeless turkeys from last year to prove it.
If you are making these with kids, let them handle the decorating part. The dipping can be tricky with little hands, but placing the candy eyes and pretzel feathers is perfect for children. It becomes a fun Thanksgiving activity rather than just another baking task.
Variations & Adaptations
Chocolate Turkey Cake Pops: Use a chocolate cake mix instead of yellow, and dip in milk chocolate candy melts. The combination tastes like a chocolate truffle, and the orange turkey face pops beautifully against the dark brown base.
Pumpkin Spice Version: Add 1/2 cup canned pumpkin puree to the cake batter (reduce the water by 1/4 cup) and increase the pumpkin pie spice to 2 teaspoons. This gives the cake pops a true Thanksgiving flavor that pairs perfectly with the candy corn beak.
Gluten-Free Adaptation: Use a gluten-free yellow cake mix and ensure your candy melts are certified gluten-free. I have made this version for my gluten-sensitive sister-in-law, and she said they were the best cake pops she had ever had. The texture is slightly denser but still delicious.
Mini Turkey Bites: Instead of lollipop sticks, form the cake mixture into 1-inch balls and place them on a baking sheet. Dip them in candy melts using a fork, then decorate as mini turkey heads. These are perfect for younger kids who might choke on the sticks.
One year, I tried a cranberry-flavored variation by adding dried cranberries to the cake mixture. The tartness was nice, but the cranberries made the cake balls lumpy and hard to roll. I would not recommend that particular experiment, but hey, that is how new recipes are born!
Serving & Storage Suggestions
These Festive Turkey Thanksgiving Cake Pops are best served at room temperature. Remove them from the refrigerator about 20 minutes before serving so the coating softens slightly and the cake interior becomes tender. Arrange them on a platter with the pretzel feathers facing outward for maximum visual impact. I like to place them in a small pumpkin-shaped bowl or around a pie for a centerpiece effect.
For storage, keep the cake pops in an airtight container in the refrigerator for up to 5 days. Place them in a single layer, or separate layers with parchment paper so the decorations do not smudge. Do not stack them directly on top of each other or the candy eyes will fall off.
You can freeze undecorated cake balls for up to 3 months. Wrap them tightly in plastic wrap and place them in a freezer bag. When you are ready to use them, thaw them in the refrigerator overnight, then dip and decorate as directed. The flavor actually improves after freezing—the cake and frosting meld together into a more cohesive texture.
If you are making these for a Thanksgiving potluck, transport them in a cake pop carrier or a clean egg carton. The individual slots keep them from rolling around and breaking. I learned this after arriving at my sister’s house with a bag of broken turkey parts. Not my finest moment.
Nutritional Information & Benefits
Each Festive Turkey Thanksgiving Cake Pop (based on 24 servings) contains approximately 185 calories, 9g fat, 25g carbohydrates, 2g protein, and 14g sugar. These are definitely a treat, not a health food, but they are smaller than a slice of pie, which makes portion control easier during the holiday feast.
The yellow cake mix provides some iron and B vitamins from enriched flour, and the cream cheese frosting adds a small amount of calcium. If you use the pumpkin spice variation, you get a boost of vitamin A from the pumpkin puree. The candy melts are mostly sugar and fat, so consider these an occasional indulgence rather than an everyday snack.
For those with dietary restrictions, this recipe contains gluten, dairy, and eggs. The gluten-free and dairy-free substitutions mentioned earlier work well, but the candy eyeballs often contain trace amounts of wheat starch, so check labels carefully if allergies are a concern.
I personally love that these cake pops are smaller than traditional desserts. After a heavy Thanksgiving meal, a single bite-sized treat feels just right—satisfying without being overwhelming. It is my favorite way to end the meal without unbuttoning my pants.
Conclusion
These Festive Turkey Thanksgiving Cake Pops are more than just a cute dessert—they are a testament to the beauty of kitchen accidents. What started as a failed pumpkin roll became my most requested holiday recipe, and I am so glad I did not give up after that first disaster. The combination of soft, creamy cake interior with the crisp candy shell and those adorable turkey faces is simply irresistible.
I encourage you to make these your own. Add more spice, switch up the candy colors, or let your kids go wild with the decorations. The recipe is forgiving and fun, which is exactly what Thanksgiving cooking should be about. Honestly, the first time you see someone’s face light up when they spot these little turkeys on the dessert table, you will understand why I keep making them year after year.
I would love to hear how your turkey cake pops turn out! Drop a comment below with your decorating ideas or any tweaks you made. And if you snapped a photo, share it—I always get inspired by seeing other people’s creations. Happy Thanksgiving, and happy baking!
Frequently Asked Questions
Can I use a homemade cake instead of a box mix?
Absolutely! Use your favorite vanilla or yellow cake recipe. Just make sure it is fully cooled and crumbled finely. Homemade cake tends to be more moist, so you may need a little less frosting to achieve the right texture.
Why did my cake pops crack after dipping?
This usually happens when the cake balls are too cold or the candy melts are too hot. The temperature difference causes the coating to expand and crack. Let the cake balls sit at room temperature for 5 minutes after removing from the fridge, and make sure your candy melts are warm but not hot to the touch.
Can I make these without lollipop sticks?
Yes! Simply shape the cake mixture into small balls, dip them in candy melts using a fork, and place them on parchment paper to set. You can still decorate them with candy eyes and pretzel feathers—they will just be turkey bites instead of pops.
How far in advance can I make these?
You can make the cake balls up to a week in advance and keep them refrigerated. Dip and decorate them the day before serving for the freshest look. The candy coating stays shiny for about 24 hours before it starts to dull slightly.
My candy melts are too thick—what do I do?
Add a teaspoon of coconut oil or vegetable shortening to the melted candy and stir well. This thins the coating without affecting the flavor. Do not add water or milk, as this will cause the candy to seize and become grainy.
Pin This Recipe!
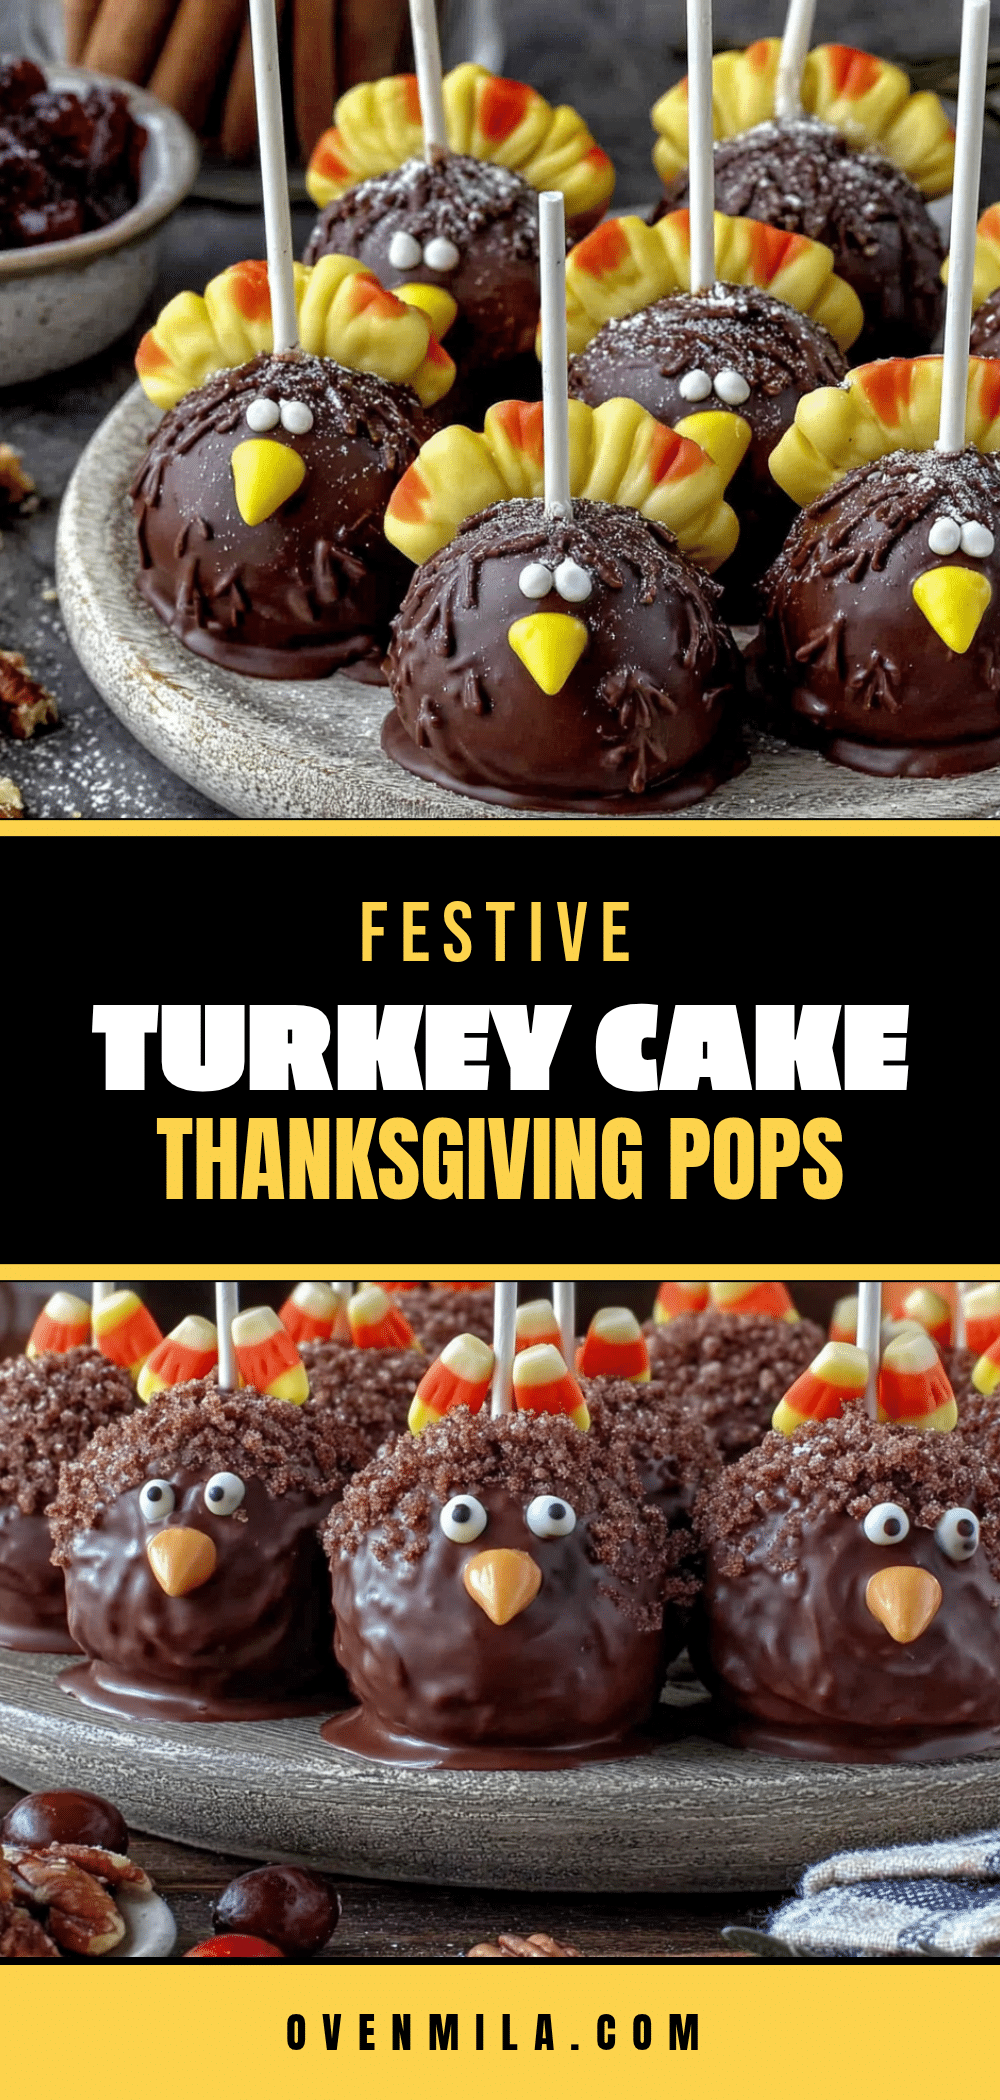
Best Festive Turkey Thanksgiving Cake Pops Recipe
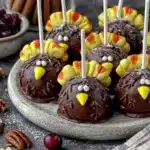
Turn a failed cake into adorable turkey cake pops that are perfect for Thanksgiving. These no-bake treats feature a soft cake center, crisp candy coating, and cute turkey decorations that kids and adults love.
- Prep Time: 30 minutes
- Cook Time: 30 minutes
- Total Time: 1 hour 30 minutes (plus chilling time)
- Yield: 24 servings 1x
- Category: Dessert
- Cuisine: American
Ingredients
- 1 box yellow cake mix (Betty Crocker or Duncan Hines)
- 3 large eggs, room temperature
- 1/2 cup vegetable oil
- 1 cup water (or milk for richer cake)
- 1 teaspoon pumpkin pie spice (optional)
- 1/2 cup cream cheese frosting (store-bought or homemade, thick not whipped)
- 1/4 cup powdered sugar
- 12 ounces orange candy melts (Wilton brand)
- 12 ounces brown candy melts
- 1 tablespoon coconut oil or shortening
- 48 candy eyeballs (6mm size)
- 1/4 cup candy corn
- 24 mini pretzel sticks (broken in half)
- Red candy melts or red frosting (for wattle)
- Lollipop sticks (6-inch)
Instructions
- Preheat oven to 350°F (175°C). Grease a 9×13 baking pan. In a large bowl, combine yellow cake mix, eggs, vegetable oil, and water. Beat with an electric mixer on medium speed for 2 minutes until smooth. Stir in pumpkin pie spice if using. Pour batter into prepared pan and bake for 28-32 minutes, or until a toothpick inserted in the center comes out clean. Let cake cool completely in the pan on a wire rack.
- Once cake is completely cool, break into large chunks and transfer to a large mixing bowl. Crumble cake into fine crumbs using your hands until it resembles wet sand (about 3-4 minutes).
- Add cream cheese frosting to crumbled cake. Mix thoroughly with a spatula or hands until mixture holds together when squeezed. If too dry, add another tablespoon of frosting; if too sticky, add a tablespoon of powdered sugar. Typically add about 1/4 cup powdered sugar for perfect texture.
- Using a cookie scoop or tablespoon, portion out cake mixture and roll into smooth balls about 1.5 inches in diameter. You should get about 24 balls. Place on a parchment-lined baking sheet. If mixture sticks to hands, lightly wet palms with water.
- Refrigerate cake balls for at least 1 hour, or up to 24 hours. For a quicker chill, freeze for 20 minutes but do not freeze solid.
- In a microwave-safe bowl, combine brown candy melts with 1 teaspoon coconut oil. Microwave in 30-second intervals, stirring after each, until completely smooth. Repeat with orange candy melts in a separate bowl.
- Remove cake balls from refrigerator. Dip tip of a lollipop stick into melted brown candy, then insert about halfway into a cake ball. Let set for 2 minutes. Dip entire cake ball into brown candy melt, covering completely. Gently tap stick on bowl edge to remove excess. Place in Styrofoam block to dry. Repeat with all cake balls.
- Once brown coating is set (about 15 minutes), dip top third of each cake pop into orange candy melts to create turkey’s head and beak area. Let set for 10 minutes.
- Use a tiny dot of melted candy to attach two candy eyeballs to each pop. Cut candy corn in half horizontally; attach wider end as beak and pointed end as wattle using a dot of candy melt. Use red candy melts or red frosting in a piping bag to draw a small teardrop shape under the beak for the wattle.
- Break mini pretzel sticks in half. Insert 3-4 halves into the back of each cake pop (the part not dipped in orange) to create turkey tail feathers. Press gently to secure. Let everything set completely for 30 minutes before serving.
Notes
Do not skip chilling the cake balls—cold cake balls hold their shape when dipped and prevent sliding off sticks. Thin candy melts with coconut oil or shortening for smoother dipping. Work in small batches (4-6 pops at a time) for best decorating results. For gluten-free, use a gluten-free yellow cake mix and certified gluten-free candy melts. For dairy-free, use vegan buttercream and dairy-free candy melts.
Nutrition
- Serving Size: 1 cake pop
- Calories: 185
- Sugar: 14
- Sodium: 180
- Fat: 9
- Saturated Fat: 4
- Carbohydrates: 25
- Protein: 2
Keywords: Thanksgiving cake pops, turkey cake pops, festive cake pops, holiday dessert, cake pop recipe, easy cake pops, no-bake dessert