This was supposed to be a pecan pie. I had the pecans toasted, the corn syrup measured, and the butter melting on the stove. But somewhere between answering the phone and shooing the dog away from the counter, I grabbed the wrong can. Instead of the dark corn syrup, my hand landed on a can of pumpkin puree that was sitting nearby from a previous project. I didn’t realize my mistake until I had already poured the entire can into the bowl with my sugar and eggs. Honestly, my first instinct was panic. The pecans were waiting, the guests were coming in three hours, and I had just made a very expensive bowl of pumpkin goo.
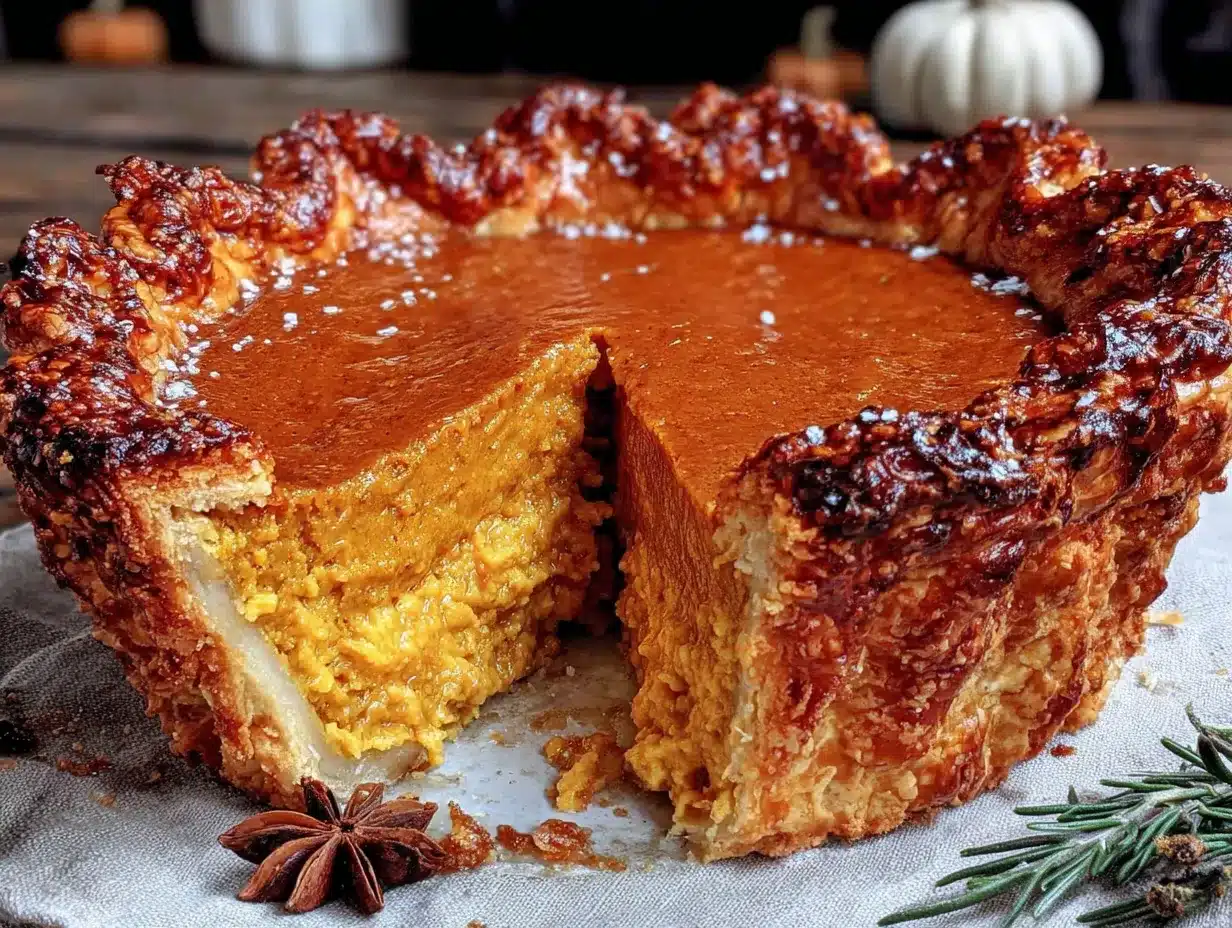
I stood there staring at the bowl for a solid minute, maybe two. The dog was still sniffing around, the phone was ringing again, and I was this close to just ordering pizza for everyone. But then something stopped me. I thought, well, I already have a butter crust chilling in the fridge. Why not just roll with it? I added a few extra spices I had on hand, poured the filling into my pie dish, and slid it into the oven with absolutely no idea what was going to happen. Let me tell you, when that pie came out of the oven, the smell alone had my neighbor knocking on the door. It was golden, wobbly in the center just right, and the crust had puffed up into these beautiful, flaky layers. I sliced into it, took one bite, and honestly, I couldn’t believe it. This accidental pumpkin pie became the only pumpkin pie I have ever made since. Maybe you’ve been there—a kitchen mishap that turns out better than the plan. This is that story.
Why You’ll Love This Recipe
This homemade pumpkin pie with flaky all-butter crust is not just another pumpkin pie recipe. It is the one that will make your family ask for it every single Thanksgiving, and maybe even on random Tuesday nights in November. I have tested this recipe at least a dozen times, tweaking the spice ratio, adjusting the bake time, and perfecting that crust until it shattered with every forkful. Here is why it works so well for busy families on a budget:
- Simple, Affordable Ingredients: You probably already have most of these in your pantry. No fancy extracts, no hard-to-find spices. Just honest, real food that won’t break the bank.
- Perfect for Family Gatherings: This pie feeds a crowd and pleases everyone from picky toddlers to critical in-laws. It is the definition of a crowd-pleaser.
- Make-Ahead Friendly: You can prep the crust and filling the day before. That means less stress on the big day and more time with your people.
- Unbelievably Flaky Crust: The all-butter crust is the real star here. It is tender, buttery, and shatters with each bite. No shortening, no margarine, just pure butter magic.
- Leftovers Reheat Beautifully: Cold pie for breakfast? Yes, please. But if you want it warm, a quick 10 minutes in a low oven brings it right back to life.
What makes this recipe different from all the others is the technique. Most recipes tell you to blind-bake the crust, which can be fussy and prone to shrinking. Not this one. We use a simple par-bake method that keeps the crust sturdy without the hassle of pie weights and parchment. Plus, the spice blend is balanced perfectly—not too heavy on the cinnamon, with just a whisper of ginger and clove that lets the pumpkin shine. This is comfort food reimagined: faster, simpler, but with the same soul-soothing satisfaction that makes you close your eyes after the first bite.
What Ingredients You Will Need
This recipe uses simple, wholesome ingredients that come together to deliver bold flavor and that signature silky texture. Most of these are pantry staples, so you likely have everything on hand.
For the All-Butter Crust
- 2 ½ cups all-purpose flour (312g) – I prefer unbleached flour for a sturdier crust
- 1 teaspoon salt – fine sea salt works best
- 1 tablespoon granulated sugar – just a touch for sweetness and browning
- 1 cup cold unsalted butter (226g), cut into small cubes – use European-style butter like Kerrygold for extra richness (trust me on this one)
- 6-8 tablespoons ice water – as cold as you can get it; add a few ice cubes to the water before measuring
For the Pumpkin Filling
- 1 can (15 oz) pumpkin puree (425g) – not pumpkin pie filling; make sure it says 100% pumpkin on the label
- ¾ cup packed dark brown sugar (165g) – light brown sugar works too, but dark gives a deeper molasses flavor
- 2 large eggs – room temperature for easier mixing
- 1 cup heavy cream (240ml) – half-and-half can be substituted in a pinch, but the texture will be slightly less rich
- 1 teaspoon vanilla extract – pure vanilla, not imitation
- 1 ½ teaspoons ground cinnamon – I use Vietnamese cinnamon for its warm, spicy kick
- ½ teaspoon ground ginger – adds a gentle warmth
- ¼ teaspoon ground cloves – a little goes a long way
- ½ teaspoon salt – balances the sweetness
If you are looking for a dairy-free option, swap the heavy cream with full-fat coconut milk. The texture will be slightly different, but still delicious. For the crust, you can use a high-quality vegan butter, though the flakiness won’t be quite the same. I have tried both, and honestly, the real butter version is worth the splurge for special occasions.
Equipment Needed
You do not need a fancy kitchen to pull off this pie. Here is what you will need:
- 9-inch pie dish – glass or ceramic works best; avoid dark metal pans as they can over-brown the crust
- Rolling pin – a standard wooden one is fine; if you don’t have one, a clean wine bottle works in a pinch
- Large mixing bowls – one for the crust, one for the filling
- Pastry cutter or two forks – for cutting the butter into the flour (your hands work too, just work quickly so the butter stays cold)
- Plastic wrap – for chilling the dough
- Whisk – for blending the filling until smooth
- Measuring cups and spoons – accuracy matters in baking
- Kitchen scale – optional but highly recommended for consistent results
I have made this pie with a cheap rolling pin from the grocery store and a cracked glass pie dish I found at a thrift store. It still came out perfect. Do not let fancy equipment stop you.
Preparation Method
Let’s get to the fun part. This method is broken down into clear steps, with time estimates and sensory cues so you know exactly what to look for.
Step 1: Make the All-Butter Crust (15 minutes + 1 hour chilling)
In a large bowl, whisk together the flour, salt, and sugar. Add the cold butter cubes. Using a pastry cutter or two forks, cut the butter into the flour until the mixture looks like coarse meal with some pea-sized butter pieces remaining. Do not overwork it—those little butter chunks are what create the flaky layers. Drizzle 6 tablespoons of ice water over the mixture and stir with a fork until the dough just comes together. If it seems dry, add the remaining water one tablespoon at a time. The dough should hold together when squeezed in your fist. Turn it out onto a piece of plastic wrap, flatten into a disc, wrap tightly, and refrigerate for at least 1 hour.
Step 2: Par-Bake the Crust (20 minutes + cooling)
Preheat your oven to 400°F (200°C). On a lightly floured surface, roll the chilled dough into a 12-inch circle, about ⅛-inch thick. Carefully transfer it to your pie dish. Gently press the dough into the dish, trimming the overhang to about ½ inch. Fold the edges under and crimp as desired. Prick the bottom of the crust all over with a fork. Line the crust with a piece of parchment paper and fill with pie weights or dried beans. Bake for 12 minutes. Remove the parchment and weights, then bake for another 5-8 minutes until the crust is just starting to turn golden. Set aside to cool slightly while you make the filling.
Step 3: Make the Pumpkin Filling (10 minutes)
Lower the oven temperature to 375°F (190°C). In a large bowl, whisk together the pumpkin puree and brown sugar until smooth. Add the eggs one at a time, whisking well after each addition. Slowly pour in the heavy cream and vanilla, whisking constantly. Finally, add the cinnamon, ginger, cloves, and salt. Whisk until everything is fully combined and the mixture is silky. The filling should be thick but pourable, with a rich, warm aroma.
Step 4: Bake the Pie (50-60 minutes)
Pour the filling into the warm par-baked crust. Place the pie on a baking sheet to catch any drips. Bake for 50-60 minutes, or until the edges are set but the center still jiggles slightly when you gently shake the pan. A knife inserted near the center should come out mostly clean. The filling will continue to set as it cools. If the edges of the crust start browning too quickly, tent them with strips of foil or a pie shield.
Step 5: Cool and Serve (2 hours minimum)
Let the pie cool completely on a wire rack, at least 2 hours. This is crucial—cutting into it too early will result in a runny mess. Once cool, slice and serve at room temperature or slightly warm. Top with whipped cream for the full experience.
Cooking Tips & Techniques
I have made this pie more times than I can count, and I have definitely messed it up a few times. Here is what I learned the hard way so you do not have to.
Keep everything cold. The butter, the water, even your hands if you can manage it. Warm butter melts into the flour instead of creating steam pockets, and that means a tough, dense crust. If your kitchen is warm, pop the dough in the fridge for 10 minutes between steps.
Do not overmix the filling. Whisk until just combined. Over-whisking incorporates too much air, which can cause the filling to puff up and crack as it cools. A few tiny bubbles on the surface are fine.
Watch the crust edges. This is the most common issue I see. The edges always brown faster than the center. I keep a roll of foil handy and tear off strips to cover the edges about 20 minutes into baking. It saves the crust every single time.
Trust the jiggle. The center of the pie should still wobble a bit when you pull it out. If it looks completely set, it is probably overbaked and will be dry. The residual heat will finish the cooking process as it cools.
Let it rest. I know it is tempting to cut into that beautiful pie right away, but patience is key. A fully cooled pie slices cleanly and holds its shape. Warm pie is delicious, but it will be messy.
Variations & Adaptations
This recipe is flexible, and I have tried several twists over the years. Here are some of my favorites:
- Gluten-Free Version: Substitute the all-purpose flour with a 1:1 gluten-free baking blend. The crust will be slightly more crumbly, but still delicious. I like the King Arthur brand for this.
- Spiced-Up Version: Add ¼ teaspoon of freshly grated nutmeg and a pinch of cardamom to the filling. It gives the pie a warm, almost chai-like flavor that is incredible with whipped cream.
- Maple Pumpkin Pie: Replace the dark brown sugar with ¾ cup of pure maple syrup. The filling will be slightly softer, so bake for an extra 5-10 minutes. The maple flavor pairs beautifully with the butter crust.
- Dairy-Free Adaptation: Use full-fat coconut milk in place of the heavy cream and a high-quality vegan butter for the crust. The texture will be a bit denser, but the flavor is still spot-on.
I once made a chocolate-swirl version by drizzling melted dark chocolate into the filling before baking. It was a huge hit with the kids, though my husband said it was a little too decadent. I say there is no such thing.
Serving & Storage Suggestions
This pie is best served at room temperature or slightly warm. A dollop of lightly sweetened whipped cream is the classic pairing, but a scoop of vanilla ice cream works beautifully too. For a fancy presentation, dust the top with a little cinnamon or add a few candied pecans.
If you have leftovers (which is rare in my house), store them in the refrigerator, tightly covered, for up to 4 days. The crust will soften slightly, but the flavor actually deepens overnight. To reheat, place slices on a baking sheet in a 300°F (150°C) oven for 10 minutes. The microwave works in a pinch, but the crust will lose its flakiness.
You can also freeze the baked pie for up to 3 months. Wrap it tightly in plastic wrap and then foil. Thaw overnight in the refrigerator and reheat as directed. The crust might not be quite as flaky, but it is still a solid option for busy holiday prep.
Nutritional Information & Benefits
Per slice (based on 8 servings), this pie contains approximately:
- Calories: 380
- Fat: 24g
- Carbohydrates: 38g
- Protein: 5g
- Fiber: 3g
- Sugar: 22g
Pumpkin is packed with vitamin A, fiber, and antioxidants, making this dessert a little more nutritious than your average pie. The butter crust is indulgent, but hey, it is a holiday treat. If you are watching your sugar intake, you can reduce the brown sugar to ½ cup, though the filling will be less sweet and slightly less firm. This recipe is not gluten-free or dairy-free as written, but see the variations section for easy swaps.
Conclusion
This homemade pumpkin pie with flaky all-butter crust started as a complete accident, but honestly, it is the best mistake I ever made in the kitchen. It is simple enough for a beginner baker but impressive enough to be the centerpiece of your holiday table. The crust is buttery and tender, the filling is silky and perfectly spiced, and the whole thing comes together with ingredients you probably already have. I hope you give it a try, and more than that, I hope you make it your own. Add a little extra cinnamon, swap in maple syrup, or top it with a mountain of whipped cream. This pie is forgiving, just like the day I accidentally made it. If you do make it, I would love to hear how it turned out. Drop a comment below or tag me in your photos. Happy baking!
Frequently Asked Questions
Can I use a store-bought crust instead?
Absolutely. If you are short on time or just not in the mood to make dough, a high-quality refrigerated pie crust works fine. Just par-bake it according to the package directions before adding the filling.
Why did my crust shrink during baking?
Crust shrinkage usually happens when the dough is overworked or not chilled enough. Make sure your butter is cold and your dough rests in the fridge for at least an hour. Also, do not stretch the dough when fitting it into the dish—ease it in gently.
Can I make this pie ahead of time?
Yes! You can bake the pie a day in advance and store it in the refrigerator. Let it cool completely before covering. The flavors actually meld together nicely overnight. Just bring it to room temperature before serving.
How do I know when the pie is done?
The edges should be set and slightly puffed, while the center should still jiggle a little when you shake the pan. A knife inserted near the center should come out mostly clean. Overbaking will cause cracks, so err on the side of underdone.
Can I freeze leftover pumpkin pie?
Yes, you can freeze the baked pie for up to 3 months. Wrap it tightly in plastic wrap and then foil. Thaw in the refrigerator overnight and reheat in a 300°F oven for 10 minutes. The crust will be slightly softer, but it still tastes great.
Pin This Recipe!
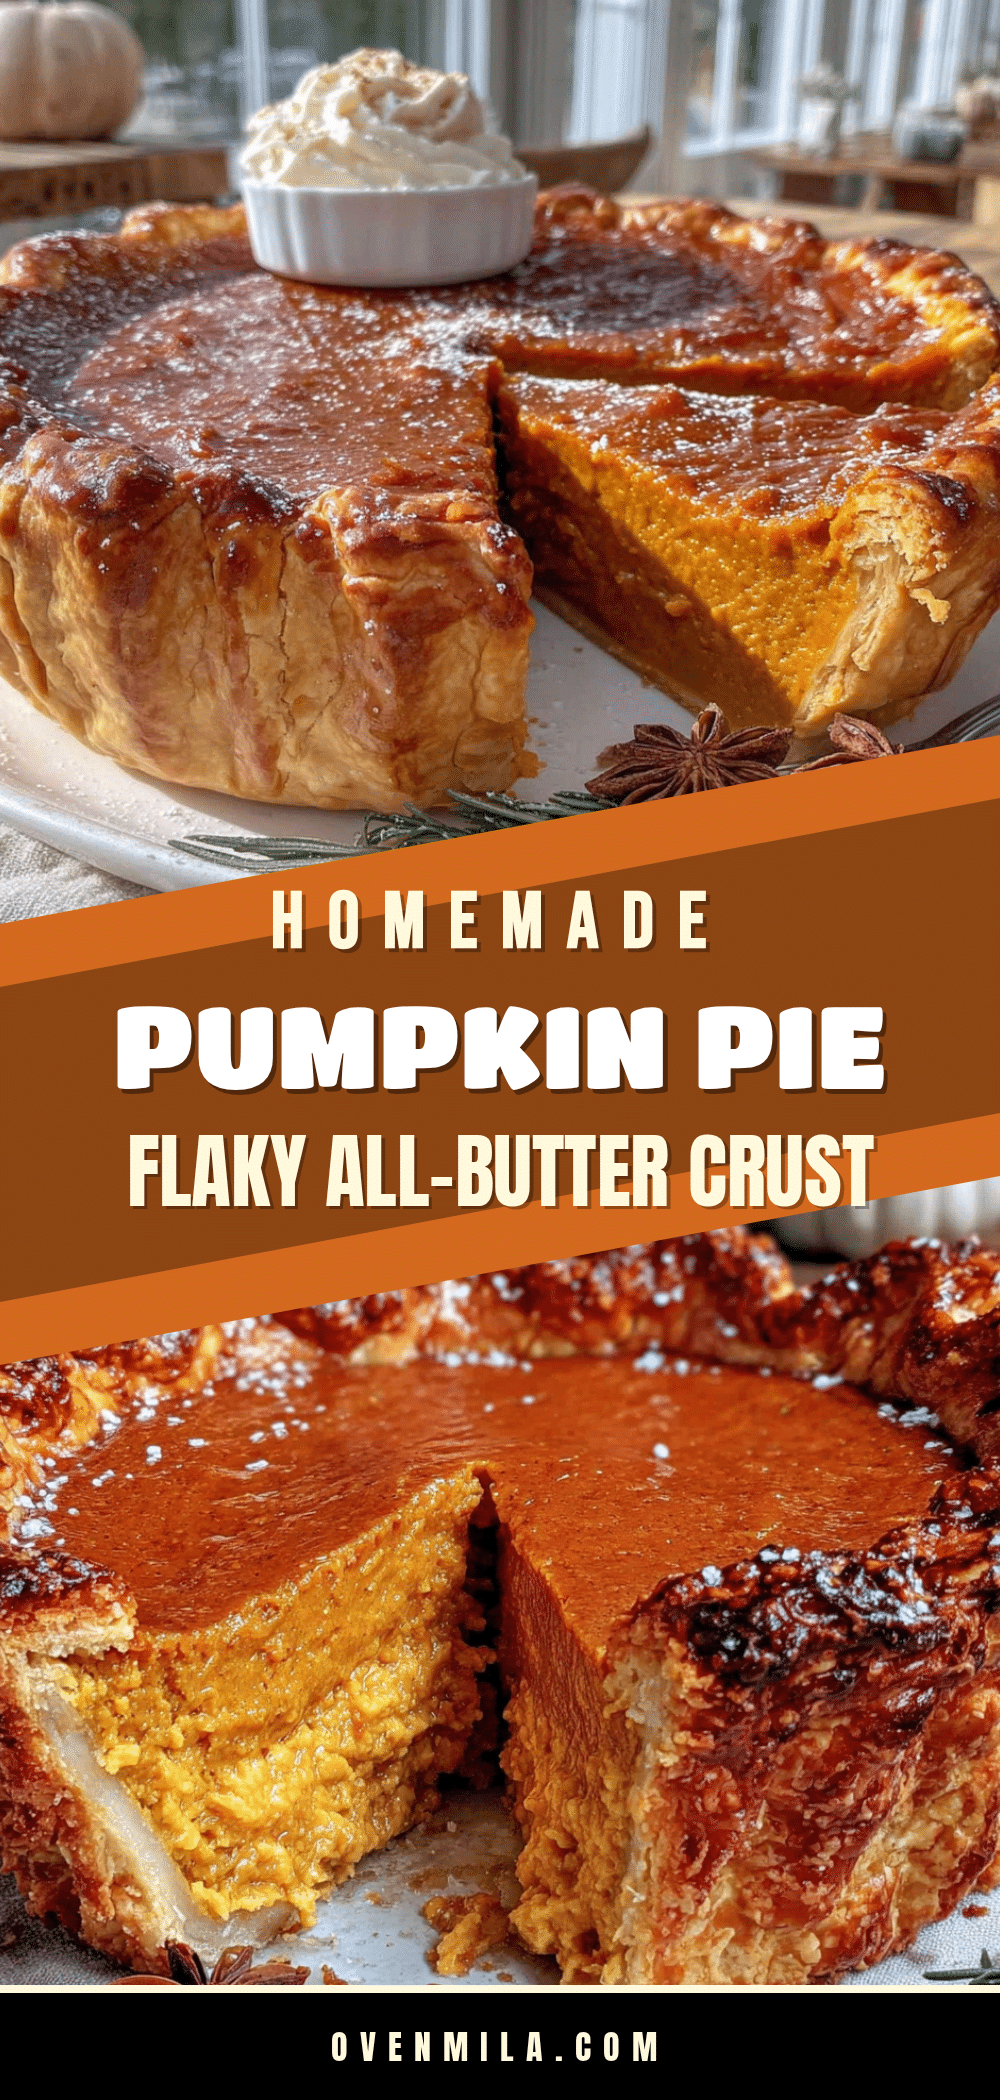
Best Homemade Pumpkin Pie with Flaky All-Butter Crust
This homemade pumpkin pie with flaky all-butter crust started as a complete accident, but it is the best mistake I ever made in the kitchen. It is simple enough for a beginner baker but impressive enough to be the centerpiece of your holiday table.
- Prep Time: 1 hour 25 minutes
- Cook Time: 1 hour 10 minutes
- Total Time: 2 hours 35 minutes
- Yield: 8 servings 1x
- Category: Dessert
- Cuisine: American
Ingredients
- 2 ½ cups all-purpose flour (312g)
- 1 teaspoon salt
- 1 tablespoon granulated sugar
- 1 cup cold unsalted butter (226g), cut into small cubes
- 6–8 tablespoons ice water
- 1 can (15 oz) pumpkin puree (425g)
- ¾ cup packed dark brown sugar (165g)
- 2 large eggs, room temperature
- 1 cup heavy cream (240ml)
- 1 teaspoon vanilla extract
- 1 ½ teaspoons ground cinnamon
- ½ teaspoon ground ginger
- ¼ teaspoon ground cloves
- ½ teaspoon salt
Instructions
- Make the All-Butter Crust: In a large bowl, whisk together the flour, salt, and sugar. Add the cold butter cubes. Using a pastry cutter or two forks, cut the butter into the flour until the mixture looks like coarse meal with some pea-sized butter pieces remaining. Drizzle 6 tablespoons of ice water over the mixture and stir with a fork until the dough just comes together. If it seems dry, add the remaining water one tablespoon at a time. Turn it out onto a piece of plastic wrap, flatten into a …
- Par-Bake the Crust: Preheat your oven to 400°F (200°C). On a lightly floured surface, roll the chilled dough into a 12-inch circle, about ⅛-inch thick. Carefully transfer it to your pie dish. Gently press the dough into the dish, trimming the overhang to about ½ inch. Fold the edges under and crimp as desired. Prick the bottom of the crust all over with a fork. Line the crust with a piece of parchment paper and fill with pie weights or dried beans. Bake for 12 minutes. Remove the parchment and w…
- Make the Pumpkin Filling: Lower the oven temperature to 375°F (190°C). In a large bowl, whisk together the pumpkin puree and brown sugar until smooth. Add the eggs one at a time, whisking well after each addition. Slowly pour in the heavy cream and vanilla, whisking constantly. Finally, add the cinnamon, ginger, cloves, and salt. Whisk until everything is fully combined and the mixture is silky.
- Bake the Pie: Pour the filling into the warm par-baked crust. Place the pie on a baking sheet to catch any drips. Bake for 50-60 minutes, or until the edges are set but the center still jiggles slightly when you gently shake the pan. A knife inserted near the center should come out mostly clean. If the edges of the crust start browning too quickly, tent them with strips of foil or a pie shield.
- Cool and Serve: Let the pie cool completely on a wire rack, at least 2 hours. Once cool, slice and serve at room temperature or slightly warm. Top with whipped cream for the full experience.
Notes
Keep everything cold for the crust. Do not overmix the filling. Watch the crust edges and tent with foil if browning too quickly. Trust the jiggle – the center should still wobble when you pull it out. Let the pie rest for at least 2 hours before slicing. Leftovers can be stored in the refrigerator for up to 4 days or frozen for up to 3 months.
Nutrition
- Serving Size: 1 slice
- Calories: 380
- Sugar: 22
- Sodium: 350
- Fat: 24
- Saturated Fat: 15
- Carbohydrates: 38
- Fiber: 3
- Protein: 5
Keywords: pumpkin pie, homemade pumpkin pie, flaky all-butter crust, Thanksgiving dessert, fall dessert, pumpkin dessert, easy pumpkin pie


