The Friendsgiving potluck at my son’s preschool was in two days and I’d completely forgotten. Every other parent was signing up for elaborate casseroles, hand-rolled meatballs, and those gorgeous pies that look like they belong on a magazine cover. I had a half-eaten bag of pretzel sticks, some cheese sticks that were about to expire, and a toddler who was “helping” by eating the raisins straight from the box. Panic doesn’t even begin to cover it. I mean, I couldn’t show up with a sad veggie tray, could I?
Then it hit me, standing there in my messy kitchen on a Tuesday afternoon. What if I made little cups? Individual servings that kids could actually hold and eat without a plate. Something that looked fancy but took zero actual skill. I grabbed some clear plastic cups from the back of the pantry—leftover from a birthday party six months ago—and started layering whatever I could find. Crackers on the bottom, cheese cubes, those sad pretzel sticks, a few grapes. My son kept stealing the turkey pepperoni, which honestly just made the whole thing feel more authentic. It was chaos, but it was good chaos.
When I walked into that classroom with a tray of forty little charcuterie cups, I fully expected to be outshined by the gourmet mac and cheese and the homemade cranberry sauce. But you know what? The kids went absolutely wild for them. They grabbed their cups, found a spot on the rug, and just started munching. No plates, no forks, no mess. The teachers took pictures. One mom asked me for the recipe. And I stood there, still in my flour-dusted sweater, trying to explain that the “recipe” was just… throwing stuff in a cup. That’s when I realized I was onto something. Maybe you’ve been there too—needing a dish that looks like you tried really hard but actually took ten minutes. These charcuterie cups are that dish. They saved me that day, and honestly, they’ve saved me a dozen times since.
Why You’ll Love These Kid-Friendly Friendsgiving Charcuterie Cups
Let’s be real for a second. Friendsgiving with kids is a whole different beast. You’ve got tiny hands, picky eaters, and the constant threat of spilled juice. These individual charcuterie cups solve all of that in one genius move. They’re not just cute—they’re practical, budget-friendly, and ridiculously easy to throw together. Here’s why they’ve become my go-to for every school party, playdate, and holiday gathering.
- Quick & Easy: These cups come together in under 15 minutes. No cooking, no baking, no waiting. Just grab, layer, and go. Perfect for the night before or even the morning of the event.
- Simple Ingredients: You probably have 90% of these items in your fridge and pantry right now. Crackers, cheese, fruit, deli meat—nothing fancy required. Your wallet will thank you.
- Perfect for Friendsgiving: Individual servings mean no double-dipping, no fighting over the last piece of cheese, and zero mess. Kids can grab their cup and find a spot without needing a plate or a fork.
- Crowd-Pleaser: I’ve made these for toddlers, teenagers, and even adults at a casual Friendsgiving dinner. Every single time, they disappear. There’s something about a personal cup of snacks that feels special.
- Unbelievably Delicious: The combination of salty crackers, creamy cheese, sweet fruit, and savory meat is just pure comfort. It’s like a fancy snack board but way easier to eat.
What makes these different from every other charcuterie idea out there? It’s the individual cup format. No big board to assemble, no worrying about who touched what, and no leftovers that get weird. Plus, you can customize each cup for picky eaters—one kid hates grapes? Leave them out. Another one only wants cheddar? Done. It’s the ultimate low-stress, high-reward recipe for busy parents. Honestly, it’s the kind of dish that makes you close your eyes after the first bite because you realize you pulled it off without breaking a sweat. Comfort food reimagined, one little cup at a time.
What Ingredients You Will Need
This recipe uses simple, wholesome ingredients that you can find at any grocery store. The beauty of these charcuterie cups is that there’s no strict rulebook—you can swap based on what your kids like or what’s on sale. Here’s what I typically use to build the perfect cup, along with a few notes from my own trial-and-error kitchen adventures.
For the Base
- Mini crackers or pretzel sticks: About 10-12 per cup. I love using mini Ritz crackers or square cheese crackers for a buttery base. Pretzel sticks add a nice salty crunch. If you’re gluten-free, use your favorite gluten-free crackers.
- Cheese cubes: 4-6 cubes per cup. Go with mild cheddar, Colby Jack, or mozzarella—kid-approved flavors. I usually buy pre-cut cubes to save time, but cutting your own from a block is cheaper. Pro tip: use a small cookie cutter to make fun shapes for holiday events.
- Deli meat: 2-3 small slices per cup. Turkey pepperoni, salami, or ham all work great. Roll them up or fold them into little fans for a pretty look. My kids love the turkey pepperoni because it’s less greasy.
- Grapes or cherry tomatoes: 3-4 per cup. Red grapes add sweetness and that pop of color. For a more savory option, use cherry tomatoes. Halve them for little kids to avoid choking hazards.
For the Fun Stuff
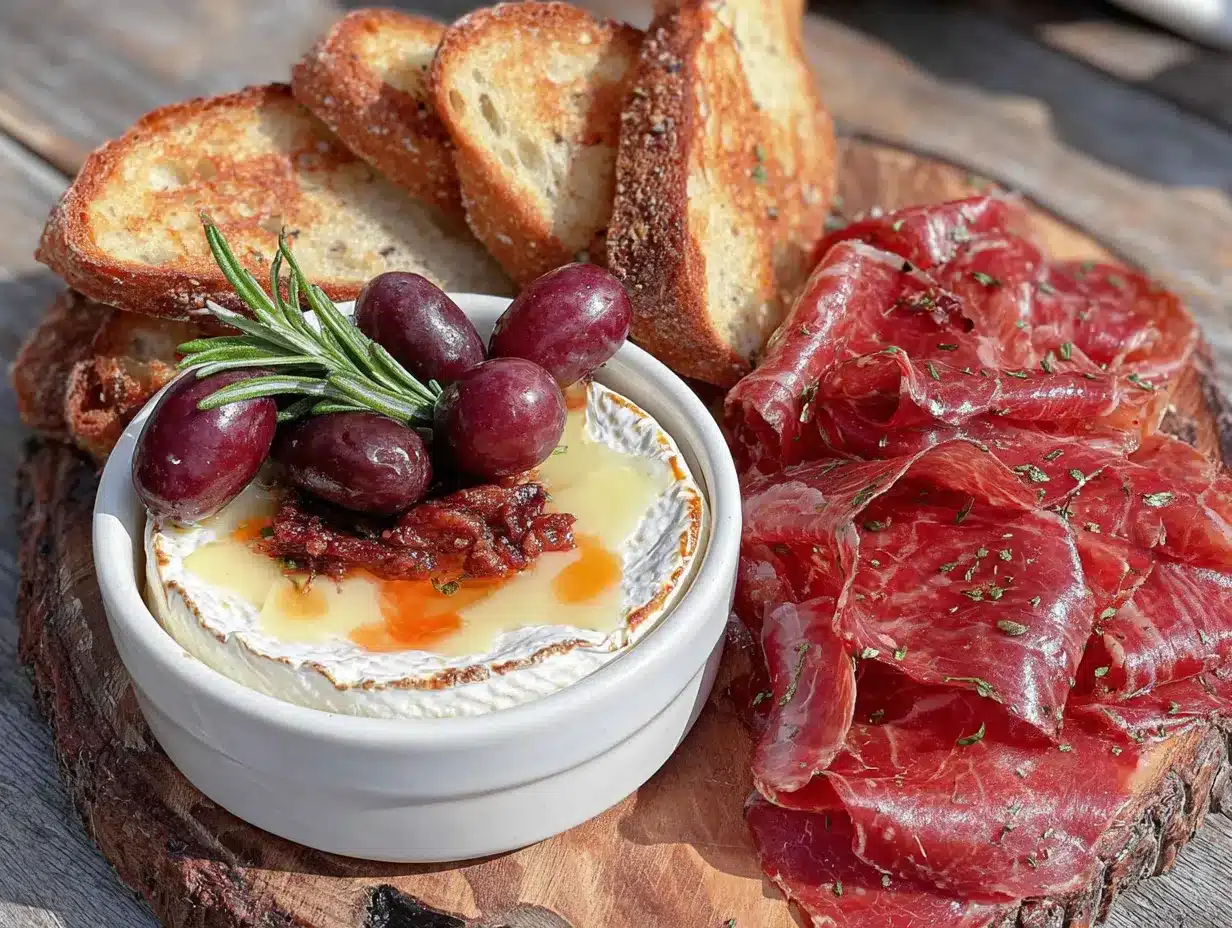
- Dried fruit: A small handful of raisins, dried cranberries, or chopped dried apricots. This gives a chewy, sweet contrast to the salty ingredients. I prefer cranberries for a Friendsgiving theme.
- Nuts or seeds: Optional, but a few almonds, cashews, or pumpkin seeds add crunch. Skip this if your event is nut-free—I’ve learned the hard way to check with the teacher first.
- Chocolate chips or M&Ms: A tiny sprinkle on top makes these cups feel like a treat. Mini chocolate chips are my secret weapon for getting kids excited about eating the fruit.
Substitution Guidance
You can easily adapt these cups for dietary needs. For a dairy-free version, use vegan cheese cubes and skip the yogurt dip. For a nut-free option, replace almonds with sunflower seeds or just add extra crackers. If you’re avoiding processed meats, swap in grilled chicken strips or even hard-boiled egg slices. The key is keeping the layers balanced—something crunchy, something creamy, something sweet, and something savory. I’ve made these with leftover rotisserie chicken and cubed avocado, and honestly, they were a hit. Don’t overthink it; just use what you have.
Equipment Needed
You don’t need any fancy tools for this recipe, which is exactly why I love it. Here’s what you’ll need to pull these cups together.
- Clear plastic cups: 9-ounce or 12-ounce cups work best. I like the clear ones because you can see all the colorful layers. You can find them at any dollar store or grocery store. Reusable plastic cups are also a great option.
- Small cookie cutters: Totally optional, but if you want to get fancy, use these to cut cheese or fruit into fun shapes. Stars, turkeys, or leaves for Friendsgiving are adorable.
- Sharp knife and cutting board: For cubing cheese, slicing fruit, and cutting deli meat. A small paring knife works best for precision.
- Measuring cups or small scoop: Not strictly necessary, but helpful for portioning out grapes and nuts evenly across all cups.
I’ve made these cups with just a butter knife and a cutting board before, so don’t stress about missing equipment. The only non-negotiable is the cups themselves. If you don’t have plastic cups, you can use small mason jars or even paper cups—just make sure they’re sturdy enough to hold the layers without tipping over. Budget-friendly tip: buy a pack of 50 cups for a few dollars and use the extras for snacks, leftovers, or craft projects.
Preparation Method
Making these individual Friendsgiving charcuterie cups is so simple that you’ll wonder why you ever bothered with a big board. Follow these steps, and you’ll have a tray of adorable, kid-friendly cups in no time. I’ve included all my little tricks from years of making these for school parties and playdates.
- Prep all your ingredients: Start by washing the grapes and letting them dry on a paper towel. Cube the cheese into bite-sized pieces—about ½-inch cubes work well. If you’re using a block of cheese, aim for uniform sizes so they look neat. Slice the deli meat into strips or fold them into small triangles. Lay everything out on a cutting board so you can work assembly-line style. This step takes about 5 minutes.
- Layer the base: Grab your first cup and add a layer of mini crackers or pretzel sticks to the bottom. You want enough to cover the bottom completely—about 10-12 crackers. This creates a stable base that prevents the other ingredients from sinking. If you’re using pretzel sticks, break them in half so they fit nicely. For a fun twist, use a mix of both.
- Add the cheese and meat: Next, drop in 4-6 cheese cubes, spreading them out evenly. Then add 2-3 small slices of rolled-up deli meat. I like to alternate colors—orange cheddar next to red salami—so the cup looks visually appealing. If your kids are picky, keep the meat and cheese separate on opposite sides of the cup. Trust me, it matters to them.
- Layer the fruit: Add 3-4 grapes or cherry tomatoes. Place them on top of the cheese and meat, not directly on the crackers, to keep the crackers from getting soggy. If you’re using halved grapes, place them cut-side up so they don’t leak juice everywhere. This is a small detail that makes a big difference if you’re prepping these the night before.
- Top with extras: Sprinkle a small handful of dried cranberries or raisins over the top. Add a few nuts or seeds if you’re using them. Finally, add a tiny pinch of mini chocolate chips or M&Ms right on top. This is the “wow” factor—kids see the chocolate and immediately grab their cup. Don’t skip it.
- Repeat and refrigerate: Continue layering until all cups are filled. You should get about 10-12 cups from this recipe, depending on cup size. Cover the cups with plastic wrap or a lid and refrigerate for at least 30 minutes before serving. This helps the flavors meld together and keeps everything fresh. You can make them up to 24 hours in advance—just add the chocolate chips right before serving so they don’t get soft.
A quick note from personal experience: if you’re making these for a classroom, label each cup with a sticker or a piece of tape. It helps avoid the “that’s mine!” arguments. And if you’re using them for a Friendsgiving dinner, set them out on a tray with small napkins—they’re perfect for appetizers while the main meal finishes cooking.
Cooking Tips & Techniques
Over the years, I’ve made about a thousand of these cups, and I’ve learned a few things the hard way. Here are my best tips to make sure your charcuterie cups turn out perfect every time.
- Keep crackers away from wet ingredients: Grapes and tomatoes release moisture, which can make crackers soggy. Always layer crackers on the bottom and place fruit on top of cheese or meat. If you’re making these more than a few hours ahead, consider adding crackers separately—just put them in a small baggie and let everyone add their own.
- Use room-temperature cheese: Cold cheese straight from the fridge tastes bland. Let your cheese cubes sit out for 10-15 minutes before assembling. It makes a huge difference in flavor. I learned this after my first batch got a “meh” from a group of discerning four-year-olds.
- Don’t overfill the cups: It’s tempting to pack in as much as possible, but kids need to be able to grab individual pieces. Leave a little space at the top so they can see all the layers. Plus, overfilled cups tip over easily—trust me, I’ve cleaned up that mess.
- Make it a game: If you’re making these with kids, turn it into a layering challenge. Let them choose their own combinations. My son always insists on putting the chocolate chips first, and you know what? That’s fine. It’s his cup.
- Prep in batches: If you’re making 40 cups for a party, don’t do them one at a time. Lay out all your cups on a tray, then go down the line adding crackers to each, then cheese, then meat, and so on. It’s way faster and more consistent.
One mistake I still make sometimes is forgetting to check for allergies. Always ask parents or teachers about nut allergies, dairy sensitivities, or other restrictions. It’s a small step that keeps everyone safe and happy. And if you’re serving these at home, just know that leftovers (if there are any) can be stored in the fridge for up to two days—though the crackers might get a little soft.
Variations & Adaptations
These charcuterie cups are endlessly customizable. Here are a few of my favorite variations that keep things fresh and exciting for different occasions and dietary needs.
- Thanksgiving-Themed Cups: Swap the regular crackers for turkey-shaped crackers or mini cornbread muffins. Use cubed turkey breast instead of deli meat, and add a dollop of cranberry sauce on top. It’s like a mini Thanksgiving dinner in a cup. I made these for a school feast, and the kids loved the “fancy” touch.
- Breakfast Charcuterie Cups: Use mini pancakes or waffle pieces as the base. Add yogurt-covered raisins, fresh berries, and small cubes of cheese. A drizzle of honey on top makes it feel like a treat. Perfect for a classroom breakfast or a lazy weekend morning at home.
- Dairy-Free Version: Replace cheese with cubed avocado or roasted sweet potato chunks. Use dairy-free crackers and skip the yogurt dip. Add extra nuts and seeds for protein. My friend’s daughter is lactose-intolerant, and she devours these every time.
- Savory Snack Cups: Skip the fruit and chocolate entirely. Use everything bagel crackers, cheddar cheese, salami, and pickles. Add a few olives for a grown-up twist. These are great for a game-day snack or a picnic lunch.
I’ve also tried a “dessert charcuterie” version with graham crackers, marshmallows, chocolate chips, and strawberries. It was a huge hit at a Valentine’s Day party. The key is to keep the layers balanced—something crunchy, something soft, something sweet, and something a little salty. Once you get the hang of it, you’ll start seeing charcuterie cup possibilities everywhere.
Serving & Storage Suggestions
These cups are best served chilled or at room temperature, depending on the ingredients. Here’s how to make sure they look and taste their best.
For serving, arrange the cups on a large tray or platter so guests can grab one easily. If you’re at a Friendsgiving dinner, place them on a side table as an appetizer before the main meal. Kids can carry them around without spilling, which is a game-changer for parents. I like to add a small napkin or a paper plate under each cup just in case.
For storage, keep the cups covered in the refrigerator for up to 24 hours. If you’re storing them longer, add the crackers and chocolate chips just before serving to keep them crunchy. I’ve made these the night before a party countless times, and they always hold up beautifully. Just don’t freeze them—the texture of the fruit and cheese will suffer.
One thing I love about these cups is that the flavors actually get better after a few hours in the fridge. The cheese softens slightly, the fruit releases a little juice, and everything melds together. If you’re making them for a party, prep them in the morning and let them chill until serving time. Your future self will thank you.
Nutritional Information & Benefits
These charcuterie cups are a balanced snack that provides protein, healthy fats, and natural sugars. Here’s a rough estimate per cup (based on a standard 9-ounce cup with crackers, cheddar cheese, turkey pepperoni, grapes, and dried cranberries).
- Calories: Approximately 250-300 per cup
- Protein: 10-12 grams (from cheese and meat)
- Carbohydrates: 25-30 grams (from crackers, fruit, and dried fruit)
- Fat: 12-15 grams (from cheese and meat)
- Fiber: 2-3 grams (from grapes and dried fruit)
The cheese provides calcium for growing bones, while the fruit offers vitamins and antioxidants. The crackers give quick energy for active kids. If you’re watching sugar intake, skip the chocolate chips and use more nuts or seeds instead. For a lower-carb option, replace crackers with cucumber slices or bell pepper strips.
One thing I appreciate about these cups is that they’re naturally portion-controlled. Kids get a satisfying snack without overeating, and parents don’t have to worry about endless grazing. Plus, the variety of textures and flavors keeps things interesting, which is half the battle with picky eaters.
Conclusion
These Kid-Friendly Individual Friendsgiving Charcuterie Cups have honestly become my secret weapon for every school party, family gathering, and playdate. They’re proof that you don’t need a fancy recipe or hours in the kitchen to create something that feels special. Just a few simple ingredients, a little creativity, and a handful of plastic cups can make everyone feel included and well-fed.
I love that this recipe is so adaptable. You can make it your own based on what your kids love, what’s on sale, or what holiday you’re celebrating. Don’t be afraid to experiment—some of my best versions came from mistakes, like the time I accidentally used cinnamon crackers and discovered they pair perfectly with cheddar cheese. Seriously, try it.
So go ahead, grab some cups, raid your pantry, and make a batch for your next Friendsgiving. Your kids will love them, your friends will ask for the “recipe,” and you’ll feel like a kitchen genius without breaking a sweat. And when you do make them, come back and tell me how it went. I’d love to hear about your favorite combinations, your kids’ reactions, or any happy accidents you discovered along the way. Happy snacking!
Frequently Asked Questions
Can I make these charcuterie cups the night before?
Yes, absolutely. You can assemble the cups up to 24 hours in advance. Just add any crunchy items like crackers or chocolate chips right before serving to keep them from getting soft. Store the cups covered in the refrigerator.
What are the best cups to use?
Clear plastic cups in 9-ounce or 12-ounce sizes work best. You can find them at dollar stores or grocery stores. Mason jars or sturdy paper cups are also good alternatives. Just make sure they’re wide enough for little hands to reach inside.
How can I make these nut-free for school events?
Simply omit any nuts or seeds and replace them with extra crackers, dried fruit, or mini chocolate chips. Always check with the teacher or event organizer about specific allergy policies before bringing these to a classroom.
Can I use fresh fruit instead of dried fruit?
Absolutely. Fresh berries, apple slices, or orange segments work great. Just be aware that fresh fruit can release moisture, so place it on top of the cheese or meat rather than directly on the crackers to prevent sogginess.
How many cups does this recipe make?
This recipe typically makes 10-12 individual cups, depending on the size of your cups and how full you fill them. You can easily double or triple the recipe for larger parties or events.
Pin This Recipe!
Best Kid-Friendly Friendsgiving Charcuterie Cups
Individual charcuterie cups that are quick, easy, and perfect for kids. No cooking required, just layer simple ingredients in a cup for a mess-free, crowd-pleasing snack.
- Prep Time: 15 minutes
- Cook Time: 0 minutes
- Total Time: 15 minutes
- Yield: 10-12 servings 1x
- Category: Appetizer
- Cuisine: American
Ingredients
- 10–12 mini crackers or pretzel sticks per cup
- 4–6 cheese cubes (mild cheddar, Colby Jack, or mozzarella) per cup
- 2–3 small slices deli meat (turkey pepperoni, salami, or ham) per cup
- 3–4 grapes or cherry tomatoes per cup
- Small handful dried cranberries or raisins per cup
- Optional: almonds, cashews, or pumpkin seeds
- Optional: mini chocolate chips or M&Ms
Instructions
- Wash grapes and let dry. Cube cheese into ½-inch pieces. Slice deli meat into strips or fold into triangles.
- Layer 10-12 mini crackers or pretzel sticks at the bottom of each clear plastic cup.
- Add 4-6 cheese cubes, then 2-3 slices of rolled-up deli meat.
- Place 3-4 grapes or cherry tomatoes on top of cheese and meat.
- Sprinkle dried cranberries or raisins over the top. Add nuts or seeds if using.
- Top with a pinch of mini chocolate chips or M&Ms.
- Repeat for all cups. Cover and refrigerate for at least 30 minutes before serving.
Notes
Keep crackers away from wet ingredients to prevent sogginess. Use room-temperature cheese for better flavor. Don’t overfill cups. Check for allergies before serving. Can be made up to 24 hours in advance; add crunchy items just before serving.
Nutrition
- Serving Size: 1 cup
- Calories: 250300
- Sugar: 1012
- Sodium: 400500
- Fat: 1215
- Saturated Fat: 68
- Carbohydrates: 2530
- Fiber: 23
- Protein: 1012
Keywords: charcuterie cups, Friendsgiving, kid-friendly, snack, party food, easy appetizer


