The summer I turned thirty, my neighbor Marcus watched me hauling grocery bags up the porch stairs and didn’t say anything at first. Then he just shook his head, laughed, and disappeared into his garage. He came back with a cast iron pot so seasoned it looked like black glass and said, “You’re making chili for the block party tomorrow, right? Let me show you how we do it in Texas.”
Honestly, I had planned to bring store-bought chips and call it a day. But something about the way he talked about chili—like it was a sacred family trust—made me want to learn. He showed me how to cube the chuck roast by feel, how to toast the chiles until the kitchen smelled like a campfire, and why real chili doesn’t need beans to be hearty. I burned the first batch of aromatics and got cumin stuck under my fingernails, but when we ladled it out the next day, people actually lined up for seconds.
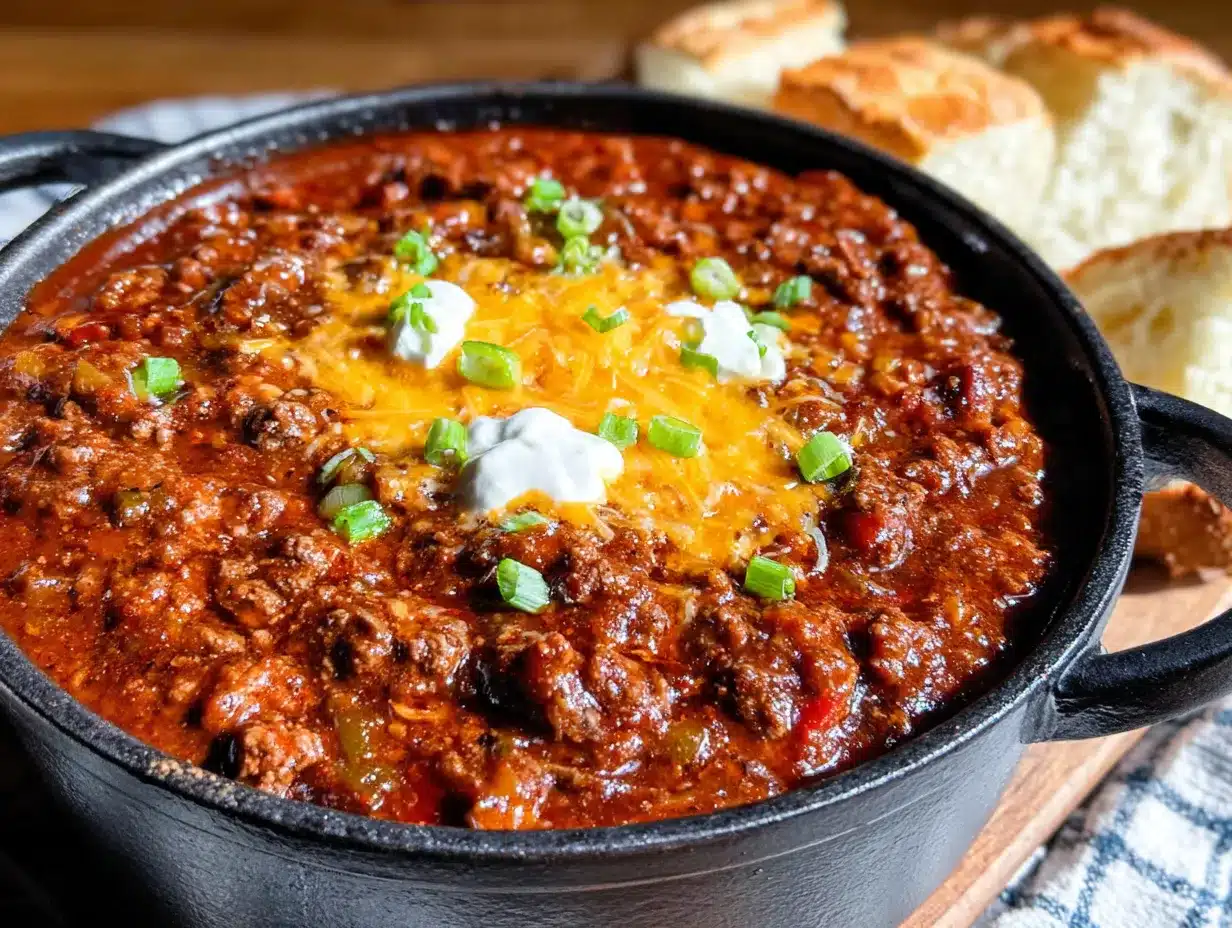
This no-bean chili for a crowd became my go-to for every gathering after that. It’s the kind of dish that makes you look like you spent all day in the kitchen when really, you just let the pot do the work. Maybe you’ve been there—wanting to bring something impressive to a dinner party or potluck but not wanting to stress about complicated steps. This recipe is your answer. It’s rich, beefy, and completely satisfying, with layers of deep chili flavor that only get better the next day. And since there are no beans, even the pickiest eaters at your table will be coming back for more.
I keep making it because it reminds me that the best recipes aren’t just about food—they’re about the people who share them with you. Marcus moved away a few years ago, but every time I brown that beef and smell the cumin hitting the hot oil, I think of him standing over that cast iron pot, telling me to be patient with the meat. This chili is my way of passing that moment forward to you.
Why You’ll Love This Recipe
Let me tell you why this no-bean chili is different from every other recipe you’ve tried. I’ve tested this version more times than I can count, tweaking the spice blend and the cooking time until it hit that perfect balance of rich, smoky, and just a little bit spicy. It’s the kind of recipe that makes you close your eyes after the first bite—I’m not kidding.
- Perfect for a Crowd : This recipe scales beautifully, making enough to feed 12-16 hungry guests at your next game day party, potluck, or family reunion. No more worrying about running out halfway through the evening.
- Simple Ingredients : You won’t need any fancy specialty items. Everything on the ingredient list is something you can find at your regular grocery store—no trips to three different markets required.
- No Beans, All Meat : This is chili purists’ dream come true. The beef takes center stage, giving you that thick, hearty texture that makes every spoonful feel substantial and satisfying.
- Better the Next Day : Like all great chilis, the flavors deepen overnight. Make it a day ahead and your guests will think you’re a culinary genius. I’ve done this for every gathering and it never fails to impress.
- Stress-Free Hosting : Almost everything can be prepped before guests arrive. Brown the meat, chop the vegetables, and let it simmer while you focus on setting out appetizers and mixing drinks.
This isn’t just another chili recipe—it’s the one that will earn you requests for the recipe every single time you serve it. The secret is in the technique: taking the time to really brown the meat in batches, letting the chiles toast before you add the liquid, and giving the pot enough time to develop that deep, complex flavor. It’s comfort food at its finest, made for sharing with the people you love most.
What Ingredients You Will Need
This no-bean chili uses simple, meaty ingredients to deliver bold, smoky flavor without any filler. Most of these are pantry staples for anyone who loves to cook, and the few fresh items are easy to find at any grocery store.
For the Chili Base
- 4 pounds beef chuck roast, cut into 1/2-inch cubes (you can also use boneless short ribs for extra richness)
- 2 tablespoons vegetable oil, divided (use avocado oil or canola—something with a high smoke point)
- 2 large yellow onions, diced (about 3 cups)
- 8 cloves garlic, minced (I use a microplane for this—it releases more flavor)
- 2 jalapeño peppers, seeded and finely diced (leave the seeds in if you want more heat)
- 1 large green bell pepper, diced
- 1 (28-ounce) can crushed tomatoes (I prefer San Marzano for their sweetness)
- 1 (15-ounce) can tomato sauce
- 1 cup beef broth, low sodium (adds depth without making it too salty)
- 2 tablespoons tomato paste (double-concentrated if you can find it)
For the Chili Spice Blend
- 4 tablespoons chili powder (I like using a blend from Penzeys, but any good quality brand works)
- 1 tablespoon ground cumin (toast whole cumin seeds and grind them yourself for the best flavor)
- 1 tablespoon smoked paprika (this gives that subtle campfire taste)
- 2 teaspoons dried oregano (Mexican oregano is ideal, but Mediterranean works too)
- 2 teaspoons garlic powder
- 1 teaspoon onion powder
- 1 teaspoon cayenne pepper (adjust to your spice tolerance—start with 1/2 teaspoon if you’re sensitive)
- 1 teaspoon black pepper, freshly ground
- 2 teaspoons salt, plus more to taste
For Thickening and Finishing
- 2 tablespoons masa harina (corn flour—this is the secret to authentic chili texture)
- 1/4 cup warm water
- Juice of 1 lime (fresh only—bottled juice won’t give you the same brightness)
- Optional garnishes: shredded cheddar cheese, diced white onion, fresh cilantro, sour cream, pickled jalapeños
I always recommend using beef chuck roast over pre-ground beef for this recipe. The cubes stay tender and give you that satisfying, meaty bite that makes no-bean chili so special. If you’re short on time, you can ask your butcher to cube the meat for you—they’re usually happy to help.
Equipment Needed
You don’t need a professional kitchen to make this chili, but having the right tools makes the process smoother and more enjoyable. Here’s what I use every time I make this recipe:
- Large heavy-bottomed pot or Dutch oven (at least 7 quarts)—this is non-negotiable for browning meat in batches and simmering without scorching. I use a Le Creuset, but a Lodge cast iron pot works beautifully for a fraction of the price.
- Sharp chef’s knife—you’ll be cubing 4 pounds of beef, so a dull knife is going to make your life miserable. A good 8-inch chef’s knife is worth the investment.
- Cutting board—get a big one. You’ll be chopping a lot of vegetables and meat.
- Wooden spoon or spatula—something sturdy for scraping up the browned bits from the bottom of the pot. Those bits are pure flavor.
- Measuring spoons and cups—for the spices and liquids
- Small bowl—for mixing the masa harina slurry
- Ladle—for serving
- Storage containers—this chili freezes beautifully, so have some airtight containers ready
If you don’t have a Dutch oven, a heavy stainless steel stockpot will work. Just keep a closer eye on the heat to prevent sticking. And honestly, a good wooden spoon is worth more than any fancy gadget when you’re making chili—it lets you scrape every bit of flavor off that pot bottom.
Preparation Method
This no-bean chili comes together in about 2 hours from start to finish, but most of that time is hands-off simmering. Let me walk you through it step by step.
- Prep the beef (15 minutes) : Pat the chuck roast dry with paper towels—this is crucial for good browning. Cut the meat into 1/2-inch cubes, trimming off any large pieces of fat as you go. Season the cubes generously with salt and pepper. Don’t skip this step; the seasoning at the beginning builds the foundation of flavor.
- Brown the meat in batches (20 minutes) : Heat 1 tablespoon of vegetable oil in your Dutch oven over medium-high heat until it shimmers. Add a single layer of beef cubes—don’t crowd the pot. You want the meat to brown, not steam. Let the cubes sit undisturbed for 3-4 minutes until a deep brown crust forms, then flip and brown the other sides. Transfer the browned meat to a bowl and repeat with the remaining beef, adding more oil as needed. This is the most important step in the whole recipe—don’t rush it.
- Sauté the aromatics (8 minutes) : After all the beef is browned, reduce the heat to medium. There should be some browned bits stuck to the bottom of the pot—that’s flavor gold. Add the remaining tablespoon of oil, then toss in the diced onions. Cook for 5 minutes, scraping up those bits with your wooden spoon, until the onions are soft and translucent. Add the garlic, jalapeños, and bell pepper, and cook for another 3 minutes until fragrant.
- Bloom the spices (2 minutes) : Add the chili powder, cumin, smoked paprika, oregano, garlic powder, onion powder, cayenne, and black pepper to the pot. Stir constantly for about 1-2 minutes until the spices smell toasty and intense. This step wakes up the flavors in a way that adding them later just can’t match.
- Build the sauce (5 minutes) : Return the browned beef and any accumulated juices to the pot. Add the tomato paste and stir it in, letting it cook for about a minute to deepen its flavor. Then pour in the crushed tomatoes, tomato sauce, and beef broth. Stir everything together, scraping the bottom of the pot one last time to incorporate all those caramelized bits.
- Simmer the chili (1 hour 30 minutes) : Bring the chili to a gentle boil, then reduce the heat to low. Cover the pot with the lid slightly ajar and let it simmer for 1 hour. After an hour, remove the lid completely and continue simmering for another 30 minutes. This uncovered simmering helps the chili thicken and concentrate its flavors. Stir occasionally to prevent sticking.
- Thicken with masa harina (5 minutes) : In a small bowl, whisk together the masa harina and warm water until smooth. It should look like a thin paste. Stir this slurry into the chili and let it simmer for another 5-10 minutes. You’ll see the chili thicken noticeably—it should coat the back of a spoon without being pasty.
- Finish and adjust (5 minutes) : Remove the pot from the heat. Stir in the fresh lime juice—this brightens all the deep, smoky flavors. Taste and adjust the salt and seasoning. I almost always add another pinch of salt and a little more cumin at this stage.
Your chili should be thick, rich, and deeply aromatic. The beef should be tender enough to break apart with a spoon. If it’s still a little thin, let it simmer uncovered for another 10-15 minutes. If it’s too thick, stir in a splash of beef broth or water.
Cooking Tips & Techniques
After making this chili dozens of times, I’ve picked up a few tricks that make the difference between good chili and unforgettable chili. Let me share what I’ve learned.
Don’t skip the browning step. I know it’s tempting to just dump everything in the pot and let it simmer, but that deep brown crust on the meat is where all the flavor lives. If you crowd the pan, the meat steams instead of browning, and you lose that rich, caramelized taste. Brown in batches, even though it takes longer. Trust me, your patience will be rewarded.
Toast your whole spices. If you really want to take this chili to the next level, buy whole cumin seeds and whole dried chiles instead of pre-ground spices. Toast them in a dry skillet over medium heat for 1-2 minutes until they smell fragrant, then grind them yourself. The difference is night and day. I learned this the hard way after making a batch that tasted flat—toasting the spices brings out essential oils that pre-ground spices just don’t have.
Watch your heat level. The cayenne and chili powder can sneak up on you. I once added a full tablespoon of cayenne thinking I could handle it, and let me tell you, that chili was almost inedible for anyone with a normal spice tolerance. Start with the amounts listed and adjust at the end. You can always add more heat, but you can’t take it out.
Plan your timing for hosting. This chili actually tastes better the next day, so I always make it the morning before a party. Let it cool completely, refrigerate it overnight, and then reheat it slowly on the stovetop before your guests arrive. The flavors meld together beautifully, and you save yourself the stress of cooking while people are mingling in your kitchen.
Use a heavy pot. Thin-bottomed pots are the enemy of good chili. They create hot spots that burn the bottom while the rest of the chili stays undercooked. Invest in a good Dutch oven if you make chili regularly—it distributes heat evenly and holds temperature beautifully.
Variations & Adaptations
One of the best things about this no-bean chili is how adaptable it is. Here are some variations I’ve tried and loved over the years.
Mild Version for Sensitive Guests : If you’re serving a crowd with varying spice tolerances, skip the jalapeño seeds and reduce the cayenne to 1/4 teaspoon. You can also serve hot sauce on the side so each person can adjust their own bowl. I do this when I’m hosting my in-laws, who prefer things on the milder side.
Smokier, Deeper Flavor : Add 2-3 dried ancho chiles to the pot during the simmering stage. Just stem and seed them, tear them into pieces, and let them soften in the chili. Before serving, fish them out and blend them with a little of the cooking liquid, then stir the puree back in. This adds an incredible smoky depth that regular chili powder just can’t replicate.
Beef and Pork Blend : Replace half of the chuck roast with cubed pork shoulder. The pork adds a subtle sweetness and richness that complements the beef beautifully. I tried this on a whim when I had leftover pork from another recipe, and it became my new favorite version.
Slow Cooker Adaptation : Brown the meat and sauté the aromatics on the stovetop first, then transfer everything to a slow cooker. Cook on low for 6-8 hours or on high for 4-5 hours. Thicken with the masa harina slurry during the last 30 minutes. This is perfect for busy hosting days when you want the chili ready exactly when guests arrive.
Dairy-Free Toppings : Skip the cheese and sour cream, and top with diced avocado, fresh cilantro, and a squeeze of lime instead. The creamy avocado gives you that same richness without any dairy. I’ve served this version to vegan friends who raved about it.
Serving & Storage Suggestions
When it comes to serving this chili for a crowd, presentation matters almost as much as taste. Here’s how I set up my chili bar for gatherings.
Serving Temperature : Serve the chili piping hot, straight from the pot. I like to transfer it to a large, warm serving bowl and set it out with all the toppings in small bowls around it. This lets guests customize their bowls exactly how they like.
Topping Bar Ideas : Set out shredded sharp cheddar cheese, diced white onion, fresh cilantro leaves, sour cream, pickled jalapeños, sliced green onions, crushed tortilla chips, and diced avocado. I also like to offer hot sauce options—Cholula for mild heat and Tabasco for more kick.
What to Serve Alongside : This chili pairs beautifully with cornbread, saltine crackers, or warm flour tortillas. For a full spread, I’ll add a simple coleslaw or a green salad with lime vinaigrette to cut through the richness. And for drinks? Ice-cold beer is the classic choice, but a spicy margarita works surprisingly well too.
Storage Instructions : Leftover chili keeps in the refrigerator for up to 5 days in an airtight container. The flavors actually get better after a day or two as they meld together. I always make extra on purpose just for the leftovers.
Freezer Tips : This chili freezes beautifully for up to 3 months. Let it cool completely, then transfer to freezer-safe containers or zip-top bags. Leave a little room for expansion. When you’re ready to eat it, thaw overnight in the refrigerator and reheat gently on the stovetop, adding a splash of beef broth if it’s too thick.
Reheating Methods : The stovetop is your best bet for reheating—warm the chili over medium-low heat, stirring occasionally, until it’s bubbling. You can use the microwave in a pinch, but the texture won’t be quite as good. If it seems too thick after refrigeration, just stir in a little water or broth as it heats.
Nutritional Information & Benefits
While I wouldn’t call chili a health food, this no-bean version has some surprising nutritional benefits that make it a satisfying choice for a crowd.
Estimated Nutritional Values (per serving, based on 12 servings) :
– Calories: 385
– Protein: 34g
– Fat: 22g
– Carbohydrates: 12g
– Fiber: 4g
– Sugar: 6g
– Sodium: 780mg
Key Health Benefits : Beef chuck is an excellent source of high-quality protein, iron, and B vitamins, especially B12 which supports energy metabolism. The tomatoes provide lycopene, a powerful antioxidant linked to heart health. Garlic and onions contain compounds that support immune function, while the chili powder (from dried chiles) is rich in vitamin C and capsaicin, which may help boost metabolism.
Dietary Considerations : This chili is naturally gluten-free (just check your spice blends for added fillers) and low-carb, with only 12g of carbohydrates per serving. It’s also dairy-free as written, though the typical toppings add dairy. If you’re watching your sodium, use low-sodium beef broth and reduce the added salt—you can always add more at the table.
Potential Allergens : This recipe is free of the top eight allergens as written, but always check your spice labels for cross-contamination warnings if you’re cooking for someone with severe allergies.
Conclusion
This no-bean chili for a crowd has become my secret weapon for every gathering I host. It’s the dish that makes people linger around the table, going back for one more spoonful, asking for the recipe before they even finish their first bowl. And honestly, that’s the best compliment a cook can get.
I love this recipe because it’s forgiving—you can tweak the spices, adjust the heat, make it ahead, and it always turns out delicious. It’s the kind of food that brings people together, that fills your home with the kind of smell that makes everyone instantly hungry and happy. Whether you’re hosting game day, a birthday party, or just a casual Sunday dinner with friends, this chili delivers every single time.
I’d love to hear how yours turns out! Leave a comment below and let me know what variations you tried, or tag me in your photos if you share them online. Did you add extra heat? Try the pork and beef blend? Serve it with something unexpected? Drop your questions and stories in the comments—I read every single one and I’m always learning new tricks from this amazing community.
Now go grab that pot and get cooking. Your guests are waiting.
Frequently Asked Questions
Can I use ground beef instead of chuck roast?
Yes, you can substitute 4 pounds of ground beef (80/20 blend) for the chuck roast. Brown it in batches just like you would the cubed meat, breaking it up with your spoon as it cooks. The texture will be different—more uniform and less chunky—but the flavor will still be excellent. Just drain off any excess fat after browning so your chili doesn’t end up greasy.
How can I make this chili spicier without changing the flavor too much?
The easiest way to add heat without altering the overall flavor profile is to include the seeds and membranes from your jalapeños. You can also add 1-2 finely diced serrano peppers along with the jalapeños, or stir in 1-2 tablespoons of your favorite hot sauce at the end of cooking. I like to add a teaspoon of chipotle powder for smokey heat that blends right in.
Why did my chili turn out bitter?
Bitterness in chili usually comes from one of two things: burning the garlic or burning the spices. If you add minced garlic to a pan that’s too hot, it can scorch in seconds and turn bitter. Similarly, toasting your chili powder and cumin for too long can create burnt flavors. Keep the heat at medium when sautéing aromatics, and stir the spices constantly for no more than 2 minutes. If your chili is already bitter, try adding a pinch of sugar or a splash of apple cider vinegar to balance it out.
Can I double this recipe for an even bigger crowd?
Absolutely. This recipe scales beautifully as long as you have a large enough pot. For a double batch, use a 12-quart or larger pot and brown the meat in even more batches—don’t try to rush it. The cooking time will stay roughly the same, though you may need to simmer a little longer to reach the right thickness. Just make sure you have enough storage containers for leftovers, because double the recipe means double the delicious leftovers.
How do I prevent my chili from burning on the bottom?
Bottom-burning happens when the heat is too high or the pot is too thin. Always use a heavy-bottomed pot that distributes heat evenly, and keep the chili at a gentle simmer—just a few bubbles breaking the surface—not a rolling boil. Stir occasionally, especially during the uncovered simmering phase. If you notice the chili sticking, reduce the heat immediately and stir in a splash of beef broth to loosen it up. A little patience goes a long way here.
PrintBest No-Bean Chili for a Crowd: Easy Stovetop Recipe

This no-bean chili is rich, beefy, and completely satisfying, with layers of deep chili flavor that only get better the next day. Perfect for feeding a crowd at game day parties, potlucks, or family reunions.
- Prep Time: 15 minutes
- Cook Time: 1 hour 30 minutes
- Total Time: 2 hours
- Yield: 12 servings 1x
- Category: Main Course
- Cuisine: American
Ingredients
- 4 pounds beef chuck roast, cut into 1/2-inch cubes
- 2 tablespoons vegetable oil, divided
- 2 large yellow onions, diced (about 3 cups)
- 8 cloves garlic, minced
- 2 jalapeño peppers, seeded and finely diced
- 1 large green bell pepper, diced
- 1 (28-ounce) can crushed tomatoes
- 1 (15-ounce) can tomato sauce
- 1 cup beef broth, low sodium
- 2 tablespoons tomato paste
- 4 tablespoons chili powder
- 1 tablespoon ground cumin
- 1 tablespoon smoked paprika
- 2 teaspoons dried oregano
- 2 teaspoons garlic powder
- 1 teaspoon onion powder
- 1 teaspoon cayenne pepper
- 1 teaspoon black pepper, freshly ground
- 2 teaspoons salt, plus more to taste
- 2 tablespoons masa harina
- 1/4 cup warm water
- Juice of 1 lime
- Optional garnishes: shredded cheddar cheese, diced white onion, fresh cilantro, sour cream, pickled jalapeños
Instructions
- Prep the beef: Pat the chuck roast dry with paper towels. Cut the meat into 1/2-inch cubes, trimming off any large pieces of fat. Season the cubes generously with salt and pepper.
- Brown the meat in batches: Heat 1 tablespoon of vegetable oil in a Dutch oven over medium-high heat until shimmering. Add a single layer of beef cubes and let them sit undisturbed for 3-4 minutes until a deep brown crust forms. Flip and brown the other sides. Transfer to a bowl and repeat with remaining beef, adding more oil as needed.
- Sauté the aromatics: Reduce heat to medium. Add the remaining 1 tablespoon of oil, then add the diced onions. Cook for 5 minutes, scraping up browned bits, until onions are soft and translucent. Add garlic, jalapeños, and bell pepper, and cook for another 3 minutes until fragrant.
- Bloom the spices: Add chili powder, cumin, smoked paprika, oregano, garlic powder, onion powder, cayenne, and black pepper. Stir constantly for 1-2 minutes until the spices smell toasty.
- Build the sauce: Return the browned beef and any accumulated juices to the pot. Add tomato paste and stir, cooking for about 1 minute. Pour in crushed tomatoes, tomato sauce, and beef broth. Stir everything together, scraping the bottom of the pot.
- Simmer the chili: Bring to a gentle boil, then reduce heat to low. Cover the pot with the lid slightly ajar and simmer for 1 hour. Remove the lid and continue simmering for another 30 minutes, stirring occasionally.
- Thicken with masa harina: In a small bowl, whisk together masa harina and warm water until smooth. Stir this slurry into the chili and let it simmer for 5-10 minutes until thickened.
- Finish and adjust: Remove from heat. Stir in fresh lime juice. Taste and adjust salt and seasoning as needed.
Notes
This chili tastes even better the next day. Make it a day ahead and refrigerate overnight, then reheat slowly on the stovetop. For a smokier flavor, add 2-3 dried ancho chiles during simmering, then blend and stir back in. To adjust heat, start with less cayenne and add more at the end.
Nutrition
- Serving Size: 1 serving (about 1 c
- Calories: 385
- Sugar: 6
- Sodium: 780
- Fat: 22
- Saturated Fat: 8
- Carbohydrates: 12
- Fiber: 4
- Protein: 34
Keywords: no-bean chili, chili for a crowd, stovetop chili, beef chili, Texas chili, game day chili, potluck chili


