This was supposed to be a sweet potato pie. I had the sweet potatoes roasted and cooling on the counter, the spices measured out, and a brand-new pie dish I’d been dying to use. But somewhere between answering a text from my sister and trying to find where I’d put the evaporated milk, I grabbed the wrong can. Pumpkin puree. Not sweet potato. And I was already running late for dinner at my neighbor’s house, the one where I’d promised to bring dessert. I stared at the open can of pumpkin, the clock ticking, and thought, well, this is happening.
I made the pie anyway, figuring I’d just call it a pumpkin pie and hope nobody noticed the difference. Honestly, I was annoyed at myself. I’d been so set on that sweet potato version, the one with the marshmallow topping I’d been dreaming about. But the oven was already hot, and the crust was waiting. So I dumped in the pumpkin, added a little extra cinnamon, and crossed my fingers. What came out was nothing like the plan — and better.
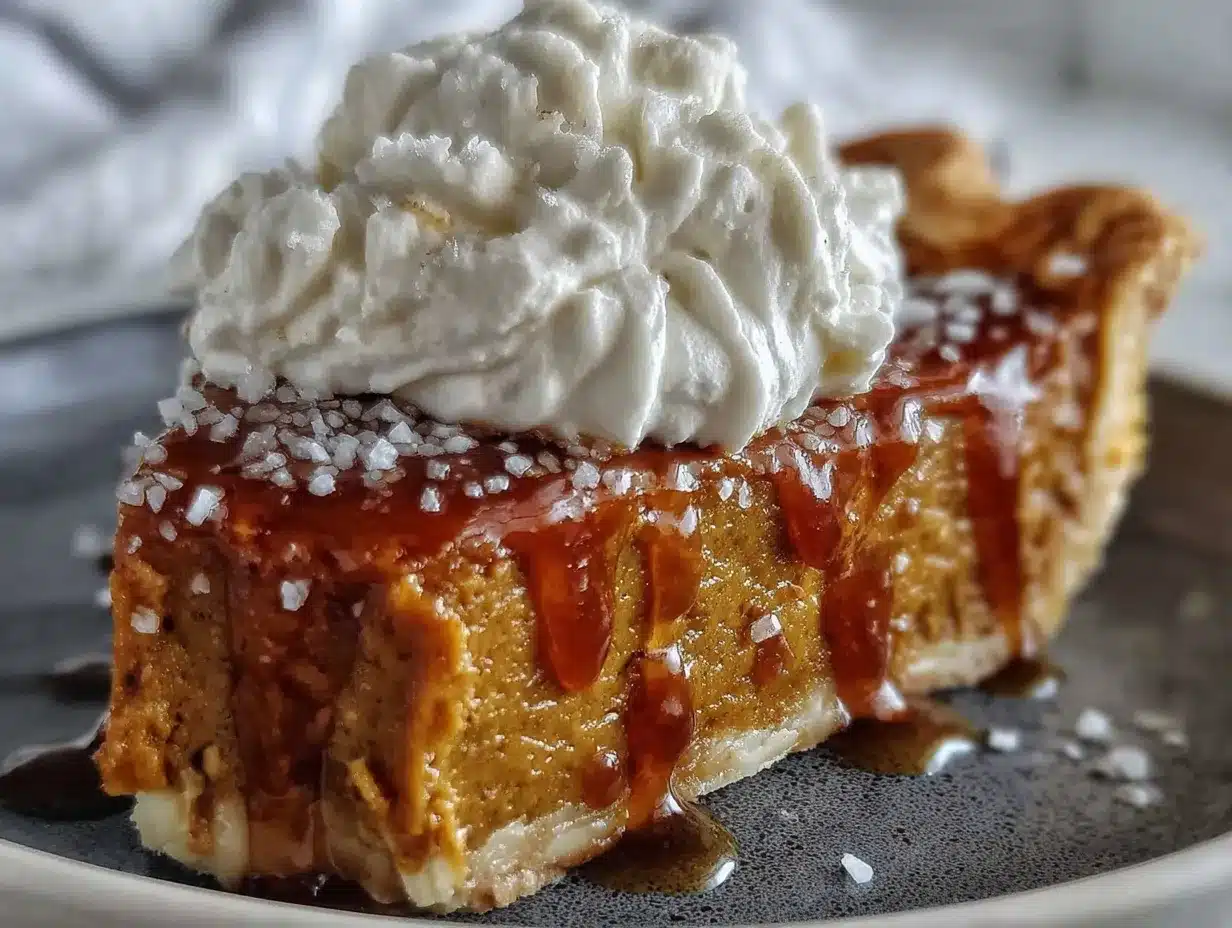
The filling was silkier, the flavor more mellow and warm. It had this depth that the sweet potato version never quite managed. And when I topped it with a dollop of salted maple whipped cream — something I threw together on a whim because, you know, I needed a win — the whole thing just clicked. My neighbor asked for the recipe before I even left. I had to admit it was a mistake. She just laughed and said, “Well, make that mistake again.” Maybe you’ve been there, staring at a kitchen disaster that somehow turns into a happy little triumph. That’s this pie. It’s the one you didn’t plan for, but now you can’t imagine the holidays without it.
Why You’ll Love This Recipe
I’ve made this pie for three Thanksgivings in a row now, and it never fails to get that little moment of quiet at the table — the kind where everyone takes a bite and just goes still for a second. That’s the sign of a good dessert, if you ask me. Here’s why this one works so well:
- Simple Ingredients: You probably have most of these in your pantry right now. No weird specialty items, just honest baking staples.
- Easy to Make Ahead: The pie actually tastes better the next day, which means you can cross one thing off your holiday to-do list.
- That Whipped Cream: The salted maple topping is what takes this from good to unforgettable. It’s barely any extra work, but it feels fancy.
- Perfect for Fall Gatherings: From Thanksgiving to Friendsgiving to cozy Sunday dinners, this pie fits right in.
- Crowd-Pleaser: I’ve served it to picky eaters and pie purists, and everyone goes back for seconds.
What makes this version different from the dozens of pumpkin pie recipes out there? It’s the balance. The spices aren’t too loud, the filling isn’t too dense, and that salted maple cream cuts through the richness just enough. It’s not just another pumpkin pie — it’s the one you’ll actually look forward to making every year. I mean, let’s face it, a lot of holiday baking feels like a chore. This one feels like a gift you’re giving yourself.
What Ingredients You Will Need
This recipe uses simple, wholesome ingredients to deliver that classic pumpkin pie flavor with a little something extra. Most of these are pantry staples, especially if you do much fall baking.
- For the Pie Crust:
- 1 ¼ cups all-purpose flour (I use King Arthur for consistent results)
- ½ teaspoon salt
- 1 tablespoon granulated sugar
- ½ cup cold unsalted butter, cut into small cubes (adds flakiness)
- 3-4 tablespoons ice water
- For the Pumpkin Filling:
- 1 can (15 oz) pumpkin puree (not pumpkin pie filling — look for 100% pure pumpkin)
- ¾ cup packed brown sugar (light or dark both work; dark gives deeper flavor)
- 2 large eggs, room temperature
- 1 teaspoon vanilla extract
- 1 ½ teaspoons ground cinnamon
- ½ teaspoon ground ginger
- ¼ teaspoon ground nutmeg (freshly grated if you have it)
- ¼ teaspoon ground cloves
- ½ teaspoon salt
- 1 cup heavy cream (or half-and-half for a lighter texture)
- For the Salted Maple Whipped Cream:
- 1 cup heavy whipping cream, cold
- 2 tablespoons pure maple syrup (the real stuff, not pancake syrup)
- ¼ teaspoon flaky sea salt (like Maldon), plus more for garnish
- ½ teaspoon vanilla extract
A quick note on the pumpkin: I’ve tried a few brands, and Libby’s is my go-to for its consistent thickness and smooth texture. If you’re using a different brand, just make sure it’s not too watery. You can blot it with a paper towel if needed. For the maple syrup, Grade A dark amber is lovely here — it has a stronger maple flavor that stands up to the salt.
Equipment Needed
You don’t need a ton of fancy equipment for this pie, which is part of why I love it. Here’s what you’ll want to have on hand:
- A 9-inch pie dish (glass or ceramic works great — I use a Pyrex one that’s seen better days but still bakes perfectly)
- Rolling pin (a wine bottle works in a pinch, I’ve been there)
- Large mixing bowls (one for the crust, one for the filling)
- Whisk (a sturdy one for the filling, a separate one for the cream)
- Parchment paper and pie weights or dried beans (for blind baking the crust)
- Electric mixer or stand mixer (for the whipped cream — you can do it by hand, but your arm will thank you for the mixer)
- Sharp knife or pastry cutter (for cutting the butter into the flour)
- Measuring cups and spoons
If you don’t have pie weights, don’t stress. I’ve used dried kidney beans for years, and they work just fine. Just keep them in a jar labeled “pie beans” so you don’t accidentally cook them later. Ask me how I know.
Preparation Method
Step 1: Make the Crust
In a large bowl, whisk together the flour, salt, and sugar. Add the cold butter cubes and cut them in using a pastry cutter or your fingertips until the mixture looks like coarse meal with some pea-sized butter pieces remaining. Drizzle in the ice water, one tablespoon at a time, mixing gently with a fork until the dough just comes together. It should look shaggy, not smooth. Turn it out onto a floured surface, shape into a disc, wrap in plastic, and refrigerate for at least 30 minutes. This rest is crucial — it relaxes the gluten and keeps the crust tender.
Step 2: Blind Bake the Crust
Preheat your oven to 375°F (190°C). Roll the chilled dough out on a floured surface to about 12 inches in diameter. Gently transfer it to your pie dish, pressing it into the corners. Trim the edges and crimp as desired. Line the crust with parchment paper and fill with pie weights or dried beans. Bake for 15 minutes, then remove the parchment and weights and bake for another 8-10 minutes, until the bottom looks dry and lightly golden. Set aside to cool slightly. Don’t skip this step — a soggy bottom is the enemy of good pie.
Step 3: Prepare the Filling
While the crust cools, make the filling. In a large bowl, whisk together the brown sugar, cinnamon, ginger, nutmeg, cloves, and salt. Add the eggs and vanilla, whisking until smooth. Add the pumpkin puree and whisk until fully combined. Slowly pour in the heavy cream, whisking gently until the mixture is smooth and uniform. It should look like a thick, velvety custard. Taste a tiny bit if you’re brave — it’s good even raw.
Step 4: Bake the Pie
Pour the filling into the pre-baked crust. Place the pie on the middle rack of the oven and bake at 375°F (190°C) for 50-60 minutes. The edges should be set, and the center should jiggle slightly when you gently shake the pan. That jiggle is important — it means the custard will set up creamy, not rubbery. If the crust edges start browning too quickly, tent them with foil or a pie shield around the 30-minute mark.
Step 5: Cool Completely
Let the pie cool on a wire rack for at least 2 hours. Then refrigerate for at least 4 hours, or overnight. This is where the magic happens — the flavors meld and the texture firms up perfectly. I know it’s tempting to cut into it warm, but trust me, patience pays off here.
Step 6: Make the Whipped Cream
Just before serving, pour the cold heavy cream into a chilled bowl. Add the maple syrup, vanilla, and flaky sea salt. Whip with an electric mixer on medium-high speed until soft peaks form. Be careful not to overwhip — you want it fluffy, not butter. Taste and adjust the salt or maple if needed.
Step 7: Serve
Slice the pie, top each piece with a generous dollop of the salted maple whipped cream, and sprinkle with a tiny pinch of flaky sea salt. Watch everyone’s eyes light up.
Cooking Tips & Techniques
I’ve made this pie enough times to know where things can go sideways. Here are a few things I’ve learned the hard way:
Don’t overwork the crust. The first time I made this, I kept kneading the dough because it looked crumbly. The result was a tough, shrunken crust that barely held the filling. Handle it gently, and stop as soon as it comes together. Imperfect is perfect here.
Watch the oven temperature. Every oven runs a little different. I once baked this pie at 400°F because I was in a hurry, and the filling cracked right down the middle. If your oven runs hot, drop the temperature to 350°F and bake a little longer. Low and slow is your friend.
Test for doneness with a jiggle. A knife inserted in the center should come out mostly clean, but the center should still have a slight wobble. If it’s completely firm in the oven, it’ll be overbaked by the time it cools. That jiggle is your cue.
Make the whipped cream fresh. I know it’s tempting to make it ahead, but whipped cream deflates and gets watery over time. Whip it up right before you serve, and you’ll get that perfect cloud-like texture. I learned this the hard way when I tried to make it the night before and ended up with a sad, soupy mess.
Salt is your secret weapon. Don’t skip the flaky salt on top. That little crunch and pop of saltiness against the sweet, creamy pie is what makes this version stand out. It’s not just garnish — it’s part of the experience.
Variations & Adaptations
This pie is pretty forgiving, so feel free to play around with it. Here are a few ways I’ve adapted it over the years:
- Gluten-Free Version: Swap the all-purpose flour for a 1:1 gluten-free baking flour blend. I’ve used Bob’s Red Mill with good results. The crust will be a little more delicate, so handle it gently.
- Dairy-Free Option: Use a vegan butter stick in the crust and full-fat coconut cream in place of heavy cream for both the filling and the whipped cream. The coconut flavor is subtle and actually pairs nicely with the pumpkin.
- Spice It Up: Add a pinch of black pepper or cayenne to the filling for a warm, unexpected kick. I tried this on a whim one year, and it was a hit with the spice lovers at the table.
- Pecan Praline Topping: Sprinkle chopped pecans over the whipped cream and drizzle with extra maple syrup for a crunchy, nutty finish. It’s over-the-top in the best way.
- Mini Pies: Use a muffin tin to make individual pies. Reduce the baking time to about 25-30 minutes. Perfect for portion control or for holiday parties where people want their own little pie.
Serving & Storage Suggestions
This pie is best served chilled or at room temperature — never hot. I like to take it out of the fridge about 20 minutes before serving to take the chill off. The whipped cream should be added just before serving, not before.
For storage, cover the pie loosely with plastic wrap or foil and keep it in the refrigerator for up to 4 days. The flavors actually deepen after a day or two, so day-old pie is a real thing. Leftover whipped cream can be stored in an airtight container for up to 24 hours, but it will deflate. Give it a quick re-whip if needed.
You can also freeze the baked, cooled pie (without the whipped cream) for up to 3 months. Wrap it tightly in plastic wrap and then foil. Thaw overnight in the refrigerator before serving. I’ve done this for busy holiday weeks, and it works like a charm.
The whipped cream doesn’t freeze well, so always make that fresh. And honestly, it takes two minutes, so there’s no reason not to.
Nutritional Information & Benefits
Here’s an approximate nutritional breakdown per slice (based on 8 servings, with whipped cream):
- Calories: 420
- Fat: 28g
- Carbohydrates: 38g
- Protein: 6g
- Fiber: 3g
- Sugar: 22g
Pumpkin is a nutritional powerhouse — it’s loaded with vitamin A (great for your eyes and immune system), fiber, and antioxidants. The cinnamon and ginger also have anti-inflammatory properties, so you can feel a little better about that second slice. The maple syrup adds a touch of minerals like zinc and manganese, which is more than you can say for plain sugar.
Obviously, this is a treat, not a health food. But it’s nice to know there’s some real food in there, right? If you’re watching your sugar intake, you can reduce the brown sugar to ½ cup and use a sugar substitute in the whipped cream. The texture will be slightly less tender, but it still works.
Conclusion
This classic pumpkin pie with salted maple whipped cream has become my signature holiday dessert, and it all started with a silly mistake. That’s the thing about cooking sometimes — the best recipes come from the moments you’re just trying to make it work. This pie is proof that you don’t need to be perfect to create something memorable. You just need good ingredients, a little patience, and maybe a can of pumpkin instead of sweet potato.
I hope you give this one a try, whether it’s for Thanksgiving, a fall dinner party, or just a Tuesday when you need a little comfort. Feel free to make it your own — add more spice, swap the crust, pile on the whipped cream. That’s the beauty of a recipe like this. It’s built to be shared and adapted.
If you make it, I’d love to hear how it turned out. Drop a comment below or tag me in your photos. And hey, if you accidentally grab the wrong can at the store, don’t panic. You might just stumble onto your new favorite pie.
Frequently Asked Questions
Can I use canned pumpkin pie filling instead of pure pumpkin?
I wouldn’t recommend it. Pumpkin pie filling already has sugar and spices added, so it will throw off the balance of this recipe. Stick with 100% pure pumpkin puree for the best texture and flavor control.
Why did my pie crust shrink during baking?
This usually happens when the dough is overworked or not chilled enough. Make sure you refrigerate the dough for at least 30 minutes before rolling, and handle it as little as possible. Also, don’t stretch the dough when fitting it into the pie dish — that causes shrinkage too.
Can I make this pie a day ahead?
Absolutely. In fact, I prefer it that way. The flavors meld and deepen overnight, and the texture sets up perfectly. Just leave the whipped cream off until you’re ready to serve.
How do I know when the pie is done baking?
The edges should be set and slightly puffed, while the center should still jiggle just a little when you gently shake the pan. If you insert a knife near the center, it should come out mostly clean. The internal temperature should be around 175°F.
Can I use a store-bought crust to save time?
Sure, you can. A good quality refrigerated pie crust will work in a pinch. But honestly, the homemade crust is so simple and makes a huge difference in texture. If you’re short on time, make the crust a day ahead and keep it chilled. That way you still get the homemade taste without the day-of stress.
PrintClassic Pumpkin Pie with Salted Maple Whipped Cream
A classic pumpkin pie with a silky, spiced filling and a salted maple whipped cream topping. This recipe turns a happy accident into a holiday favorite.
- Prep Time: 30 minutes
- Cook Time: 1 hour 10 minutes
- Total Time: 5 hours 40 minutes (includes chilling)
- Yield: 8 servings 1x
- Category: Dessert
- Cuisine: American
Ingredients
- 1 ¼ cups all-purpose flour
- ½ teaspoon salt
- 1 tablespoon granulated sugar
- ½ cup cold unsalted butter, cut into small cubes
- 3–4 tablespoons ice water
- 1 can (15 oz) pumpkin puree (100% pure pumpkin)
- ¾ cup packed brown sugar (light or dark)
- 2 large eggs, room temperature
- 1 teaspoon vanilla extract
- 1 ½ teaspoons ground cinnamon
- ½ teaspoon ground ginger
- ¼ teaspoon ground nutmeg
- ¼ teaspoon ground cloves
- ½ teaspoon salt
- 1 cup heavy cream (or half-and-half)
- 1 cup heavy whipping cream, cold
- 2 tablespoons pure maple syrup
- ¼ teaspoon flaky sea salt, plus more for garnish
- ½ teaspoon vanilla extract
Instructions
- Make the Crust: In a large bowl, whisk together flour, salt, and sugar. Cut in cold butter cubes using a pastry cutter or fingertips until mixture resembles coarse meal with pea-sized butter pieces. Drizzle in ice water, one tablespoon at a time, mixing with a fork until dough just comes together. Shape into a disc, wrap in plastic, and refrigerate for at least 30 minutes.
- Blind Bake the Crust: Preheat oven to 375°F (190°C). Roll dough on a floured surface to 12 inches in diameter. Transfer to a 9-inch pie dish, trim edges, and crimp. Line with parchment paper and fill with pie weights or dried beans. Bake for 15 minutes, then remove parchment and weights and bake for another 8-10 minutes until bottom is dry and lightly golden. Set aside to cool slightly.
- Prepare the Filling: In a large bowl, whisk together brown sugar, cinnamon, ginger, nutmeg, cloves, and salt. Add eggs and vanilla, whisking until smooth. Add pumpkin puree and whisk until fully combined. Slowly pour in heavy cream, whisking gently until smooth and uniform.
- Bake the Pie: Pour filling into pre-baked crust. Place on middle rack of oven and bake at 375°F (190°C) for 50-60 minutes. Edges should be set, center should jiggle slightly when shaken. If crust edges brown too quickly, tent with foil after 30 minutes.
- Cool Completely: Let pie cool on a wire rack for at least 2 hours. Then refrigerate for at least 4 hours, or overnight.
- Make the Whipped Cream: Just before serving, pour cold heavy cream into a chilled bowl. Add maple syrup, vanilla, and flaky sea salt. Whip with an electric mixer on medium-high speed until soft peaks form. Be careful not to overwhip.
- Serve: Slice pie, top each piece with a generous dollop of salted maple whipped cream, and sprinkle with a tiny pinch of flaky sea salt.
Notes
Don’t overwork the crust. Watch oven temperature to avoid cracking. Test for doneness with a jiggle. Make whipped cream fresh. Salt is your secret weapon.
Nutrition
- Serving Size: 1 slice
- Calories: 420
- Sugar: 22
- Fat: 28
- Carbohydrates: 38
- Fiber: 3
- Protein: 6
Keywords: pumpkin pie, salted maple whipped cream, Thanksgiving dessert, fall baking, classic pumpkin pie


