This was supposed to be a batch of homemade vanilla extract. I had the vanilla beans soaking in bourbon, the little glass bottles lined up on the counter, and a very clear plan. But somewhere between the third cup of coffee and wrapping presents, I grabbed the bottle of almond extract instead of the vanilla. I poured a good glug into a simmering pot of sugar and water before I even realized what I had done. The kitchen smelled like a Christmas bakery had exploded—but not in a bad way. Honestly, I was ready to dump it all down the sink and start over.
My hands were sticky, the timer was beeping, and I had already wrapped three gifts wrong side up. It was one of those afternoons where everything felt slightly off. But I decided to let the syrup keep simmering, just to see what would happen. I mean, the worst that could happen was a weird-tasting pancake topping, right? When I finally tasted it—warm, buttery, with that accidental almond note—I realized I had stumbled onto something way better than my original plan.
That little mistake turned into the backbone of my entire Christmas coffee bar. It’s the kind of syrup that makes you slow down, take a breath, and actually enjoy the moment. Maybe you’ve been there—trying too hard to make everything perfect, only to find the magic in the mess. This Cozy Christmas Coffee Bar Sugar Cookie Syrup is proof that sometimes the best things happen when you stop trying so hard.
Why You’ll Love This Recipe
This isn’t just another flavored syrup. It’s the kind of thing that makes your morning coffee feel like a holiday hug. I’ve tested this recipe about seven times now—yes, seven—because I wanted to get the balance just right. Not too sweet, not too thin, and with that unmistakable sugar cookie flavor that tastes like Christmas morning.
- Quick & Easy: From start to finish, you’re looking at about 15 minutes. That’s it. No complicated steps, no candy thermometer needed. Just a pot, a whisk, and a little patience.
- Simple Ingredients: You probably have most of these in your pantry right now. Sugar, water, butter extract, vanilla—nothing fancy. No hunting down obscure grocery store items.
- Perfect for the Holidays: This syrup is made for cozy mornings, holiday brunches, and those evenings when you want a warm drink without the caffeine. It’s also a fantastic edible gift.
- Crowd-Pleaser: I brought a bottle to my neighbor’s holiday party, and it was gone in twenty minutes. People were putting it in their coffee, their tea, even their hot chocolate. Kids and adults both went crazy for it.
- Unbelievably Delicious: The flavor is exactly like a soft, frosted sugar cookie—but in liquid form. It’s comforting, nostalgic, and just the right amount of indulgent.
What makes this recipe different from all the others? It’s the little touch of almond extract and the way the butter flavor rounds everything out. Most sugar cookie syrops taste flat or artificial. This one tastes like you actually baked cookies. It’s comfort food reimagined—faster, easier, but with the same soul-soothing satisfaction.
What Ingredients You Will Need
This recipe uses simple, wholesome ingredients to deliver that classic sugar cookie flavor without any fuss. Most of these are pantry staples, so you can whip up a batch whenever the holiday mood strikes.
- Granulated Sugar (1 cup / 200g): The base of the syrup. White sugar gives the cleanest flavor. I’ve tried this with organic cane sugar, and it works just as well—just expect a slightly warmer color.
- Water (1 cup / 240ml): Filtered water is best if you have it. Tap water can sometimes add a slight mineral taste, but honestly, I’ve used both and couldn’t tell the difference in the final syrup.
- Light Brown Sugar (¼ cup / 50g, packed): This adds a tiny bit of molasses depth that makes the syrup taste more like a real baked cookie. Don’t skip it—it’s the secret to that rich, caramelized note.
- Unsalted Butter (2 tablespoons / 28g): Real butter, not margarine. The butter adds richness and that melt-in-your-mouth feel. I prefer Kerrygold for the flavor, but any good unsalted butter works.
- Vanilla Extract (1 teaspoon / 5ml): Pure vanilla extract, not imitation. The real stuff makes a noticeable difference here. I use Nielsen-Massey because it’s potent and smooth.
- Butter Extract (½ teaspoon / 2.5ml): This is the secret ingredient that gives the syrup that “baked cookie” taste. You can find it in the baking aisle near the vanilla extract. If you can’t find it, you can use ¼ teaspoon of almond extract as a substitute (but the flavor will be slightly different).
- Almond Extract (¼ teaspoon / 1.25ml): Just a tiny splash. It rounds out the flavor and adds that subtle nuttiness that makes sugar cookies so addictive. Be careful—a little goes a long way.
- Pinch of Salt: A tiny pinch of fine sea salt balances the sweetness. Don’t skip this—it prevents the syrup from tasting cloying.
Equipment Needed
You don’t need a fancy kitchen setup for this recipe. Here’s what I use every single time:
- Medium Saucepan (2-quart size): A heavy-bottomed saucepan works best because it distributes heat evenly. I use a stainless steel one from Cuisinart, but any non-reactive pan is fine. Avoid aluminum, as it can react with the sugar.
- Whisk: A standard wire whisk is all you need. I prefer a silicone-coated whisk because it won’t scratch your pan, but a metal one works just as well.
- Fine-Mesh Strainer: This is optional but helpful. If you notice any undissolved sugar crystals or bits of butter, a quick strain makes the syrup perfectly smooth. I use a mesh strainer from OXO.
- Glass Jar or Bottle: A 16-ounce glass bottle with a swing-top lid is perfect for storing the syrup. I save old maple syrup bottles for this purpose. Mason jars work too, just make sure they’re heat-safe.
- Measuring Cups and Spoons: Accurate measurements are key for syrup making. I use metal measuring spoons for the extracts and liquid measuring cups for the water.
Preparation Method
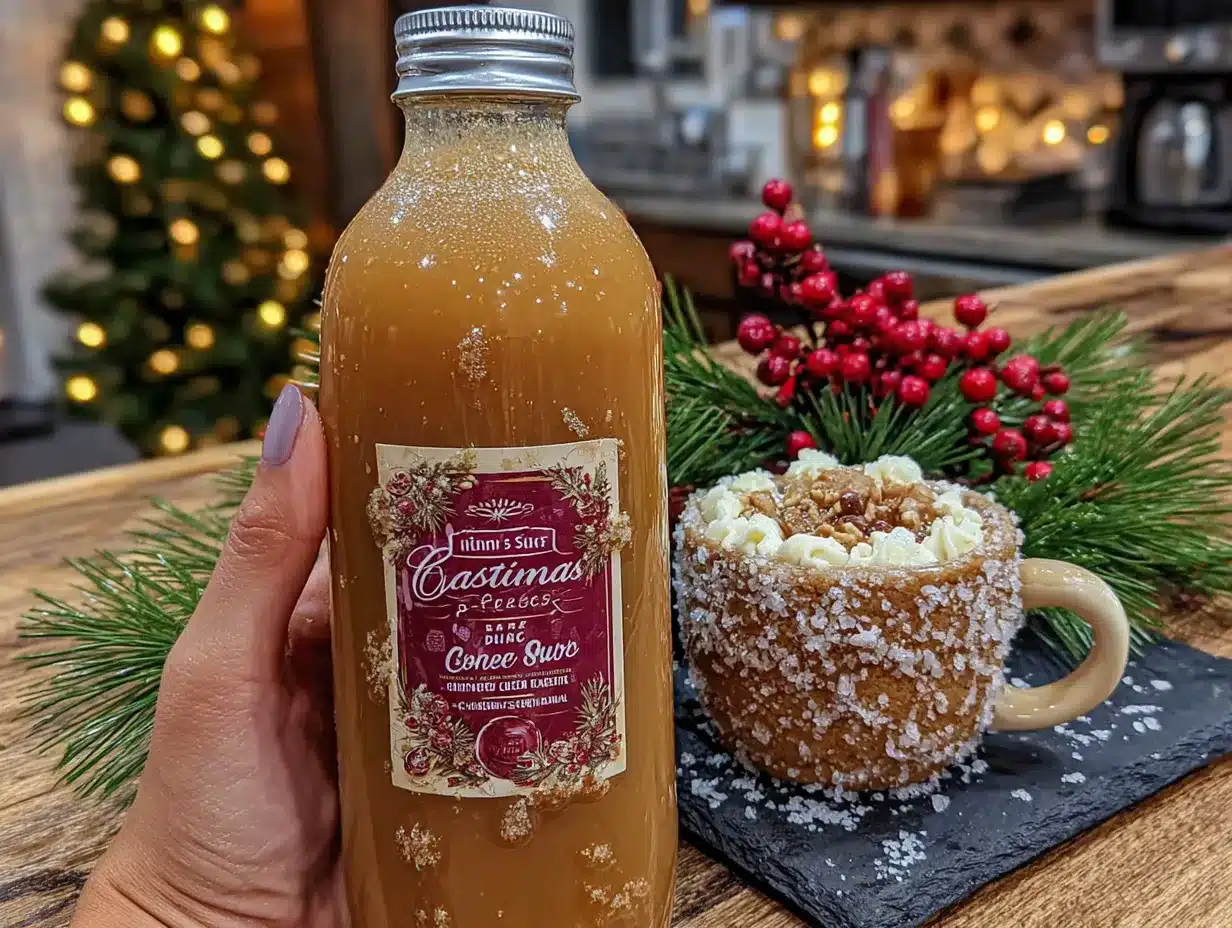
- Combine the sugars and water (2 minutes): In your medium saucepan, add the granulated sugar, packed brown sugar, and water. Give it a quick whisk to start dissolving the sugars. Don’t worry if it looks grainy—that’s normal.
- Bring to a gentle simmer (3-4 minutes): Place the saucepan over medium heat. Stir occasionally with your whisk. You want a gentle simmer, not a rolling boil. Bubbles should break the surface, but the mixture shouldn’t be splashing. If it starts boiling aggressively, turn the heat down.
- Add the butter (2 minutes): Once the sugar is fully dissolved and the mixture is clear, add the butter. Whisk until the butter is completely melted and incorporated. The mixture will look slightly cloudy at first—that’s the butter emulsifying into the syrup. Keep whisking until it’s smooth.
- Remove from heat and add extracts (1 minute): Take the saucepan off the heat entirely. Let it sit for 30 seconds to cool slightly. Then whisk in the vanilla extract, butter extract, and almond extract. The smell at this point is incredible—like a fresh batch of sugar cookies.
- Add the salt and whisk (30 seconds): Sprinkle in your pinch of salt and give it one final whisk. Taste the syrup carefully (it’s hot!). If you want a stronger cookie flavor, add another ¼ teaspoon of butter extract. If it tastes too sweet, add another tiny pinch of salt.
- Strain the syrup (optional, 1 minute): If you see any tiny sugar crystals or butter solids, pour the syrup through a fine-mesh strainer into your glass jar. This step makes the syrup perfectly clear and smooth. I usually strain it because I like the look of clear syrup in the bottle.
- Cool completely (30-45 minutes): Let the syrup cool at room temperature before sealing the jar. Do not put it in the fridge while it’s hot—this can cause condensation and water down the syrup. Once it’s completely cool, screw on the lid.
- Stir before using: As the syrup cools, the butter might separate slightly and float to the top. This is totally normal. Just give the jar a gentle shake or stir before each use. The syrup will thicken slightly as it cools—that’s how you know it’s ready.
Cooking Tips & Techniques
I’ve made this syrup about seven times now, and let me tell you—I’ve made every mistake in the book. Here’s what I learned so you don’t have to repeat my failures.
Don’t boil the syrup. I know it’s tempting to crank up the heat to speed things up, but a full boil can make the syrup too thick and even cause it to crystallize later. Keep it at a gentle simmer. If you see big, aggressive bubbles, you’re going too fast.
Watch for crystallization. One time, I didn’t stir the sugar enough at the beginning, and the syrup turned grainy after it cooled. To avoid this, make sure all the sugar is fully dissolved before you add the butter. If you see sugar crystals clinging to the sides of the pan, use a wet pastry brush to brush them down into the syrup.
Measure your extracts carefully. Almond extract is potent. I once added a full teaspoon instead of a quarter teaspoon, and the syrup tasted like a marzipan factory. Start with the smaller amount, taste, and add more if needed. You can always add, but you can’t take away.
Use room temperature butter. Cold butter takes longer to melt and can cause the syrup to seize up slightly. Let your butter sit out for 15 minutes before you start. If you forget (like I do half the time), cut it into small cubes so it melts faster.
Multitask wisely. This syrup only takes about 15 minutes of active time, so I usually make it while I’m doing something else—like wrapping gifts or watching a Christmas movie. Just don’t walk away from the stove. Sugar syrup can go from perfect to burnt in about 30 seconds.
Variations & Adaptations
This recipe is super flexible. Here are a few ways I’ve changed it up depending on my mood or what I have on hand:
Dairy-Free Version: Replace the butter with coconut oil or a high-quality vegan butter. I’ve used Miyoko’s European Style Cultured Vegan Butter, and it works beautifully. The flavor is slightly different—a tiny hint of coconut if you use coconut oil—but still delicious.
Spiced Sugar Cookie Syrup: Add ½ teaspoon of cinnamon and ¼ teaspoon of nutmeg along with the extracts. This version tastes like a snickerdoodle cookie. I made this for a Christmas brunch, and my friend poured it over her oatmeal. She said it was the best oatmeal she’d ever had.
Peppermint Sugar Cookie Syrup: Swap the almond extract for ¼ teaspoon of peppermint extract. The result is a cool, minty sugar cookie flavor that’s perfect for hot chocolate. My kids go crazy for this version—they call it “candy cane coffee syrup.”
Low-Sugar Option: Use a granulated monk fruit sweetener instead of the granulated sugar. The brown sugar can be replaced with a brown sugar substitute like Swerve. The texture will be slightly thinner, and the flavor won’t be as rich, but it’s a solid option if you’re watching your sugar intake.
Vanilla Bean Version: Split one vanilla bean and scrape the seeds into the water before simmering. Let the bean pod steep in the syrup for 10 minutes after removing from heat, then strain it out. This gives the syrup a beautiful speckled look and an even deeper vanilla flavor.
Serving & Storage Suggestions
This syrup is made for cozy mornings. I love it stirred into a hot latte—just add 1-2 tablespoons per cup of coffee. It’s also amazing in cold brew, iced lattes, or even drizzled over pancakes and waffles. Honestly, I’ve been known to put a splash in my hot tea on a cold afternoon.
How to serve: For a full Christmas coffee bar experience, set out a bottle of this syrup alongside some cinnamon sticks, whipped cream, and a jar of crushed candy canes. Let your guests customize their drinks. It makes the whole thing feel special without any extra work for you.
Storage instructions: Store the syrup in a sealed glass jar in the refrigerator. It will keep for up to 3 weeks. I usually write the date on the lid with a marker so I don’t forget. The butter in the syrup means it needs to stay cold—don’t leave it out on the counter overnight.
Reheating tips: The syrup will thicken in the fridge and the butter might solidify. To bring it back to pourable consistency, take the jar out and let it sit on the counter for 15 minutes. Or, microwave the jar (without the lid) in 10-second bursts, stirring between each, until it’s liquid again. Don’t microwave it for too long, or the butter will separate.
Flavor development: The flavors actually get better after a day or two in the fridge. The extracts meld together, and the syrup becomes more rounded. I always try to make this at least a day before I plan to use it. It’s one of those rare recipes that tastes even better the next day.
Nutritional Information & Benefits
Let’s be real—this is a treat. But knowing what’s in it helps you enjoy it mindfully. Here’s the estimated nutrition for a 1-tablespoon serving (15ml):
- Calories: 45
- Total Fat: 1.5g
- Saturated Fat: 1g
- Carbohydrates: 8g
- Sugar: 8g
- Protein: 0g
- Sodium: 10mg
Health benefits of key ingredients: While this is an indulgence, the real butter provides a small amount of vitamin A and healthy fats. The vanilla extract contains trace amounts of antioxidants. And honestly, the biggest benefit is the joy it brings—there’s something to be said for a little happiness in your morning cup.
Dietary considerations: This recipe is vegetarian and can be made dairy-free with a simple swap. It is not vegan (unless you use plant-based butter). It contains dairy (butter) and is gluten-free as written. If you’re avoiding almonds, simply omit the almond extract and add an extra ¼ teaspoon of vanilla extract instead.
FAQs
Can I use this syrup in iced coffee?
Absolutely! It dissolves beautifully in cold liquids because it’s a thin syrup, not a thick sauce. Just stir it in well, or shake it in a sealed jar with your milk and coffee for a quick iced latte.
Why did my syrup crystallize?
Crystallization usually happens when sugar isn’t fully dissolved, or when the syrup is stirred too much after it starts cooling. To fix it, gently reheat the syrup with a splash of water and whisk until the crystals dissolve. Then cool it again without stirring.
Can I double this recipe?
Yes! This recipe doubles perfectly. Just use a larger pot (3-quart or bigger) and expect the simmering time to increase by a couple of minutes. Store the extra syrup in a separate jar or give it as a gift.
How long does this syrup last?
Stored in a sealed jar in the refrigerator, it stays fresh for up to 3 weeks. I usually finish a batch in about 10 days because I use it in everything. If you see any mold or off smells, toss it immediately.
Can I use salted butter instead of unsalted?
You can, but skip the added pinch of salt. Salted butter will make the syrup slightly saltier, which some people actually prefer. I’ve tested it both ways, and the unsalted version gives you more control over the final flavor.
Conclusion
This Cozy Christmas Coffee Bar Sugar Cookie Syrup started as a mistake—a happy accident that turned into one of my most-requested recipes. It’s proof that you don’t need everything to go perfectly to create something wonderful. Just a little sugar, some butter, and a splash of vanilla can turn an ordinary morning into something special.
I’d love to hear how you use this syrup. Do you stir it into your morning coffee? Drizzle it over pancakes? Give it as a gift? Drop a comment below and share your favorite way to enjoy it. And if you try a variation—like the peppermint version or the spiced one—tell me about it! Your twist might become someone else’s new favorite.
Here’s to cozy mornings, happy accidents, and the kind of recipes that feel like a warm hug. Go make some syrup, pour yourself a cup, and enjoy the moment. You deserve it.
Pin This Recipe!
Cozy Christmas Coffee Bar Sugar Cookie Syrup

A simple, 15-minute homemade syrup that tastes just like a frosted sugar cookie, perfect for coffee, tea, hot chocolate, or pancakes. This happy accident turned holiday staple is made with pantry ingredients and brings cozy Christmas mornings to life.
- Prep Time: 5 minutes
- Cook Time: 10 minutes
- Total Time: 15 minutes
- Yield: 16 servings (1 tablespoon per serving) 1x
- Category: Syrup
- Cuisine: American
Ingredients
- 1 cup (200g) granulated sugar
- 1 cup (240ml) water
- 1/4 cup (50g) packed light brown sugar
- 2 tablespoons (28g) unsalted butter
- 1 teaspoon (5ml) vanilla extract
- 1/2 teaspoon (2.5ml) butter extract
- 1/4 teaspoon (1.25ml) almond extract
- Pinch of fine sea salt
Instructions
- Combine the sugars and water (2 minutes): In a medium saucepan, add the granulated sugar, packed brown sugar, and water. Whisk to start dissolving the sugars.
- Bring to a gentle simmer (3-4 minutes): Place the saucepan over medium heat. Stir occasionally with a whisk. Heat until the mixture reaches a gentle simmer (bubbles break the surface but not a rolling boil).
- Add the butter (2 minutes): Once the sugar is fully dissolved and the mixture is clear, add the butter. Whisk until completely melted and incorporated, until smooth.
- Remove from heat and add extracts (1 minute): Take the saucepan off the heat. Let it sit for 30 seconds to cool slightly. Whisk in the vanilla extract, butter extract, and almond extract.
- Add the salt and whisk (30 seconds): Sprinkle in the pinch of salt and whisk one final time. Taste carefully (it’s hot) and adjust if needed.
- Strain the syrup (optional, 1 minute): If you see any undissolved sugar crystals or butter solids, pour the syrup through a fine-mesh strainer into a glass jar for a perfectly smooth syrup.
- Cool completely (30-45 minutes): Let the syrup cool at room temperature before sealing the jar. Do not refrigerate while hot.
- Stir before using: As the syrup cools, the butter may separate slightly. Give the jar a gentle shake or stir before each use.
Notes
This syrup started as a happy accident. For best results, don’t boil the syrup—keep it at a gentle simmer to prevent crystallization. The flavors meld and improve after a day in the fridge. Store in a sealed jar in the refrigerator for up to 3 weeks. To reheat, let sit at room temperature for 15 minutes or microwave in 10-second bursts.
Nutrition
- Serving Size: 1 tablespoon (15ml)
- Calories: 45
- Sugar: 8
- Sodium: 10
- Fat: 1.5
- Saturated Fat: 1
- Carbohydrates: 8
Keywords: sugar cookie syrup, Christmas coffee syrup, homemade syrup, holiday syrup, coffee bar syrup, easy syrup recipe


