I wasn’t expecting construction advice from my dentist, but there I was, mid-filling, listening to Dr. Patel describe exactly how to make royal icing that wouldn’t crack. “It’s all about the meringue powder,” he mumbled around his instruments, pausing to suction. “And patience. You can’t rush the peaks.” I had mentioned my annual gingerbread house disaster—walls collapsing, roof sliding, icing that looked like sad toothpaste—and he’d perked up like I’d asked about gum health. Turns out, Dr. Patel builds elaborate gingerbread replicas of famous landmarks every December. The Taj Mahal, the Eiffel Tower, even our local post office. All from scratch. All held together with this royal icing recipe he’s perfected over twenty years.
I sat in that chair, mouth propped open, mentally scribbling notes between “rinse” and “spit.” His assistant handed me a sticky note—literally a sticky note from her desk—with the ratios scribbled in blue ink. “Two tablespoons of meringue powder,” it read, “and don’t skimp on the vanilla.” I tucked it into my coat pocket, still tasting fluoride, and drove straight home to test it. That was three winters ago, and I haven’t used another royal icing recipe since. Not once.
Honestly, I’ve made a mess of plenty of gingerbread houses over the years—roofs that slid off like sleds, walls that leaned like they’d had one too many eggnogs. But this royal icing? It’s the real deal. It dries hard as cement but pipes smooth as buttercream. It holds everything together, even when your walls aren’t perfectly square (and let’s face it, whose are?). Dr. Patel’s sticky note sits framed in my kitchen now, a reminder that good recipes come from the strangest places. Maybe you’ve had a moment like that—where cooking advice appears out of nowhere, from someone you’d never expect. This is that recipe for me. And once you try it, it’ll be that for you too.
Why You’ll Love This Recipe
This royal icing isn’t just another sticky, sugary mess—it’s the kind that makes you close your eyes after that first perfect pipe. I’ve tested this recipe across three winters, six gingerbread houses, and one particularly ambitious attempt at a gingerbread castle (the turrets were ambitious, okay?). Here’s why it works:
- Rock-Solid Structure : This icing dries hard enough to hold up walls, roofs, and even those tiny pretzel fence posts. No more mid-party collapses.
- Pipes Like a Dream : The consistency is just right—not too runny, not too stiff. You’ll get clean lines and smooth details every time.
- Simple Ingredients : You probably already have everything in your pantry. No fancy extracts or specialty sugars needed.
- Forgiving Formula : Messed up the consistency? Add a drop of water or a pinch more sugar. This recipe adapts to your mistakes.
- Perfect for Beginners : If you’ve never piped icing in your life, this recipe won’t judge you. It’s patient and easy to work with.
- Kid-Friendly Too : Let the little ones help with decorating—this icing is safe to eat and forgiving of wobbly hands.
What makes this different from every other royal icing recipe out there? It’s the meringue powder ratio. Most recipes use too much, making the icing brittle. Or too little, making it soft. Dr. Patel’s ratio—perfected over two decades of architectural gingerbread—hits the sweet spot. It’s chewy enough to work with, firm enough to hold. Plus, I’ve added a touch of cream of tartar for stability, something I learned after my first batch turned into a puddle. This isn’t just another version of royal icing. It’s the best version. The one you’ll come back to every December, the one you’ll scribble on a sticky note and pass along to someone else.
What Ingredients You Will Need
This recipe uses simple, honest ingredients to create icing that’s both sturdy and beautiful. No weird chemicals or hard-to-find items—just pantry staples that work together like a well-trained team. Here’s what you’ll need:
For the Royal Icing Base
- 4 cups powdered sugar , sifted (confectioners’ sugar works best—I prefer C&H or Domino for consistent texture)
- 3 tablespoons meringue powder (I recommend Wilton or Genie’s—they dissolve cleanly without lumps)
- 1/2 teaspoon cream of tartar (this stabilizes the icing and keeps it from weeping)
- 1/2 cup warm water (not hot—just warm enough to dissolve the meringue powder)
- 1 teaspoon clear vanilla extract (clear vanilla keeps the icing white; regular vanilla works too but adds a slight tan tint)
For Coloring and Decorating
- Gel food coloring (liquid coloring will thin the icing—use gel for vibrant colors without changing consistency)
- Piping bags (disposable or reusable—I’ve used both and prefer disposable for easy cleanup)
- Couplers and tips (Wilton #2 for detail work, #4 for outlining, #12 for filling larger areas)
Ingredient Tips from My Kitchen
Let’s talk about meringue powder for a second. I’ve tried three different brands, and Wilton consistently gives me the best results. It dissolves completely, doesn’t clump, and produces icing that dries with a nice matte finish. If you can’t find meringue powder, you can substitute with 3 large egg whites (pasteurized, for safety) and skip the water. But honestly? Meringue powder is more reliable—no risk of salmonella, no weird egg smell, and it keeps forever in your pantry.
For the powdered sugar, sifting is non-negotiable. I learned this the hard way when my first batch came out lumpy and I spent twenty minutes fishing out clumps with a toothpick. Just sift it. Your future self will thank you. And that cream of tartar? It’s not just there for show. It prevents the sugar from crystallizing and keeps your icing smooth and pipeable for longer. I once forgot to add it and my icing turned grainy within an hour. Never again.
If you’re making this for a gingerbread house contest or a holiday party, double the recipe. Trust me—you’ll use more than you think, and running out mid-pipe is a special kind of kitchen tragedy. I keep a backup batch in the fridge just in case. It keeps for up to a week in an airtight container, so you can make it ahead and focus on the fun part—decorating.
Equipment Needed
You don’t need a professional bakery setup to make this royal icing, but a few key tools will make your life easier. Here’s what I use:
- Stand mixer or hand mixer : A stand mixer with the paddle attachment is ideal, but a hand mixer works fine too. I’ve made this recipe with both, and the stand mixer is faster but the hand mixer gets the job done.
- Mixing bowls : One large bowl for the icing, one small bowl for testing consistency. Glass or stainless steel work best—plastic can hold onto grease.
- Sifter or fine-mesh strainer : For sifting the powdered sugar. A strainer works in a pinch, but a proper sifter is faster.
- Rubber spatula : For scraping down the sides of the bowl. Get a good one—cheap spatulas bend and leave streaks.
- Piping bags : Disposable or reusable. I prefer disposable for easy cleanup, but reusable bags are more eco-friendly.
- Piping tips : Wilton #2 (fine detail), #4 (outlining), and #12 (filling). You can start with just a #4 if you’re keeping it simple.
- Couplers : These let you swap tips without changing bags. Worth the extra dollar.
- Toothpicks : For popping air bubbles and testing consistency.
- Damp paper towel : Keep one handy to cover your bowl between uses—royal icing dries out fast.
If you don’t have piping bags, you can use a zip-top bag with a corner snipped off. It’s not as precise, but it works for beginners. I used that method for my first two gingerbread houses, and honestly? They turned out fine. Not perfect, but fine. And sometimes fine is good enough when you’re covered in powdered sugar and having fun.
Preparation Method
Let’s make some royal icing. Take your time with this—rushing leads to lumps, and lumps lead to frustration. I’ve made every mistake in the book so you don’t have to.
- Sift the powdered sugar into a large mixing bowl. Yes, sift it. I know it’s an extra step, but clumpy icing is no fun. Sift it twice if you’re feeling ambitious.
- Add the meringue powder and cream of tartar to the sifted sugar. Whisk them together dry to distribute evenly. This prevents the meringue powder from clumping when you add water.
- Pour in the warm water and vanilla extract. Start mixing on low speed to avoid a sugar cloud—trust me, you don’t want powdered sugar all over your kitchen. I learned this the messy way.
- Mix on medium speed for 4-5 minutes. The icing will go from thin and soupy to thick and glossy. You’re looking for stiff peaks—when you lift the mixer paddle, the icing should form a peak that holds its shape without drooping.
- Stop and scrape down the bowl at the 2-minute mark. Get the sides and bottom—there’s always some unmixed sugar hiding down there.
- Test the consistency : Dip a toothpick into the icing. It should stand straight up without falling over. If it’s too stiff, add water one drop at a time. Too thin, add sifted powdered sugar one tablespoon at a time.
- Color your icing : Divide into separate bowls and add gel food coloring one drop at a time. Mix thoroughly—color deepens as it sits, so start light.
- Transfer to piping bags : Fit your bags with couplers and tips. Fill them halfway—overfilling leads to icing squirting out the top. Twist the top closed and secure with a rubber band or twist tie.
- Let it rest for 5 minutes : This allows air bubbles to rise to the surface. Pop any bubbles with a toothpick before you start piping.
- Start piping : Hold the bag at a 45-degree angle and apply steady pressure. Practice on a piece of parchment paper first if you’re nervous. I still do this every time.
A few things I’ve learned the hard way: If your icing seems too thick after resting, add water one drop at a time and stir gently. Don’t overmix—you’ll incorporate air bubbles that pop during piping and ruin your lines. And if you need to step away, cover your bowl with a damp paper towel. Royal icing dries out fast, and crusty icing is useless icing.
For gingerbread house assembly, use a thicker consistency (stiff peaks) for the walls and roof. For decorating—windows, doors, snowflakes—thin it slightly with a few drops of water until it flows like honey but holds its shape. This is called “flood consistency” and it’s perfect for filling in large areas.
Cooking Tips & Techniques
After six gingerbread houses and countless batches of royal icing, I’ve collected a few tricks that make the process smoother. Some I learned from Dr. Patel, some from my own mistakes, and a few from sheer desperation at 11 PM on a December night.
Consistency is everything. Too thick and your icing won’t flow through the tip. Too thin and it’ll run off your gingerbread walls like tears. The sweet spot? When you lift your mixer paddle, the icing should form a ribbon that folds back into itself within 10 seconds. If it sits on top like a mountain, add water. If it disappears immediately, add more sugar.
Don’t overmix. I know it’s tempting to let the mixer run while you prep other things, but overmixing incorporates too much air. Those tiny bubbles will show up in your piping lines, making them look bumpy and unprofessional. Mix just until combined and glossy—about 4-5 minutes max.
Keep your bowl covered. Royal icing is a drama queen—it dries out if you look away for five seconds. Between piping sessions, cover your bowl with a damp paper towel or plastic wrap pressed directly onto the surface. I’ve lost entire batches to crusty tops because I got distracted by a phone call.
Practice on parchment. Before you pipe on your actual gingerbread house, practice your lines on a piece of parchment paper. Write your name, draw a snowflake, pipe a few dots. This warms up your hand and helps you get a feel for the pressure. I still do this every time, even after years of practice.
Work in sections. Don’t try to decorate your entire gingerbread house at once. Focus on one wall at a time, letting each section dry completely before moving on. This prevents smudging and collapsing. I learned this after accidentally smearing a perfectly piped window with my sleeve.
Use a toothpick for details. For tiny details like door handles or snowflake centers, dip a toothpick in icing and dot it on. It’s more precise than piping and gives you better control. Plus, it’s oddly satisfying.
Variations & Adaptations
This royal icing is wonderfully adaptable. Here are a few ways I’ve tweaked it over the years:
Flavor Variations
- Peppermint : Replace the vanilla with 1/2 teaspoon peppermint extract. Add crushed candy canes on top for a festive crunch.
- Almond : Use 1/2 teaspoon almond extract instead of vanilla. This pairs beautifully with gingerbread spices.
- Lemon : Add 1 tablespoon fresh lemon juice and reduce the water by 1 tablespoon. The acidity brightens the flavor and makes the icing extra glossy.
- Orange : Replace the water with fresh orange juice and add 1 teaspoon orange zest. This is my go-to for spring gingerbread houses.
Dietary Adaptations
- Egg-Free : This recipe already uses meringue powder instead of egg whites, so it’s safe for those with egg allergies. Just double-check your meringue powder brand—some contain egg whites.
- Vegan : Use vegan meringue powder (made from potato starch or aquafaba) and plant-based food coloring. The texture will be slightly different but it works.
- Gluten-Free : Royal icing is naturally gluten-free, but check your vanilla extract and food coloring for hidden gluten. Most are safe.
- Low-Sugar : Substitute half the powdered sugar with powdered erythritol or monk fruit sweetener. The texture won’t be identical, but it’ll still hold together.
Seasonal Twists
- Winter Wonderland : Add a pinch of edible glitter or luster dust to the icing for a sparkly finish.
- Autumn Harvest : Use warm colors—orange, brown, gold—and pipe leaf patterns instead of snowflakes.
- Spring Garden : Pastel colors and flower piping. Thin the icing slightly for a softer, more delicate look.
I once made a chocolate version by replacing 1/4 cup of the powdered sugar with unsweetened cocoa powder. It was delicious but slightly less stable—the cocoa absorbed moisture differently. It worked for a small house, but I wouldn’t recommend it for anything structural. Stick to the original for load-bearing walls.
Serving & Storage Suggestions
Royal icing is best used fresh, but you can make it ahead if you’re planning a big decorating day. Here’s what I’ve learned about storage:
At Room Temperature : Store unused icing in an airtight container with plastic wrap pressed directly onto the surface. It’ll keep for 3-4 days at room temperature. Before using, stir gently to recombine—it may separate slightly.
In the Refrigerator : Royal icing keeps for up to a week in the fridge. Let it come to room temperature before using, then stir gently. You may need to add a drop or two of water to restore the consistency.
In the Freezer : Yes, you can freeze royal icing! Transfer to a freezer-safe bag, squeeze out the air, and freeze for up to 3 months. Thaw overnight in the fridge, then bring to room temperature and stir. It won’t be quite as glossy as fresh, but it works fine for gingerbread houses.
For Decorated Gingerbread Houses : Let the icing dry completely (12-24 hours) before storing. Wrap the house loosely in plastic wrap or store in a large cake box. Keep it in a cool, dry place—humidity will make the icing sticky and soft. I once lost a beautiful house to a humid December day. The roof slid off like a wet pancake.
Reheating Tips : If your icing has thickened too much, add warm water one drop at a time and stir gently. Don’t microwave it—that’ll ruin the texture completely. I learned this the hard way when I tried to speed-thaw a frozen batch. It turned into a sugary puddle.
Flavors actually develop over time with this icing. The vanilla mellows out and the sweetness becomes more balanced. I’ve found that icing made a day ahead pipes even smoother than fresh. So if you’re planning a big decorating party, make the icing the night before. Your future self will thank you.
Nutritional Information & Benefits
Let’s be real—royal icing is sugar with a side of sugar. But here’s the breakdown if you’re curious:
| Nutrient | Per 1 tablespoon serving |
|---|---|
| Calories | 45 |
| Total Fat | 0g |
| Sodium | 5mg |
| Total Carbohydrates | 11g |
| Sugars | 11g |
| Protein | 0g |
On the bright side, this icing is fat-free, cholesterol-free, and contains no artificial preservatives. The meringue powder adds a tiny bit of protein (about 1g per batch), and the cream of tartar provides potassium. But honestly? This is a treat. It’s meant for decorating and celebrating, not for daily consumption. I always tell people to enjoy the process and not stress about the numbers. Gingerbread houses are about creativity and family time, not counting calories.
For those with dietary restrictions: This recipe is gluten-free, nut-free, and soy-free (check your vanilla extract). It does contain egg products from the meringue powder, but you can find vegan versions if needed. Always check labels if you’re cooking for someone with allergies—I’ve been surprised by hidden ingredients in some brands of food coloring.
Conclusion
This royal icing recipe came from a dentist’s chair, scribbled on a sticky note, and it’s been my go-to ever since. It’s reliable, forgiving, and produces beautiful results every time. Whether you’re building your first gingerbread house or your fiftieth, this icing will hold your walls together and make your decorations shine.
I love this recipe because it reminds me that good things come from unexpected places. Dr. Patel didn’t have to share his secret—he could’ve kept it to himself, building his gingerbread landmarks in silence. But he passed it along, and now I’m passing it to you. That’s the beauty of cooking, isn’t it? A recipe is just a story waiting to be told, and this one deserves to be shared.
So go ahead—make a mess, pipe wonky lines, and laugh at your mistakes. That’s what gingerbread houses are all about. And when someone asks where you got the recipe, you can smile and say, “From my dentist.” They’ll never see it coming.
I’d love to see your creations! Drop a comment below with your gingerbread house photos, your own tips, or the weirdest place you’ve ever gotten a recipe. And if you try this icing, let me know how it works for you. Happy decorating!
Frequently Asked Questions
Can I use egg whites instead of meringue powder?
Yes, you can substitute 3 large pasteurized egg whites for the meringue powder and water. The texture will be slightly different—egg whites create a softer, more elastic icing. Just be aware that raw egg whites carry a small risk of salmonella, so use pasteurized eggs if serving to children, elderly, or pregnant women.
Why is my royal icing too runny?
Your icing is probably too thin because you added too much water. Fix it by adding sifted powdered sugar one tablespoon at a time until you reach the right consistency. Remember, you’re looking for stiff peaks that hold their shape. If it’s still runny after adding sugar, you may have overmixed—try again with a fresh batch.
How long does royal icing take to dry?
Royal icing typically dries in 2-4 hours at room temperature, but full hardening takes 12-24 hours. Humidity affects drying time—on humid days, it can take twice as long. To speed things up, place your gingerbread house in a cool, dry room with a fan running. Don’t use a hairdryer—it’ll melt the icing.
Can I color royal icing with liquid food coloring?
You can, but I don’t recommend it. Liquid food coloring adds extra moisture that thins the icing and changes the consistency. Gel food coloring is much better—it’s concentrated, so you use less, and it doesn’t affect the texture. If you only have liquid coloring, add it drop by drop and compensate with extra powdered sugar.
How do I fix royal icing that’s too thick?
Add warm water one drop at a time and stir gently. Don’t add more than a few drops at once—you can always thin it more, but you can’t take water out. If you accidentally make it too thin, add sifted powdered sugar to thicken it back up. This is a forgiving recipe, so don’t panic if you mess up the consistency.
Pin This Recipe!

Cozy Gingerbread House Royal Icing: Best Recipe

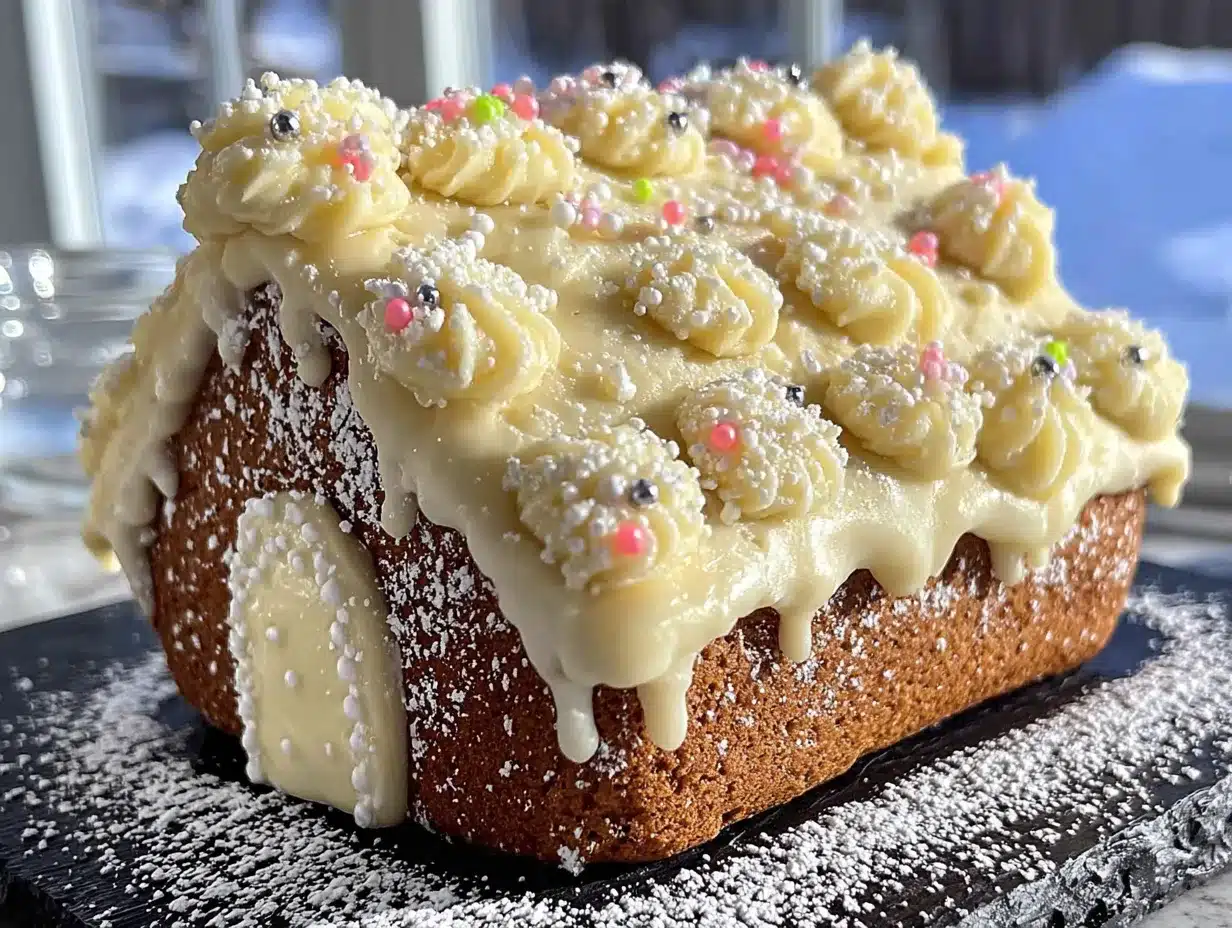
This royal icing recipe, perfected over twenty years by a dentist who builds elaborate gingerbread landmarks, dries hard as cement but pipes smooth as buttercream. It’s the reliable, forgiving icing you’ll come back to every December.
- Prep Time: 10 minutes
- Cook Time: 0 minutes
- Total Time: 15 minutes
- Yield: 2 cups 1x
- Category: Dessert
- Cuisine: American
Ingredients
- 4 cups powdered sugar, sifted
- 3 tablespoons meringue powder
- 1/2 teaspoon cream of tartar
- 1/2 cup warm water
- 1 teaspoon clear vanilla extract
- Gel food coloring (optional)
- Piping bags
- Couplers and tips (Wilton #2, #4, #12)
Instructions
- Sift the powdered sugar into a large mixing bowl.
- Add the meringue powder and cream of tartar to the sifted sugar. Whisk together dry to distribute evenly.
- Pour in the warm water and vanilla extract. Start mixing on low speed to avoid a sugar cloud.
- Mix on medium speed for 4-5 minutes until stiff peaks form—when you lift the mixer paddle, the icing should form a peak that holds its shape without drooping.
- Stop and scrape down the bowl at the 2-minute mark.
- Test the consistency: Dip a toothpick into the icing. It should stand straight up without falling over. If too stiff, add water one drop at a time. If too thin, add sifted powdered sugar one tablespoon at a time.
- Color your icing: Divide into separate bowls and add gel food coloring one drop at a time. Mix thoroughly.
- Transfer to piping bags: Fit bags with couplers and tips. Fill halfway, twist the top closed, and secure with a rubber band or twist tie.
- Let it rest for 5 minutes to allow air bubbles to rise. Pop any bubbles with a toothpick.
- Start piping: Hold the bag at a 45-degree angle and apply steady pressure. Practice on parchment paper first if needed.
Notes
For gingerbread house assembly, use a thicker consistency (stiff peaks) for walls and roof. For decorating, thin slightly with a few drops of water until it flows like honey but holds its shape (flood consistency). Keep bowl covered with a damp paper towel between uses to prevent drying. Icing can be made ahead and stored in an airtight container at room temperature for 3-4 days, in the fridge for up to a week, or frozen for up to 3 months.
Nutrition
- Serving Size: 1 tablespoon
- Calories: 45
- Sugar: 11
- Sodium: 5
- Carbohydrates: 11
Keywords: royal icing, gingerbread house, holiday baking, decorating icing, meringue powder icing


