Maria, the older woman who runs the herb stall at my local farmers’ market, watched me fumbling with a bunch of thyme one Saturday morning. I was trying to untangle a particularly stubborn knot of stems, and I was losing the battle. She didn’t say anything at first. Then she reached over, snipped the knot with a pair of shears she pulled from her apron pocket, and handed me a single perfect sprig. “For the rice,” she said, with a knowing smile. “It needs a friend.”
That conversation—about how a simple grain like rice can feel lonely without a good partner—stuck with me. It got me thinking about all the times I’d made plain chicken with a side of plain rice, and honestly, how boring that plate always was. I wanted a dish where they cooked together, where the chicken dripped its buttery, garlicky goodness right into the pot, and the rice soaked it all up like a sponge. This cozy one-pan garlic butter chicken and rice is the result of that market-day inspiration.
I’ll be the first to admit, my first attempt was a bit of a disaster. I used too much liquid, and the rice turned into a gluey paste. I mean, it was edible, but it was not something you’d want to serve to anyone you liked. But Maria’s words kept echoing in my head, and I knew the rice just needed the right friend. After a few more tries—and a lot of hungry evenings—I finally nailed it. The chicken stays juicy, the rice is fluffy and fragrant, and the whole thing comes together in one single pan. Maybe you’ve been there, staring at a pile of dishes and wishing dinner could just… fix itself. This recipe is that fix.
Why You’ll Love This Recipe
This isn’t just another chicken and rice recipe. It is the one you will make on a Tuesday when you are tired, and it will still feel like a Sunday supper. I have tested this version more times than I can count, and it has been approved by my pickiest eaters and my most seasoned chef friends. Here is why it stands out.
- Quick & Easy: From stove to table in about 45 minutes, with only about 10 minutes of active prep. The oven does the rest of the work.
- Simple Ingredients: You probably have garlic, butter, chicken, and rice in your kitchen right now. No fancy grocery trips required.
- Perfect for Cozy Nights: This dish is made for rainy evenings, busy weeknights, or any time you need a warm, comforting meal without a lot of fuss.
- Crowd-Pleaser: I have brought this to potlucks and family dinners, and the pan always comes back empty. Kids love the buttery rice, and adults appreciate the savory, garlicky chicken.
- Unbelievably Delicious: The secret is in the technique—browning the chicken first to build a deep, savory base, then letting the rice finish cooking in all those delicious juices. It’s comfort food that actually delivers.
What makes this recipe different from the rest is the balance. The garlic doesn’t overpower; it just whispers through the dish. The butter adds richness without making it heavy. And the rice—it comes out perfectly tender, every single time. It is the kind of meal that makes you close your eyes after the first bite, just for a second. It’s comfort food reimagined—simpler, faster, but with the same soul-soothing satisfaction. Perfect for impressing guests without stress, or turning a simple Tuesday into something memorable.
What Ingredients You Will Need
This recipe uses simple, wholesome ingredients to deliver bold flavor and satisfying texture without the fuss. Most of these are pantry staples, which makes this dish perfect for those nights when you need dinner to just work.
For the Chicken
- 4 bone-in, skin-on chicken thighs (about 1.5 lbs / 680g) – The bone and skin add incredible flavor and keep the meat juicy. You can use boneless thighs, but reduce the cooking time by about 10 minutes.
- 1 teaspoon salt – I prefer kosher salt for its clean taste.
- ½ teaspoon black pepper – Freshly ground is always better.
- 1 teaspoon paprika – Adds a subtle smoky sweetness and a beautiful color.
- 2 tablespoons olive oil – For searing the chicken. Avocado oil works too.
For the Garlic Butter Rice
- 4 tablespoons unsalted butter (½ stick / 56g) – Use unsalted so you can control the salt level. I recommend Kerrygold for its rich taste.
- 6 cloves garlic, minced – Fresh garlic is non-negotiable here. Do not use the jarred stuff; it will taste bitter.
- 1 cup long-grain white rice (200g) – Basmati or jasmine work beautifully. Avoid short-grain rice, which can get too sticky.
- 2 cups low-sodium chicken broth (480ml) – Low-sodium is key so the dish doesn’t become overly salty. You can use water in a pinch, but the flavor will be less rich.
- ½ cup dry white wine (120ml) – Optional, but it adds a lovely acidity that cuts through the butter. Use a Sauvignon Blanc or Pinot Grigio. If you skip it, add an extra ½ cup of broth.
- 1 teaspoon dried thyme – A nod to Maria. You can use 1 tablespoon fresh thyme leaves instead.
- ½ teaspoon salt – Adjust to taste.
- ¼ teaspoon black pepper
- 2 tablespoons fresh parsley, chopped – For garnish and a fresh finish.
Optional Add-Ins
- ½ cup frozen peas – Stir them in during the last 5 minutes of cooking for a pop of green.
- ¼ cup grated Parmesan cheese – Sprinkle over the finished dish for a salty, nutty kick.
- Lemon wedges – For squeezing over the top at the table.
Equipment Needed
You do not need a lot of fancy tools for this one, which is part of the beauty of it. Here is what you will need.
- A large oven-safe skillet or Dutch oven – A 10-12 inch cast-iron skillet is my go-to. It heats evenly and goes from stovetop to oven without any fuss. If you don’t have cast iron, any oven-safe skillet will work. Just make sure the handle is metal, not plastic.
- Sharp knife and cutting board – For mincing the garlic and chopping the parsley. A good chef’s knife makes this step feel effortless.
- Measuring cups and spoons – Accuracy matters for the rice-to-liquid ratio.
- Tongs – For flipping the chicken without piercing the skin. Trust me, this keeps the juices inside.
- Wooden spoon or spatula – For stirring the rice and scraping up any browned bits from the bottom of the pan.
If you do not have an oven-safe skillet, you can transfer the mixture to a baking dish before putting it in the oven. It is one extra step, but it works perfectly. I have done this more times than I care to admit when my cast iron was already dirty.
Preparation Method
Let’s get cooking. This method is straightforward, but paying attention to a few key steps makes all the difference.
- Preheat your oven to 375°F (190°C). This gives it time to come to temperature while you work on the stovetop.
- Pat the chicken thighs dry with paper towels. This is crucial for getting a good sear. Wet chicken will steam instead of brown. Season both sides with the salt, pepper, and paprika.
- Heat the olive oil in your oven-safe skillet over medium-high heat. Wait until the oil shimmers—this takes about 2 minutes. Carefully place the chicken thighs skin-side down in the hot oil. Do not crowd them; they should sizzle immediately. Cook for 5-6 minutes without moving them, until the skin is deep golden brown and crispy. Flip and cook for another 3 minutes on the other side. Transfer the chicken to a plate. It will not be fully cooked yet, and that is fine.
- Reduce the heat to medium. In the same skillet, add the 4 tablespoons of butter. Let it melt, then scrape up any browned bits from the bottom of the pan with your wooden spoon. Those bits are pure flavor, and you want them in the rice.
- Add the minced garlic. Stir it into the butter and cook for about 30 seconds, just until it becomes fragrant. Do not let it burn, or it will turn bitter. If it starts to brown too quickly, take the pan off the heat for a moment.
- Add the rice. Stir it into the garlic butter for about 1 minute, coating every grain. This toasting step helps the rice stay separate and fluffy instead of turning into mush.
- Pour in the white wine. If you are using it. Let it bubble and cook for about 1 minute, until most of the liquid has evaporated. This cooks off the alcohol and leaves behind a lovely acidity.
- Add the chicken broth, dried thyme, salt, and pepper. Stir everything together. Bring the mixture to a gentle simmer—you should see small bubbles around the edges. This takes about 2-3 minutes.
- Nestle the chicken thighs back into the skillet, skin-side up. Place them on top of the rice. Do not submerge them; you want the skin to stay crispy. If you are adding frozen peas, scatter them around the chicken now.
- Transfer the skillet to the preheated oven. Bake, uncovered, for 25-30 minutes. The rice should be tender and have absorbed all the liquid. The chicken should be cooked through and register 165°F (74°C) on an instant-read thermometer.
- Remove from the oven and let it rest for 5 minutes. This allows the rice to settle and the juices to redistribute in the chicken. Sprinkle with fresh parsley before serving.
Cooking Tips & Techniques
I have made this recipe more times than I can remember, and I have definitely made my share of mistakes. Here are the lessons I learned so you do not have to repeat them.
- Do not skip drying the chicken. I once got lazy and skipped this step, thinking it would not matter. It did. The skin steamed instead of searing, and I ended up with pale, rubbery skin. Pat those thighs dry. It takes ten seconds and makes a world of difference.
- Use a heavy-bottomed pan. Thin pans create hot spots, which means some of your rice will burn while other parts remain undercooked. A cast-iron or stainless steel skillet distributes heat evenly. If you only have a non-stick skillet, keep the heat a bit lower and watch it carefully.
- Let the rice rest. I know it is tempting to dig in right away, but that 5-minute rest is essential. The rice continues to absorb steam and becomes perfectly tender. If you serve it immediately, the rice might be a little wet in the center.
- Check your rice-to-liquid ratio. Different rice brands can absorb liquid differently. If your rice looks dry after 25 minutes in the oven, add a splash of hot broth and cook for 5 more minutes. If it looks too wet, leave the lid off for a few extra minutes.
- Toast the rice. This is a game-changer. Stirring the raw rice in the garlic butter for a minute coats each grain in fat, which prevents them from sticking together. It also adds a subtle nutty flavor that plain rice just does not have.
Variations & Adaptations
This recipe is wonderfully flexible. Here are a few ways you can make it your own.
- Make it dairy-free: Swap the butter for a good quality vegan butter or use 3 tablespoons of olive oil instead. The flavor will change slightly, but it will still be delicious.
- Go gluten-free: This recipe is naturally gluten-free as long as you use a gluten-free chicken broth. Double-check your broth label just to be safe.
- Add vegetables: Toss in a cup of chopped mushrooms or sliced bell peppers along with the garlic. They will soften in the oven and add extra texture. I have also added a handful of spinach stirred in during the last 5 minutes, and it wilts beautifully.
- Try different herbs: If you do not have thyme, rosemary or oregano work wonderfully. Use about half the amount for dried herbs, as they are more potent. Fresh herbs are even better—just double the quantity.
- Make it spicy: Add ½ teaspoon of red pepper flakes along with the garlic for a gentle heat. Or serve it with a drizzle of sriracha or chili crisp on top.
- Use chicken breasts: If you prefer white meat, use 2 large boneless, skinless chicken breasts cut in half horizontally. Sear them for 2-3 minutes per side, then follow the same baking instructions. They will cook faster, so check them at the 20-minute mark.
I once tried a version with coconut milk instead of half the broth. It was a bit too rich for my taste, but my friend who loves Thai food absolutely adored it. So feel free to experiment—you might discover your new favorite variation.
Serving & Storage Suggestions
This dish is a complete meal on its own, but a few simple sides can round it out beautifully.
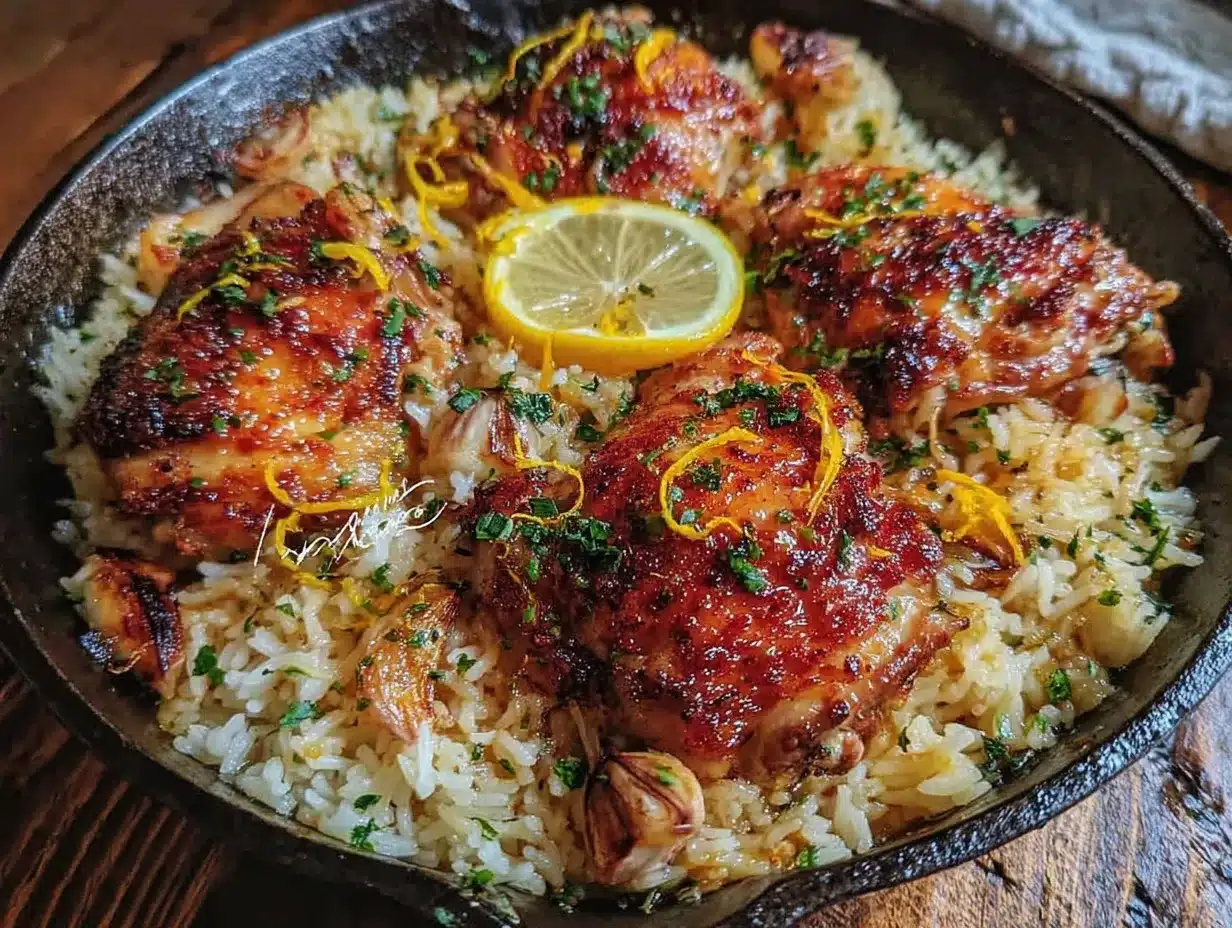
Serving: Serve the chicken and rice hot, straight from the skillet. I like to place the skillet right on the table for a cozy, family-style presentation. Sprinkle the fresh parsley over the top and add a few lemon wedges on the side. A squeeze of lemon juice brightens up the whole dish. This pairs wonderfully with a simple green salad dressed with a light vinaigrette, or some steamed green beans tossed in a little butter.
Storage: Leftovers keep well in an airtight container in the refrigerator for up to 4 days. The rice will absorb more liquid as it sits, so it might be a bit denser the next day, but the flavor only gets better. To reheat, add a splash of water or broth to the rice and microwave in 30-second bursts, stirring in between. You can also reheat it in a covered skillet over low heat, adding a tablespoon of water to create steam.
Freezing: This dish freezes surprisingly well. Let it cool completely, then transfer to a freezer-safe container. It will keep for up to 3 months. Thaw overnight in the refrigerator before reheating. The chicken skin will lose its crispiness, but the flavor will still be fantastic. I have used frozen leftovers as a quick lunch more times than I can count.
Nutritional Information & Benefits
This recipe is hearty and satisfying, but it also offers some nutritional perks. Here is an approximate breakdown per serving (based on 4 servings).
- Calories: ~520
- Protein: ~32g
- Fat: ~24g
- Carbohydrates: ~42g
- Fiber: ~1g
- Sodium: ~680mg (varies based on broth and added salt)
Chicken thighs are a great source of protein, iron, and B vitamins, which support energy metabolism. Garlic is known for its immune-boosting properties, and the butter provides a small amount of vitamin A. The rice offers quick energy and is easy on the stomach. If you want to boost the fiber content, swap half the white rice for brown rice—just add an extra ¼ cup of broth and increase the baking time by 10-15 minutes.
This recipe is naturally gluten-free and can be made dairy-free with a simple swap. It is not low-carb, but it is a balanced meal that provides sustained energy without feeling heavy. I personally love that it feels indulgent while still being made from whole, recognizable ingredients.
Conclusion
This cozy one-pan garlic butter chicken and rice has become a staple in my kitchen for a reason. It is the dish I turn to when I need a guaranteed win—whether I am cooking for a quiet night alone or for a table full of hungry friends. The chicken comes out perfectly juicy, the rice is rich and fragrant, and the whole thing comes together with minimal cleanup. Honestly, what more could you ask for from a weeknight dinner?
I hope you give this recipe a try and make it your own. Maybe you will add a little extra garlic, or swap the thyme for rosemary, or throw in whatever vegetables are lingering in your fridge. That is the beauty of a one-pan meal—it is forgiving, flexible, and always delicious. When you make it, I would love to hear how it turned out. Leave a comment below or tag me in your photos. And if you have your own twist on this dish, please share it. That is how recipes become legends, after all.
Happy cooking, and may your rice always be fluffy.
Frequently Asked Questions
Can I use boneless, skinless chicken thighs?
Yes, you can. Boneless thighs will cook faster, so check them at the 20-minute mark. The flavor will be slightly less rich without the bone and skin, but it will still be delicious. Reduce the searing time to 3-4 minutes per side.
Why is my rice still crunchy after baking?
This usually happens if the oven temperature is too low or if the rice did not have enough liquid. Make sure your oven is fully preheated to 375°F (190°C). If your rice is still crunchy after 30 minutes, add ¼ cup of hot broth, cover the skillet with foil, and bake for another 5-10 minutes.
Can I make this in a slow cooker or Instant Pot?
I have tested this in both. For the Instant Pot, use the sauté function to brown the chicken and toast the rice, then pressure cook on high for 6 minutes with a natural release. For a slow cooker, brown the chicken first, then cook on low for 4-5 hours. The rice will be softer and less distinct, but the flavor is still wonderful.
How do I prevent the rice from turning mushy?
Do not stir the rice after it goes into the oven. Stirring releases starch, which can make the rice gummy. Also, make sure you are using long-grain rice, which holds its shape better than short-grain varieties. Toasting the rice in butter before adding the liquid also helps keep the grains separate.
Can I use brown rice instead of white rice?
Yes, but you will need to adjust the liquid and cooking time. Use 2 ½ cups of broth instead of 2 cups, and increase the baking time to 45-50 minutes. You may also need to cover the skillet with foil for the first 30 minutes to prevent the rice from drying out. Brown rice has a nuttier flavor and more fiber, which makes this a great whole-grain option.
Pin This Recipe!

Cozy One-Pan Garlic Butter Chicken and Rice: Easy Weeknight Dinner

This cozy one-pan garlic butter chicken and rice is the perfect weeknight dinner. Juicy chicken thighs and fluffy, fragrant rice cook together in one pan, soaking up buttery, garlicky goodness for a soul-soothing meal with minimal cleanup.
- Prep Time: 10 minutes
- Cook Time: 35 minutes
- Total Time: 45 minutes
- Yield: 4 servings 1x
- Category: Main Course
- Cuisine: American
Ingredients
- 4 bone-in, skin-on chicken thighs (about 1.5 lbs / 680g)
- 1 teaspoon salt
- ½ teaspoon black pepper
- 1 teaspoon paprika
- 2 tablespoons olive oil
- 4 tablespoons unsalted butter (½ stick / 56g)
- 6 cloves garlic, minced
- 1 cup long-grain white rice (200g)
- 2 cups low-sodium chicken broth (480ml)
- ½ cup dry white wine (120ml), optional
- 1 teaspoon dried thyme
- ½ teaspoon salt
- ¼ teaspoon black pepper
- 2 tablespoons fresh parsley, chopped
- ½ cup frozen peas (optional)
- ¼ cup grated Parmesan cheese (optional)
- Lemon wedges (optional)
Instructions
- Preheat your oven to 375°F (190°C).
- Pat the chicken thighs dry with paper towels. Season both sides with the salt, pepper, and paprika.
- Heat the olive oil in your oven-safe skillet over medium-high heat. Wait until the oil shimmers. Carefully place the chicken thighs skin-side down in the hot oil. Cook for 5-6 minutes without moving them, until the skin is deep golden brown and crispy. Flip and cook for another 3 minutes on the other side. Transfer the chicken to a plate.
- Reduce the heat to medium. In the same skillet, add the 4 tablespoons of butter. Let it melt, then scrape up any browned bits from the bottom of the pan with your wooden spoon.
- Add the minced garlic. Stir it into the butter and cook for about 30 seconds, just until fragrant. Do not let it burn.
- Add the rice. Stir it into the garlic butter for about 1 minute, coating every grain.
- Pour in the white wine (if using). Let it bubble and cook for about 1 minute, until most of the liquid has evaporated.
- Add the chicken broth, dried thyme, salt, and pepper. Stir everything together. Bring the mixture to a gentle simmer.
- Nestle the chicken thighs back into the skillet, skin-side up. If adding frozen peas, scatter them around the chicken now.
- Transfer the skillet to the preheated oven. Bake, uncovered, for 25-30 minutes, until the rice is tender and the chicken is cooked through (165°F / 74°C).
- Remove from the oven and let it rest for 5 minutes. Sprinkle with fresh parsley before serving.
Notes
Do not skip drying the chicken for a good sear. Toast the rice in butter for fluffier grains. Let the rice rest for 5 minutes after baking. For boneless thighs, reduce cooking time by 10 minutes. For brown rice, use 2 ½ cups broth and bake 45-50 minutes.
Nutrition
- Serving Size: 1 serving (1 chicken
- Calories: 520
- Sugar: 2
- Sodium: 680
- Fat: 24
- Saturated Fat: 10
- Carbohydrates: 42
- Fiber: 1
- Protein: 32
Keywords: one-pan chicken and rice, garlic butter chicken, easy weeknight dinner, comfort food, one skillet meal


