My neighbor, an older woman named Clara, watched me struggling with a massive batch of cookie dough one October afternoon. I was covered in flour, muttering about how I only wanted six cookies, not six dozen. She didn’t say anything at first. Then she shuffled back inside her house and returned ten minutes later with a small, crumpled index card in her hand. “This,” she said, tapping the paper, “is for when you want the taste of fall without feeding a whole army.”
That card held the beginnings of what I now call my cozy small-batch apple cider cookies. Clara had gotten it from a friend years ago, and she’d tweaked it until it was just right for her quiet afternoons. Honestly, I was skeptical at first. Could a cookie really capture that deep, spiced apple cider flavor without being a soggy mess? I mean, I’ve had my share of apple-flavored baked goods that tasted more like artificial syrup than the real thing. But one bite of these, and I was hooked. They’re soft, they’re chewy, and they have this incredible warmth that feels like wrapping your hands around a mug of hot cider.
Maybe you’ve been there—standing in your kitchen, craving something sweet and seasonal, but dreading the thought of a full batch that leaves you with a mountain of leftovers. That’s exactly why this recipe exists. It’s for those cozy evenings when you just want a little taste of the season, not a project. Let me tell you, these cookies have become my go-to for those in-between moments when the weather turns crisp and the leaves start to fall.
Why You’ll Love This Recipe
I’ve tested this recipe more times than I care to admit, and let me tell you, it’s been through the wringer. I’ve tried different apple cider reduction times, swapped out flours, and even attempted a gluten-free version (which turned out surprisingly well). What I landed on is the perfect balance of flavor and texture, all in a small batch that won’t overwhelm your kitchen or your waistline.
- Quick & Easy: From start to finish, these cookies come together in about 30 minutes. Perfect for a last-minute craving or a cozy afternoon treat.
- Simple Ingredients: No fancy grocery trips needed. You likely have most of these items in your pantry already, especially if you’re a fall baking enthusiast.
- Perfect for Fall Evenings: These cookies are tailor-made for those crisp autumn nights when you want something warm and comforting without a huge production.
- Crowd-Pleaser: Despite being a small batch, they always get rave reviews. The combination of apple cider and warm spices is a guaranteed hit.
- Unbelievably Delicious: The texture is soft and chewy, with a concentrated apple flavor that comes from reducing the cider. It’s next-level comfort food.
What makes this recipe different from the rest? It’s the technique of reducing the apple cider. Instead of just adding liquid cider to the dough (which would make it too wet), we simmer it down into a concentrated syrup. This gives you that intense, authentic apple flavor without compromising the cookie’s structure. It’s a little trick I picked up from Clara, and it makes all the difference.
This recipe isn’t just good—it’s the kind that makes you close your eyes after the first bite. It’s comfort food reimagined: quicker, simpler, but with the same soul-soothing satisfaction. Perfect for impressing guests without stress, or turning a simple evening into something memorable.
What Ingredients You Will Need
This recipe uses simple, wholesome ingredients to deliver bold flavor and satisfying texture. The star of the show is the apple cider, but every component plays a role in creating that perfect fall cookie.
- Apple Cider (1/2 cup): Use fresh, unfiltered apple cider if you can find it. The flavor is much richer than filtered juice. You’ll be reducing this, so the quality matters. (I prefer the local brand from my farmer’s market, but any good cider works.)
- Unsalted Butter (4 tablespoons, softened): Softened to room temperature for easy creaming. If you only have salted butter, reduce the added salt by a pinch.
- Granulated Sugar (1/4 cup): Adds sweetness and helps create that soft, chewy texture.
- Light Brown Sugar (2 tablespoons, packed): Adds a touch of molasses flavor and extra moisture. Dark brown sugar works too, for a deeper flavor.
- Large Egg Yolk (1): Using just the yolk gives the cookies a richer, more tender crumb. Save the white for another use, like a quick omelet.
- Vanilla Extract (1/2 teaspoon): Enhances the warm spices and apple flavor. Pure vanilla is best, but imitation works in a pinch.
- All-Purpose Flour (3/4 cup): Provides structure. For a gluten-free option, use a 1:1 gluten-free baking flour blend.
- Baking Soda (1/4 teaspoon): Helps the cookies spread just the right amount.
- Ground Cinnamon (1/2 teaspoon): The quintessential fall spice. Freshly ground is amazing, but pre-ground is fine.
- Ground Nutmeg (1/4 teaspoon): Adds warmth and depth. Freshly grated nutmeg is a game-changer if you have it.
- Salt (1/8 teaspoon): Balances the sweetness and enhances all the flavors.
- Powdered Sugar (1/2 cup, for glaze): For that simple, sweet finish. You’ll mix this with a bit of the reduced cider to make a glaze.
For the glaze, you’ll also need about 1-2 teaspoons of the reduced apple cider (from the cooking process) and a splash of milk if needed to thin it out. It’s a lovely touch that ties the whole cookie together.
Equipment Needed
You don’t need a lot of fancy equipment for these cookies, which is part of their charm. Here’s what you’ll need:
- Small Saucepan: For reducing the apple cider. A 1-quart saucepan is perfect.
- Mixing Bowls: One medium bowl for the dry ingredients and one for the wet ingredients.
- Electric Mixer: A hand mixer works great for creaming the butter and sugars. You can do it by hand with a wooden spoon, but it takes a bit more elbow grease.
- Baking Sheet: A standard half-sheet pan works perfectly. Line it with parchment paper for easy cleanup.
- Cooling Rack: Essential for letting the cookies cool evenly before glazing.
- Whisk: For combining the dry ingredients and mixing the glaze.
- Measuring Cups and Spoons: Accurate measurements are key for baking success.
- Cookie Scoop (optional): A 1.5-tablespoon scoop makes portioning the dough quick and uniform. If you don’t have one, just use two spoons.
I’ve made these cookies with a cheap baking sheet and a hand-me-down mixer, and they turned out just fine. Don’t overthink the equipment—just use what you have.
Preparation Method
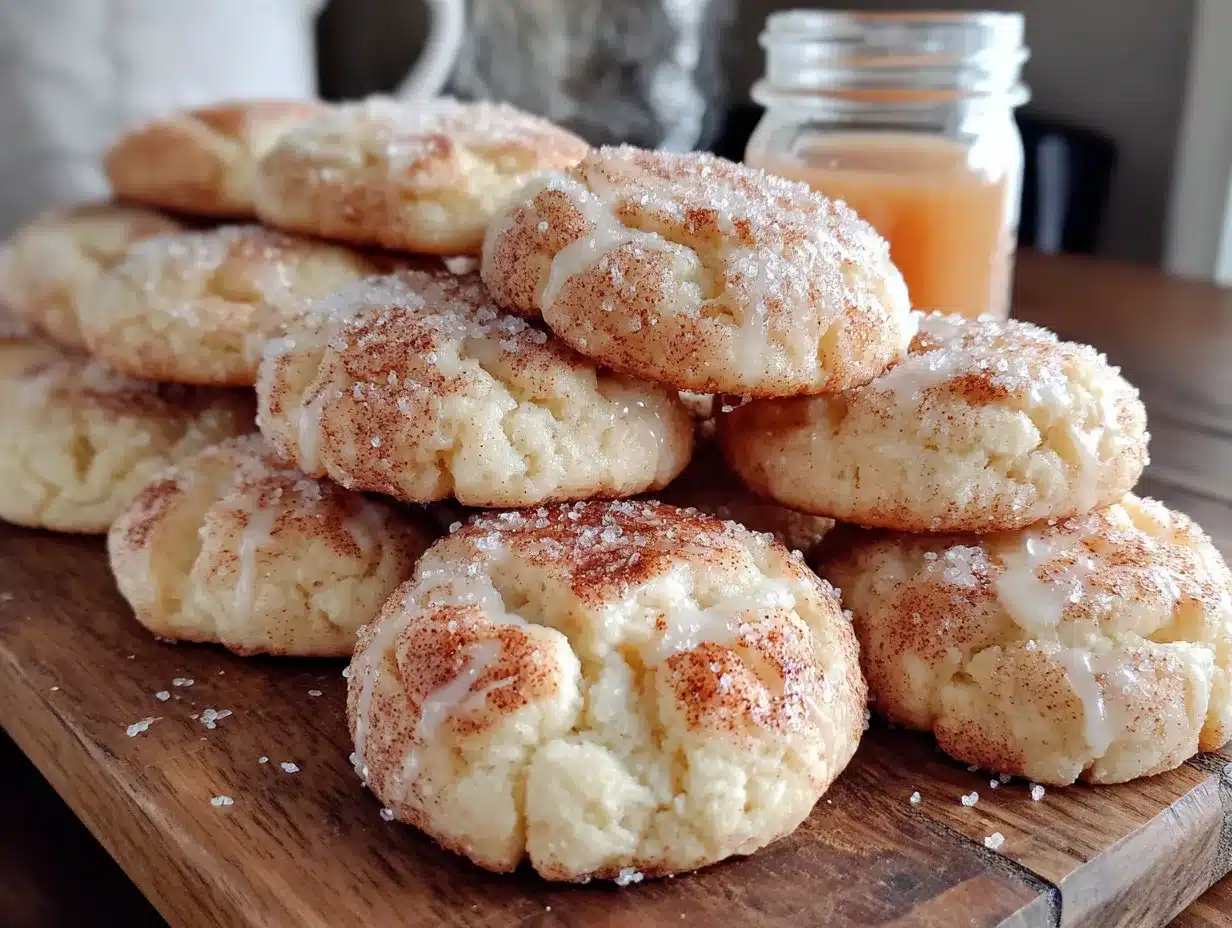
Let’s get baking! Follow these steps carefully, and you’ll have a batch of cozy apple cider cookies in no time.
- Reduce the Apple Cider: Pour the 1/2 cup of apple cider into a small saucepan. Bring it to a boil over medium-high heat, then reduce the heat to a simmer. Let it cook for about 8-10 minutes, stirring occasionally, until it reduces to about 2 tablespoons of a syrupy liquid. It should be thick and fragrant. Watch it closely at the end so it doesn’t burn. Remove from heat and let it cool completely. (This step is crucial—don’t skip it!)
- Preheat and Prep: Preheat your oven to 350°F (175°C). Line your baking sheet with parchment paper. Set it aside.
- Cream the Butter and Sugars: In a medium mixing bowl, beat the softened butter, granulated sugar, and brown sugar together with an electric mixer on medium speed until light and fluffy, about 2 minutes. Scrape down the sides of the bowl as needed.
- Add the Wet Ingredients: Beat in the egg yolk, vanilla extract, and 1 tablespoon of the cooled reduced apple cider (reserve the rest for the glaze). Mix until just combined. The mixture might look a little curdled—that’s okay.
- Combine Dry Ingredients: In a separate small bowl, whisk together the flour, baking soda, cinnamon, nutmeg, and salt. Make sure there are no clumps.
- Mix the Dough: Gradually add the dry ingredients to the wet ingredients, mixing on low speed until just combined. Do not overmix. The dough will be soft but not sticky. If it feels too sticky, add a tablespoon more of flour.
- Chill the Dough (Optional but Recommended): For the best texture, cover the bowl and refrigerate the dough for 15-20 minutes. This prevents the cookies from spreading too much. If you’re in a hurry, you can skip this step, but the cookies will be flatter.
- Portion the Dough: Using a cookie scoop or two spoons, portion the dough into 6 equal balls (about 1.5 tablespoons each). Place them on the prepared baking sheet, spacing them about 2 inches apart.
- Bake: Bake for 10-12 minutes, or until the edges are lightly golden and the centers look just set. The cookies will puff up slightly. They might look a little underdone in the middle—that’s perfect. Overbaking will make them dry.
- Cool: Let the cookies cool on the baking sheet for 5 minutes. The residual heat will finish setting them. Then transfer them to a cooling rack to cool completely before glazing.
- Make the Glaze: In a small bowl, whisk together the powdered sugar and the remaining 1 tablespoon of reduced apple cider. Add a tiny splash of milk if the glaze is too thick. It should be thick but drizzle-able.
- Glaze the Cookies: Once the cookies are completely cool, drizzle the glaze over them using a spoon or a small piping bag. Let the glaze set for about 10 minutes before serving. Enjoy!
Cooking Tips & Techniques
I’ve made a few mistakes along the way so you don’t have to. Here are my best tips for perfect cookies every time.
- Don’t Rush the Cider Reduction: The first time I made these, I got impatient and used the cider before it was fully reduced. The cookies were bland and flat. The reduction concentrates the flavor, so be patient. It should be syrupy, not watery.
- Watch the Oven Closely: Ovens vary, and these cookies bake quickly. Start checking at 9 minutes. You want them just barely golden on the edges. They will continue to cook on the hot baking sheet after you pull them out.
- Room Temperature Ingredients Matter: Make sure your butter is truly softened (not melted) and your egg yolk is at room temperature. This helps everything cream together smoothly for a better texture.
- Chill for Better Shape: I know it’s tempting to skip the chilling step, but it really does help the cookies hold their shape. If you skip it, they’ll spread into thin, crispy disks instead of soft, chewy rounds.
- Glaze Timing: Don’t glaze the cookies while they’re still warm, or the glaze will melt into a sticky mess. Wait until they are completely cool. I learned this the hard way.
- Double the Batch: If you find yourself wanting more (and you will), you can easily double this recipe. Just use a whole egg instead of two yolks for the doubled batch.
Variations & Adaptations
One of the best things about this recipe is how adaptable it is. Here are a few ways to make it your own.
- Spice It Up: Add a pinch of ground cloves or allspice to the dry ingredients for a more complex spice blend. I did this once on a whim, and it was fantastic.
- Add Mix-Ins: Fold in 1/4 cup of chopped pecans, walnuts, or even white chocolate chips after mixing the dough. The crunch adds a lovely contrast to the soft cookie.
- Make It Dairy-Free: Substitute the butter with a high-quality vegan butter stick (like Earth Balance) and use a dairy-free milk in the glaze. The texture will be slightly different but still delicious.
- Apple Cider Glaze Variations: For a maple twist, replace 1 teaspoon of the reduced cider in the glaze with maple syrup. For a spiced glaze, add a tiny pinch of cinnamon to the powdered sugar.
- No Glaze Option: If you’re not in the mood for a glaze, these cookies are still wonderful on their own. You can also roll the dough balls in cinnamon sugar before baking for a crunchy, sparkly top.
I once made a version with dried cranberries and orange zest mixed in, and it was like a holiday cookie in the fall. Don’t be afraid to experiment—that’s half the fun!
Serving & Storage Suggestions
These cookies are best enjoyed fresh, but they store well too. Here’s how to make the most of them.
- Serving Temperature: Serve them at room temperature or slightly warm. If you want to reheat one, pop it in the microwave for 10 seconds. It’s like a fresh-baked hug.
- Presentation: Arrange the glazed cookies on a pretty plate with a few cinnamon sticks and apple slices for a cozy fall presentation. Perfect for a small gathering or a quiet night in.
- Complementary Pairings: These cookies pair beautifully with a hot cup of spiced chai, a mug of hot apple cider, or even a glass of cold milk. For a dessert board, serve them alongside caramel dip and fresh apple slices.
- Storage Instructions: Store the cookies in an airtight container at room temperature for up to 3 days. If you stack them, place a piece of parchment paper between layers to prevent the glaze from sticking.
- Freezing Instructions: You can freeze the baked, unglazed cookies for up to 2 months. Wrap them individually in plastic wrap and place them in a freezer bag. Thaw at room temperature, then glaze before serving. You can also freeze the dough balls—just place them on a baking sheet, freeze until solid, then transfer to a bag. Bake from frozen, adding 1-2 minutes to the baking time.
- Flavor Development: Honestly, these cookies taste even better the next day. The spices mellow and meld together overnight. If you can resist eating them all, let them sit for a day.
Nutritional Information & Benefits
While these are definitely a treat, they’re made with real, simple ingredients. Here’s a rough estimate per cookie (based on 6 cookies with glaze).
- Calories: Approximately 180-200 calories per cookie
- Fat: 9g (mostly from butter)
- Carbohydrates: 26g
- Sugar: 16g
- Protein: 2g
These numbers are estimates and will vary based on your specific ingredients. The apple cider does provide a small amount of vitamin C and antioxidants, but let’s be real—we’re eating these for the joy, not the health benefits. That said, using real apple cider and butter means you’re avoiding the artificial flavors and preservatives found in many store-bought cookies.
For dietary considerations, this recipe is vegetarian. To make it gluten-free, use a 1:1 gluten-free flour blend. For a lower-sugar option, you can reduce the granulated sugar to 3 tablespoons, but the texture will be slightly less tender. It’s all about balance, right?
Conclusion
These cozy small-batch apple cider cookies are more than just a recipe—they’re a little moment of fall captured in a cookie. They’re for those evenings when you want something sweet without a huge commitment, for those days when the air is crisp and you need a warm hug in edible form. I’ve made them countless times, and they never fail to bring a smile to my face.
I encourage you to make them your own. Add your favorite spices, throw in some nuts, or skip the glaze entirely. The beauty of a small batch is that you can experiment without worrying about wasting a ton of ingredients. And honestly, that’s what cooking should be about—playing, tasting, and enjoying the process.
I’d love to hear how yours turn out! Drop a comment below and let me know if you tried any variations, or just share your favorite fall baking memory. And if you loved this recipe, don’t forget to pin it for later. Happy baking, friends—may your kitchen smell like cinnamon and apples all season long.
Frequently Asked Questions
Can I use apple juice instead of apple cider?
You can, but the flavor will be less rich and slightly sweeter. Apple cider has a deeper, more complex flavor that really shines after reduction. If you use juice, you might want to add a pinch more cinnamon to compensate.
Why did my cookies spread too much?
This usually happens if the butter was too soft or melted, or if you skipped the chilling step. Make sure your butter is just softened, not greasy, and chill the dough for at least 15 minutes. Also, double-check your baking soda—old baking soda loses its power.
Can I make these cookies vegan?
Yes! Substitute the butter with a vegan butter stick and use a flax egg (1 tablespoon ground flaxseed mixed with 3 tablespoons water, let sit for 5 minutes) instead of the egg yolk. The texture will be slightly denser but still delicious.
How do I know when the cider is reduced enough?
It should be thick and syrupy, coating the back of a spoon. It will reduce from 1/2 cup to about 2 tablespoons. Watch it carefully in the last few minutes—it can go from perfect to burnt quickly. If it smells nutty or bitter, you’ve gone too far.
Can I double this recipe for a larger batch?
Absolutely! To double, use 1 whole egg instead of 2 egg yolks, and increase all other ingredients by 1.5 to 2 times. The baking time may need an extra minute or two. It’s perfect for holiday cookie exchanges or when you need a bigger treat.
PrintCozy Small-Batch Apple Cider Cookies

Soft and chewy apple cider cookies with a concentrated apple flavor from reduced cider, topped with a simple glaze. Perfect for a cozy fall evening when you want a small batch of seasonal treats.
- Prep Time: 15 minutes
- Cook Time: 12 minutes
- Total Time: 30 minutes
- Yield: 6 cookies 1x
- Category: Dessert
- Cuisine: American
Ingredients
- 1/2 cup apple cider (unfiltered preferred)
- 4 tablespoons unsalted butter, softened
- 1/4 cup granulated sugar
- 2 tablespoons light brown sugar, packed
- 1 large egg yolk
- 1/2 teaspoon vanilla extract
- 3/4 cup all-purpose flour
- 1/4 teaspoon baking soda
- 1/2 teaspoon ground cinnamon
- 1/4 teaspoon ground nutmeg
- 1/8 teaspoon salt
- 1/2 cup powdered sugar (for glaze)
- 1–2 teaspoons reduced apple cider (for glaze)
- Splash of milk (for glaze, if needed)
Instructions
- Reduce the apple cider: Pour 1/2 cup apple cider into a small saucepan. Bring to a boil over medium-high heat, then reduce to a simmer. Cook for 8-10 minutes, stirring occasionally, until reduced to about 2 tablespoons of syrupy liquid. Remove from heat and let cool completely.
- Preheat oven to 350°F (175°C). Line a baking sheet with parchment paper.
- In a medium mixing bowl, beat softened butter, granulated sugar, and brown sugar with an electric mixer on medium speed until light and fluffy, about 2 minutes. Scrape down sides as needed.
- Beat in egg yolk, vanilla extract, and 1 tablespoon of the cooled reduced apple cider (reserve the rest for glaze). Mix until just combined.
- In a separate small bowl, whisk together flour, baking soda, cinnamon, nutmeg, and salt.
- Gradually add dry ingredients to wet ingredients, mixing on low speed until just combined. Do not overmix. Dough should be soft but not sticky.
- Optional but recommended: Cover bowl and refrigerate dough for 15-20 minutes to prevent spreading.
- Portion dough into 6 equal balls (about 1.5 tablespoons each). Place on prepared baking sheet, spacing 2 inches apart.
- Bake for 10-12 minutes, until edges are lightly golden and centers look just set. Let cool on baking sheet for 5 minutes, then transfer to a cooling rack to cool completely.
- Make the glaze: In a small bowl, whisk together powdered sugar and remaining 1 tablespoon reduced apple cider. Add a splash of milk if too thick. Glaze should be thick but drizzle-able.
- Once cookies are completely cool, drizzle glaze over them. Let set for about 10 minutes before serving.
Notes
Don’t rush the cider reduction—it should be syrupy, not watery. Chilling the dough is recommended for better shape. Watch the oven closely; cookies bake quickly. Glaze only when cookies are completely cool. For a gluten-free version, use a 1:1 gluten-free flour blend. For dairy-free, use vegan butter and dairy-free milk in glaze. Cookies taste even better the next day.
Nutrition
- Serving Size: 1 cookie
- Calories: 190
- Sugar: 16
- Sodium: 85
- Fat: 9
- Saturated Fat: 5
- Carbohydrates: 26
- Fiber: 1
- Protein: 2
Keywords: apple cider cookies, small batch cookies, fall cookies, easy cookie recipe, soft cookies, chewy cookies, apple cookies, autumn baking


