The soft, buttery crumble sinking into a pool of warm, jammy apples — that first bite is the whole point. Everything else about this cozy small-batch apple crisp for two is just a means to that end. I made this for the first time on a Tuesday night in late October, when the air had that particular chill that makes you want to wrap your hands around something warm. My husband was working late, and I wanted something that felt special but wouldn’t leave me eating leftovers for a week.
I had two apples sitting in the fruit bowl (the ones nobody wanted to eat plain), and a craving that wouldn’t quit. So I pulled out my smallest baking dish — the one that’s too big for one but perfect for two — and started measuring. No complicated steps, no stand mixer required. Just butter, oats, brown sugar, and a little patience.
Honestly, I wasn’t sure it would work. Small-batch baking can be tricky; ratios get weird when you scale down. But this one? It landed perfectly the first time. The topping stayed crisp on top while the apples underneath turned into this luscious, cinnamon-scented filling. It’s the kind of dessert that makes you slow down and actually taste what you’re eating.
That Tuesday night, I sat on the couch with my little ramekin of warm apple crisp, and it felt like a hug in a dish. No fuss, no presentation anxiety — just good, honest dessert. And that’s exactly what I want to share with you today.
Why You’ll Love This Recipe
Let me tell you why this little dessert has earned a permanent spot in my rotation. I’ve tested this recipe at least half a dozen times, tweaking the oat-to-flour ratio, playing with different apple varieties, and even sneaking in a few secret ingredients along the way. Here’s what makes it special:
- Perfectly Portioned: No more staring at a huge pan of leftovers wondering what to do. This makes exactly two generous servings — ideal for date night, a quiet evening, or when you just need a little something sweet.
- Simple Pantry Ingredients: You probably have everything in your kitchen right now. Butter, oats, flour, brown sugar, cinnamon, and a couple of apples. That’s it. No special trips to the store required.
- Ready in Under an Hour: From start to finish, you’re looking at about 45 minutes. The apples soften in the oven while the topping turns golden and crisp. It’s practically hands-off baking.
- Customizable for Any Diet: Swap in gluten-free oats and use a gluten-free flour blend, and you’ve got a gluten-free dessert. Use coconut oil instead of butter for a dairy-free version. It adapts beautifully.
- Comfort Food at Its Finest: There’s something about warm apples and a buttery crumble that just hits different. It’s nostalgic without being heavy, satisfying without being over-the-top.
I’ve made this for friends who swore they weren’t “dessert people,” and watched them go back for seconds. It’s that good. Plus, it’s way easier than making a full pie — no rolling dough, no fussing with crusts. Just mix, layer, and bake.
This isn’t just another apple crisp recipe. It’s the one I turn to when I want something that feels like a warm blanket on a cold day. And honestly, that’s the best kind of dessert there is.
What Ingredients You Will Need
This recipe keeps things wonderfully simple. You don’t need a long list of fancy ingredients — just good, honest staples that come together to create something magical. Let me walk you through each one.
For the Apple Filling
- 2 medium apples — I recommend a mix of sweet and tart varieties. Honeycrisp and Granny Smith are my go-to combination. The Honeycrisp brings sweetness and holds its shape well, while the Granny Smith adds that lovely tangy contrast. You could also use Fuji, Braeburn, or Pink Lady. Avoid Red Delicious — they turn mushy and don’t have enough flavor.
- 2 tablespoons granulated sugar — Just enough to sweeten the apples without making them cloying. You can reduce this slightly if your apples are very sweet.
- 1 tablespoon all-purpose flour — This helps thicken the juices as the apples cook, creating that luscious, syrupy consistency. Cornstarch works too, just use half the amount.
- 1 teaspoon ground cinnamon — The backbone of any good apple dessert. I use Ceylon cinnamon when I have it — it’s milder and slightly sweeter than the standard Cassia variety.
- 1/4 teaspoon ground nutmeg — Freshly grated if you can. It makes a noticeable difference in warmth and aroma.
- 1 tablespoon lemon juice — A squeeze of fresh lemon brightens the apples and prevents them from browning. It also balances the sweetness beautifully.
For the Crisp Topping
- 1/2 cup old-fashioned rolled oats — Not quick oats! The old-fashioned kind gives you that satisfying chewy texture and stays crisp longer. Quick oats will turn mushy.
- 1/2 cup all-purpose flour — This provides structure to the crumble. Whole wheat pastry flour works great here too, adding a subtle nuttiness.
- 1/3 cup packed brown sugar — Light or dark, both work. Dark brown sugar gives a deeper, almost molasses-like flavor that I personally love. I usually use light brown sugar for a milder sweetness.
- 1/4 teaspoon salt — Don’t skip this! Salt balances the sweetness and enhances all the other flavors.
- 1/4 cup cold unsalted butter — Cut into small cubes. Cold butter is key for a crumbly topping. If you use salted butter, reduce the added salt to a pinch.
- 1/2 teaspoon vanilla extract — A little vanilla goes a long way in rounding out the flavors. I prefer pure vanilla extract over imitation.
That’s genuinely everything you need. No obscure ingredients, no expensive specialty items. Just simple, wholesome components that work together perfectly.
Equipment Needed
You don’t need a fully stocked bakery to make this work. Here’s what you’ll need:
- Two 8-ounce ramekins or a 1-quart baking dish — Ramekins make individual servings feel extra special, but a small baking dish works just as well. I found a set of ceramic ramekins at a thrift store years ago, and they’re perfect for this.
- Mixing bowls — One medium bowl for the topping, one small bowl for the filling. Nothing fancy needed.
- A sharp knife and cutting board — For prepping the apples. A good chef’s knife makes quick work of peeling and slicing.
- A pastry cutter or fork — To cut the butter into the dry ingredients. If you don’t have a pastry cutter, two forks or even your fingertips work perfectly. Just work quickly so the butter stays cold.
- A baking sheet — Place your ramekins or dish on a baking sheet to catch any bubbly overflow. Trust me on this one — I learned the hard way.
- Measuring cups and spoons — For accurate measurements. Baking is more precise than cooking, so measuring matters here.
That’s it. If you have these basics, you’re ready to make the best small-batch apple crisp of your life.
Preparation Method
Let me walk you through this step by step. I’ve included all the little details I wish someone had told me when I first started making apple crisp.
- Preheat your oven to 350°F (175°C). While it’s heating up, place your ramekins or baking dish on a small baking sheet. This catches any drips and makes cleanup much easier.
- Prepare the apples. Peel, core, and slice your apples into roughly 1/4-inch thick pieces. I like to cut them into bite-sized chunks rather than thin slices — they hold up better during baking and give you nice, tender bites. You should end up with about 2 cups of apple pieces.
- Make the filling. In a small bowl, toss the apple slices with the granulated sugar, flour, cinnamon, nutmeg, and lemon juice. Stir until every piece is evenly coated. Let this sit while you prepare the topping — this gives the apples time to release some of their juices, which makes the filling extra luscious.
- Make the crisp topping. In a medium bowl, whisk together the oats, flour, brown sugar, and salt. Add the cold butter cubes and vanilla extract. Using a pastry cutter or your fingertips, work the butter into the dry ingredients until the mixture resembles coarse crumbs with some pea-sized butter pieces remaining. Don’t overwork it — those little butter chunks are what create those crispy, craggy bits on top.
- Assemble. Divide the apple mixture evenly between your two ramekins (or spread it in the small baking dish). Sprinkle the topping evenly over the apples, pressing down gently so it sticks. Don’t pack it too tightly — you want some texture and air pockets for maximum crispiness.
- Bake. Place the baking sheet with your ramekins in the preheated oven. Bake for 30-35 minutes, or until the filling is bubbly around the edges and the topping is golden brown. If the topping starts browning too quickly, tent loosely with foil for the last 10 minutes.
- Cool slightly. Let the crisp rest for 5-10 minutes before serving. This allows the filling to set up a bit — if you dive in immediately, it’ll be runny. Patience pays off here.
Your kitchen will smell absolutely incredible at this point. The cinnamon, the caramelizing apples, the toasty oats — it’s pure autumn in a dish.
Cooking Tips & Techniques
After making this recipe more times than I can count (including a few spectacular failures), here are the tips that make the biggest difference:
Use cold butter. This is non-negotiable for a crispy topping. If the butter warms up, your crumble will turn into a dense, sad paste. I sometimes pop my butter in the freezer for 10 minutes before cutting it into the flour mixture. Works like a charm.
Don’t overmix the topping. You want visible chunks of butter throughout. When those butter pockets melt in the oven, they create steam pockets that make the topping light and crispy. Overmixing gives you a uniform, tough crust.
Mix your apple varieties. Using two different types of apples gives you a more complex flavor and better texture. One breaks down slightly (creating that jammy filling) while the other holds its shape (giving you nice apple chunks). It’s a textural thing that really matters.
Let the apples macerate. That 5-10 minutes you let the sliced apples sit with sugar and lemon juice? It’s not wasted time. The sugar draws out moisture from the apples, which then combines with the flour to create a natural syrup. Skip this step, and your filling will be watery.
Watch your bake time. Ovens vary wildly. I’ve made this in three different ovens, and the bake time ranged from 28 to 38 minutes. Start checking at 25 minutes — look for bubbly edges and a deep golden-brown topping.
One mistake I’ll never make again: I once used quick oats because that’s what I had on hand. The topping turned into a mushy, gluey mess. Old-fashioned oats are worth the extra trip to the store.
Variations & Adaptations
This recipe is wonderfully flexible. Here are some variations I’ve tried and loved:
Gluten-Free Version: Swap the all-purpose flour with a 1:1 gluten-free flour blend, and use certified gluten-free oats. I’ve tested this with Bob’s Red Mill 1:1 Baking Flour, and it works perfectly. The texture is slightly more delicate, but the flavor is just as good.
Dairy-Free Version: Replace the butter with cold coconut oil or a vegan butter stick. I prefer using refined coconut oil (no coconut flavor) for the best results. The topping won’t be quite as crispy, but it’s still delicious.
Spiced Apple Crisp: Add 1/4 teaspoon of cardamom and a pinch of cloves to the filling for a more complex spice profile. This is my go-to during the holiday season — it pairs beautifully with a scoop of vanilla ice cream.
Pear or Apple-Pear Crisp: Swap one apple for a ripe but firm pear. Bosc or Anjou pears work best — they hold their shape and add a lovely sweetness. The combination of apple and pear is honestly underrated.
Nutty Crumble: Add 1/4 cup of chopped pecans or walnuts to the topping. Toast them lightly first for extra flavor. I did this on a whim one Thanksgiving, and it’s become my favorite variation.
Berry-Apple Crisp: Toss in a handful of fresh or frozen cranberries, blueberries, or raspberries with the apples. The tart berries balance the sweet apples beautifully. If using frozen berries, add an extra tablespoon of flour to absorb the extra moisture.
Feel free to experiment! This recipe is forgiving enough to handle substitutions without falling apart.
Serving & Storage Suggestions
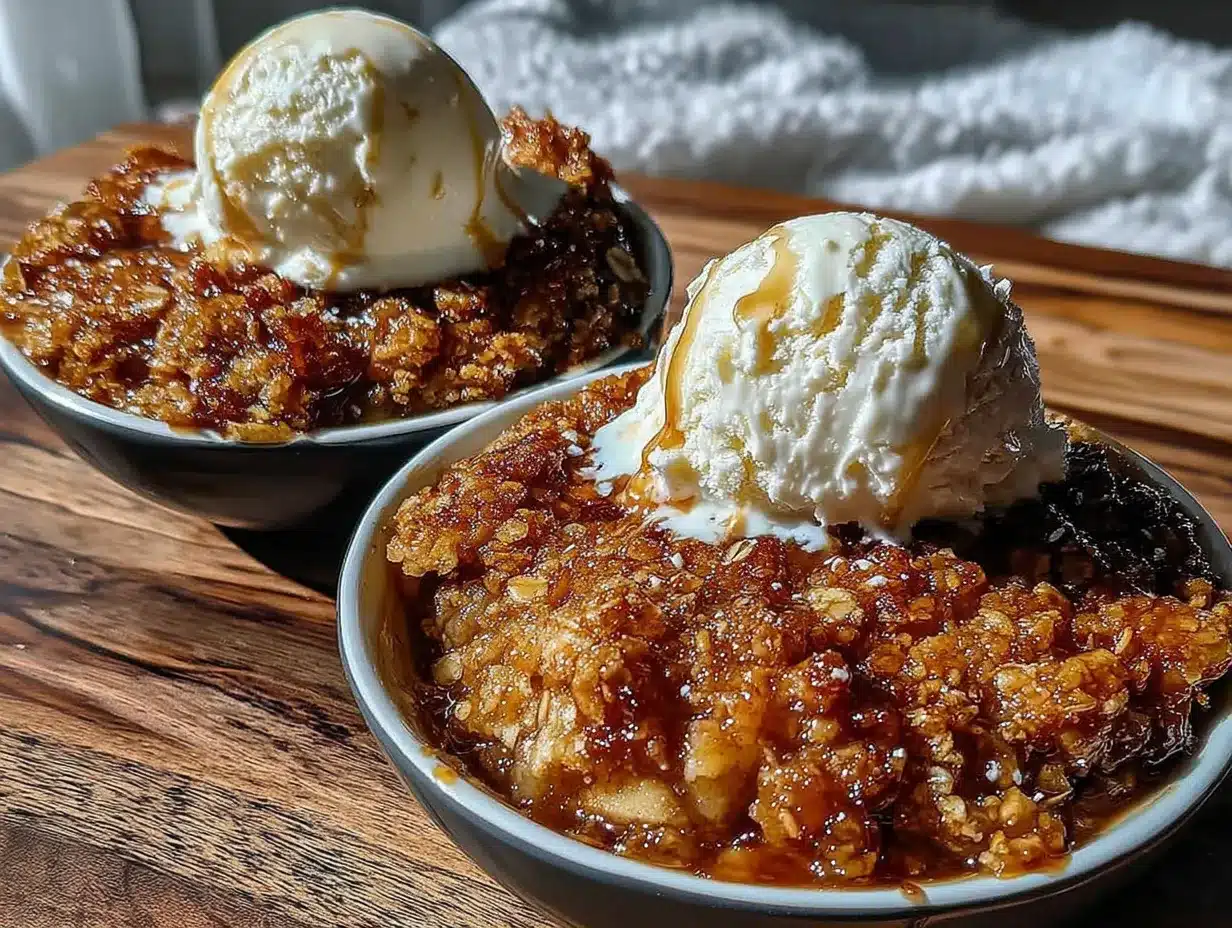
This apple crisp is best served warm, straight from the oven. The contrast between the hot, jammy apples and cold ice cream is pure magic. Here are my favorite ways to serve it:
- Classic: Top with a generous scoop of vanilla bean ice cream. The melting ice cream mingling with the warm apple filling is the stuff of dessert dreams.
- Extra Indulgent: Drizzle with salted caramel sauce and add a dollop of whipped cream. This turns it into a full-on dessert experience.
- Lighter Option: Serve with a dollop of Greek yogurt or a drizzle of heavy cream. It’s still satisfying but feels a bit less decadent.
- Breakfast Twist: Okay, this might be controversial, but leftover apple crisp with a spoonful of plain yogurt makes an incredible breakfast. Don’t knock it till you try it.
Storage instructions: If you have leftovers (unlikely, but possible), cover the ramekins tightly with plastic wrap or transfer to an airtight container. Store in the refrigerator for up to 3 days. The topping will lose some of its crispness, but the flavor will still be fantastic.
Reheating: The best way to reheat is in the oven at 300°F for about 10 minutes. This helps restore some of the topping’s crunch. The microwave works in a pinch (30 seconds), but the topping will be soft. If you’re reheating in the microwave, consider adding fresh granola on top for crunch.
Freezer-friendly: You can freeze the unbaked crisp for up to 3 months. Assemble everything in a freezer-safe dish, wrap tightly, and freeze. Bake directly from frozen, adding 10-15 minutes to the bake time. I’ve done this for last-minute guests, and it works beautifully.
Nutritional Information & Benefits
Let’s talk numbers. This recipe makes two servings, and here’s the approximate nutritional breakdown per serving (without ice cream or toppings):
- Calories: 380-420
- Fat: 16g
- Carbohydrates: 62g
- Fiber: 6g
- Sugar: 38g
- Protein: 4g
Now, let’s be honest — apple crisp isn’t health food. But it does have some redeeming qualities. Apples are packed with fiber and vitamin C, and oats provide soluble fiber that’s great for heart health. The cinnamon has anti-inflammatory properties, and the nuts (if you add them) offer healthy fats and protein.
This dessert is naturally vegetarian and can easily be made gluten-free or dairy-free. It contains wheat and dairy in its standard form. If you’re watching your sugar intake, you can reduce the sugar in both the filling and topping by about a third without sacrificing too much.
I like to think of this as a dessert that nourishes the soul. Sometimes that’s exactly what we need.
Conclusion
This cozy small-batch apple crisp for two has become my favorite way to end a quiet evening. It’s simple enough for a Tuesday night but special enough for a date night dessert. The combination of tender, cinnamon-spiced apples and buttery, golden crumble is comfort food at its finest.
What I love most about this recipe is how adaptable it is. You can make it your own — swap the apples, change up the spices, add nuts or berries. The base is solid, and the possibilities are endless.
I’d love to hear how yours turns out! Did you try a variation? Serve it with something unexpected? Leave a comment below and share your experience. And if you’re looking for more cozy fall desserts, you might also enjoy these cozy small-batch pumpkin chocolate chip muffins or this easy cinnamon streusel pumpkin bread with cream cheese swirl. Both are perfect for those days when you want something sweet but don’t need a full batch.
Happy baking, friends. Your kitchen is about to smell amazing.
Frequently Asked Questions
Can I make this apple crisp in advance?
Absolutely! You can assemble the crisp (without baking) up to 24 hours ahead. Cover and refrigerate, then bake as directed when you’re ready. You may need to add 5-10 minutes to the bake time since the dish will be cold.
What’s the best apple for apple crisp?
I recommend using a mix of sweet and tart apples. Honeycrisp and Granny Smith are my favorites. Braeburn, Fuji, and Pink Lady also work wonderfully. Avoid Red Delicious — they turn mushy and lack flavor.
Can I use quick oats instead of rolled oats?
I really don’t recommend it. Quick oats absorb moisture differently and will give you a soft, mushy topping instead of that lovely crispy crumble. Stick with old-fashioned rolled oats for the best texture.
How do I prevent the topping from burning?
If you notice the topping browning too quickly, loosely tent the ramekins with aluminum foil for the last 10 minutes of baking. Every oven runs a little differently, so keep an eye on it after the 25-minute mark.
Can I double this recipe?
Yes! Simply double all the ingredients and bake in an 8×8 or 9×9 inch baking dish. Increase the bake time to about 40-45 minutes, or until bubbly and golden. Perfect for when you’re serving a crowd or want leftovers.
Pin This Recipe!

Cozy Small-Batch Apple Crisp for Two

A perfectly portioned apple crisp for two, featuring tender cinnamon-spiced apples and a buttery, golden oat crumble. Ready in under an hour with simple pantry ingredients, this cozy dessert is ideal for date night or a quiet evening.
- Prep Time: 15 minutes
- Cook Time: 30 minutes
- Total Time: 45 minutes
- Yield: 2 servings 1x
- Category: Dessert
- Cuisine: American
Ingredients
- 2 medium apples (Honeycrisp and Granny Smith recommended)
- 2 tablespoons granulated sugar
- 1 tablespoon all-purpose flour
- 1 teaspoon ground cinnamon
- 1/4 teaspoon ground nutmeg
- 1 tablespoon lemon juice
- 1/2 cup old-fashioned rolled oats
- 1/2 cup all-purpose flour
- 1/3 cup packed brown sugar (light or dark)
- 1/4 teaspoon salt
- 1/4 cup cold unsalted butter, cut into small cubes
- 1/2 teaspoon vanilla extract
Instructions
- Preheat your oven to 350°F (175°C). Place two 8-ounce ramekins or a 1-quart baking dish on a small baking sheet.
- Peel, core, and slice the apples into roughly 1/4-inch thick pieces (about 2 cups).
- In a small bowl, toss the apple slices with granulated sugar, flour, cinnamon, nutmeg, and lemon juice until evenly coated. Let sit while preparing the topping.
- In a medium bowl, whisk together oats, flour, brown sugar, and salt. Add cold butter cubes and vanilla extract. Using a pastry cutter or fingertips, work the butter into the dry ingredients until the mixture resembles coarse crumbs with some pea-sized butter pieces remaining.
- Divide the apple mixture evenly between the ramekins (or spread in the baking dish). Sprinkle the topping evenly over the apples, pressing down gently.
- Bake for 30-35 minutes, or until the filling is bubbly around the edges and the topping is golden brown. If the topping browns too quickly, tent loosely with foil for the last 10 minutes.
- Let the crisp rest for 5-10 minutes before serving.
Notes
Use cold butter for a crispy topping. Don’t overmix the topping; visible butter chunks create crispy bits. Mix apple varieties for better texture. Let apples macerate with sugar and lemon juice to create natural syrup. Start checking doneness at 25 minutes. Avoid quick oats as they turn mushy.
Nutrition
- Serving Size: 1 ramekin (about 1 c
- Calories: 400
- Sugar: 38
- Sodium: 200
- Fat: 16
- Saturated Fat: 10
- Carbohydrates: 62
- Fiber: 6
- Protein: 4
Keywords: apple crisp, small-batch, for two, easy, fall dessert, comfort food, baked apples, oat crumble


