“You have to make that pumpkin cheesecake thing again.” That’s what my neighbor said, leaning over the fence last October, spatula in hand like she was ready to catch a slice mid-air. I’d brought over a pan of what I tentatively called “crustless pumpkin cheesecake bars” the night before, and she’d apparently finished half of them before breakfast. Not that I blamed her.
The thing is, I never set out to make a crustless version of anything. I love a good crust—don’t get me wrong. But that particular week, I’d run out of butter for the gingersnap base I usually make, and I was too stubborn to go to the store. So I did what any reasonable person would do: I crushed the gingersnaps I had left, mixed them with a little coconut oil, and sprinkled them on top instead of pressing them into the bottom. It was a happy accident, honestly. The crumble stayed crunchy, the filling stayed creamy, and suddenly I had a dessert that felt lighter but just as satisfying.
These creamy crustless pumpkin cheesecake bars with gingersnap crumble have become my fall signature. They’re the kind of dessert that makes people close their eyes after the first bite—not because it’s fancy, but because it tastes like everything good about autumn in one forkful. The pumpkin keeps it velvety, the cheesecake keeps it rich, and that crumble on top? Let’s just say it’s the reason my neighbor now checks my baking schedule before planning her grocery trips.
Why You’ll Love This Recipe
I’ve tested this recipe about seven times to get it just right—and by “tested,” I mean I ate a lot of pumpkin cheesecake bars over the course of a month. My family didn’t complain. Here’s why these bars have earned a permanent spot in my fall rotation:
- No Crust, No Fuss : Skipping the crust means you save at least 15 minutes of prep time. No pressing, no blind baking, no worrying about a soggy bottom. The crumble on top does all the heavy lifting—texture-wise and flavor-wise.
- Simple Ingredients : You probably have most of these in your pantry right now. Canned pumpkin, cream cheese, eggs, sugar, and a box of gingersnaps. No obscure specialty items required.
- Perfect for Fall Gatherings : Whether it’s Thanksgiving, a Friendsgiving potluck, or just a cozy Sunday with a cup of coffee, these bars travel well and look impressive with zero effort.
- Crowd-Pleaser : I’ve served these to kids, grandparents, and that one friend who “doesn’t really like pumpkin.” All of them asked for seconds. The gingersnap crumble converts people.
- Unbelievably Creamy : The texture is what gets people. It’s dense but silky, almost like a pumpkin panna cotta meets cheesecake. No cracking, no sinking—just smooth, velvety perfection.
What makes this recipe different from the dozens of pumpkin cheesecake bars out there? It’s the crustless approach combined with that crunchy, spiced topping. Most recipes bury the gingersnap flavor in a base that gets soft and sad by day two. Here, the crumble stays crisp, the cheesecake stays lush, and every bite gives you that satisfying contrast. It’s comfort food reimagined—simpler, faster, but with the same soul-soothing satisfaction that makes you close your eyes after that first forkful.
What Ingredients You Will Need
This recipe uses simple, wholesome ingredients to deliver bold flavor and satisfying texture without the fuss. Most of these are pantry staples, especially if you’re already in full fall baking mode.
For the Pumpkin Cheesecake Filling
- Cream cheese : 16 ounces (two 8-ounce blocks), softened to room temperature. I prefer full-fat Philadelphia for the creamiest texture—low-fat versions can make the filling grainy.
- Pumpkin puree : 1 cup (about half a 15-ounce can). Make sure you’re buying 100% pumpkin puree, not pumpkin pie filling. Libby’s is my go-to brand for consistent texture.
- Granulated sugar : ¾ cup. You can reduce this to ½ cup if you prefer a less sweet dessert, but I wouldn’t go lower—the sugar helps with structure.
- Brown sugar : ¼ cup, packed. Light or dark both work. Dark brown sugar adds a deeper molasses note that pairs beautifully with the spices.
- Large eggs : 2, at room temperature. Cold eggs can seize the cream cheese mixture and create lumps.
- Vanilla extract : 1 teaspoon. Pure vanilla makes a difference here, but imitation works in a pinch.
- Pumpkin pie spice : 1½ teaspoons. If you don’t have a blend, use ½ teaspoon cinnamon, ¼ teaspoon nutmeg, ¼ teaspoon ginger, and a pinch of cloves.
- Cinnamon : ½ teaspoon. Just for an extra warmth boost.
- Salt : ¼ teaspoon. It balances the sweetness and brightens the pumpkin flavor.
For the Gingersnap Crumble Topping
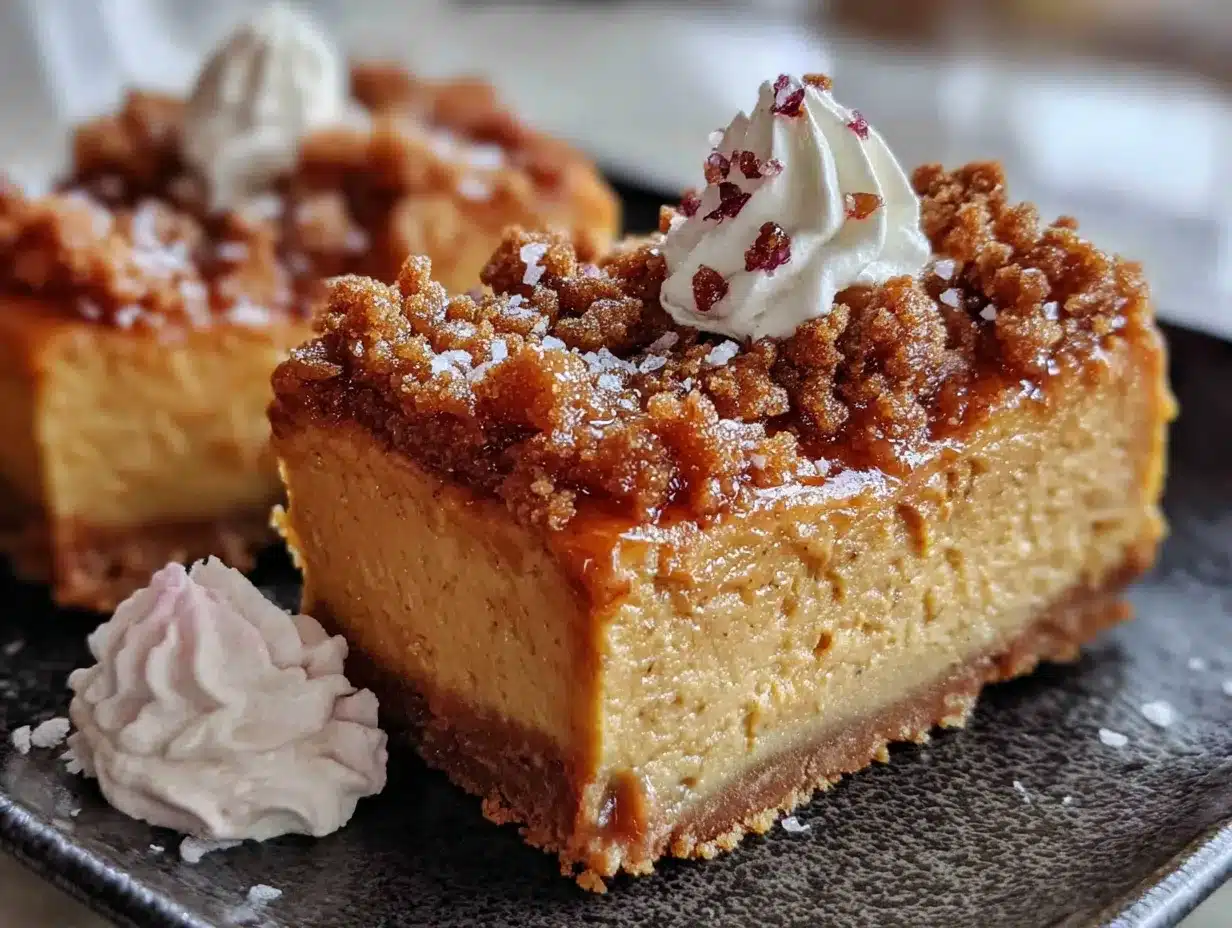
- Gingersnap cookies : 1½ cups, crushed (about 20-25 cookies). I use Nabisco Ginger Snaps—they’re sturdy, spicy, and crush beautifully. Avoid the soft-baked kind; you need dry, crunchy cookies here.
- Coconut oil : 3 tablespoons, melted. You can substitute unsalted butter if you prefer, but coconut oil keeps the crumble dairy-free and adds a subtle richness.
- Brown sugar : 2 tablespoons, packed. This helps the crumble caramelize slightly in the oven.
- Cinnamon : ¼ teaspoon. Just a pinch to tie everything together.
- Salt : A tiny pinch. Don’t skip it—it makes the sweet-spicy flavors pop.
Ingredient Selection Tip : Look for cream cheese that’s pliable but not greasy when you press it. If it’s too cold, let it sit on the counter for 30-45 minutes. For the gingersnaps, check the expiration date—stale cookies won’t give you that satisfying crunch.
Substitution Guidance : Need a gluten-free option? Use gluten-free gingersnap cookies (I’ve had good luck with Mi-Del brand). For a dairy-free version, swap the cream cheese with a high-quality dairy-free block alternative—just make sure it’s the block style, not the spreadable tub version, which has too much water content.
Equipment Needed
You don’t need a fancy kitchen to make these bars. Here’s what you’ll need:
- 9×9-inch baking pan : Glass or metal both work. I prefer metal for more even browning on the edges. If you only have an 8×8 pan, your bars will be slightly thicker and need an extra 5-7 minutes of baking time.
- Parchment paper : This is non-negotiable for easy removal. Leave overhang on two opposite sides so you can lift the whole block out.
- Electric hand mixer or stand mixer : You can mix by hand if your arm is up for it, but an electric mixer gives you that silky-smooth texture without lumps. I’ve made these with a whisk before—it took forever and my bicep was sore the next day. Not recommended.
- Large mixing bowl : For the cheesecake filling.
- Medium mixing bowl : For the crumble topping.
- Ziploc bag or rolling pin : For crushing the gingersnaps. A food processor works too, but I like the uneven texture you get from manual crushing—some bigger chunks, some fine crumbs.
- Rubber spatula : For scraping every last bit of that creamy filling into the pan.
- Measuring cups and spoons : Standard set. I recommend using dry measuring cups for the sugar and liquid measuring cups for the pumpkin puree.
Budget-Friendly Tip : If you don’t have a 9×9 pan, use an 8×8 or even a loaf pan—just adjust your baking time. I once made these in a disposable aluminum pan for a potluck, and they turned out perfectly. No need to invest in specialty equipment here.
Preparation Method
Let’s get to the good part. I’ve broken this down step by step so you don’t miss anything. Trust me—read through once before you start, and you’ll breeze through it.
Step 1: Prep Your Pan and Oven
Preheat your oven to 350°F (175°C). Line your 9×9-inch baking pan with parchment paper, leaving about 2 inches of overhang on two opposite sides. This creates handles for lifting the bars out later. Lightly grease the parchment with a thin layer of butter or non-stick spray—just to be safe.
Step 2: Make the Gingersnap Crumble
Place the gingersnap cookies in a ziploc bag and seal it, squeezing out the air. Use a rolling pin (or the bottom of a heavy skillet) to crush them into a mix of fine crumbs and small chunks—you want texture, not dust. Pour the crumbs into a medium bowl. Add the brown sugar, cinnamon, and salt. Drizzle in the melted coconut oil and stir with a fork until everything looks like wet sand. Set aside.
Pro tip from my kitchen : If your crumble clumps together when you press it between your fingers, you’ve got the right consistency. If it’s dry and falls apart, add another teaspoon of melted coconut oil.
Step 3: Beat the Cream Cheese
In a large mixing bowl, beat the softened cream cheese with an electric mixer on medium speed until it’s completely smooth—about 2 minutes. Scrape down the sides and bottom of the bowl with your rubber spatula. This step is crucial. If you skip it, you’ll end up with lumps of cream cheese in your finished bars, and nobody wants that.
Step 4: Add the Sugars
Add the granulated sugar and brown sugar to the cream cheese. Beat on medium speed for another 1-2 minutes until the mixture is light and fluffy. You’ll notice it becomes slightly paler in color. That’s a good sign—it means you’re incorporating air, which helps keep the texture light.
Step 5: Incorporate the Eggs
Add the eggs one at a time, beating on low speed after each addition just until the yolk disappears. Overmixing at this stage can incorporate too much air, which leads to cracks on the surface of your cheesecake. I learned this the hard way after making a batch that looked like the Grand Canyon.
Step 6: Add the Pumpkin and Flavorings
Add the pumpkin puree, vanilla extract, pumpkin pie spice, cinnamon, and salt. Beat on low speed until everything is combined and the mixture is a uniform orange-tan color. Scrape the bowl again to make sure there are no hidden streaks of cream cheese. The batter should be thick, smooth, and smell absolutely incredible at this point.
Step 7: Pour and Sprinkle
Pour the pumpkin cheesecake filling into your prepared pan. Use the spatula to spread it into an even layer—take your time here. Uneven layers mean uneven baking. Now sprinkle the gingersnap crumble evenly over the top. Don’t press it in; just let it sit on top like a crunchy blanket.
Step 8: Bake
Bake at 350°F (175°C) for 35-40 minutes. The edges should look set and slightly puffed, but the center should still jiggle just a little when you gently shake the pan—like Jell-O, not soup. If you insert a toothpick near the center, it should come out with a few moist crumbs, not wet batter.
Sensory cue : Around the 25-minute mark, your kitchen will smell like a fall candle factory exploded. The gingersnaps will toast and deepen in color, and you’ll see the edges of the cheesecake pulling away slightly from the parchment.
Step 9: Cool Completely
Let the pan cool on a wire rack for 1 hour at room temperature. Then transfer it to the refrigerator and chill for at least 4 hours—overnight is even better. I know it’s hard to wait, but this step is non-negotiable. The bars need time to set properly, and slicing them warm will give you a goopy mess. Trust the process.
Step 10: Slice and Serve
Once fully chilled, lift the entire block out of the pan using the parchment overhang. Place it on a cutting board. Use a sharp knife to slice into 9 or 16 bars (depending on how generous you’re feeling). Wipe the knife clean between cuts for neat edges. Let the bars sit at room temperature for 10 minutes before serving—it brings back the creamy texture.
Cooking Tips & Techniques
After making these bars more times than I care to admit, I’ve collected a few hard-won lessons. Here’s what I wish someone had told me the first time:
Room temperature ingredients matter . I know, I know—every recipe says this. But with cheesecake, it’s genuinely the difference between silky smooth and lumpy disaster. Cold cream cheese doesn’t blend evenly, and cold eggs can cause the batter to curdle. Set everything out 30-45 minutes before you start. If you forget (which I do, constantly), cut the cream cheese into small cubes and microwave it in 10-second bursts until it’s soft but not melted.
Don’t overmix after adding the eggs . This is the most common mistake I see. Too much air in the batter leads to cracks on the surface. Mix on low speed and stop as soon as the yolk disappears. Your bars will thank you.
That jiggle test is your friend . I used to overbake my cheesecakes because I was terrified of undercooked eggs. But here’s the thing: cheesecake continues to set as it cools. If you bake it until the center is completely firm, you’ll end up with a dry, crumbly texture. Pull it out when the center still wobbles slightly—it will finish cooking from residual heat.
The cooling process is a two-step dance . Room temperature first, then the fridge. If you put a hot pan directly into the refrigerator, condensation forms on the surface and makes the top soggy. I learned this after ruining a beautiful batch that looked like it had been rained on.
For clean slices, use a hot knife . Run your knife under hot water, dry it off, then slice. Wipe clean and repeat between each cut. This gives you those gorgeous, bakery-style edges that make people think you spent hours on presentation.
Variations & Adaptations
One of the best things about this recipe is how flexible it is. Here are some variations I’ve tried and loved:
Gluten-Free Version : Use gluten-free gingersnap cookies for the crumble. I’ve tested this with Mi-Del brand, and the texture is almost identical. The cheesecake filling itself is naturally gluten-free, so this swap is easy.
Dairy-Free Version : Swap the cream cheese with a high-quality dairy-free block alternative (I like Kite Hill or Violife). Use coconut oil in the crumble instead of butter. The texture will be slightly less dense, but still delicious. I served this version to a friend with dairy allergies, and she asked for the recipe before she even finished her first bar.
Spiced Pecan Crumble : Add ½ cup of finely chopped pecans to the gingersnap crumble mixture. Toast them lightly in a dry pan first for extra flavor. This adds a lovely nutty crunch that pairs beautifully with the pumpkin.
Chocolate Twist : Sprinkle ¼ cup of mini chocolate chips over the cheesecake filling before adding the crumble. The chocolate melts into little pockets of richness—perfect for when you want a dessert that’s both pumpkin and chocolate. My kids beg for this version every time.
Maple Glaze Drizzle : For extra decadence, whisk together ½ cup powdered sugar, 2 tablespoons maple syrup, and 1 tablespoon milk. Drizzle over the cooled bars before slicing. It adds a beautiful finish and an extra layer of fall flavor.
Low-Sugar Option : Reduce the granulated sugar to ½ cup and use a sugar-free brown sugar substitute. The texture will be slightly less tender, but the flavor still shines. I’ve made this for a diabetic friend, and she said it was the best pumpkin dessert she’d had in years.
Serving & Storage Suggestions
These bars are versatile enough for any occasion. Here’s how to make the most of them:
Serving Temperature : For the creamiest texture, let the bars sit at room temperature for 10-15 minutes before serving. Straight from the fridge, they’re firmer and more like cheesecake. At room temperature, they’re almost mousse-like. Both are delicious—it’s a matter of preference.
Presentation Ideas : Dust the tops with a light sprinkle of cinnamon or pumpkin pie spice before serving. A dollop of whipped cream on each bar adds a beautiful contrast. For a fall dessert board, arrange the bars on a platter with caramel apple cider sangria and fresh apple slices.
What to Serve With Them : These bars pair beautifully with a hot cup of coffee or chai tea. For a full fall dessert spread, serve them alongside brown butter pumpkin snickerdoodle cookies and a scoop of vanilla ice cream. The combination of warm spices and cold cream is unbeatable.
Refrigerator Storage : Store the bars in an airtight container in the refrigerator for up to 5 days. Place a sheet of parchment paper between layers to prevent the crumble from sticking. The flavor actually improves after a day or two as the spices meld together.
Freezer Storage : These bars freeze beautifully. Wrap individual slices tightly in plastic wrap, then place them in a freezer-safe bag or container. They’ll keep for up to 3 months. To thaw, transfer a slice to the refrigerator overnight. The crumble might soften slightly, but the flavor stays perfect.
How Flavors Develop : Honestly, these bars taste even better on day two. The pumpkin and spice flavors deepen, and the texture becomes creamier as everything settles. If you can resist eating them all on day one, you’re in for a real treat on day two.
Nutritional Information & Benefits
While these bars are definitely a treat, they do offer some nutritional perks. Here’s a rough breakdown per serving (based on 9 servings):
- Calories : Approximately 320-350 per bar
- Protein : 6-7 grams (thanks to the cream cheese and eggs)
- Carbohydrates : 30-35 grams
- Fat : 20-22 grams
- Fiber : 2-3 grams (from the pumpkin)
- Sugar : 24-28 grams
Health Benefits of Key Ingredients : Pumpkin is packed with vitamin A (great for eye health), fiber, and antioxidants. Cream cheese provides calcium and protein. Gingersnaps contain ginger, which has anti-inflammatory properties. It’s not health food, but it’s not empty calories either.
Dietary Considerations : This recipe is naturally vegetarian. For gluten-free and dairy-free options, see the variations section above. The bars contain eggs and dairy, so they’re not suitable for vegan diets without significant modification.
My Personal Perspective : I believe in balance. These bars are a special treat, not an everyday snack. But when you’re going to have dessert anyway, making it from scratch with real ingredients—pumpkin, cream cheese, eggs, spices—feels a lot better than reaching for a box of processed snacks. Plus, the joy of sharing them with people you love? That’s good for the soul too.
Frequently Asked Questions
Can I use fresh pumpkin instead of canned?
Yes, but you’ll need to roast and puree it first, then strain it through cheesecloth to remove excess water. Fresh pumpkin has more moisture than canned, which can make the bars watery. I’ve done it before, and it works—it’s just more work. Canned pumpkin is more consistent and honestly, just as delicious.
Why did my cheesecake crack on top?
Cracks usually happen from overmixing the eggs or overbaking. Make sure you’re mixing on low speed after adding the eggs, and pull the bars out when the center still jiggles slightly. Cooling them slowly (room temperature first, then fridge) also helps prevent cracks. If they do crack, don’t worry—the crumble topping covers imperfections beautifully.
Can I make these bars in advance for a party?
Absolutely. In fact, I recommend it. These bars need at least 4 hours to chill, but they’re even better after 24 hours. Make them a day ahead, keep them in the fridge, and slice just before serving. The crumble might soften slightly overnight, but the flavor deepens beautifully.
Can I use a different cookie for the crumble?
Yes, but the flavor will change. Graham crackers work in a pinch—add extra cinnamon and ginger to mimic the spice profile. Shortbread cookies create a milder, buttery crumble. Speculoos or biscoff cookies are excellent alternatives with a similar spiced flavor. Just avoid soft cookies like chocolate chip or oatmeal raisin—they won’t crisp up properly.
How do I know when the bars are done baking?
The edges should look set and slightly puffed, while the center still jiggles like Jell-O when you gently shake the pan. A toothpick inserted near the center should come out with a few moist crumbs, not wet batter. If the toothpick comes out clean, you’ve overbaked them. Remember—cheesecake continues to set as it cools.
Conclusion
These creamy crustless pumpkin cheesecake bars with gingersnap crumble have become my fall signature for a reason. They’re simple enough for a Tuesday night treat but impressive enough for Thanksgiving dessert. The no-crust approach saves time without sacrificing flavor, and that crunchy, spicy crumble on top is honestly the best part.
I love that this recipe lets the pumpkin and cream cheese shine without being weighed down by a heavy crust. It’s lighter, creamier, and somehow more satisfying than traditional pumpkin cheesecake. And honestly? It’s the kind of dessert that makes people ask for the recipe before they’ve even finished their first bite.
If you’re looking for more cozy fall desserts, you might also enjoy these easy maple pumpkin dump cake with pecan crumble or these cozy small batch pumpkin chocolate chip muffins for a quicker treat. And if you’re planning a fall gathering, this homemade pumpkin spice latte pairs perfectly with a slice of these bars.
I’d love to hear how yours turn out. Did you try a variation? Did the crumble disappear before you could slice the bars? (Mine does, every single time.) Drop a comment below and let me know—I read every single one, and I’m always looking for new ideas to try in my own kitchen. Happy baking, friends. 🍂
Pin This Recipe!
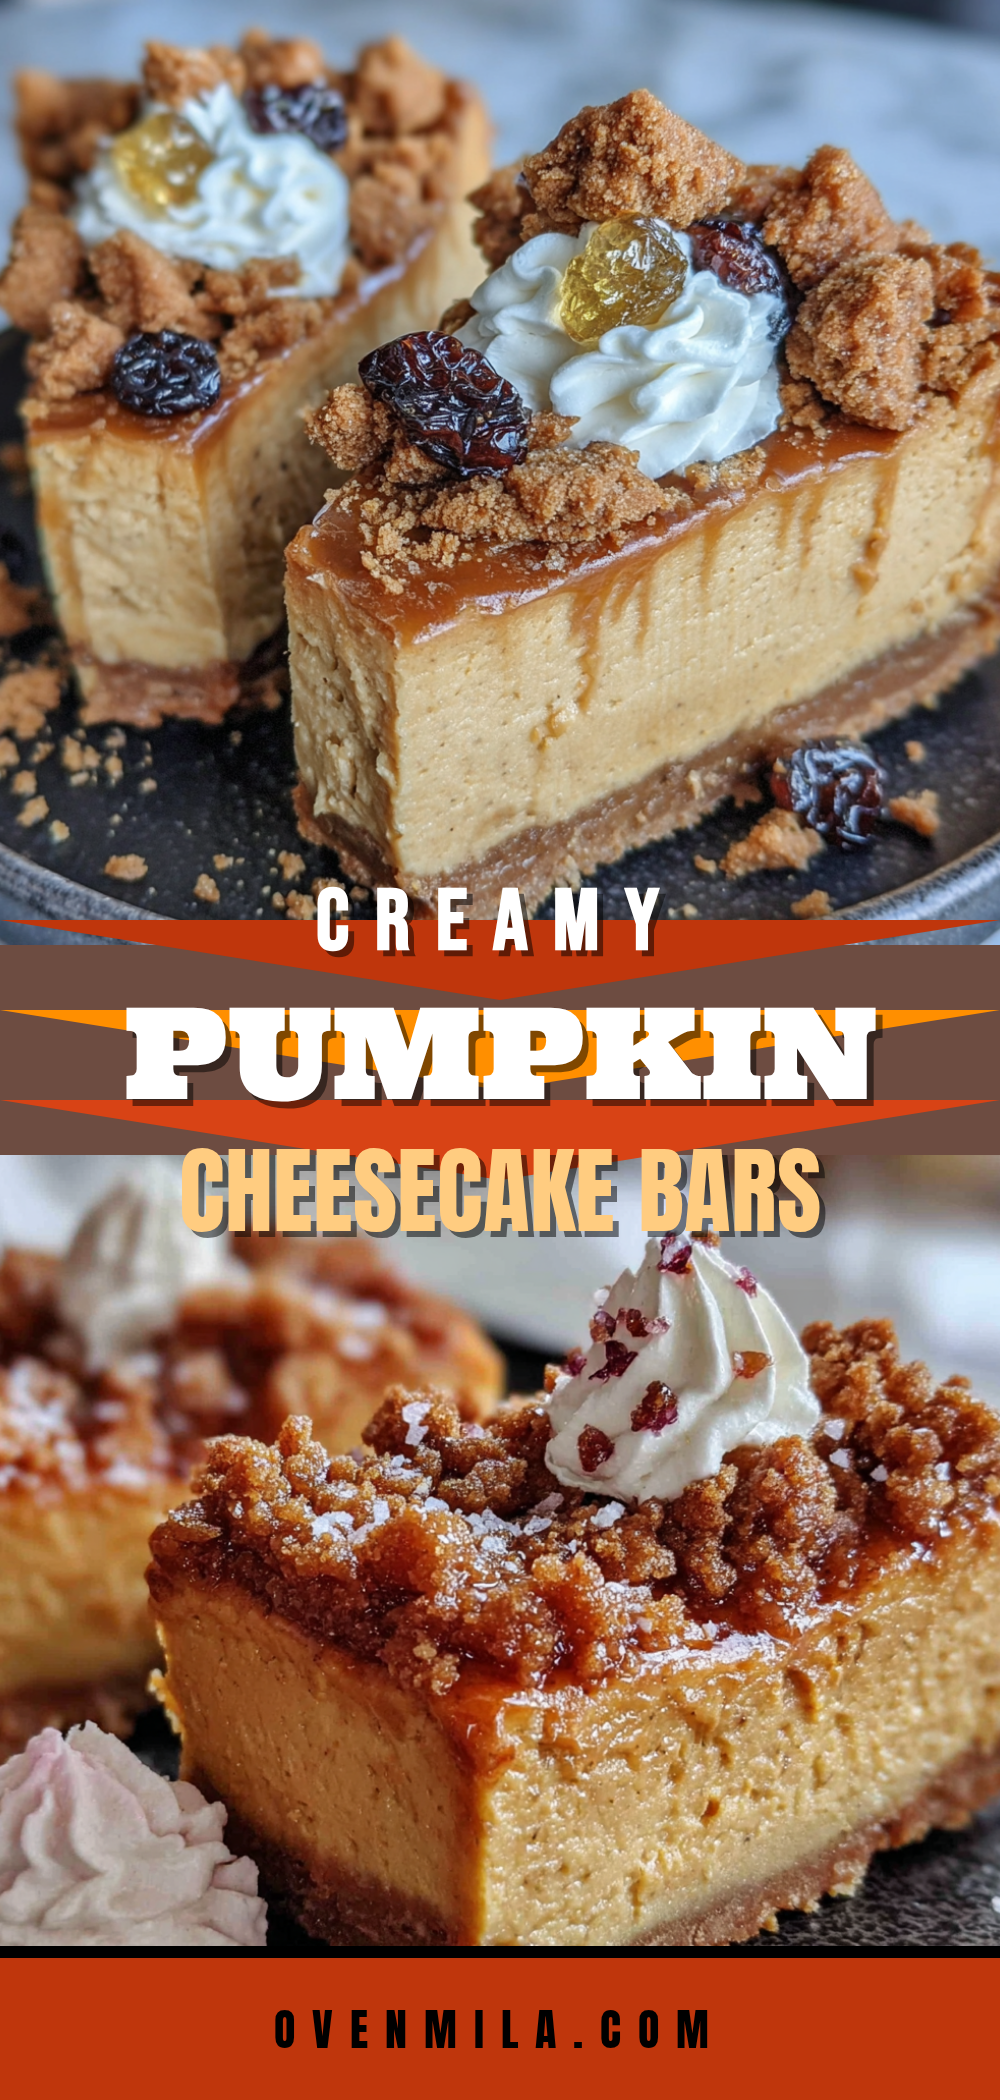
Creamy Crustless Pumpkin Cheesecake Bars with Gingersnap Crumble
These creamy crustless pumpkin cheesecake bars with a crunchy gingersnap crumble are a simple, no-fuss fall dessert that’s perfect for gatherings. The crustless approach saves time while the spiced topping adds texture and flavor.
- Prep Time: 20 minutes
- Cook Time: 35-40 minutes
- Total Time: 4 hours 55 minutes (includes chilling)
- Yield: 9-16 servings 1x
- Category: Dessert
- Cuisine: American
Ingredients
- 16 ounces cream cheese, softened to room temperature
- 1 cup pumpkin puree (about half a 15-ounce can)
- ¾ cup granulated sugar
- ¼ cup packed brown sugar
- 2 large eggs, at room temperature
- 1 teaspoon vanilla extract
- 1½ teaspoons pumpkin pie spice
- ½ teaspoon cinnamon
- ¼ teaspoon salt
- 1½ cups crushed gingersnap cookies (about 20–25 cookies)
- 3 tablespoons melted coconut oil
- 2 tablespoons packed brown sugar
- ¼ teaspoon cinnamon
- A tiny pinch of salt
Instructions
- Preheat your oven to 350°F (175°C). Line a 9×9-inch baking pan with parchment paper, leaving about 2 inches of overhang on two opposite sides. Lightly grease the parchment with butter or non-stick spray.
- Make the gingersnap crumble: Place the gingersnap cookies in a ziploc bag and crush them with a rolling pin into a mix of fine crumbs and small chunks. Pour into a medium bowl. Add 2 tablespoons brown sugar, ¼ teaspoon cinnamon, and a tiny pinch of salt. Drizzle in the melted coconut oil and stir with a fork until the mixture looks like wet sand. Set aside.
- In a large mixing bowl, beat the softened cream cheese with an electric mixer on medium speed until completely smooth, about 2 minutes. Scrape down the sides and bottom of the bowl.
- Add the granulated sugar and ¼ cup brown sugar to the cream cheese. Beat on medium speed for 1-2 minutes until light and fluffy.
- Add the eggs one at a time, beating on low speed after each addition just until the yolk disappears. Do not overmix.
- Add the pumpkin puree, vanilla extract, pumpkin pie spice, ½ teaspoon cinnamon, and ¼ teaspoon salt. Beat on low speed until combined and the mixture is a uniform orange-tan color. Scrape the bowl again.
- Pour the pumpkin cheesecake filling into the prepared pan and spread into an even layer. Sprinkle the gingersnap crumble evenly over the top. Do not press it in.
- Bake at 350°F (175°C) for 35-40 minutes. The edges should look set and slightly puffed, but the center should still jiggle slightly when you gently shake the pan.
- Let the pan cool on a wire rack for 1 hour at room temperature. Then transfer to the refrigerator and chill for at least 4 hours, preferably overnight.
- Once fully chilled, lift the entire block out of the pan using the parchment overhang. Place on a cutting board and slice into 9 or 16 bars using a sharp knife. Wipe the knife clean between cuts. Let the bars sit at room temperature for 10 minutes before serving.
Notes
Room temperature ingredients are crucial for a smooth texture. Do not overmix after adding eggs to prevent cracks. The bars continue to set as they cool, so pull them out when the center still jiggles slightly. For clean slices, use a hot knife. The flavor improves after a day or two.
Nutrition
- Serving Size: 1 bar (based on 9 se
- Calories: 320350
- Sugar: 2428
- Sodium: 250300
- Fat: 2022
- Saturated Fat: 1012
- Carbohydrates: 3035
- Fiber: 23
- Protein: 67
Keywords: pumpkin cheesecake bars, crustless cheesecake, gingersnap crumble, fall dessert, Thanksgiving dessert, easy cheesecake bars


