I burned the cheese topping on my mac and cheese at least three times before I figured out how to get that perfect crispy crust without turning it into a charred mess. It’s funny because I don’t even usually care that much about mac and cheese, but once the Hatch green chiles came into the picture, everything changed. The first time I roasted those chiles in my oven, their smoky, slightly spicy aroma filled the kitchen and honestly distracted me from the cheese bubbling in the background. I ended up with a mix of crispy and gooey that was sort of accidental but ended up tasting like some kind of homey magic.
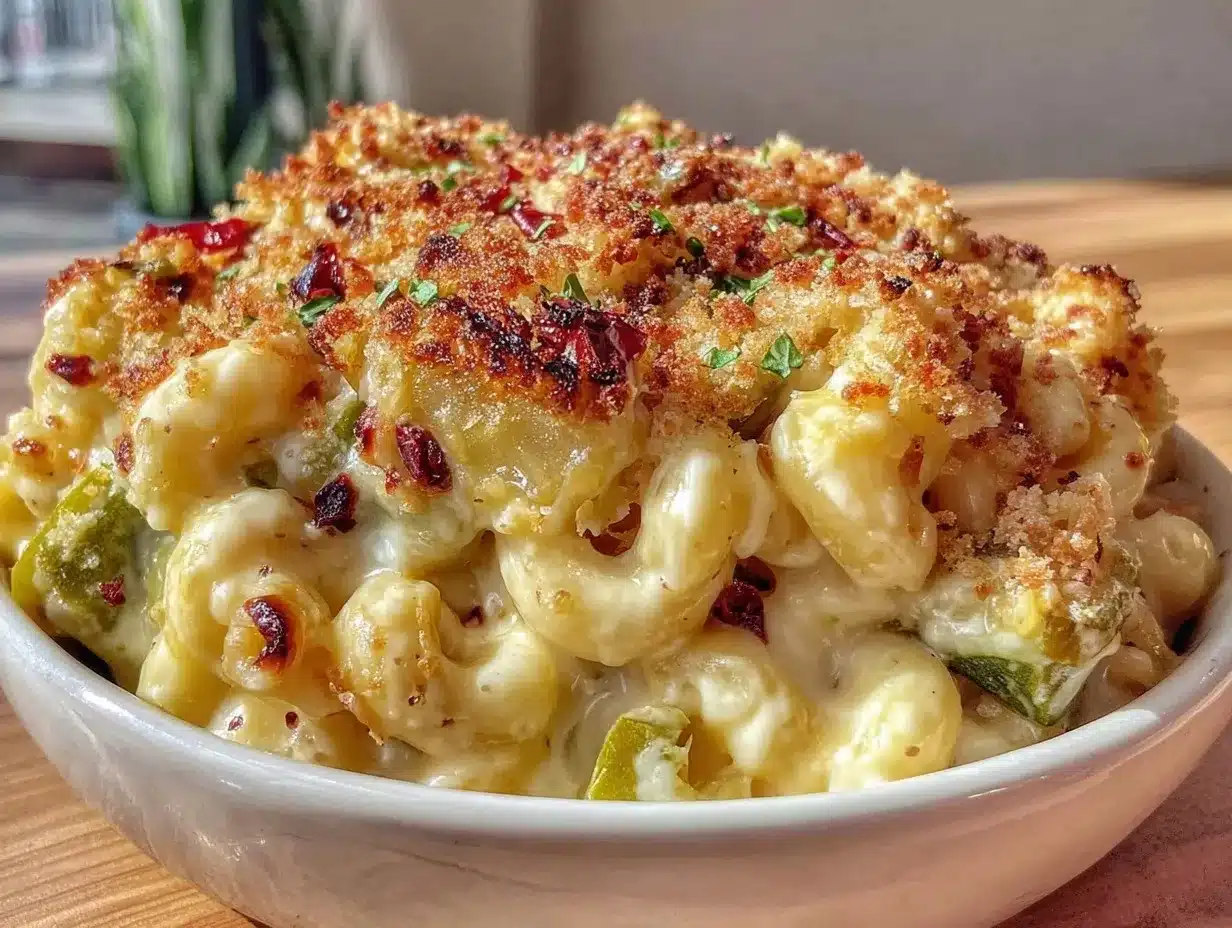
What really clicks with this crispy roasted Hatch green chile mac and cheese is the way the smoky heat cuts through the creamy cheese sauce — it’s not just another mac and cheese. Plus, that crust? It’s not just crunchy; it’s got this almost nutty toasted flavor from the panko and browned cheese that makes you want to scrape every last bit off the pan. I remember thinking, “Why didn’t I try this combo sooner?” The subtle heat from the Hatch chiles wakes up your palate but doesn’t punch you in the face, making it ideal for folks who want a little thrill without a fire alarm.
So yeah, this recipe stuck with me because it’s honest comfort food with a twist — something that feels like a treat but is straightforward enough to whip up on a random weeknight. And if you’re like me, sometimes you want that satisfying crunch on top without spending forever babysitting the oven. This crispy roasted Hatch green chile mac and cheese hits all those marks, quietly promising a cozy, flavorful meal whenever you need it.
Why You’ll Love This Recipe
- Quick & Easy: Ready in under 45 minutes, perfect for busy nights when you just want something comforting without fuss.
- Simple Ingredients: No hunting for exotic stuff here; just pantry staples and fresh Hatch green chiles (or jarred if you’re in a pinch).
- Perfect for Casual Gatherings: Whether it’s a family dinner or a laid-back potluck, this mac and cheese always disappears fast.
- Crowd-Pleaser: Kids love the cheesy goodness, adults dig the smoky chile kick — everybody wins.
- Unbelievably Delicious: The crispy panko topping combined with the roasted green chiles creates a flavor and texture combo that’s downright addictive.
This isn’t just any mac and cheese recipe. The secret is in roasting those Hatch green chiles yourself (if you can), which brings out a deep, smoky sweetness that jarred chiles just don’t have. Plus, blending a little bit of sharp cheddar with creamy Monterey Jack and a splash of cream creates a sauce that’s silky smooth but packed with flavor. The crispy topping is where I really took my time experimenting — mixing panko breadcrumbs with a small handful of grated Parmesan and a touch of smoked paprika adds a toasty, slightly smoky crunch that contrasts beautifully with the melty cheese underneath.
Honestly, this recipe stuck with me because it’s like comfort food with a little more personality. It’s the kind of dish you want to make when you’re craving something familiar but also want to impress yourself (and maybe your guests) just a bit. Plus, it pairs so well with bright, fresh sides — which reminds me of the fresh quinoa salad recipe I love making when I want a lighter touch alongside this rich meal.
What Ingredients You Will Need
This recipe uses simple, wholesome ingredients to deliver bold flavor and satisfying texture without the fuss. Most of these are pantry staples, and the Hatch green chiles are the star that brings everything to life.
- Elbow Macaroni: 12 ounces (340 grams) – classic small pasta shape that holds sauce well.
- Hatch Green Chiles: 3 medium-sized, roasted and peeled (or 1 cup jarred roasted Hatch chiles if fresh aren’t available).
- Unsalted Butter: 4 tablespoons (57 grams), divided – for richness in the sauce and topping.
- All-Purpose Flour: 1/4 cup (30 grams) – to thicken the cheese sauce.
- Whole Milk: 2 1/2 cups (600 ml), warmed – creates a creamy base for the cheese sauce.
- Sharp Cheddar Cheese: 2 cups shredded (about 8 ounces / 225 grams) – provides that classic sharp flavor.
- Monterey Jack Cheese: 1 cup shredded (about 4 ounces / 115 grams) – melts beautifully and adds creaminess.
- Parmesan Cheese: 1/2 cup grated (about 1.5 ounces / 40 grams) – mixed into the topping for extra umami and crispiness.
- Panko Breadcrumbs: 1 cup (about 50 grams) – for that irresistible crunch on top.
- Smoked Paprika: 1 teaspoon – adds a subtle smoky warmth to the topping.
- Garlic Powder: 1/2 teaspoon – enhances the overall flavor.
- Salt and Black Pepper: To taste – seasoning is key, don’t be shy.
For the freshest flavor, I recommend roasting your Hatch green chiles at home if possible – it’s straightforward and the smoky aroma is worth the effort. If fresh isn’t an option, the jarred roasted Hatch chiles from brands like Hatch Chile Company or Santa Fe are solid alternatives. For a gluten-free version, swapping the all-purpose flour for a gluten-free blend and using gluten-free panko works well.
Equipment Needed
- Large Pot: For boiling the macaroni – something sturdy and roomy helps avoid sticky noodles.
- Large Skillet or Saucepan: To make the cheese sauce – a heavy-bottomed pan prevents scorching.
- Baking Dish: Around 9×13 inches (23×33 cm) – ideal size for even baking and crispy topping development.
- Mixing Bowls: For combining the topping ingredients and mixing pasta with sauce.
- Roasting Pan or Baking Sheet: If roasting fresh Hatch chiles yourself – a rimmed sheet works perfectly.
- Grater: For shredding cheeses fresh – I prefer a box grater for texture control.
- Whisk and Wooden Spoon: For stirring the sauce and combining ingredients.
If you don’t have a roasting pan, a sturdy baking sheet lined with foil will do just fine for chiles. When it comes to baking dishes, I’ve found ceramic or glass pans promote even browning better than metal ones, but any oven-safe dish will work. For budget-friendly options, a basic nonstick skillet and a disposable aluminum baking tray can get you through the recipe with minimal cleanup.
Preparation Method
- Roast the Hatch Green Chiles: Preheat your oven to 450°F (230°C). Place the whole green chiles on a baking sheet and roast for about 15-20 minutes, turning every 5 minutes until the skin is blistered and blackened. Remove from oven and let cool in a covered bowl or sealed bag for 10 minutes. Peel off the charred skin, remove seeds, and roughly chop the flesh. (If using jarred chiles, simply drain and chop.)
- Cook the Macaroni: Bring a large pot of salted water to a boil. Add 12 ounces (340 grams) elbow macaroni and cook according to package instructions until just al dente (usually around 7-8 minutes). Drain well and set aside. You want the pasta a little undercooked since it will bake further.
- Make the Cheese Sauce: In a large skillet or saucepan, melt 3 tablespoons (43 grams) of butter over medium heat. Whisk in 1/4 cup (30 grams) flour and cook for about 2 minutes until pale golden and bubbling, stirring constantly to avoid lumps. Gradually pour in 2 1/2 cups (600 ml) warmed whole milk, whisking continuously until smooth and thickened, about 5-7 minutes. The sauce should coat the back of a spoon.
- Add the Cheeses: Remove the sauce from heat and stir in 2 cups (225 grams) shredded sharp cheddar and 1 cup (115 grams) shredded Monterey Jack until melted and smooth. Season with salt, pepper, and 1/2 teaspoon garlic powder. Stir in the chopped Hatch green chiles, folding gently to distribute evenly.
- Combine Pasta and Sauce: Add the drained macaroni to the cheese sauce, stirring gently to coat every piece. Pour the mixture into a greased 9×13 inch (23×33 cm) baking dish, spreading evenly.
- Prepare the Topping: In a small bowl, melt the remaining 1 tablespoon (14 grams) butter. Mix in 1 cup (50 grams) panko breadcrumbs, 1/2 cup (40 grams) grated Parmesan, 1 teaspoon smoked paprika, and a pinch of salt and pepper. Sprinkle the mixture evenly over the mac and cheese.
- Bake: Place the dish in the preheated oven at 375°F (190°C) and bake uncovered for 20-25 minutes until the topping is golden brown and crispy. For extra crispiness, switch to broil for the last 2-3 minutes but watch carefully to avoid burning.
- Rest and Serve: Let the mac and cheese sit for 5-10 minutes after baking so it firms up slightly and the flavors settle. Scoop into bowls and enjoy while warm.
If your cheese sauce feels too thick before adding pasta, stir in a splash more milk. If the topping browns too quickly, loosely tent with foil halfway through baking. The roasted Hatch green chiles should smell smoky but not overpower the cheese — that balance is key.
Cooking Tips & Techniques
Getting the topping perfectly crispy without burning took me a few tries. I learned that mixing panko with a little melted butter and Parmesan helps it brown evenly and stay crunchy rather than dry and brittle. Also, I always warm the milk before adding it to the roux — cold milk can cause lumps and slows down thickening.
When roasting the Hatch chiles, don’t skip the resting step covered in a bowl or bag; it makes peeling the skins so much easier. Leaving some seeds inside adds a nice mild heat, but if you want less spice, remove all seeds carefully.
Timing is your friend here. Cook the pasta just shy of al dente since it will bake more and soak up sauce. Overcooked pasta turns mushy fast. Also, stirring in the chiles last keeps their texture intact and prevents the sauce from turning too bitter.
One trick I picked up is to let the mac and cheese rest after baking — this step helps the sauce thicken slightly, making serving less messy. I also recommend using a mix of cheeses; sharp cheddar gives tang, Monterey Jack melts smoothly, and Parmesan boosts the topping flavor.
Variations & Adaptations
You can easily tweak this recipe to fit different tastes and dietary needs:
- Spicy Kick: Add a pinch of cayenne or chipotle powder to the cheese sauce for more heat, or toss in diced jalapeños along with the Hatch chiles.
- Vegetarian Twist: Stir in sautéed mushrooms, caramelized onions, or roasted corn for added texture and flavor.
- Gluten-Free: Use gluten-free pasta, substitute the all-purpose flour with a gluten-free blend, and swap regular panko for gluten-free panko breadcrumbs.
- Dairy-Free: Replace butter with olive oil or vegan margarine, use plant-based milk (like oat or almond), and swap cheese for vegan cheese alternatives designed for melting.
- Cheese Swap: Try smoked gouda or fontina in place of Monterey Jack for a different depth of flavor.
Personally, I once made a version with roasted Hatch chiles and chunks of smoky pulled jackfruit that paired beautifully — similar in spirit to the smoky flavors in those jackfruit sliders. It was an unexpected but delicious combo.
Serving & Storage Suggestions
This crispy roasted Hatch green chile mac and cheese is best served warm, straight out of the oven when the topping is still crunchy and the cheese sauce is luscious. It pairs wonderfully with a fresh salad like the fresh quinoa salad to balance richness with brightness.
Leftovers keep well in the fridge for up to 3 days, covered tightly. Reheat in the oven at 350°F (175°C) for 15-20 minutes to revive the crispy topping, or microwave gently with a damp paper towel to avoid drying out the sauce. The flavors meld nicely overnight, so sometimes the second-day version tastes even better.
If you want to freeze, portion into airtight containers and freeze for up to 2 months. Thaw in the fridge overnight before reheating. Keep in mind the topping may lose some crunch when frozen but will still taste delicious.
Nutritional Information & Benefits
A serving of this Hatch green chile mac and cheese contains roughly 450-500 calories, with about 20 grams of fat and 25 grams of carbohydrates. The cheeses provide a good dose of calcium and protein, making it a satisfying meal.
Hatch green chiles are rich in vitamins A and C and bring a gentle metabolism boost thanks to their capsaicin content. Using whole milk keeps the sauce creamy but balanced. For those watching carbs, swapping the elbow macaroni for a legume-based pasta can reduce the carb load.
This dish is vegetarian-friendly but contains dairy and gluten unless modified. From a wellness perspective, it’s a hearty option that pairs well with fresh vegetable sides to round out the meal.
Conclusion
This crispy roasted Hatch green chile mac and cheese recipe is an honest-to-goodness crowd-pleaser that brings a smoky, spicy twist to classic comfort food. Its ease and bold flavor have made it a go-to in my kitchen for nights when I want something both cozy and a bit special. I hope you find it as satisfying and approachable as I do — don’t hesitate to tweak it to your taste and make it your own.
I’d love to hear how you put your spin on this dish, whether you try adding extra heat or pair it with a bright side like the fresh avocado and smoked salmon crostini I adore. Feel free to leave a comment sharing your experience or questions — cooking is better when it’s shared!
FAQs About Crispy Roasted Hatch Green Chile Mac and Cheese
Can I use canned green chiles instead of fresh Hatch chiles?
Yes, you can use jarred roasted Hatch green chiles if fresh ones aren’t available. They still add great flavor, though fresh-roasted chiles have a deeper smoky aroma.
How do I get the topping extra crispy without burning it?
Mix panko with melted butter and Parmesan, then bake at 375°F (190°C). For extra crispiness, broil for 2-3 minutes at the end but watch closely to prevent burning.
Can I prepare this recipe ahead of time?
You can assemble it a few hours before baking and refrigerate. Bring to room temperature before baking to ensure even cooking and crispy topping.
Is it possible to make this recipe vegan?
Yes, substitute dairy butter with vegan margarine, use plant-based milk, and replace cheese with vegan cheese alternatives. Use gluten-free pasta if needed.
What sides go well with this Hatch green chile mac and cheese?
Fresh, crisp salads like a quinoa salad or cucumber basil sparkling water complement this rich dish nicely. Roasted vegetables or light citrusy sides also balance the flavors.
Pin This Recipe!
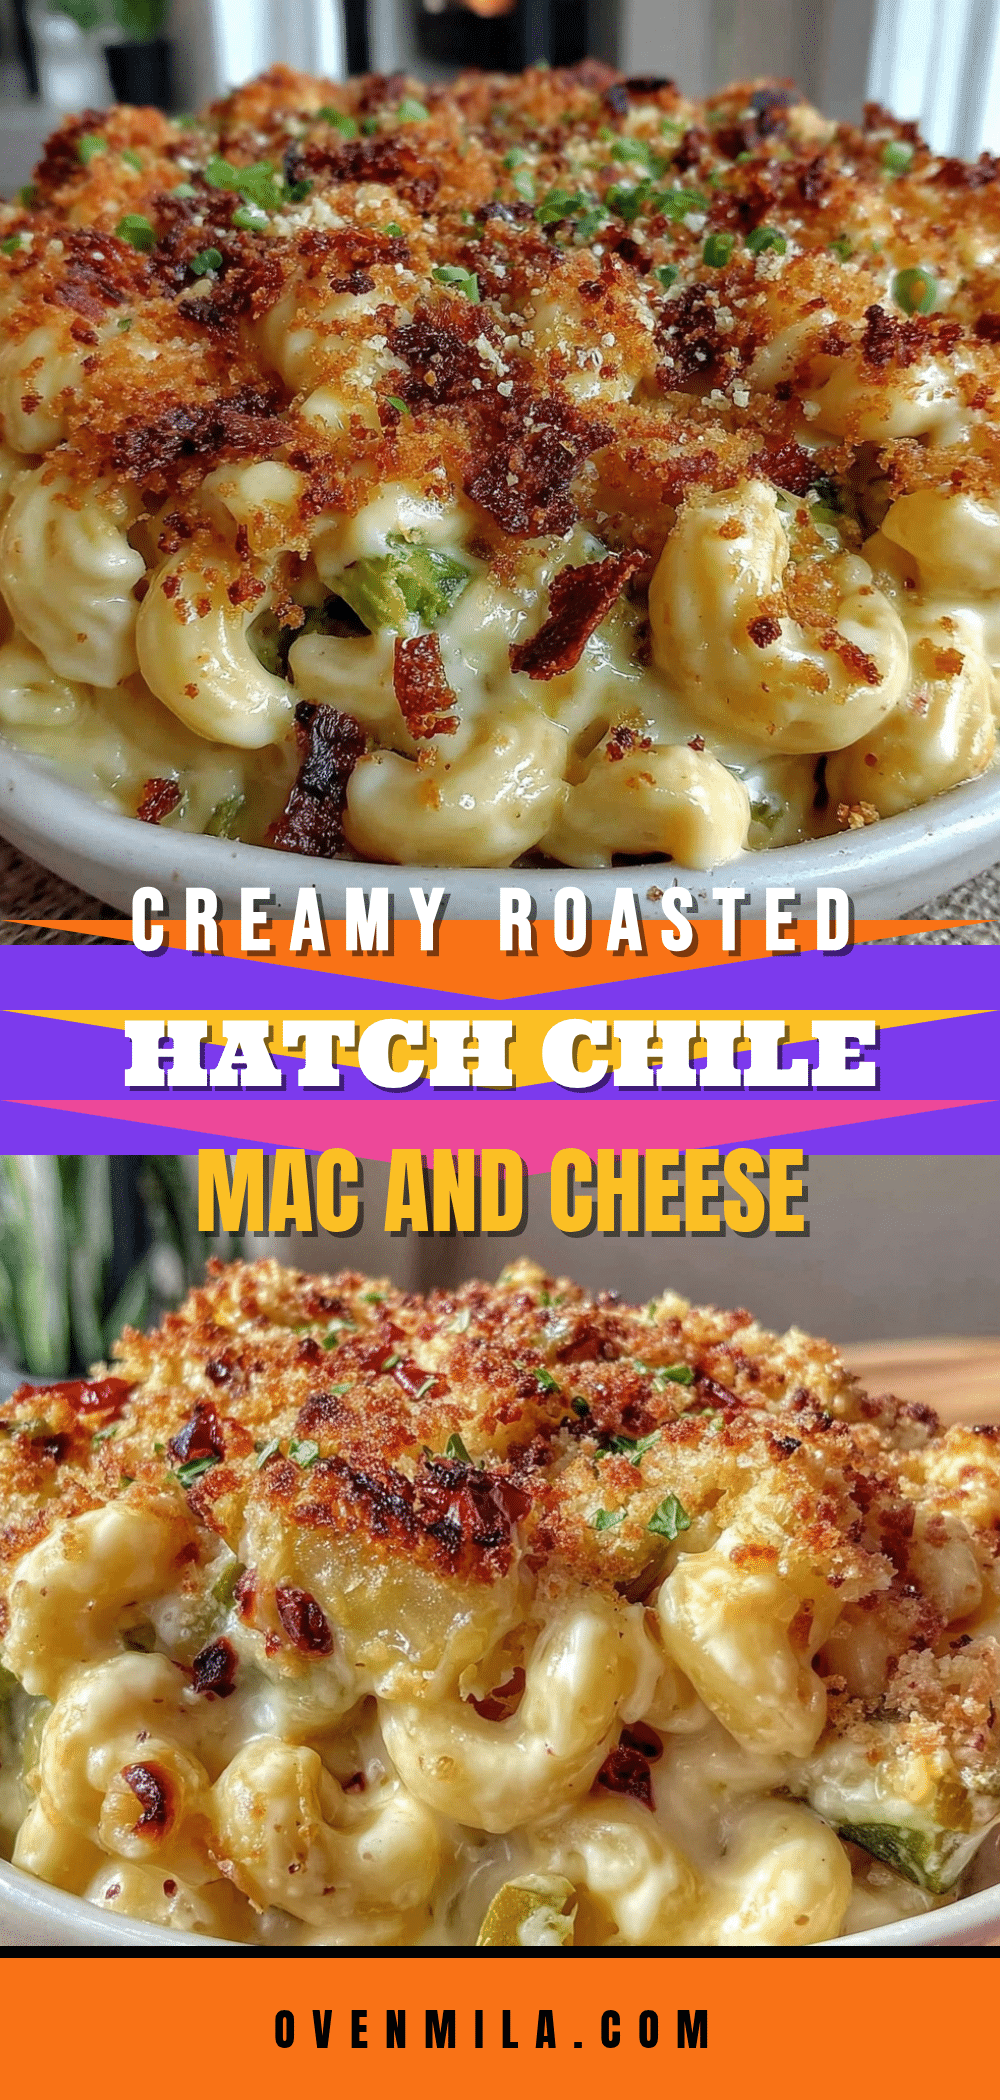
Crispy Roasted Hatch Green Chile Mac and Cheese

A smoky, slightly spicy twist on classic mac and cheese featuring roasted Hatch green chiles and a crispy panko-Parmesan topping. This comforting dish balances creamy cheese sauce with a nutty, crunchy crust.
- Prep Time: 20 minutes
- Cook Time: 25 minutes
- Total Time: 45 minutes
- Yield: 6 servings 1x
- Category: Main Course
- Cuisine: American
Ingredients
- 12 ounces elbow macaroni
- 3 medium-sized Hatch green chiles, roasted and peeled (or 1 cup jarred roasted Hatch chiles)
- 4 tablespoons unsalted butter, divided
- 1/4 cup all-purpose flour
- 2 1/2 cups whole milk, warmed
- 2 cups shredded sharp cheddar cheese
- 1 cup shredded Monterey Jack cheese
- 1/2 cup grated Parmesan cheese
- 1 cup panko breadcrumbs
- 1 teaspoon smoked paprika
- 1/2 teaspoon garlic powder
- Salt and black pepper to taste
Instructions
- Preheat oven to 450°F (230°C). Roast whole Hatch green chiles on a baking sheet for 15-20 minutes, turning every 5 minutes until skin is blistered and blackened. Cool covered for 10 minutes, peel, remove seeds, and chop. If using jarred chiles, drain and chop.
- Bring a large pot of salted water to a boil. Cook elbow macaroni until just al dente (7-8 minutes). Drain and set aside.
- In a large skillet or saucepan, melt 3 tablespoons butter over medium heat. Whisk in flour and cook for 2 minutes until pale golden and bubbling, stirring constantly.
- Gradually whisk in warmed milk and cook 5-7 minutes until sauce thickens and coats the back of a spoon.
- Remove from heat and stir in shredded sharp cheddar and Monterey Jack cheeses until melted and smooth. Season with salt, pepper, and garlic powder. Fold in chopped Hatch green chiles.
- Add drained macaroni to cheese sauce and stir gently to coat. Pour mixture into a greased 9×13 inch baking dish and spread evenly.
- Melt remaining 1 tablespoon butter in a small bowl. Mix in panko breadcrumbs, grated Parmesan, smoked paprika, salt, and pepper. Sprinkle topping evenly over mac and cheese.
- Bake uncovered at 375°F (190°C) for 20-25 minutes until topping is golden and crispy. For extra crispiness, broil for 2-3 minutes watching carefully to avoid burning.
- Let rest for 5-10 minutes before serving to allow sauce to thicken and flavors to settle.
Notes
Warm the milk before adding to the roux to avoid lumps. Tent with foil if topping browns too quickly. Let mac and cheese rest after baking for better texture. For gluten-free, use gluten-free flour, pasta, and panko. For dairy-free, substitute butter, milk, and cheese with plant-based alternatives.
Nutrition
- Serving Size: 1 cup
- Calories: 475
- Sugar: 5
- Sodium: 450
- Fat: 20
- Saturated Fat: 12
- Carbohydrates: 25
- Fiber: 1
- Protein: 20
Keywords: mac and cheese, Hatch green chile, roasted chiles, crispy topping, comfort food, cheesy, easy recipe


