Introduction
My sister had sworn she was “over” candy corn for a solid decade. Every October, she’d roll her eyes at the little orange, yellow, and white triangles, muttering something about how they tasted like sweetened wax. Last Halloween, I was testing out bark recipes for a neighborhood party, and I tossed a handful of candy corn onto a white chocolate base with crushed cookies, mostly because I had an open bag and didn’t know what else to do with it. I left the pan on the counter to set and walked away. Twenty minutes later, I came back to find her standing over the cutting board, a piece of the bark halfway to her mouth, with this look of pure, caught-in-the-act guilt. “It’s for quality control,” she mumbled, crumbs falling from her lips. Honestly, I let her finish that entire corner piece before I even touched it myself.
That moment stuck with me. Not just because I loved catching her red-handed, but because the bark itself was genuinely good. The crunch of the cookies, the creamy snap of the white chocolate, and those little pops of chewy sweetness from the candy corn—it worked in a way that surprised even me. The power went out in my kitchen halfway through that first test batch, so I had to let the bark set in the fridge by flashlight, which felt oddly festive. I mean, there’s something about making candy in the dark that makes you feel like you’re running a secret operation. Maybe you’ve been there, standing over a half-finished dessert, wondering if this random combination is genius or a disaster. This one, I promise, is genius.
I keep making this bark because it’s the kind of treat that doesn’t take itself too seriously. It’s silly and colorful and takes all of thirty minutes, but it also makes people happy in a way that fancy desserts sometimes don’t. There’s no pretense here. It’s just good, crunchy, sweet, and ridiculously easy. And honestly, watching someone who claims to hate candy corn reach for a second piece? That never gets old.
Why You’ll Love This Recipe
Let me be real with you. There are a million fall desserts out there that require pulling out your stand mixer, softening butter, and measuring out a dozen ingredients. This is not that recipe. This is the recipe you make when you want something that looks like you tried, but you actually barely tried at all. And that’s the beauty of it.
- Ready in 30 Minutes : From start to finish, including setting time, this bark comes together in half an hour. That’s faster than a trip to the store for a bakery treat.
- Five Simple Ingredients : You need white chocolate, candy corn, shortbread cookies, a touch of coconut oil, and maybe some flaky salt. That’s it. No weird extracts or hard-to-find items.
- Perfect for Halloween Parties : The colors are spot-on for fall gatherings, but it’s also great for Thanksgiving dessert tables or just a random Tuesday when you need something sweet.
- Crowd-Pleaser : I’ve brought this to three different gatherings now, and every single time, the plate comes back empty. Kids love the candy corn, adults love the cookie crunch.
- Unbelievably Delicious : The texture combo is what gets you. The white chocolate is creamy and firm, the cookies add a buttery crunch, and the candy corn gives you that little chewy moment. It’s like a candy bar and a cookie had a really good baby.
What makes this version different from the hundred other bark recipes out there? It’s the ratio. I tested this five times to get the right balance of chocolate to cookies to candy corn. Most bark recipes drown the mix-ins, so you end up with a mouthful of plain chocolate. Not here. Every piece has a good distribution of cookies and candy, which is exactly how it should be. This isn’t just another version—it’s the one where you actually taste everything in every bite.
There’s something about this bark that makes people close their eyes after the first bite. I’ve seen it happen. It’s comfort food reimagined—silly, nostalgic, and somehow exactly what you didn’t know you were craving. Perfect for impressing guests without breaking a sweat, or turning a simple night in into something a little more memorable.
What Ingredients You Will Need
This recipe uses simple, pantry-friendly ingredients to deliver that perfect balance of creamy, crunchy, and chewy. Most of these are things you might already have on hand, especially if you’ve been stocking up for fall baking.
- White chocolate melting wafers or white chocolate chips (12 ounces / 340 grams) — I prefer Ghirardelli white chocolate melting wafers for the smoothest melt, but good-quality white chocolate chips work too. Avoid white baking chips that are labeled “white morsels” as they sometimes don’t melt as smoothly.
- Coconut oil (1 teaspoon) — This is optional but helps thin the white chocolate just enough for easy spreading. It also gives the bark a slightly glossier finish. Refined coconut oil works best since it has no coconut flavor.
- Shortbread cookies (about 20 cookies, roughly 200 grams) — I use Lorna Doone or Walkers shortbread. The buttery flavor pairs beautifully with the sweet white chocolate. You want them crisp but not overly dense. Avoid chocolate cookies here—they’ll muddy the colors.
- Candy corn (1 cup / 200 grams) — The star of the show. Brach’s is the classic choice and widely available. You can also use autumn mix if you want the little pumpkins and mellowcremes mixed in. Just make sure your candy corn is fresh—stale candy corn gets hard and loses that soft chew.
- Flaky sea salt (optional, about 1/2 teaspoon) — I highly recommend this. Maldon flaky sea salt is my go-to. The salt cuts through the sweetness and makes the whole thing taste more sophisticated than it has any right to be.
- Optional add-ins — A handful of toasted pecans or chopped pretzels can add another layer of texture. If you’re feeling extra, drizzle a little melted dark chocolate over the top after it sets.
For the candy corn, look for bags that feel soft when you squeeze them through the package. Hard candy corn is a sign of an older batch. And if you’re not a candy corn fan (like my sister claimed to be), you can substitute with chopped dried apricots and white chocolate chips—it gives a similar chewy-sweet effect without the controversial flavor.
Equipment Needed
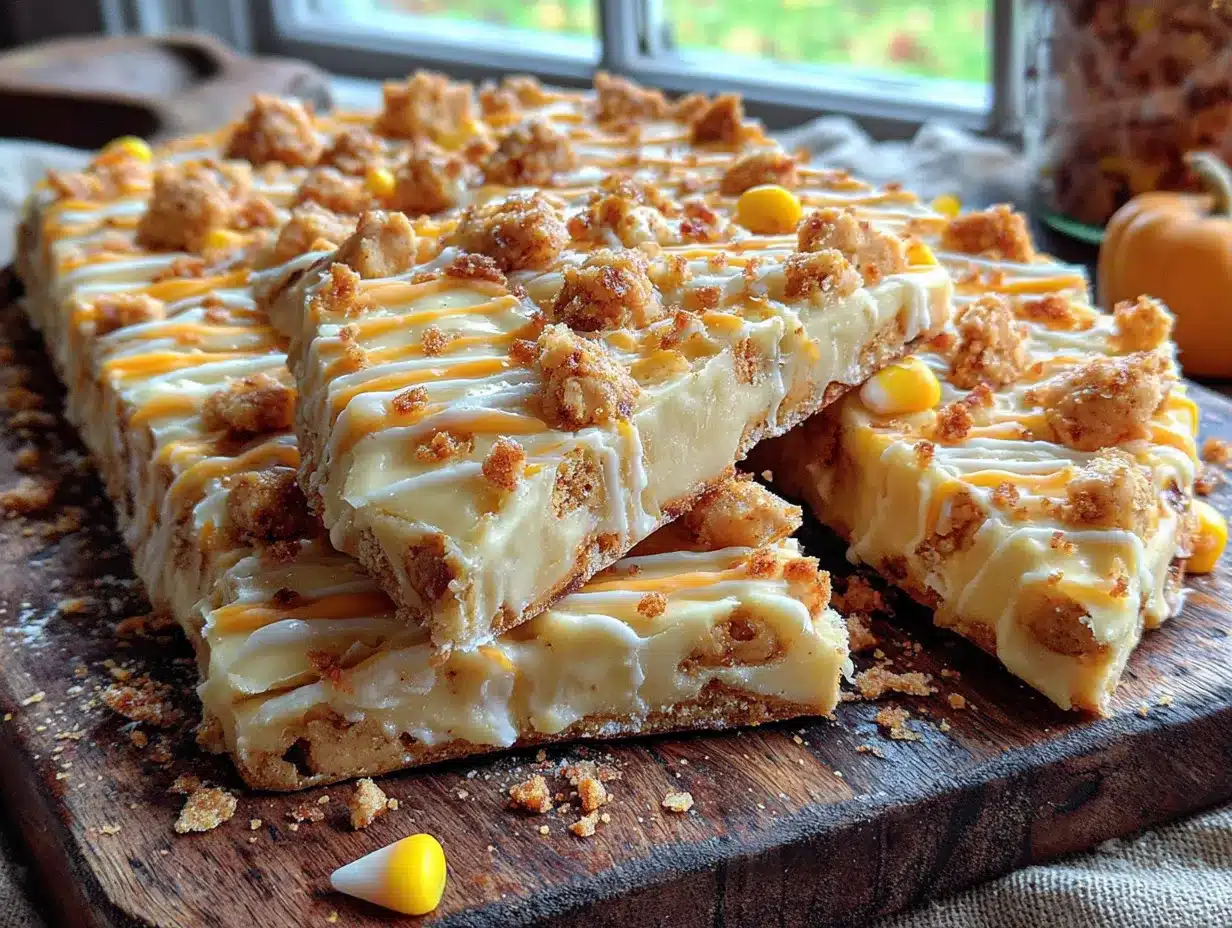
You don’t need much for this recipe, which is part of why I love it. Here’s what you’ll want to have ready:
- Baking sheet (standard half-sheet size, 13×18 inches) — Line it with parchment paper or a silicone baking mat. Parchment is easier to peel off later.
- Medium microwave-safe bowl — For melting the white chocolate. Glass or ceramic both work fine.
- Rubber spatula — For stirring and spreading. Silicone is best because it won’t scratch your bowl.
- Rolling pin or food processor — To crush the shortbread cookies. A rolling pin and a zip-top bag works great if you want to avoid extra dishes. A food processor gives you more uniform crumbs, but I actually prefer the rustic texture you get from crushing by hand.
- Sharp knife — For cutting the bark after it sets. A chef’s knife works well, but a long serrated knife also does the job.
- Refrigerator space — You’ll need about 20 minutes of fridge time for the bark to set properly.
I’ve made this with cheap chocolate chips and a butter knife, and it still turned out great. Don’t overthink the equipment. If you have a baking sheet and a microwave, you’re good to go.
Preparation Method
Follow these steps, and you’ll have bark that looks like it came from a fancy bakery. I’ve included all the little details that make the difference between good bark and great bark.
- Prep your pan. Line a standard baking sheet with parchment paper. Make sure the paper extends slightly over the edges—this gives you handles to lift the bark out later. Set the pan aside.
- Crush the cookies. Place the shortbread cookies in a large zip-top bag. Seal it, then use a rolling pin to crush them into rough pieces. You want a mix of smaller crumbs and bigger chunks, about the size of a pea. Don’t pulverize them into dust—you want texture. Aim for about 1 1/2 cups of crushed cookies. Set aside.
- Melt the white chocolate. Place the white chocolate wafers or chips in a medium microwave-safe bowl. Add the coconut oil if using. Microwave in 30-second intervals, stirring well after each interval. White chocolate is finicky—it can seize up if overheated. Stop microwaving when most of the chocolate is melted but a few lumps remain. Stir continuously until the residual heat melts the rest. It should be smooth and glossy, not thick or clumpy.
- Combine the base. Reserve about 2 tablespoons of the crushed cookies and 2 tablespoons of the candy corn for the top. Fold the remaining crushed cookies and candy corn into the melted white chocolate. Stir gently but thoroughly. You want every piece coated but not crushed further.
- Spread the mixture. Pour the mixture onto the prepared baking sheet. Use your rubber spatula to spread it into an even layer, about 1/4 to 1/2 inch thick. Don’t worry if it’s not perfectly rectangular—rustic edges are part of the charm. Work quickly because the white chocolate will start to set as it cools.
- Add the toppings. Sprinkle the reserved crushed cookies and candy corn over the top. Press them in gently with your fingers or the back of a spoon so they stick. If using flaky sea salt, sprinkle it evenly over the entire surface now.
- Set the bark. Place the baking sheet in the refrigerator for 20 to 25 minutes. The bark should be firm to the touch and no longer sticky. If you live in a humid climate, it might need a few extra minutes. Don’t rush this step—under-set bark will crumble when you cut it.
- Cut and serve. Once set, lift the parchment paper to remove the bark from the pan. Place it on a cutting board. Use a sharp knife to cut or break it into irregular pieces. I like pieces about 2 to 3 inches across. Store in an airtight container.
One thing I learned the hard way: if your kitchen is warm, the bark might start to soften as you’re cutting it. If that happens, pop it back in the fridge for five minutes. Also, the white chocolate will look matte when it’s fully set—that’s normal and actually makes for a prettier presentation.
Cooking Tips & Techniques
I’ve made this bark more times than I care to admit, and I’ve definitely made some mistakes along the way. Here’s what I’ve learned so you don’t have to repeat my errors.
Don’t overheat the white chocolate. This is the number one mistake people make. White chocolate burns faster than milk or dark chocolate because of its high milk solids content. If it looks grainy or clumpy, you’ve overheated it. The fix? Stir in a teaspoon of coconut oil or vegetable shortening while it’s still warm. It won’t be perfect, but it’ll be usable. Better yet, go low and slow with your microwave intervals.
Crush cookies by hand for better texture. I tried using a food processor once, and it turned half the cookies into powder. The bark still tasted fine, but it lost that satisfying crunch. A rolling pin gives you more control. Leave some pieces as big as a dime—those become the best bites.
Work fast once the chocolate is melted. White chocolate starts setting at room temperature pretty quickly. Have all your ingredients measured and ready before you start melting. I keep my crushed cookies and candy corn in little bowls, lined up like I’m on a cooking show. It makes the whole process smoother.
Press toppings in firmly. If you just sprinkle them on top, half will fall off when you cut the bark. Use gentle pressure to embed them into the surface. Your fingers work best for this, but if the chocolate is still warm, you can use the back of a spoon.
Let it set fully before cutting. I once got impatient and started cutting after 15 minutes. The bark was still soft, and I ended up with a crumbly mess. Twenty minutes in the fridge is the minimum. If you’re in a hurry, you can pop it in the freezer for 10 minutes instead, but watch it carefully—freezer time can make the chocolate brittle.
Variations & Adaptations
One of the best things about this bark is how easy it is to change up. Here are some variations I’ve tried and loved.
Chocolate version. Swap the white chocolate for semi-sweet or milk chocolate chips. Use chocolate sandwich cookies (like Oreos) instead of shortbread. The candy corn stands out beautifully against dark chocolate. This version is less sweet and feels a bit more grown-up.
Nutty crunch. Add 1/2 cup of toasted pecans or salted peanuts along with the cookies. The saltiness from the nuts balances the sweetness of the candy corn. I made this for a Thanksgiving gathering, and it was the first thing to disappear from the dessert table.
Gluten-free adaptation. Use gluten-free shortbread cookies or gluten-free graham crackers. Most candy corn is naturally gluten-free, but always check the label. This version tastes just as good as the original—I’ve tested it with two different gluten-free cookie brands.
Fall spice twist. Add 1/2 teaspoon of pumpkin pie spice or cinnamon to the melted white chocolate before adding the mix-ins. It gives the bark a warm, cozy flavor that screams autumn. I did this on a whim one rainy October afternoon, and now I can’t go back.
White chocolate drizzle. After the bark sets, melt a small amount of dark chocolate and drizzle it over the top in zigzag lines. Let it set for another 5 minutes in the fridge. It looks gorgeous and adds a nice bitter counterpoint to all that sweetness.
For a dairy-free version, use dairy-free white chocolate chips and skip the coconut oil. Just be aware that dairy-free white chocolate can be a bit softer at room temperature, so store this version in the fridge until serving.
Serving & Storage Suggestions
This bark is best served cold or at cool room temperature. I prefer it straight from the fridge—the white chocolate has a satisfying snap, and the candy corn stays pleasantly chewy. If you leave it out for more than an hour, the white chocolate can soften and lose its clean break.
For presentation, I like to arrange the pieces on a wooden board or a white platter. The orange, yellow, and white colors pop beautifully against a neutral background. Sprinkle a few extra candy corn pieces around the board for decoration. It makes a great centerpiece for a Halloween party or a fall dessert table.
This bark pairs wonderfully with a cup of hot apple cider or a pumpkin spice latte. For an adult gathering, try it with a glass of dessert wine like Moscato or a creamy stout beer. The sweetness of the bark plays nicely with both.
Storage: Keep the bark in an airtight container in the refrigerator for up to 2 weeks. Layer pieces between sheets of parchment paper to prevent sticking. I’ve also frozen this bark successfully—just place it in a freezer-safe container with parchment between layers. It keeps for up to 3 months. Thaw in the refrigerator for about 30 minutes before serving.
One thing to note: the candy corn can absorb moisture from the fridge over time, making it slightly softer. That’s not a bad thing—it actually makes the texture more uniform. But if you prefer a firmer candy corn bite, store the bark at cool room temperature and eat it within 3 days.
Nutritional Information & Benefits
Let’s be honest—this is a treat, not a health food. But here’s what you should know if you’re keeping an eye on things.
Per serving (about 1/8 of the recipe): approximately 280 calories, 14 grams of fat, 36 grams of carbohydrates, 3 grams of protein, and 22 grams of sugar. These values will vary based on the specific brands you use and whether you add nuts or extra toppings.
The shortbread cookies provide a small amount of iron and calcium, and the white chocolate contributes some calcium as well. If you use the coconut oil, you’re getting a tiny dose of healthy medium-chain triglycerides. The flaky sea salt adds trace minerals, which feels like a stretch but technically counts.
For those with dietary restrictions: this recipe contains dairy (white chocolate), gluten (shortbread cookies), and soy (often found in white chocolate chips). It is not suitable for vegans unless you use dairy-free white chocolate and vegan cookies. The candy corn is typically gluten-free and contains no major allergens beyond corn syrup.
My personal take? This is a dessert for occasions when you want something fun and nostalgic without spending hours in the kitchen. It’s okay to enjoy treats like this in moderation. I make this for parties and holidays, and I don’t feel guilty about having a piece or two. Life is too short to skip the candy corn bark.
Conclusion
This easy candy corn white chocolate cookie bark is the kind of recipe that proves you don’t need fancy techniques or a long ingredient list to make something people genuinely love. It’s quick, it’s colorful, and it always gets that surprised “wait, this is actually amazing” reaction. My sister still pretends she’s above candy corn, but I caught her sneaking a piece from the fridge just last week. Some things never change.
I hope you give this recipe a try and make it your own. Add nuts if you like them, swap in dark chocolate if that’s more your style, or keep it exactly as written. The beauty of bark is that it’s forgiving—you really can’t mess it up. And if you do, just call it “rustic” and eat it anyway. That’s what I do.
I’d love to hear how yours turns out. Drop a comment below and tell me if you’re team candy corn or if you made a variation I haven’t thought of. Share a photo of your bark on Pinterest and tag me—I always love seeing what you create. Happy snacking, friend. You’ve got this.
Frequently Asked Questions
Can I use white chocolate chips instead of melting wafers?
Yes, you can. White chocolate chips work fine, but they sometimes contain stabilizers that make them thicker when melted. Add an extra teaspoon of coconut oil to help them spread more smoothly. Ghirardelli and Guittard brands tend to melt the best.
How do I keep the bark from sticking to the pan?
Use parchment paper or a silicone baking mat. Don’t use wax paper—it can melt or stick to the chocolate. If you’re out of parchment, lightly grease the pan with butter or cooking spray, but be aware the bark might have a slightly greasy bottom.
Can I make this without a microwave?
Absolutely. Use a double boiler instead. Fill a small saucepan with an inch of water, bring it to a simmer, and place a heatproof bowl on top. Make sure the bowl doesn’t touch the water. Stir the white chocolate until melted, then proceed with the recipe. It takes a few minutes longer but works perfectly.
Why did my white chocolate seize up?
White chocolate seizes when it comes into contact with even a tiny amount of water or when it’s overheated. Make sure your bowl and spatula are completely dry. If it does seize, stir in a teaspoon of coconut oil or vegetable shortening. It won’t be as smooth, but it’s still usable for bark.
How far in advance can I make this bark?
You can make it up to 2 weeks ahead if stored in an airtight container in the refrigerator. For best texture, add the flaky sea salt just before serving. If you’re making it for a party, I recommend making it the day before—the flavors meld together nicely overnight.
Pin This Recipe!

Easy Candy Corn White Chocolate Cookie Bark: 30-Minute Treat

This easy candy corn white chocolate cookie bark is a quick, colorful, and crowd-pleasing treat that combines creamy white chocolate, crunchy shortbread cookies, and chewy candy corn. Ready in just 30 minutes, it’s perfect for Halloween parties, fall gatherings, or a simple sweet craving.
- Prep Time: 10 minutes
- Cook Time: 5 minutes
- Total Time: 30 minutes
- Yield: 8 servings 1x
- Category: Dessert
- Cuisine: American
Ingredients
- 12 ounces (340 grams) white chocolate melting wafers or white chocolate chips
- 1 teaspoon coconut oil (optional)
- 20 shortbread cookies (about 200 grams), crushed
- 1 cup (200 grams) candy corn
- 1/2 teaspoon flaky sea salt (optional)
Instructions
- Line a standard baking sheet with parchment paper, extending slightly over the edges for easy removal. Set aside.
- Place shortbread cookies in a large zip-top bag and crush with a rolling pin into a mix of small crumbs and pea-sized chunks. Reserve 2 tablespoons for topping.
- In a medium microwave-safe bowl, combine white chocolate and coconut oil (if using). Microwave in 30-second intervals, stirring well after each, until mostly melted. Stir until smooth and glossy.
- Reserve 2 tablespoons of candy corn for topping. Fold remaining crushed cookies and candy corn into melted white chocolate until evenly coated.
- Pour mixture onto prepared baking sheet and spread into an even layer, about 1/4 to 1/2 inch thick.
- Sprinkle reserved crushed cookies and candy corn over the top. Gently press them into the surface. Sprinkle with flaky sea salt if using.
- Refrigerate for 20-25 minutes until firm to the touch.
- Lift parchment to remove bark from pan. Cut or break into irregular 2-3 inch pieces. Store in an airtight container.
Notes
Don’t overheat white chocolate; it can seize. Work quickly once chocolate is melted. For best texture, crush cookies by hand. Store in refrigerator for up to 2 weeks or freeze for up to 3 months. For a gluten-free version, use gluten-free shortbread cookies.
Nutrition
- Serving Size: 1/8 of recipe
- Calories: 280
- Sugar: 22
- Sodium: 120
- Fat: 14
- Saturated Fat: 8
- Carbohydrates: 36
- Fiber: 1
- Protein: 3
Keywords: candy corn bark, white chocolate bark, Halloween dessert, easy fall treat, cookie bark, 30-minute dessert


