My sister-in-law had sworn off charcuterie boards for years. Swore they were overpriced, over-hyped, and always looked better in photos than they tasted. Three Christmases ago, I showed up to her place with a cutting board shaped like a tree and a bag full of groceries. She rolled her eyes so hard I thought they’d get stuck. Then I started arranging everything—folded salami roses, little clusters of grapes, cheese cubes stacked like ornaments—and I caught her watching over my shoulder. By the time I finished, she was already reaching for a slice of prosciutto. I didn’t say a word. I just handed her a plate.
That’s the thing about this Easy Christmas Tree Charcuterie Board in 15 Minutes. It doesn’t announce itself as impressive. It just quietly becomes the center of attention. You don’t need a fancy board or a culinary degree. You just need some good ingredients and a little patience for arranging things in a vaguely triangular shape. Honestly, the hardest part is not eating everything before your guests arrive.
Maybe you’ve been there—staring at a Pinterest board full of elaborate Christmas spreads that look like they took all day. Let me tell you, this one takes fifteen minutes. Maybe twenty if you’re particular about the symmetry of your pepperoni. It’s the kind of appetizer that makes people think you tried way harder than you actually did, which is honestly my favorite kind of cooking.
Why You’ll Love This Recipe
Let’s be real for a second. The holidays are chaotic. You’ve got presents to wrap, relatives to host, and about seventeen different dishes to coordinate. The last thing you need is a complicated appetizer that requires precision knife work or obscure ingredients. This board solves that problem beautifully.
- Quick & Easy: Comes together in under 15 minutes. No cooking, no baking, no waiting for anything to cool. Just arrange and serve.
- Simple Ingredients: Everything comes from your regular grocery store. No hunting down specialty items or spending a fortune on imported cheese.
- Perfect for Holiday Gatherings: Whether it’s Christmas Eve, a office party, or just a cozy night in, this board fits the occasion without stealing the show from the main meal.
- Crowd-Pleaser: I’ve served this to kids, picky eaters, and cheese snobs alike. Everyone finds something they love.
- Unbelievably Festive: The tree shape alone makes people smile. It’s hard not to feel a little Christmas magic when you see a salami tree covered in cheese ornaments.
What makes this different from all the other charcuterie tutorials out there? It’s the method, honestly. I’ve figured out the exact order of operations so you’re not rearranging things five times. Plus, I’ve tested about a dozen different ingredient combinations to find what holds up best at room temperature without getting sad and sweaty. This isn’t just another charcuterie board—it’s the one that actually works for real people with real time constraints.
There’s something about that first moment when someone walks into the room and sees it. They stop. They smile. They pull out their phone. And then they eat half the cheese before anyone else gets a turn. That’s the kind of energy we’re going for here.
What Ingredients You Will Need
This recipe uses simple, grocery-store ingredients to create something that looks far more expensive and complicated than it actually is. Most of these are pantry staples during the holidays anyway, so you probably already have them on hand.
- Meats (about 8-10 ounces total): Prosciutto (thinly sliced), salami (I prefer Genoa for flavor), and pepperoni. The variety gives texture and color contrast. I like using Boar’s Head for consistent quality, but any deli counter brand works fine.
- Cheeses (about 8-10 ounces total): Cubed cheddar (sharp is best), small mozzarella balls (bocconcini or ciliegine), and a soft cheese like brie or goat cheese for the “star” on top. Pre-cubed cheese saves time, but cubing your own from a block tastes better and costs less.
- Fresh produce: Red and green grapes (seedless), cherry tomatoes, fresh rosemary sprigs, and fresh basil leaves. The grapes add sweetness and color; the rosemary mimics pine needles beautifully.
- Crunchy elements: Crackers (I prefer water crackers or rosemary crackers), pretzel sticks, and maybe some breadsticks. Arrange these around the base of the tree.
- Fillers and garnishes: Green olives (stuffed with pimento for color), almonds or pecans, dried cranberries, and maybe some cornichons if you’re feeling fancy. These fill the gaps and add variety.
- For the “trunk”: A breadstick, pretzel rod, or even a thick carrot stick. Something brown and sturdy to form the base of the tree.
For substitutions: use turkey pepperoni if you want less fat, swap in dairy-free cheese for guests with restrictions, or use apple slices instead of crackers for a low-carb option. The beauty of this board is its flexibility—you can swap almost anything for something similar.
I’ve learned the hard way that some ingredients don’t hold up well. Avoid anything too wet (like sliced cucumbers or juicy berries) because they’ll make the crackers soggy. Also, skip anything that stains easily—beet chips look pretty but turn everything pink after twenty minutes.
Equipment Needed
You don’t need much for this, which is part of the charm. Here’s what I use:
- A large cutting board or serving platter: Ideally rectangular or square, at least 12×16 inches. A wooden board looks best, but a large white platter works beautifully too. I’ve even used a clean baking sheet in a pinch—just cover it with parchment paper for a rustic look.
- Small bowls or ramekins: For olives, nuts, or dips if you’re adding them. These keep wet ingredients from making everything else soggy.
- A sharp knife: For cubing cheese and slicing anything that needs trimming. Nothing fancy needed—just something that cuts cleanly.
- Toothpicks or small skewers: Optional, but helpful for keeping things in place, especially the star on top.
- Parchment paper (optional): If your board is ugly or you want easy cleanup, line it with parchment cut into a rough tree shape.
I once made this board on a flimsy plastic cutting board that kept sliding around. It was a disaster. Invest in something with a little weight, or put a damp paper towel underneath to keep it stable. Trust me on this one.
Preparation Method
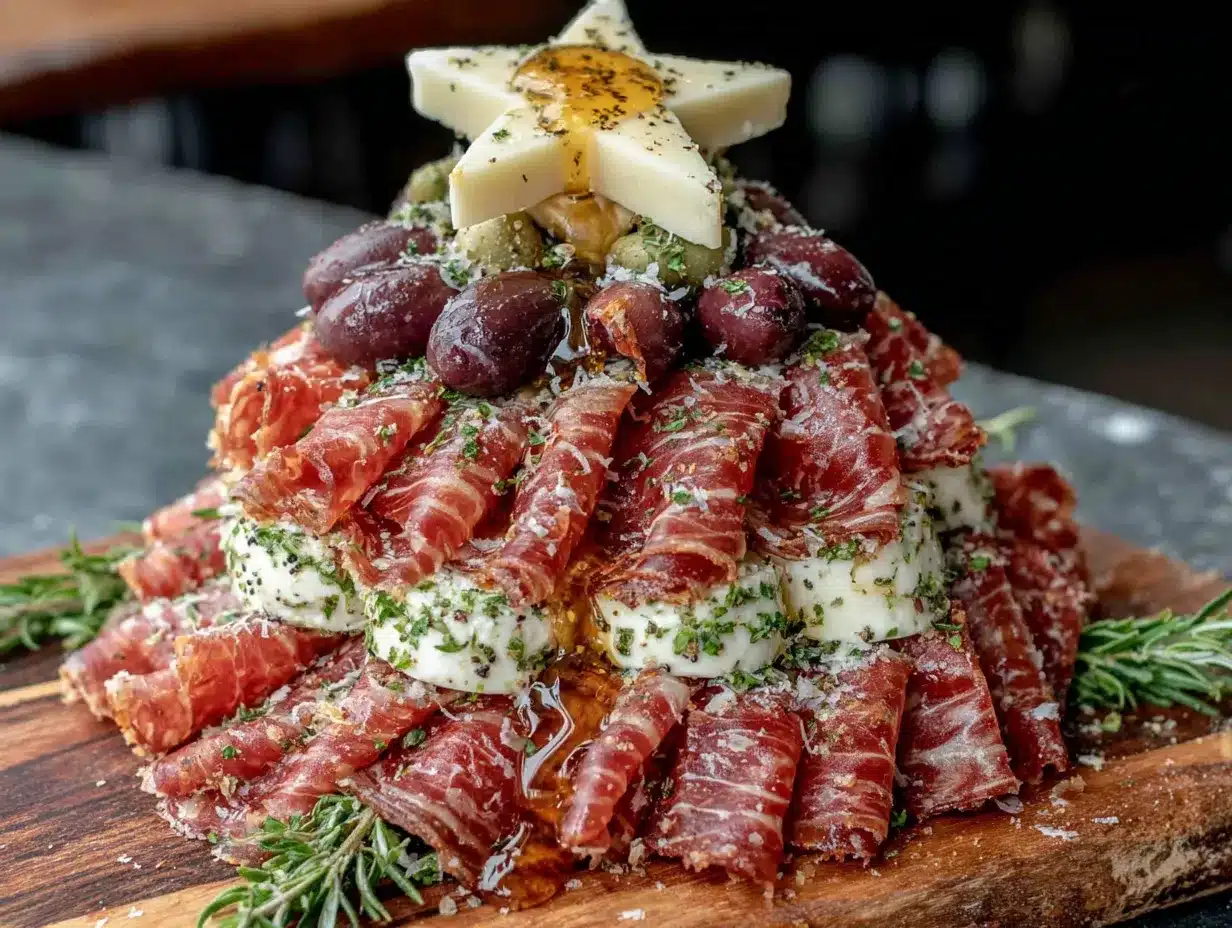
Let’s get to the fun part. Here’s exactly how to build this board in fifteen minutes flat. I’ve timed myself multiple times, so these steps are optimized for speed and visual impact.
- Prep your board (1 minute): Place your board on a flat surface. If using parchment, cut a rough triangle shape to guide your arrangement. This isn’t necessary, but it helps if you’re a perfectionist like me.
- Create the trunk (1 minute): Place your breadstick, pretzel rod, or carrot stick at the bottom center of your board. This forms the trunk of your tree. Make sure it’s straight and centered.
- Layer the base meats (3 minutes): Starting from the bottom, arrange your salami slices in overlapping rows, working upward in a triangular shape. Think of it like shingles on a roof—each row slightly shorter than the one below. Use about 4-5 slices per row for the bottom, tapering to 1-2 slices near the top. Fold some slices in half for texture.
- Add the prosciutto (2 minutes): Drape prosciutto ribbons loosely over the salami base. Don’t overthink this—just let it fall naturally in wavy folds. It adds a softer texture against the firmer salami.
- Place the cheese “ornaments” (3 minutes): Dot the tree with cheese cubes and mozzarella balls. Space them evenly, like ornaments on a Christmas tree. Aim for about 8-10 pieces total, distributed from bottom to top. Press them gently into the meat so they stay put.
- Add the grapes (2 minutes): Tuck small clusters of red and green grapes into the gaps. They add color and help fill empty spaces. I like to put green grapes on one side and red on the other for a balanced look.
- Insert the rosemary “branches” (1 minute): Break rosemary sprigs into 2-3 inch pieces and tuck them between the ingredients, pointing outward. This is what makes it look like an actual tree. Don’t skip this step—it’s the visual game-changer.
- Fill the gaps (2 minutes): Scatter almonds, dried cranberries, and olives into any remaining empty spots. You want the board to look full and abundant, not sparse. A few extra pieces around the base create a “fallen ornaments” effect that looks intentional.
- Top with the star (1 minute): Place a small star-shaped cheese piece (use a cookie cutter or just cut one freehand) or a single beautiful strawberry at the very top. Secure it with a toothpick if needed. This is the crown jewel.
- Surround the base (2 minutes): Arrange crackers, pretzels, and breadsticks around the bottom of the tree, forming a “base” or “pot.” This gives guests something to grab and eat with.
A few notes from experience: If your salami slices are sticking together, separate them before you start. Nothing kills momentum like wrestling with stuck meat. Also, if you’re making this ahead, cover it loosely with plastic wrap and refrigerate for up to 2 hours. Let it sit at room temperature for 15 minutes before serving—cold cheese doesn’t taste as good.
Cooking Tips & Techniques
I’ve made this board about a dozen times now, and I’ve learned some things the hard way. Here’s what I wish someone had told me:
Build from bottom to top. Always start with the widest part of the tree and work upward. If you start from the top, you’ll run out of room and end up with a sad, skinny tree. Gravity is not your friend in that scenario.
Use a mix of textures. The best boards have variety—crunchy crackers, soft cheese, chewy meat, juicy grapes. If everything feels the same, people get bored after two bites. I learned this after making a board with nothing but hard cheese and salami. It was a texture nightmare.
Don’t overcrowd the board. I know it’s tempting to cram everything in, but leave tiny gaps between items. It looks more intentional and gives guests room to grab things without knocking over your masterpiece. Trust the negative space.
Keep wet and dry separate. Olives, pickles, and juicy fruits will make crackers and breadsticks soggy within minutes. Use small ramekins for wet items, or place them on the outer edges where they won’t touch the crunchy stuff. I learned this after watching a beautiful cracker turn into a sad, damp mess in under ten minutes.
Prep everything before you start arranging. Cube your cheese, fold your salami, wash your grapes. Once you start building, you don’t want to stop and hunt for the knife. I keep a little prep bowl with everything ready to go. It makes the whole process feel like assembly rather than actual work.
One more thing: If you’re serving this at a party, make two. I’m not kidding. One board disappears in about twenty minutes, especially if there are hungry teenagers or adults who skipped lunch. Having a backup board (or at least backup ingredients) saves the day when the first one vanishes.
Variations & Adaptations
This board is endlessly customizable. Here are some variations I’ve tried and loved:
Vegetarian Version: Skip the meat entirely and double up on cheese, nuts, and veggies. Add roasted red pepper strips, marinated artichoke hearts, and grilled zucchini slices. The colors are even more vibrant without the meat, and honestly, nobody misses it.
Low-Carb/Keto Version: Replace crackers with cucumber rounds, bell pepper strips, and celery sticks. Use full-fat cheeses and add extra nuts. I’ve made this for keto friends and they nearly cried with joy. It’s that good.
Sweet & Savory Version: Add dark chocolate squares, dried figs, and honeycomb alongside the usual savory ingredients. The sweet-salty combination is addictive. I once added chocolate-covered almonds by accident and it was a happy mistake I now repeat intentionally.
Gluten-Free Version: Use gluten-free crackers or rice cakes, and double-check your meats (some deli meats contain gluten). Most cheeses are naturally gluten-free, which makes this adaptation surprisingly easy.
Mini Individual Boards: For a party, make several small tree-shaped boards on individual plates or small cutting boards. Each guest gets their own tree. It’s adorable and prevents the awkward “can I take the last piece of brie?” conversation.
I once made a breakfast version with pancake “branches,” fruit, and yogurt dip. It was ridiculous and wonderful. The point is, don’t feel married to the traditional ingredients. This format works with almost anything.
Serving & Storage Suggestions
Serve this board at room temperature. Cold cheese doesn’t have the same flavor or texture, so let it sit out for about 15-20 minutes before guests arrive. If you’ve refrigerated it, give it a little extra time.
For presentation, place the board in the center of the table where everyone can reach it. I like to put it on a slightly elevated surface (like a cake stand or inverted bowl) so it becomes a focal point. Add some extra rosemary sprigs around the base for a finished look.
As for complementary dishes, this board pairs beautifully with a simple salad, a warm soup, or a glass of sparkling wine. It’s also great alongside other appetizers like stuffed mushrooms or spinach dip. Don’t serve it right next to something saucy or messy—the board is the star here.
Storage: If you have leftovers (unlikely, but possible), separate the components and store them individually. Cheese goes in an airtight container, meats in a zip-top bag, and crackers in a dry container. Don’t store assembled leftovers—the textures will suffer. Leftover grapes and nuts keep well for a few days. The board itself should last about 3-4 days if stored properly, though the crackers will lose their crunch after day one.
Reheating isn’t really a thing here, but if your cheese feels too cold, let it sit at room temperature for 20 minutes before serving again. The flavors actually develop a bit overnight, so day-old prosciutto often tastes even better.
Nutritional Information & Benefits
This board is more of a “eat what you want” situation than a precise nutritional plan, but here’s a rough estimate per serving (about 1/6 of the board):
| Nutrient | Approximate Value |
|---|---|
| Calories | 350-450 |
| Protein | 18-22g |
| Fat | 25-30g |
| Carbohydrates | 15-20g |
| Fiber | 2-4g |
| Sugar | 8-12g |
The health benefits here come from the variety. Cheese provides calcium and protein. Grapes and nuts offer antioxidants and healthy fats. Prosciutto and salami give you iron and B vitamins. It’s not a health food, but it’s not junk either—it’s real food you can feel good about serving.
For dietary considerations: this board is naturally gluten-free if you skip the crackers and use gluten-free alternatives. It’s also low-carb friendly if you focus on meat and cheese. The main allergens are dairy (cheese) and tree nuts (almonds), so label those clearly if you’re serving a crowd.
I personally love that this board lets people eat intuitively. Nobody’s counting calories at a Christmas party, and this board respects that. It’s about joy, not restriction.
Conclusion
This Easy Christmas Tree Charcuterie Board in 15 Minutes has become my go-to holiday appetizer for a reason. It’s fast, it’s forgiving, and it always gets the reaction I’m hoping for—that little gasp of delight when someone walks into the room and sees it. My sister-in-law? She’s made it twice since that first Christmas. She still won’t admit she was wrong about charcuterie boards, but I see her taking photos before anyone touches it.
I hope you’ll try this and make it your own. Swap in your favorite cheeses, use whatever meats you have on hand, and don’t stress about perfection. The beauty of this board is that it looks intentional no matter what. Even if your tree leans a little to the left or your rosemary sprigs are uneven, it still says “I cared enough to make something special.”
I’d love to hear how yours turns out. Leave a comment below with your favorite ingredient combination, or share a photo of your creation. And if you have a tip I haven’t thought of, please share it—I’m always learning new tricks from this community. Happy holidays, and happy snacking!
Frequently Asked Questions
Can I make this board ahead of time?
Yes, you can assemble it up to 2 hours ahead. Cover it loosely with plastic wrap and refrigerate. Let it sit at room temperature for 15-20 minutes before serving to let the cheese soften and the flavors come together.
What if I don’t have a large board?
No problem! Use a baking sheet, a large platter, or even a clean cutting board. You can also make two smaller trees on separate plates. The shape matters more than the surface.
How do I keep the tree shape from falling apart?
Start with a solid base of overlapping meats, and build upward slowly. The ingredients will hold each other in place if you layer them carefully. A breadstick trunk also helps anchor everything.
Can I use different cheeses?
Absolutely. The best cheeses for this board are firm enough to cube (cheddar, gouda, manchego) and soft enough to spread (brie, goat cheese). Avoid anything too crumbly or wet.
How many people does this serve?
This board serves about 6-8 people as an appetizer. If it’s the main snack for a party, plan for one board per 4-6 guests. Hungry crowds go through it fast, so having extra ingredients on hand is always a good idea.
Pin This Recipe!
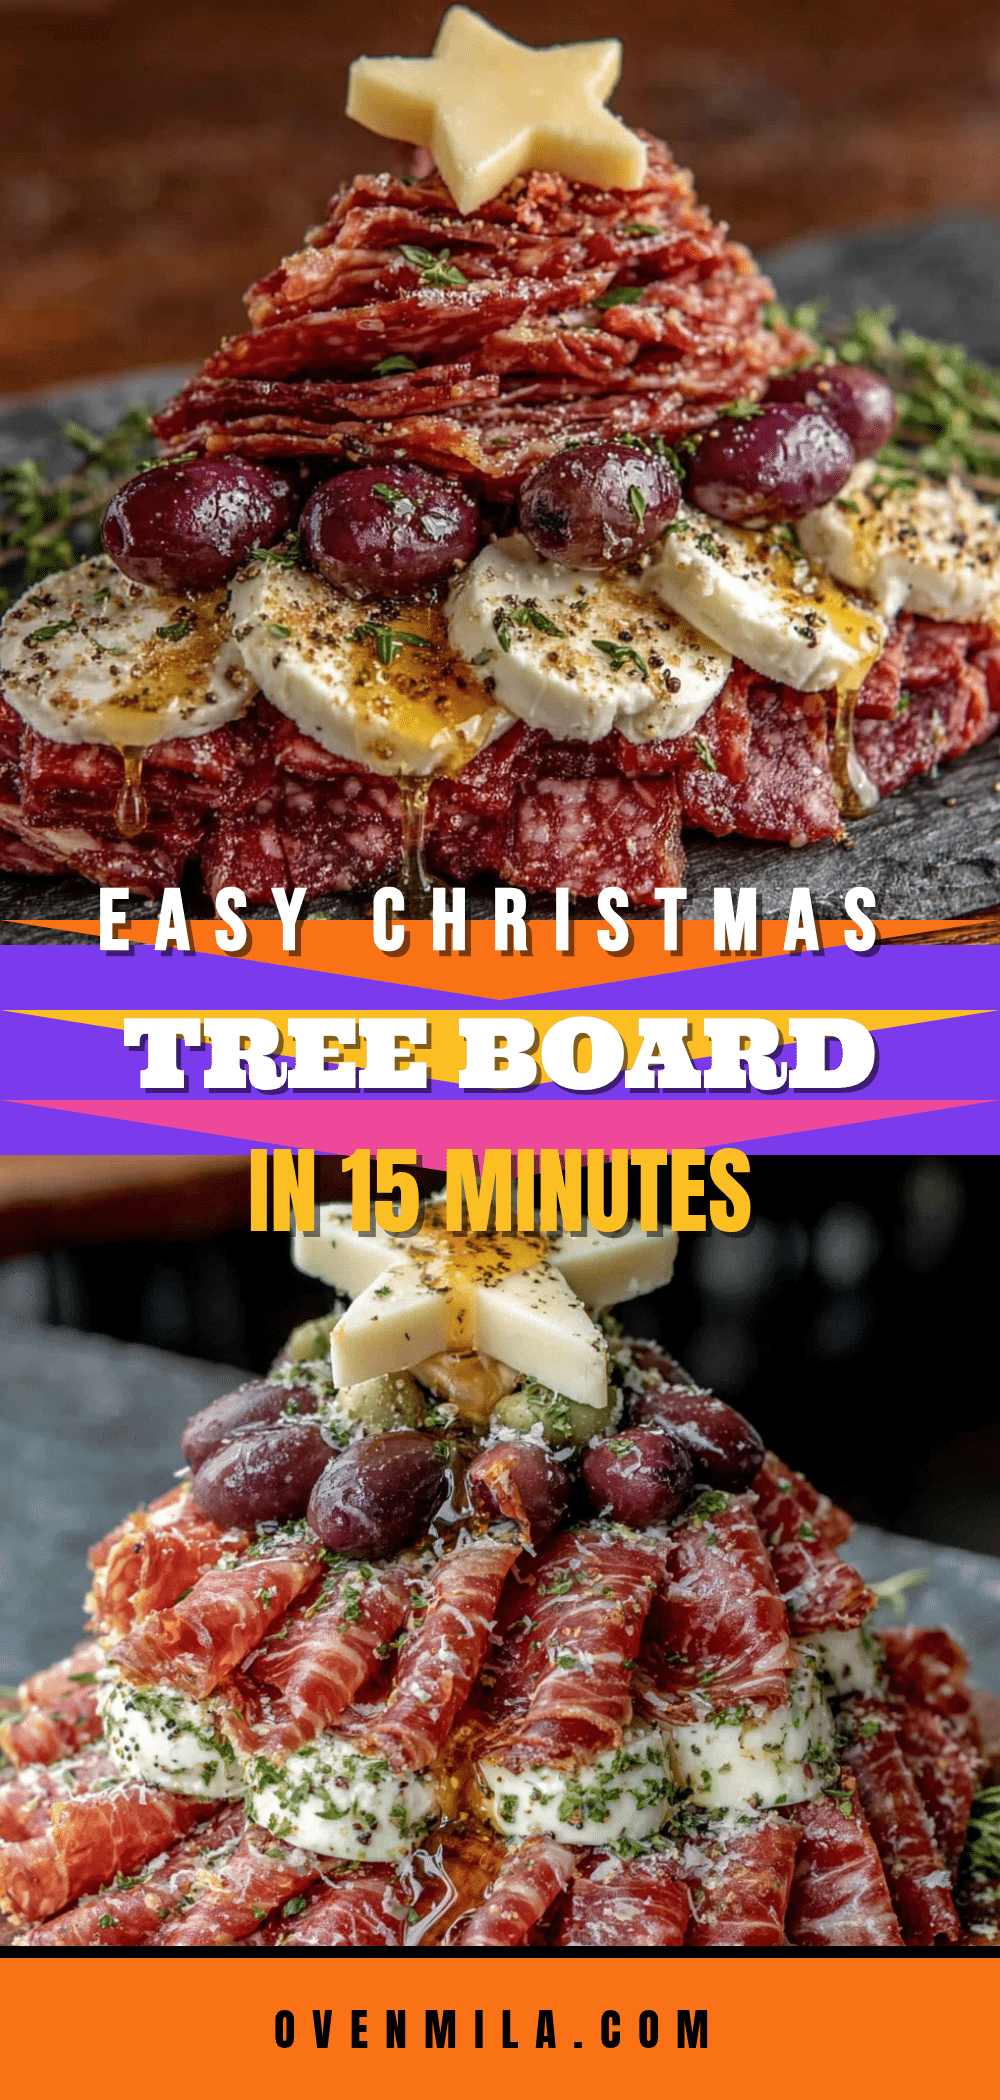
Easy Christmas Tree Charcuterie Board in 15 Minutes
A festive and impressive charcuterie board shaped like a Christmas tree, ready in just 15 minutes. Perfect for holiday gatherings, this no-cook appetizer uses simple ingredients to create a stunning centerpiece.
- Prep Time: 15 minutes
- Cook Time: 0 minutes
- Total Time: 15 minutes
- Yield: 6-8 servings 1x
- Category: Appetizer
- Cuisine: American
Ingredients
- 8–10 ounces prosciutto, thinly sliced
- 8–10 ounces Genoa salami, sliced
- 8–10 ounces pepperoni, sliced
- 8–10 ounces sharp cheddar cheese, cubed
- 8–10 ounces small mozzarella balls (bocconcini or ciliegine)
- 4–6 ounces brie or goat cheese (for the star on top)
- 1 cup red seedless grapes
- 1 cup green seedless grapes
- 1 cup cherry tomatoes
- Fresh rosemary sprigs
- Fresh basil leaves
- 1 box water crackers or rosemary crackers
- 1 cup pretzel sticks
- 1/2 cup breadsticks
- 1/2 cup green olives stuffed with pimento
- 1/2 cup almonds or pecans
- 1/4 cup dried cranberries
- 1/4 cup cornichons (optional)
- 1 breadstick, pretzel rod, or carrot stick (for the trunk)
Instructions
- Place your board on a flat surface. If using parchment, cut a rough triangle shape to guide your arrangement.
- Place your breadstick, pretzel rod, or carrot stick at the bottom center of your board to form the trunk.
- Starting from the bottom, arrange salami slices in overlapping rows, working upward in a triangular shape. Use about 4-5 slices per row for the bottom, tapering to 1-2 slices near the top. Fold some slices in half for texture.
- Drape prosciutto ribbons loosely over the salami base in wavy folds.
- Dot the tree with cheese cubes and mozzarella balls, spacing them evenly like ornaments. Press them gently into the meat.
- Tuck small clusters of red and green grapes into the gaps.
- Break rosemary sprigs into 2-3 inch pieces and tuck them between the ingredients, pointing outward.
- Scatter almonds, dried cranberries, and olives into any remaining empty spots.
- Place a small star-shaped cheese piece or a single strawberry at the very top. Secure with a toothpick if needed.
- Arrange crackers, pretzels, and breadsticks around the bottom of the tree to form a base.
Notes
Build from bottom to top for best results. Use a mix of textures for variety. Keep wet and dry ingredients separate to prevent sogginess. Prep all ingredients before arranging. Can be assembled up to 2 hours ahead; refrigerate loosely covered and let sit at room temperature for 15-20 minutes before serving.
Nutrition
- Serving Size: 1/6 of the board
- Calories: 350450
- Sugar: 812
- Sodium: 8001000
- Fat: 2530
- Saturated Fat: 1015
- Carbohydrates: 1520
- Fiber: 24
- Protein: 1822
Keywords: Christmas charcuterie board, holiday appetizer, easy charcuterie, tree-shaped board, no-cook appetizer, festive snack


