This was supposed to be a batch of simple, elegant snowflake cookies. You know, the kind that look like they belong on a magazine cover. I had the royal icing perfectly thinned, the piping bags loaded, and a vision of pristine white icing in my head. Then my three-year-old wandered into the kitchen, grabbed the bag of orange food coloring I’d left on the counter, and gave it a mighty squeeze right into the middle of my perfectly white royal icing. I stared at the bright orange blob for a solid ten seconds, feeling that familiar wave of kitchen panic. I mean, I was already running late for a playdate, and now my “snowflakes” were looking more like something from a pumpkin patch.
Honestly, I almost scraped the whole batch. But the kid was so proud of her “contribution,” and I didn’t have the heart—or the time—to start over. I sighed, grabbed a turkey cookie cutter from the back of my drawer (the one I bought on a whim last November and never used), and decided to just go with it. What came out of that oven was nothing like the plan. They were messy, a little lopsided, and covered in a shade of orange that could only be described as “aggressively festive.” But as I iced those little googly eyes and wobbly beaks, something clicked. These weren’t just cookies. They were a tiny, edible celebration of the exact moment I stopped trying to be perfect.
I keep making these turkey sugar cookies because they remind me that the best things in the kitchen—and maybe in life—happen when you let go of the plan. Maybe you’ve been there, staring at a kitchen disaster and wondering if you should just order pizza. Let me tell you, these cookies are the happy accident you didn’t know you needed. They are the proof that a little chaos can taste pretty darn sweet.
Why You’ll Love This Recipe
This recipe is built for the cook who wants impressive results without the fuss. I’ve tested these cookies on a Tuesday night after a long workday, and they came together in less time than it takes to decide what to watch on Netflix. You don’t need a pastry degree or a drawer full of specialty tools. What you need is a little bit of time and the willingness to have some fun.
- Quick & Easy: From start to finish, these cookies are ready in under an hour. The dough comes together in one bowl, and the icing sets fast, so you aren’t waiting around all day.
- Simple Ingredients: You likely have everything in your pantry right now. No trips to a specialty baking store for weird flours or hard-to-find extracts.
- Perfect for Thanksgiving Prep: These are a fantastic make-ahead project. Bake the cookies a day or two before, and then let the kids help with the decorating on the big day.
- Crowd-Pleaser: Kids and adults alike go crazy for these. They are cute, they are festive, and they are just sweet enough without being overwhelming.
- Unbelievably Delicious: The sugar cookie base is soft in the middle with a slightly crisp edge. It is the perfect canvas for the royal icing, which dries to a satisfying snap.
What makes this recipe different? It’s the royal icing. I’ve perfected a version that is thick enough to hold its shape for the turkey feathers but thin enough to spread smoothly for the body. No more runny icing disasters or lumpy, cracked surfaces. This is the recipe I turn to every single year, and it has never let me down. It’s comfort baking reimagined—faster, easier, and with the same soul-soothing satisfaction of creating something beautiful with your own hands.
What Ingredients You Will Need
This recipe uses simple, wholesome ingredients to deliver a soft, buttery sugar cookie and a glossy, stable royal icing. Every component plays a specific role in the final texture and flavor. Below is everything you’ll need, along with a few tips I’ve picked up from years of baking these little guys.
For the Sugar Cookies
- Unsalted butter, softened: 1 cup (2 sticks). Using unsalted butter lets you control the salt level in the dough. Make sure it is truly softened to room temperature—it should give slightly when you press it with your finger.
- Granulated sugar: 1 cup. Standard white sugar gives the cookies that classic sweetness and helps them spread just the right amount.
- Large egg: 1, at room temperature. A room-temperature egg emulsifies into the butter-sugar mixture much better than a cold one, creating a smoother dough.
- Vanilla extract: 1 teaspoon. I recommend using pure vanilla extract for the best flavor, but imitation will work in a pinch.
- All-purpose flour: 2 ½ cups. Spoon and level the flour into your measuring cup for the most accurate measurement. Scooping directly from the bag can pack in too much flour, making the cookies dry.
- Baking powder: ½ teaspoon. This gives the cookies a slight lift, making them tender rather than dense.
- Salt: ¼ teaspoon. Salt balances the sweetness and enhances the buttery flavor.
For the Royal Icing
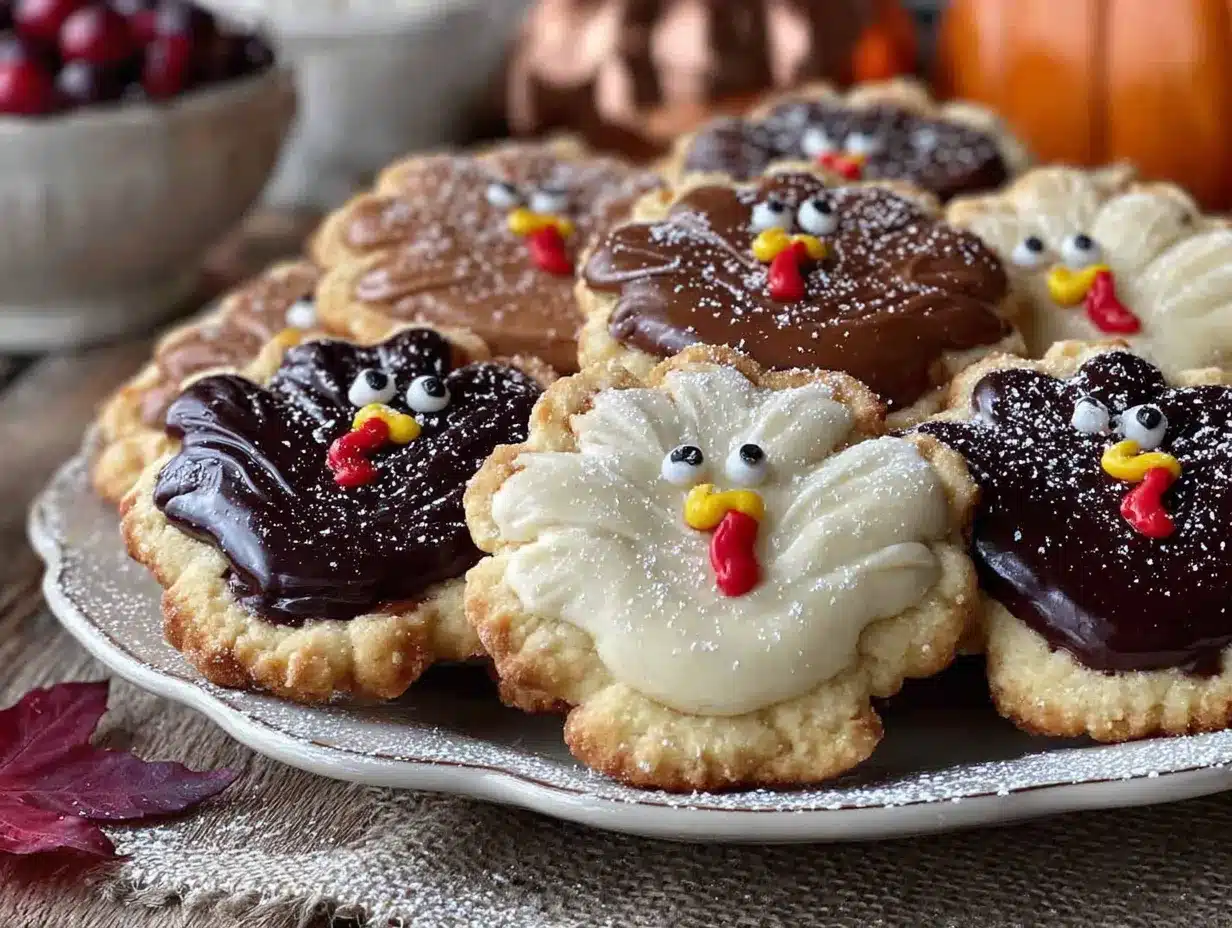
- Powdered sugar: 3 cups, sifted. Sifting is non-negotiable here. Lumps in the powdered sugar will create lumps in your icing, and nobody has time for that.
- Meringue powder: 2 tablespoons. This is the secret to a stable, hard-drying royal icing. I recommend the Wilton brand—it is reliable and easy to find at most craft stores or online.
- Warm water: 4-5 tablespoons. Start with 4 tablespoons and add the fifth only if needed. The consistency should be thick but spreadable.
- Vanilla extract: ½ teaspoon. A little goes a long way to flavor the icing without overpowering the cookie.
- Gel food coloring: Orange, brown, red, and yellow. Gel colors are much more concentrated than liquid drops, so they won’t thin out your icing. I like the Americolor brand for bright, consistent colors.
For Decoration
- Candy eyeballs: A small bag of these is a lifesaver. They give the turkeys instant personality without requiring you to pipe tiny white circles. You can find them in the baking aisle at most grocery stores.
- Black piping gel (optional): If you want to draw little smiles or eyebrows on your turkeys, a tube of black piping gel is easier than mixing up a tiny batch of black royal icing.
Equipment Needed
You don’t need a professional bakery setup to make these cookies. Here is the equipment that will make your life easier.
- Electric stand mixer or hand mixer: A stand mixer makes creaming the butter and sugar effortless, but a hand mixer works just fine. You just need something to get the dough smooth.
- Turkey cookie cutter: This is the star of the show. I use a 3-inch turkey cutter, but any size will work. You can find them in the seasonal section of most kitchen stores or online.
- Rolling pin: A standard rolling pin is fine. If you have adjustable rolling rings, they are great for getting a perfectly even thickness every time.
- Parchment paper: Line your baking sheets with this for easy cleanup and to prevent the cookies from sticking.
- Baking sheets: Heavy-duty, light-colored baking sheets work best. Dark sheets can cause the bottoms of the cookies to brown too quickly.
- Piping bags or squeeze bottles: For the royal icing, disposable piping bags with a small round tip (like a Wilton #2 or #3) are perfect. For the kids, squeeze bottles with a fine tip are easier to handle.
- Small bowls: You will need several small bowls to portion out and color your royal icing.
- Toothpicks: These are essential for popping air bubbles in the icing and for swirling colors together.
Preparation Method
Let’s get baking. Follow these steps, and you will have a tray of adorable turkey cookies before you know it.
Step 1: Make the Cookie Dough
In the bowl of your stand mixer (or a large bowl with a hand mixer), beat the softened butter and granulated sugar together on medium speed until light and fluffy, about 2-3 minutes. Scrape down the sides of the bowl with a spatula. Add the egg and vanilla extract, and beat until well combined. In a separate bowl, whisk together the flour, baking powder, and salt. With the mixer on low, gradually add the dry ingredients to the wet ingredients. Mix until just combined—do not overmix, or the cookies will be tough. The dough will be soft but not sticky.
Step 2: Chill the Dough
Divide the dough in half, flatten each half into a disk, and wrap them tightly in plastic wrap. Refrigerate for at least 30 minutes. This step is crucial. Chilling the dough firms up the butter, which prevents the cookies from spreading too much in the oven and losing their shape. You can chill the dough for up to 3 days at this point.
Step 3: Roll and Cut
Preheat your oven to 375°F (190°C). Line two baking sheets with parchment paper. On a lightly floured surface, roll out one disk of dough to about ¼-inch thickness. Use your turkey cookie cutter to cut out shapes. Transfer the cutouts to the prepared baking sheets, spacing them about 1 inch apart. Gather the scraps, re-roll them, and cut out more cookies. Repeat with the second disk of dough.
Step 4: Bake
Bake the cookies for 8-10 minutes, or until the edges are just barely golden. The centers should still look pale and slightly puffed. Let the cookies cool on the baking sheet for 5 minutes, then transfer them to a wire rack to cool completely. Do not try to ice warm cookies—the icing will melt and slide right off. It is worth the wait.
Step 5: Make the Royal Icing
While the cookies cool, make the icing. In the bowl of your stand mixer (or a large bowl with a hand mixer), combine the sifted powdered sugar and meringue powder. Add 4 tablespoons of warm water and the vanilla extract. Beat on low speed until combined, then increase to medium-high speed and beat for 5-7 minutes, until the icing is thick, glossy, and holds stiff peaks. If the icing is too thick, add the remaining tablespoon of water, one teaspoon at a time, until it reaches the desired consistency.
Step 6: Color the Icing
Divide the icing into small bowls. You will need brown for the turkey body, orange for the beak and feet, red for the wattle (that dangly bit on the beak), and yellow for the feathers. Use a toothpick to add a tiny amount of gel food coloring to each bowl and stir well. Cover the bowls with a damp paper towel to prevent the icing from drying out while you work.
Step 7: Decorate the Cookies
This is where the magic happens. Transfer each color of icing to a separate piping bag fitted with a small round tip. Start by outlining the turkey body with the brown icing, then fill it in (this is called “flooding”). Use a toothpick to spread the icing into the corners if needed. Repeat with the orange for the beak and feet, and the red for the wattle. For the feathers, pipe small dots or lines of yellow icing. While the icing is still wet, gently press the candy eyeballs into place. Let the cookies sit at room temperature for at least 2 hours, or until the icing is completely hard and dry to the touch.
Cooking Tips & Techniques
I have made every mistake in the book so you don’t have to. Here are the lessons I learned the hard way.
Don’t skip the chill time. I once tried to rush the process and cut the cookies as soon as the dough was mixed. They spread into flat, shapeless blobs in the oven. The chill time is not optional—it is your insurance policy against cookie sprawl.
Royal icing consistency is everything. If your icing is too thick, it will be hard to pipe and will not spread smoothly. If it is too thin, it will run off the edges of the cookie. The perfect consistency is like honey: it flows slowly off a spoon but holds its shape for a moment before settling. When you lift the spoon, the ribbon of icing should disappear back into the bowl within 10 seconds.
Work in an assembly line. Outline and flood all the turkey bodies first, then move on to the beaks, then the feathers. This way, you aren’t constantly switching piping bags and cleaning tips. It is faster and less messy.
Pop air bubbles immediately. After you flood the icing, you will probably see a few tiny air bubbles on the surface. Take a toothpick and gently pop them before the icing starts to set. Otherwise, they will dry into little craters.
Use a damp paper towel. Royal icing dries out fast. Keep a damp paper towel over the bowls of icing you aren’t actively using. If the icing starts to crust over on the surface, give it a quick stir to incorporate the dry bits.
Variations & Adaptations
This recipe is incredibly forgiving. Here are a few ways to make it your own.
Gluten-Free Version: Substitute the all-purpose flour with a 1-to-1 gluten-free baking flour blend that contains xanthan gum. I have tested this with the Bob’s Red Mill brand, and the cookies turned out tender and delicious. Chill the dough for an extra 15 minutes, as gluten-free dough can be a bit softer.
Vegan Adaptation: Replace the butter with a high-quality vegan butter stick (not the spreadable kind in a tub). Use a flax egg (1 tablespoon ground flaxseed mixed with 3 tablespoons water, let sit for 5 minutes) in place of the chicken egg. For the royal icing, you can use aquafaba (the liquid from a can of chickpeas) in place of the meringue powder and water. Beat 3 tablespoons of aquafaba with the powdered sugar until stiff peaks form.
Flavor Twist: Add ½ teaspoon of almond extract to the cookie dough along with the vanilla. It adds a subtle, nutty flavor that pairs beautifully with the sweet royal icing. You can also add a pinch of cinnamon or nutmeg to the dough for a more autumnal taste.
Different Shapes: Don’t have a turkey cutter? No problem. Use a round cutter for the body and a small leaf cutter for the feathers. Arrange the iced feathers in a fan shape behind the round body. It looks just as cute.
Serving & Storage Suggestions
These cookies are best served at room temperature. The royal icing should be completely dry and hard to the touch, which gives a satisfying snap when you bite into the cookie. Arrange them on a festive platter for a Thanksgiving dessert table, or package them in clear cellophane bags tied with a ribbon for a thoughtful homemade gift.
Storage: Store the decorated cookies in an airtight container at room temperature for up to 2 weeks. Do not refrigerate them, as the moisture in the fridge can make the icing sticky and cause the colors to bleed. If you need to stack them, place a layer of parchment paper between each cookie to protect the icing.
Freezing: You can freeze the undecorated baked cookies for up to 3 months. Wrap them tightly in plastic wrap and then place them in a freezer-safe bag. When you are ready to decorate, let them thaw at room temperature for about 30 minutes, then proceed with the icing. Do not freeze cookies that have already been iced—the icing will crack and become brittle.
Make-Ahead Tip: The royal icing can be made up to 3 days in advance. Store it in an airtight container in the refrigerator. When you are ready to use it, let it come to room temperature and give it a good stir. You may need to add a drop or two of water to bring it back to the right consistency.
Nutritional Information & Benefits
Let’s be honest—these are a treat. They are meant to be enjoyed in moderation as part of a festive celebration. Here is the estimated nutritional breakdown for one cookie (based on the recipe yielding 24 cookies).
| Nutrient | Amount Per Cookie |
|---|---|
| Calories | 165 |
| Total Fat | 7g |
| Saturated Fat | 4g |
| Cholesterol | 25mg |
| Sodium | 55mg |
| Total Carbohydrates | 24g |
| Sugars | 16g |
| Protein | 2g |
While these cookies are not a health food, there is a small silver lining. The butter provides a source of Vitamin A, and the egg contributes a bit of protein. The royal icing, while high in sugar, is free of the artificial colors and preservatives found in many store-bought cookies. When you make them from scratch, you control exactly what goes into them. And honestly, the joy of decorating and sharing them with loved ones is a pretty good kind of nourishment, too.
Conclusion
These quick decorated turkey sugar cookies are more than just a cute addition to your Thanksgiving spread. They are a reminder that the best memories in the kitchen are often the ones you didn’t plan for. They are the perfect project for a busy weeknight, a rainy afternoon, or a holiday gathering where you need something fun and low-stress for the kids to do. The dough comes together in minutes, the icing sets fast, and the decorating possibilities are endless.
I love this recipe because it gives me permission to be imperfect. My turkeys never look exactly the same, and that is kind of the point. They each have their own little personality. So go ahead, grab that turkey cookie cutter, and let your creativity run wild. I would love to see what you come up with. Share your creations in the comments below, or tag me on social media. And if you have a decorating tip or a variation that your family loves, please share it. Happy baking, friend.
Frequently Asked Questions
Can I use a different cookie recipe for the base?
Absolutely. While this sugar cookie recipe is my favorite for its soft texture and sturdy shape, you can use any rolled cookie dough you like. A shortbread or gingerbread base would also work beautifully with the royal icing.
My royal icing is too runny. How do I fix it?
If your icing is too thin, add a little more sifted powdered sugar, one tablespoon at a time, until it thickens up. Beat it on low speed to incorporate the sugar without adding too much air. If it is too thick, add water one teaspoon at a time.
How far in advance can I make these cookies?
You can bake the cookies up to a week in advance and store them in an airtight container at room temperature. The decorated cookies will stay fresh for up to two weeks. Just keep them in a cool, dry place away from direct sunlight.
Can I freeze the decorated cookies?
I do not recommend freezing cookies that have already been decorated with royal icing. The moisture in the freezer can cause the icing to become sticky and lose its hard finish. It is best to freeze the undecorated cookies and ice them after they have thawed.
What if I don’t have a turkey cookie cutter?
You can easily make your own template using a piece of cardboard. Draw a simple turkey shape, cut it out, and place it on the rolled dough. Use a sharp knife to cut around the template. It takes a little more time, but the results are just as charming.
Pin This Recipe!
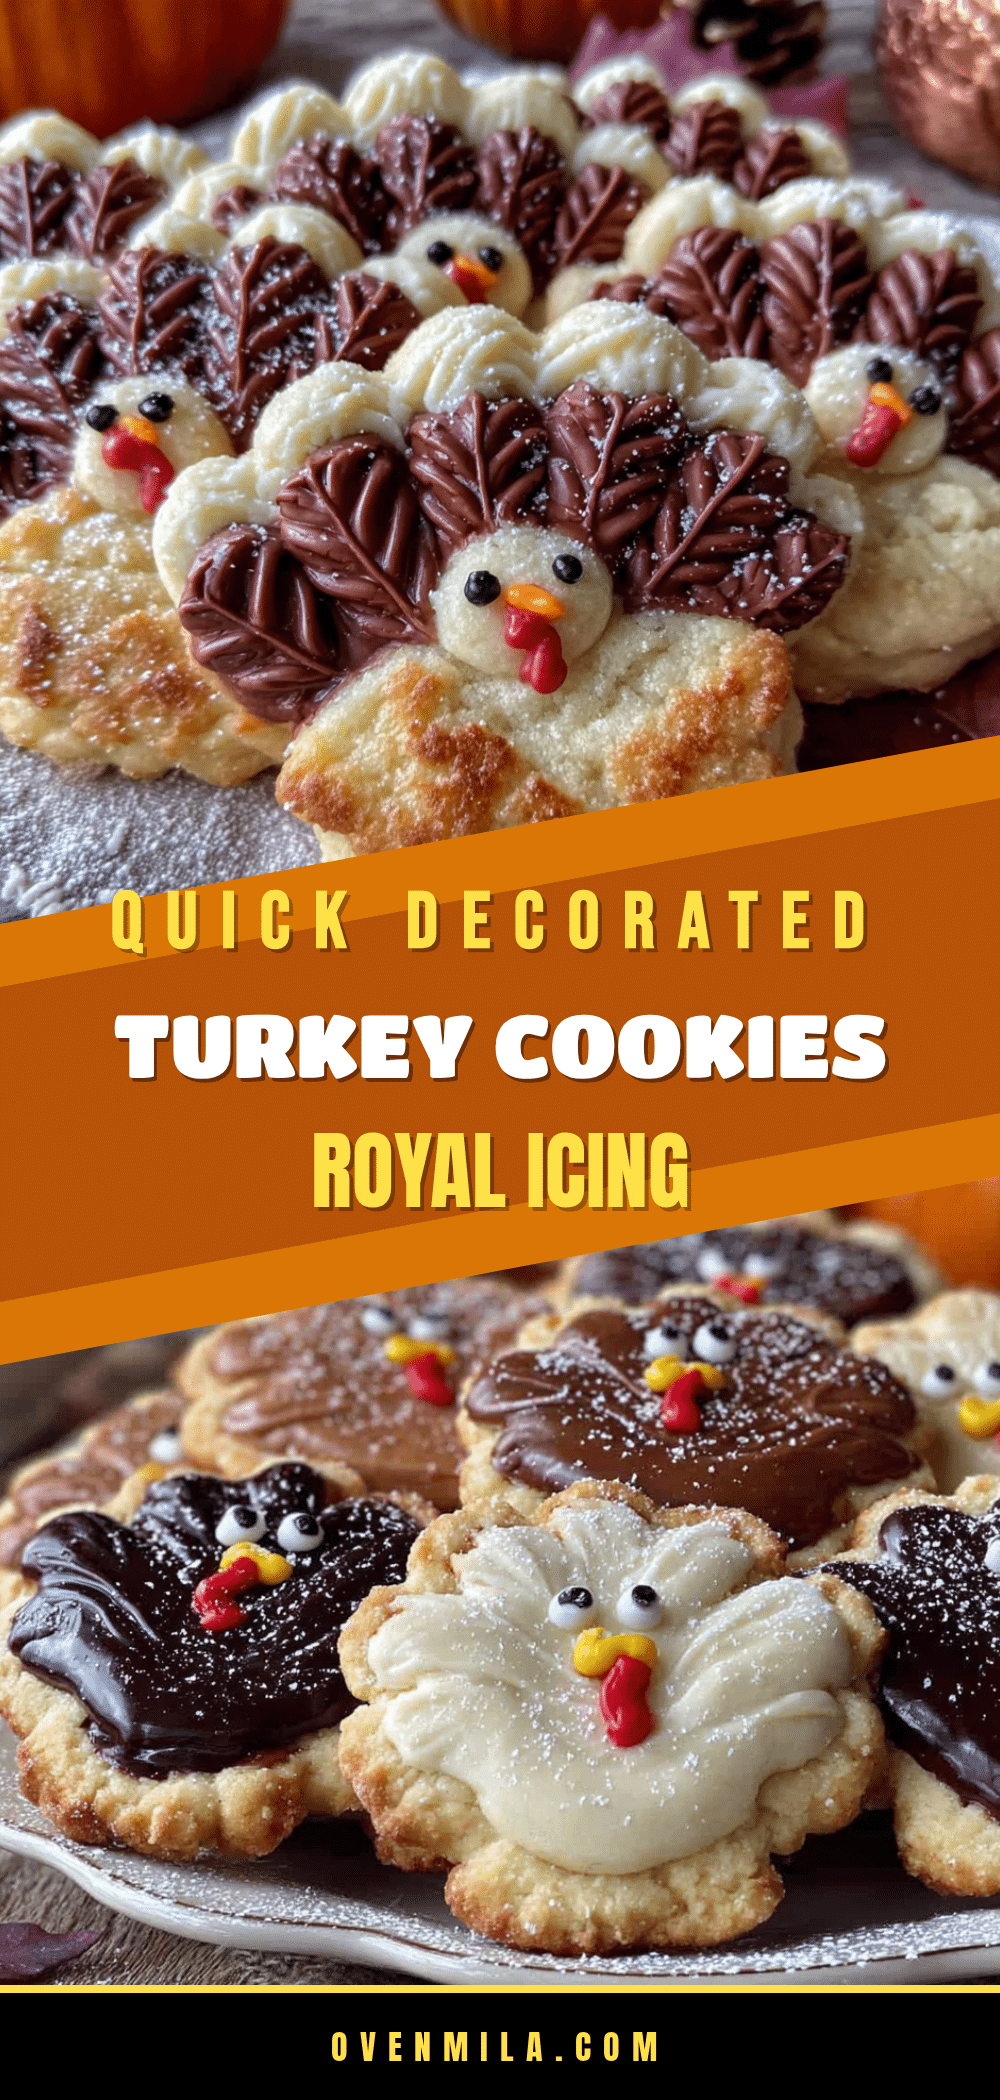
Easy Decorated Turkey Sugar Cookies with Royal Icing

These adorable turkey sugar cookies are a happy accident turned tradition. With a soft, buttery sugar cookie base and a glossy royal icing that sets perfectly, they are the perfect make-ahead project for Thanksgiving.
- Prep Time: 30 minutes
- Cook Time: 10 minutes
- Total Time: 40 minutes
- Yield: 24 servings 1x
- Category: Dessert
- Cuisine: American
Ingredients
- 1 cup (2 sticks) unsalted butter, softened
- 1 cup granulated sugar
- 1 large egg, at room temperature
- 1 teaspoon vanilla extract
- 2 ½ cups all-purpose flour
- ½ teaspoon baking powder
- ¼ teaspoon salt
- 3 cups powdered sugar, sifted
- 2 tablespoons meringue powder
- 4–5 tablespoons warm water
- ½ teaspoon vanilla extract
- Gel food coloring: orange, brown, red, yellow
- Candy eyeballs
- Black piping gel (optional)
Instructions
- In the bowl of a stand mixer (or a large bowl with a hand mixer), beat the softened butter and granulated sugar together on medium speed until light and fluffy, about 2-3 minutes. Scrape down the sides of the bowl with a spatula.
- Add the egg and vanilla extract, and beat until well combined.
- In a separate bowl, whisk together the flour, baking powder, and salt.
- With the mixer on low, gradually add the dry ingredients to the wet ingredients. Mix until just combined—do not overmix.
- Divide the dough in half, flatten each half into a disk, and wrap them tightly in plastic wrap. Refrigerate for at least 30 minutes.
- Preheat your oven to 375°F (190°C). Line two baking sheets with parchment paper.
- On a lightly floured surface, roll out one disk of dough to about ¼-inch thickness. Use a turkey cookie cutter to cut out shapes. Transfer the cutouts to the prepared baking sheets, spacing them about 1 inch apart. Gather the scraps, re-roll them, and cut out more cookies. Repeat with the second disk of dough.
- Bake the cookies for 8-10 minutes, or until the edges are just barely golden. Let the cookies cool on the baking sheet for 5 minutes, then transfer them to a wire rack to cool completely.
- While the cookies cool, make the icing. In the bowl of your stand mixer (or a large bowl with a hand mixer), combine the sifted powdered sugar and meringue powder. Add 4 tablespoons of warm water and the vanilla extract. Beat on low speed until combined, then increase to medium-high speed and beat for 5-7 minutes, until the icing is thick, glossy, and holds stiff peaks. If the icing is too thick, add the remaining tablespoon of water, one teaspoon at a time, until it reaches the desired consiste…
- Divide the icing into small bowls. Use a toothpick to add a tiny amount of gel food coloring to each bowl and stir well. Cover the bowls with a damp paper towel to prevent the icing from drying out.
- Transfer each color of icing to a separate piping bag fitted with a small round tip. Start by outlining the turkey body with the brown icing, then fill it in (flooding). Use a toothpick to spread the icing into the corners if needed. Repeat with the orange for the beak and feet, and the red for the wattle. For the feathers, pipe small dots or lines of yellow icing. While the icing is still wet, gently press the candy eyeballs into place.
- Let the cookies sit at room temperature for at least 2 hours, or until the icing is completely hard and dry to the touch.
Notes
Don’t skip the chill time—it prevents the cookies from spreading. Royal icing consistency is key: it should be like honey. Work in an assembly line for efficiency. Pop air bubbles immediately with a toothpick. Keep a damp paper towel over bowls of icing to prevent drying.
Nutrition
- Serving Size: 1 cookie
- Calories: 165
- Sugar: 16
- Sodium: 55
- Fat: 7
- Saturated Fat: 4
- Carbohydrates: 24
- Protein: 2
Keywords: turkey cookies, sugar cookies, royal icing, Thanksgiving cookies, decorated cookies, easy cookies


