The PTA Halloween party was in four hours and I’d completely forgotten I was on the snack committee. Everyone else would be bringing those elaborate witch-hat cookies or pumpkin-shaped Rice Krispie treats that looked like they took all weekend. I had a package of Oreos, a box of instant pudding, and a bag of gummy worms sitting in my cart at the grocery store at 2 PM, praying for a miracle. Honestly, I almost just grabbed a bag of candy and called it a day.
But then I remembered these little cups my aunt used to throw together for my cousins’ birthday parties. Dirt cups. The kind where you crush up cookies to look like soil and stick gummy worms in them like they’re crawling out. It felt almost too simple to bring to a party where other parents were clearly competing for the “Best Halloween Treat” trophy. I mean, come on—it’s crushed cookies and pudding. But I was out of time and out of options, so I grabbed the stuff and hoped for the best.
Fast forward to the party. Those dirt cups were gone in twenty minutes. A mom came up to me and asked for the recipe, looking genuinely annoyed that something so easy could be such a hit. Another dad said his kid had eaten three. I just stood there with my plastic spoon, feeling like some kind of accidental kitchen genius. That’s the thing about this Easy Halloween Dirt Cups recipe—it doesn’t try hard, but it wins every single time. Maybe you’ve been there, scrambling for a last-minute treat that somehow becomes the star of the show. That’s exactly why I keep coming back to this one.
Why You’ll Love This Recipe
Let’s be real for a second. Halloween is busy enough without adding complicated baking projects to your plate. This recipe respects your time and your sanity. Here’s why it works so well:
- Quick & Easy: We’re talking five minutes of active prep time. No oven, no stovetop, no complicated techniques. Just mix, crush, layer, and chill. It’s the ultimate last-minute dessert.
- Simple Ingredients: You probably already have most of this in your pantry. Oreos, instant pudding, milk, and gummy worms. That’s it. No fancy grocery store runs required.
- Perfect for Halloween Parties: Whether it’s a classroom celebration, a neighborhood get-together, or just a fun treat for your own kids, these cups fit right in. They’re portable, individual-sized, and mess-free.
- Crowd-Pleaser: Kids absolutely go nuts for these. Adults do too, honestly. There’s something about eating “dirt” that brings out the kid in everyone. I’ve never seen a single person turn one down.
- Unbelievably Delicious: It’s creamy, crunchy, and sweet all at once. The texture of the crushed Oreos against the smooth pudding is just perfect. And those gummy worms? Pure nostalgia in every bite.
What makes this version different from the rest? I’ve tested a lot of dirt cup recipes over the years. Some use homemade pudding (too much work for a weeknight), some skip the cream cheese layer (too boring), and some use way too many gummy worms (yes, that’s a thing). My version strikes the perfect balance. The cream cheese in the pudding gives it a richness that boxed pudding alone just can’t match. It’s a small tweak that makes a huge difference. Honestly, it’s the kind of dessert that makes you close your eyes after the first bite and remember being a kid again.
What Ingredients You Will Need
This recipe uses simple, everyday ingredients to create something that feels way more special than it actually is. Most of these are pantry staples, which makes this perfect for those moments when you need a treat fast.
- 1 package (14.3 ounces) Oreo cookies – Regular Oreos work best. Don’t use double-stuf for the “dirt” part because the extra cream filling makes it clump up. You want them crushed into fine crumbs, like real soil. I’ve tried this with generic chocolate sandwich cookies, and they just don’t have the same deep chocolate flavor.
- 1 package (3.4 ounces) instant vanilla pudding mix – Jell-O brand is my go-to, but any brand works. Do not use cook-and-serve pudding; it won’t set up properly for this recipe. You need the instant kind that thickens in the fridge.
- 1 cup cold milk – Whole milk gives the richest texture, but 2% works fine too. I’ve even used oat milk in a pinch, and it turned out okay—just slightly less creamy. Almond milk is too thin for my liking.
- 4 ounces cream cheese, softened – This is my secret weapon. It adds a tangy richness that makes the pudding taste homemade. Make sure it’s softened to room temperature so it blends smoothly. Philadelphia is my preferred brand because it’s consistently creamy.
- 1/4 cup powdered sugar – Just a little sweetness to balance the tang of the cream cheese. You can skip this if you want a less sweet version, but I find it helps everything meld together.
- 1 cup whipped topping (like Cool Whip), thawed – This lightens up the pudding mixture and makes it fluffy. You can substitute homemade whipped cream if you’re feeling fancy, but Cool Whip holds up better over time, especially if you’re making these ahead.
- 1/2 cup gummy worms – The star of the show! I recommend Trolli or Black Forest brand for the best texture. Cut them in half or leave them whole, depending on how creepy you want them to look. Pro tip: buy extra because you will eat some while assembling.
- Small clear plastic cups (7-9 ounce size) – The clear cups are essential for the visual effect. You want people to see the layers of “dirt” and the worms poking out. I get mine at the dollar store or on Amazon in packs of 25.
Optional garnish ideas: A few extra crushed Oreos on top, a plastic spider ring for fun, or a dollop of extra whipped cream. Some people like to add a few candy pumpkins or candy corn on top for extra Halloween flair.
Equipment Needed
You don’t need much for this recipe, which is part of its beauty. Here’s what you’ll need:
- A food processor or blender – This makes crushing the Oreos into fine crumbs effortless. I use my Cuisinart food processor, and it takes about 30 seconds. If you don’t have one, no worries.
- A resealable plastic bag and rolling pin – The old-school method. Put the Oreos in a zip-top bag, squeeze out the air, and roll over them with a rolling pin until they’re crushed. It’s a great way to let kids help. Just be careful not to poke a hole in the bag.
- A medium mixing bowl – For the pudding mixture. Any bowl works, but I like using a glass one so I can see if everything is blended evenly.
- A hand mixer or whisk – A hand mixer makes quick work of combining the cream cheese and pudding, but a strong whisk works too. You’ll just need a little elbow grease.
- A spatula – For scraping down the sides of the bowl and transferring the pudding into the cups. A silicone spatula is my favorite because nothing sticks to it.
- Small clear plastic cups (7-9 ounces each) – As mentioned, these are key for the visual effect. I’ve used small mason jars too, and they look adorable.
- A measuring cup and spoons – For accurate measurements. I know, I know, eyeballing is tempting, but the pudding-to-cream-cheese ratio matters here.
Budget-friendly tip: Skip the food processor and use the bag-and-rolling-pin method. It takes a few extra minutes, but it’s free and honestly kind of therapeutic. Plus, it gives the kids something to do while you mix the pudding.
Preparation Method
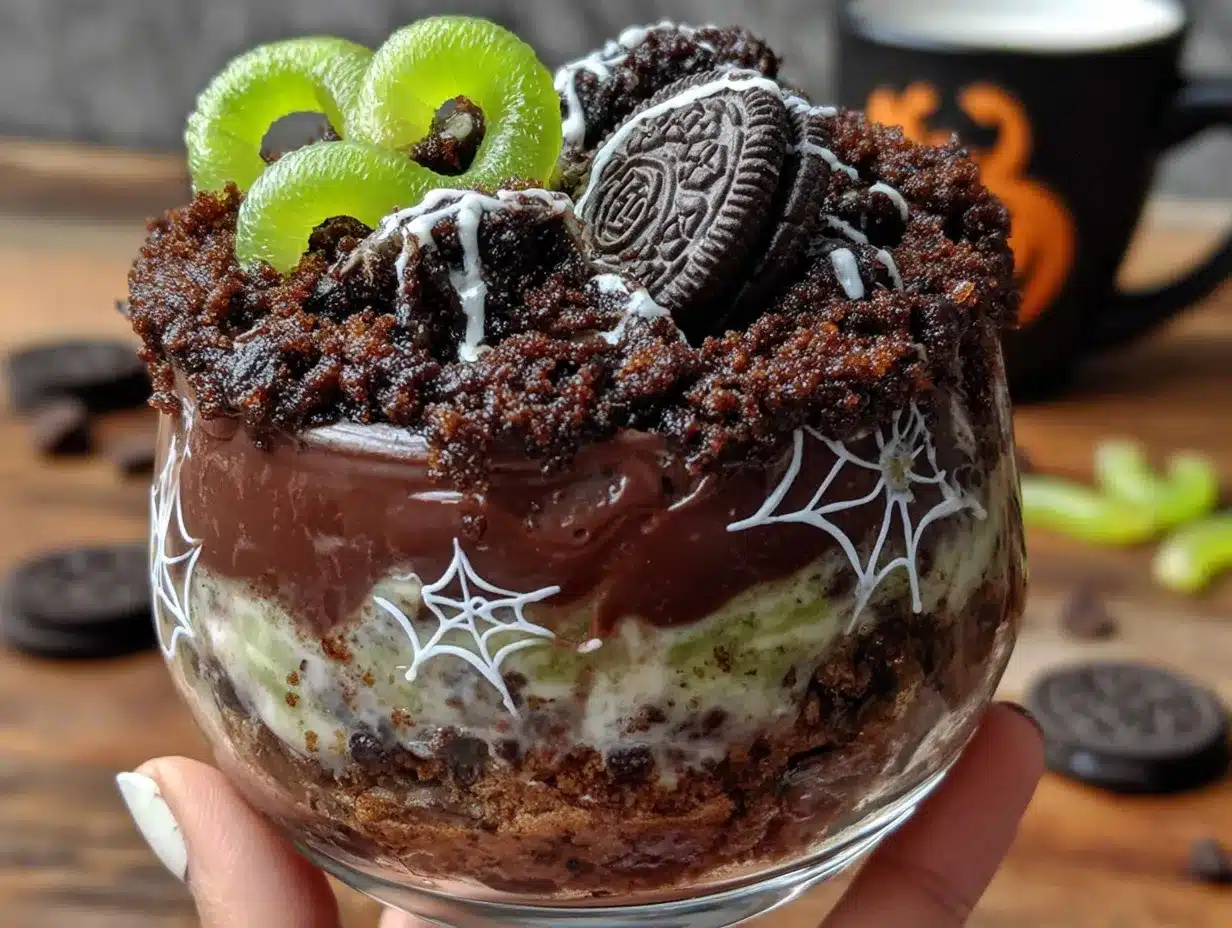
Alright, let’s make some dirt cups. This is so simple you’ll wonder why you ever bought pre-made ones from the store.
- Crush the Oreos. Place all the Oreos in your food processor and pulse until they become fine crumbs. You want them to look like dark, rich soil—no large chunks remaining. If using the bag method, put the cookies in a heavy-duty zip-top bag and crush them with a rolling pin. Set the crumbs aside. You’ll use about 3/4 of them for the layers and save the rest for topping. (Pro tip: Don’t over-crush them into dust; you want a little texture.)
- Make the cream cheese base. In a medium mixing bowl, beat the softened cream cheese with the powdered sugar until smooth and fluffy. This takes about 2 minutes with a hand mixer. Make sure there are no lumps. I learned this the hard way—lumpy cream cheese makes lumpy pudding, and nobody wants that.
- Prepare the pudding. In a separate bowl, whisk the instant pudding mix with the cold milk for about 2 minutes until it starts to thicken. It will be loose at first, then it’ll firm up. Let it sit for 2-3 minutes to fully activate. (This is important—if you don’t let it sit, the layers won’t set properly.)
- Combine everything. Add the pudding mixture to the cream cheese mixture and beat until smooth. Then fold in the thawed whipped topping gently with a spatula until everything is combined and fluffy. The mixture should be light, creamy, and a pale vanilla color. Taste it here—I won’t judge if you need to “test” it a few times.
- Layer the cups. Now for the fun part. Spoon about 2 tablespoons of the crushed Oreos into the bottom of each clear cup. Press down lightly with the back of a spoon to create a solid “dirt” base. Then spoon or pipe the pudding mixture on top, filling each cup about 3/4 full. Smooth the top with a spatula.
- Add the “dirt” topping. Sprinkle a generous layer of the remaining crushed Oreos over the pudding. You want it to completely cover the surface so it looks like a little cup of soil. Don’t be shy here—this is the visual payoff.
- Insert the gummy worms. Here’s where the magic happens. Gently push 2-3 gummy worms into each cup, leaving part of them sticking out as if they’re crawling out of the dirt. I like to position some at different angles—one diving in, one climbing out, one halfway. It makes the cups look more dynamic and creepy-cute.
- Chill and set. Place the cups in the refrigerator for at least 1-2 hours before serving. This allows the pudding to fully set and the flavors to meld together. The cups will keep in the fridge for up to 3 days, but honestly, they’re best within the first 24 hours when the Oreos still have a little crunch.
A note on timing: If you’re making these for a party, you can assemble them the night before. Just wait to add the gummy worms until right before serving so they don’t get too soft and lose their shape. Trust me on this—soggy gummy worms are not a good look.
Cooking Tips & Techniques
I’ve made these dirt cups more times than I can count, and I’ve definitely made my share of mistakes. Here’s what I’ve learned so you don’t have to repeat my failures.
Don’t skip the cream cheese. I know it’s an extra step, but it is absolutely worth it. The first time I made these, I just used boxed pudding and Cool Whip. They were fine, but they were forgettable. The cream cheese adds a tangy richness that makes people ask, “What’s in this?” It’s the secret to making a five-minute dessert taste like you actually tried.
Crush the Oreos finely but not to dust. You want them to look like real soil, not chocolate powder. If you over-crush them, they turn into a paste that clumps together. If you under-crush them, you get big chunks that don’t look like dirt. Aim for a consistency like coarse sand. I usually pulse my food processor about 15 times and then check.
Let the pudding set before layering. This was a hard lesson for me. The first time I made these, I was in a hurry and poured the pudding right after mixing. It was too thin and seeped into the Oreo layer, making everything a muddy mess. Let the pudding sit for 3-4 minutes after mixing until it’s thick but still spoonable. That’s the sweet spot.
Use clear cups for the full effect. I’ve made these in opaque cups before, and while they still taste great, they lose the visual wow factor. The whole point is seeing those layers of dirt and those worms poking out. Clear cups are cheap and make all the difference. You can find them at any grocery store or party supply store.
Make extra—seriously. This recipe makes about 6-8 cups depending on the size of your cups. Double it if you’re serving a crowd. I once made a single batch for a party of 12 and watched them disappear in minutes. People will eat two. Kids will eat three. Just save yourself the stress and make a double batch.
Timing tip for multitasking: While the pudding is setting, crush your Oreos. While the cups are chilling, clean up your kitchen. This recipe is so fast that the cleanup takes almost as long as the prep. Keep a damp paper towel handy for sticky fingers.
Variations & Adaptations
One of the best things about this recipe is how easy it is to adapt. Here are some variations I’ve tried and loved:
Chocolate Pudding Version: Swap the vanilla pudding for chocolate instant pudding. It makes the dessert even more chocolatey and the “dirt” looks even more realistic against the dark pudding. This is my personal favorite for Halloween parties because it looks extra creepy.
Gluten-Free Option: Use gluten-free chocolate sandwich cookies. There are several brands available now, and they work just as well. The rest of the ingredients are naturally gluten-free, so this is an easy swap. I’ve used the Goodie Girl brand and they’re excellent.
Dairy-Free Version: Use dairy-free cream cheese (like Kite Hill or Tofutti), coconut milk or oat milk for the pudding, and a dairy-free whipped topping. The texture is slightly different—a bit less rich—but it still tastes great. I’ve made this for a friend with a dairy allergy and she said it was the best dirt cup she’d ever had.
Peanut Butter Dirt Cups: Add 2 tablespoons of creamy peanut butter to the cream cheese mixture. It adds a salty-sweet depth that pairs beautifully with the chocolate Oreos. Just make sure to check for peanut allergies if you’re serving these at a school event.
Pumpkin Spice Dirt Cups: For a fall twist, add 1/4 cup of pumpkin puree and 1 teaspoon of pumpkin pie spice to the pudding mixture. It turns these into a Thanksgiving dessert that still has the fun Halloween vibe. The orange color against the dark “dirt” is actually really pretty.
Mini Version: Use small shot glasses or mini cups for a party appetizer-sized treat. These are perfect for adult Halloween parties where people want a small sweet bite without committing to a full cup. I made these for a work party and they were a huge hit.
Serving & Storage Suggestions
These dirt cups are best served cold, straight from the fridge. The contrast between the cool, creamy pudding and the crunchy Oreo “dirt” is part of the magic. Here are my serving and storage tips:
Serving Temperature: Serve chilled, but not ice-cold. If they’ve been in the fridge for more than a few hours, let them sit on the counter for 5-10 minutes before serving. This softens the pudding just enough to make it perfectly spoonable.
Presentation Tips: Arrange the cups on a platter or tray for easy grabbing. You can add a few extra gummy worms on the platter for effect, or scatter some candy corn around for color. For a really spooky look, place a plastic spider on top of each cup or add a tombstone-shaped cookie.
Storage: Keep the cups covered in the refrigerator for up to 3 days. I use plastic wrap or reusable silicone lids. The Oreo crumbs will soften over time, so the texture is best within the first 24 hours. If you’re making them ahead, I recommend layering the pudding and Oreos, then adding the gummy worms and final crumb topping just before serving.
Freezing: I don’t recommend freezing these. The pudding becomes watery when thawed, and the texture is just not the same. These are best made fresh or a day ahead.
How Flavors Develop: The cream cheese and pudding flavors meld together beautifully after a few hours in the fridge. If you can resist eating them immediately, they actually taste better the next day. The Oreos soften into a cake-like texture that some people prefer over the crunchy version.
Complementary Pairings: Serve these alongside other Halloween treats like caramel apples, popcorn balls, or pumpkin cupcakes. For a drink pairing, apple cider or hot chocolate is perfect for a chilly October evening. For an adult party, a cinnamon-spiced coffee or a dark stout beer pairs surprisingly well with the chocolate and cream cheese flavors.
Nutritional Information & Benefits
Let’s be honest—this is a treat, not a health food. But here’s the breakdown so you know what you’re working with:
Estimated Nutrition per Serving (1 cup):
- Calories: 320-380
- Fat: 16g
- Carbohydrates: 45g
- Protein: 5g
- Sugar: 32g
- Fiber: 1g
Health Benefits of Key Ingredients: The cream cheese provides a small amount of calcium and protein. The milk adds vitamin D and more calcium. And honestly? The mental health benefit of eating something fun and nostalgic is real. Sometimes we need a treat that makes us smile, and that’s okay.
Dietary Considerations: This recipe is vegetarian. For gluten-free, dairy-free, or vegan options, see the variations section above. The main allergens are dairy (milk, cream cheese, whipped topping) and wheat (Oreos). Always check labels if you’re serving someone with allergies.
My Personal Take: I’m not a nutritionist, just a mom who believes in balance. These dirt cups are a once-in-a-while treat for us, and they’re worth every calorie. The joy on my kids’ faces when they see those gummy worms poking out? Priceless. Sometimes the best thing you can do for your family is make something that feels like pure fun.
Conclusion
So there you have it—the Easy Halloween Dirt Cups recipe that saved me from PTA party disaster and has become a yearly tradition in our house. It’s proof that you don’t need fancy ingredients or hours in the kitchen to create something memorable. Sometimes the simplest ideas are the ones that stick.
I love this recipe because it brings people together. Whether you’re making it with your kids on a rainy October afternoon or throwing it together at the last minute for a party, it never fails to get smiles and laughter. And honestly, isn’t that what Halloween is all about?
I’d love to hear how yours turn out! Did you try any of the variations? Did your kids help crush the Oreos? Did anyone try to eat the gummy worms before they made it into the cups? (No judgment here—I’ve been there.) Drop a comment below and let me know. And if you have your own twist on these dirt cups, please share it—I’m always looking for new ideas!
Happy Halloween, friends. Go make some dirt and have fun with it. You’ve got this.
Frequently Asked Questions
Can I make these dirt cups ahead of time?
Absolutely! You can assemble them up to 24 hours in advance. Just wait to add the gummy worms until right before serving so they stay firm and chewy. The pudding will set up perfectly overnight, and the flavors will actually meld together even better.
Can I use homemade pudding instead of instant?
You can, but I don’t recommend it for this recipe. Homemade pudding is thinner and won’t set up as firmly in the cups. Instant pudding is designed to thicken quickly and hold its shape, which is exactly what you need for layered dirt cups. If you really want to use homemade, add an extra tablespoon of cornstarch to help it set.
How many cups does this recipe make?
This recipe makes about 6-8 cups, depending on the size of your cups. I use 7-ounce clear plastic cups and get exactly 8 cups. If you’re using smaller cups like shot glasses for appetizer portions, you’ll get closer to 12-15.
Can I use double-stuf Oreos?
I don’t recommend it. The extra cream filling makes the crushed cookies clump together instead of looking like fine dirt. You end up with sticky, pasty crumbs that don’t have the right texture. Stick with regular Oreos for the best results.
How do I keep the gummy worms from getting soggy?
The key is to add them right before serving. If you add them too early, the moisture from the pudding will soften them. If you’re making the cups ahead of time, store the gummy worms separately and insert them into the cups just before you’re ready to serve. This keeps them chewy and fun.
Pin This Recipe!
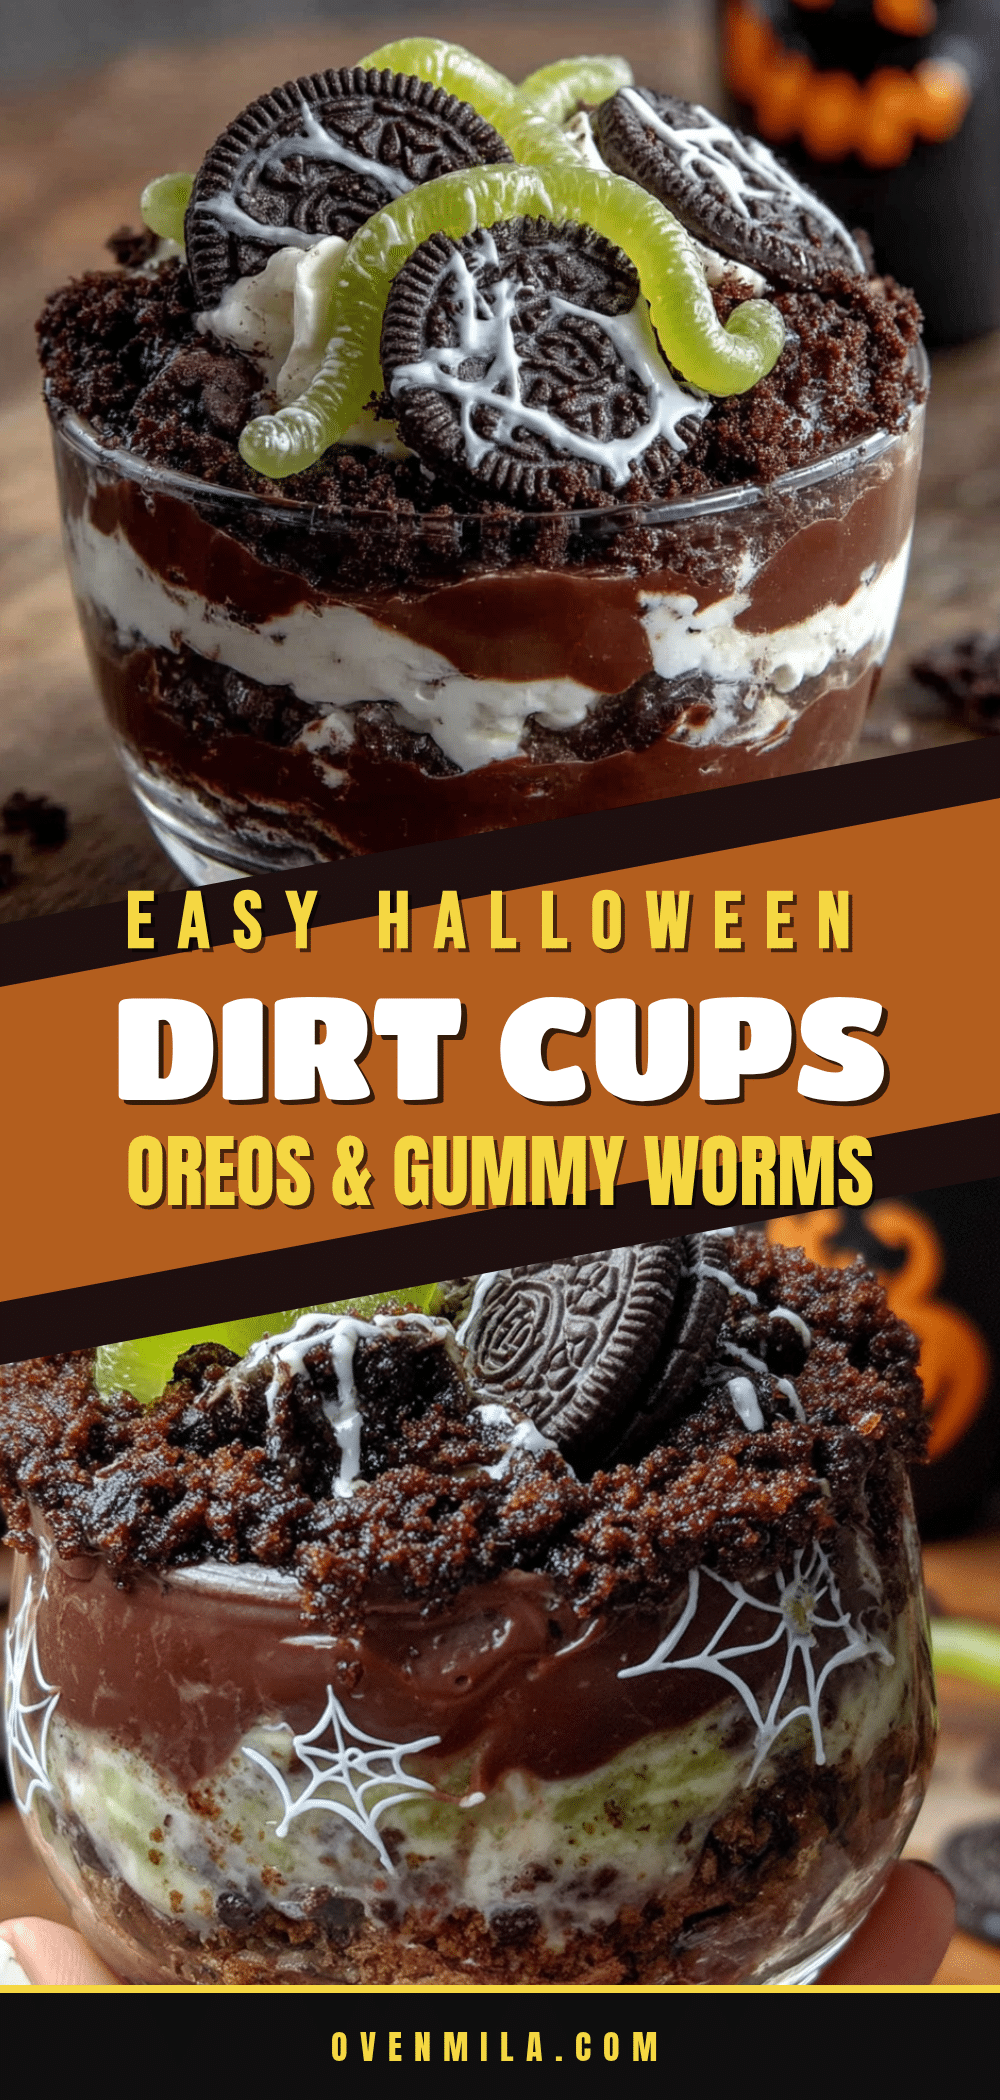
Easy Halloween Dirt Cups: 5-Minute Oreo & Gummy Worm Dessert
A quick and easy no-bake Halloween dessert made with crushed Oreos, creamy pudding, and gummy worms. Perfect for last-minute parties and guaranteed to be a crowd-pleaser.
- Prep Time: 5 minutes
- Cook Time: 0 minutes
- Total Time: 1 hour 5 minutes (including chilling)
- Yield: 6-8 servings 1x
- Category: Dessert
- Cuisine: American
Ingredients
- 1 package (14.3 ounces) Oreo cookies
- 1 package (3.4 ounces) instant vanilla pudding mix
- 1 cup cold milk
- 4 ounces cream cheese, softened
- 1/4 cup powdered sugar
- 1 cup whipped topping (like Cool Whip), thawed
- 1/2 cup gummy worms
- Small clear plastic cups (7-9 ounce size)
Instructions
- Crush the Oreos in a food processor or by placing them in a resealable bag and crushing with a rolling pin until they resemble fine crumbs. Set aside.
- In a medium mixing bowl, beat the softened cream cheese with the powdered sugar until smooth and fluffy, about 2 minutes.
- In a separate bowl, whisk the instant pudding mix with the cold milk for about 2 minutes until it starts to thicken. Let it sit for 2-3 minutes to fully activate.
- Add the pudding mixture to the cream cheese mixture and beat until smooth. Then fold in the thawed whipped topping gently with a spatula until combined and fluffy.
- Spoon about 2 tablespoons of the crushed Oreos into the bottom of each clear cup. Press down lightly with the back of a spoon.
- Spoon or pipe the pudding mixture on top, filling each cup about 3/4 full. Smooth the top with a spatula.
- Sprinkle a generous layer of the remaining crushed Oreos over the pudding to completely cover the surface.
- Gently push 2-3 gummy worms into each cup, leaving part of them sticking out as if they are crawling out of the dirt.
- Refrigerate for at least 1-2 hours before serving. For best results, add gummy worms just before serving if making ahead.
Notes
For best results, use regular Oreos (not double-stuf) to avoid clumpy crumbs. Let the pudding sit for 3-4 minutes after mixing before layering. Add gummy worms just before serving to keep them from getting soggy. The cups can be assembled up to 24 hours in advance, but add the gummy worms and final crumb topping right before serving.
Nutrition
- Serving Size: 1 cup
- Calories: 350
- Sugar: 32
- Sodium: 380
- Fat: 16
- Saturated Fat: 8
- Carbohydrates: 45
- Fiber: 1
- Protein: 5
Keywords: Halloween dirt cups, Oreo dessert, gummy worm dessert, no-bake Halloween treat, easy Halloween dessert


