My neighbor Sarah asked me last week why I couldn’t just roast the turkey breast at a higher temperature for less time. I started to explain why that wouldn’t work — then stopped. Honestly, I had no good answer. I’d been following the same low-and-slow method for years because that’s what my grandmother taught me, not because I’d ever questioned it.
So I tried it her way. 425°F, no fussing, just a simple herb butter and a quick roast. I stood there watching through the oven door, ready to grab a fire extinguisher or at least apologize for the dried-out bird I was certain we’d be eating. Instead, the most beautiful golden-brown turkey breast I’d ever made came out of that oven. The skin was crackling crisp. The meat was somehow juicier than my usual method. Sarah just smiled from my kitchen stool, and I had to admit — she was right.
That moment changed how I think about cooking, honestly. Sometimes the simplest approach wins, even when we’ve convinced ourselves that complicated means better. This easy herb butter roasted turkey breast with pan gravy has become my go-to for weeknight dinners that feel special, small holiday gatherings, and any time I want that Sunday-roast feeling without spending all day in the kitchen. Maybe you’ve been there — standing in the grocery aisle, turkey breast in hand, wondering if you really need to brine it for 24 hours and babysit it all afternoon. You don’t. Let me show you what I learned from letting go of the rules.
Why You’ll Love This Recipe
This isn’t just another turkey recipe. After testing this method at least a dozen times — on regular Tuesday nights and for a few small Thanksgiving dinners — I can tell you it works every single time. Here is why this one earns a permanent spot in your recipe collection:
- Quick & Easy: From fridge to table in about 90 minutes, with only 15 minutes of active prep. Perfect for busy weeknights when you want something hearty without the hassle.
- Simple Ingredients: Butter, fresh herbs, garlic, and a turkey breast. That’s it. No special trips to specialty stores or obscure spice blends.
- Perfect for Any Occasion: Works beautifully for a cozy Sunday dinner, a small holiday gathering, or meal prep for the week.
- Foolproof Results: The high-heat method delivers consistently juicy meat and crispy skin, even if you forget to set a timer (I’ve done that more than once).
- Built-In Gravy: The pan drippings transform into a rich, silky gravy with almost no extra effort. No drippings? No problem — this method guarantees them.
What makes this recipe different from every other roasted turkey breast out there is the technique. I spent years thinking you had to start low and finish high, basting every 20 minutes, covering and uncovering. This method skips all that. The herb butter does the work, the high heat seals in the moisture, and you get to sit down instead of hovering by the oven. The first time I made it this way, I actually had time to set the table and pour myself a glass of wine before dinner. That never happened before.
This is the kind of recipe that makes you close your eyes after the first bite. It is comfort food stripped down to its essentials — faster, easier, but with the same soul-soothing satisfaction. Perfect for impressing guests without stress, or turning a simple Tuesday into something memorable.
What Ingredients You Will Need
This recipe uses simple, wholesome ingredients to deliver bold flavor and satisfying texture without the fuss. Most of these are probably already in your kitchen, which is exactly the point.
For the Turkey and Herb Butter
- 1 bone-in, skin-on turkey breast (5-7 pounds / 2.3-3.2 kg) — Look for one that is evenly shaped for consistent cooking. I prefer the whole breast with the backbone removed, but a half breast works too (just reduce cooking time by about 15 minutes).
- 4 tablespoons unsalted butter, softened — Kerrygold is my go-to for its rich flavor, but any good-quality butter works. Make sure it’s truly soft so the herbs mix in evenly.
- 2 tablespoons fresh rosemary, finely chopped — Fresh makes a huge difference here. Dried rosemary can be woody and overpowering. If you must substitute, use 2 teaspoons dried and crush it between your fingers first.
- 2 tablespoons fresh thyme leaves — Strip the leaves from the stems. No need to chop them further — they are small enough as they are.
- 1 tablespoon fresh sage, finely chopped — Sage has a strong flavor, so don’t go overboard. This amount gives a lovely savory note without dominating.
- 3 cloves garlic, minced — Fresh garlic, not the jarred stuff. The flavor is sharper and more aromatic.
- 1 teaspoon salt — I use kosher salt. If using table salt, reduce to 3/4 teaspoon.
- 1/2 teaspoon black pepper, freshly ground — Pre-ground pepper works in a pinch, but fresh makes a noticeable difference.
- 1 tablespoon olive oil — Just a little to help the skin crisp up even more. Any neutral oil works.
For the Pan Gravy
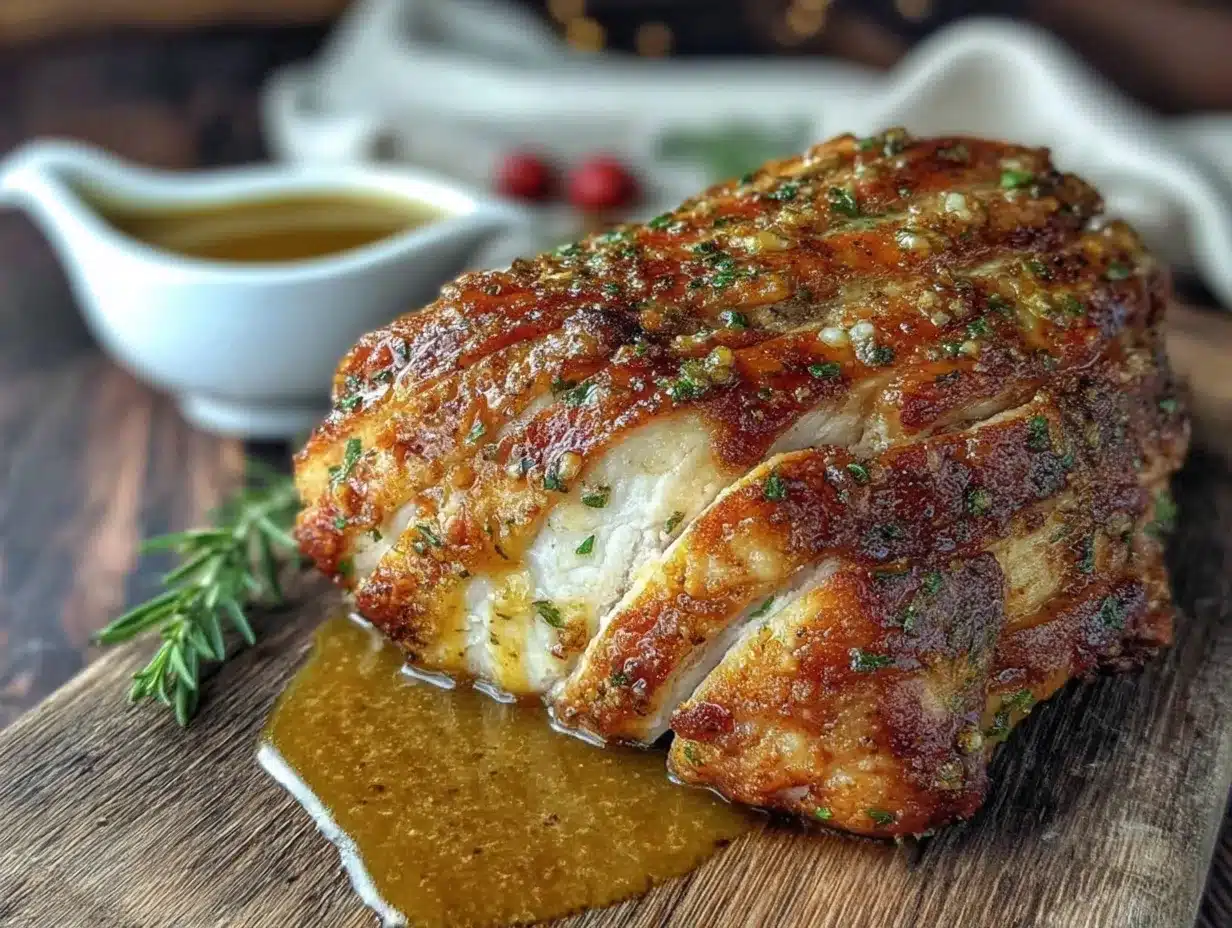
- 2 tablespoons pan drippings (or butter, if drippings are scarce) — The drippings from the turkey are liquid gold. If your turkey didn’t render much fat, supplement with butter.
- 2 tablespoons all-purpose flour — This thickens the gravy. For a gluten-free version, use cornstarch mixed with cold water (see substitution notes below).
- 1 cup chicken broth, low-sodium — Homemade is wonderful, but store-bought works perfectly. I like Swanson’s low-sodium for consistent results.
- 1/2 cup dry white wine (optional) — Adds acidity and depth. Use a Sauvignon Blanc or Pinot Grigio — nothing oaky. Skip it if you prefer, and use an extra 1/2 cup broth instead.
- Salt and pepper to taste — The drippings are already seasoned, so taste before adding more salt.
Ingredient Selection Tips
When choosing your turkey breast, look for one that feels heavy for its size — that means it’s juicy. Avoid any with a lot of liquid in the package, which can indicate the meat has been injected with saline solution. If you end up with a pre-brined or injected turkey, reduce the added salt in the herb butter to 1/2 teaspoon.
For the herbs, farmers’ markets are my favorite source. They are often fresher and more affordable than grocery store bundles. If you grow your own, even better. I keep a small rosemary plant on my kitchen windowsill specifically for this recipe.
Substitution Guidance
- Butter: Use vegan butter or coconut oil for a dairy-free option. The flavor will change slightly, but it still works.
- Fresh herbs: In winter, I’ve used 2 teaspoons each of dried rosemary, thyme, and sage. It’s not quite the same, but it gets the job done.
- Chicken broth: Turkey broth or vegetable broth both work. Avoid beef broth — the flavor is too heavy.
- Flour: For gluten-free gravy, mix 1 tablespoon cornstarch with 2 tablespoons cold water, then whisk into the drippings at the end. Simmer until thickened.
Equipment Needed
- Roasting pan — A metal or ceramic pan with low sides works best. A 9×13-inch baking dish also works in a pinch.
- Wire rack — Lifts the turkey off the bottom of the pan so the heat circulates evenly. If you don’t have one, use halved onions or celery stalks as a makeshift rack.
- Instant-read thermometer — Non-negotiable for perfectly cooked turkey. I’ve used a cheap $10 one for years and it works fine. The ThermoPro TP19 is my current favorite for its quick read.
- Small bowl — For mixing the herb butter.
- Chef’s knife and cutting board — For chopping herbs and garlic.
- Measuring spoons — For accurate seasoning.
- Whisk — For making the gravy smooth and lump-free.
- Fat separator — Not essential, but makes removing excess fat from the drippings much easier. A liquid measuring cup works too — just spoon off the fat from the top.
- Foil — For tenting the turkey while it rests.
I’ll be honest — I didn’t own a roasting rack for years. I used crumpled foil to lift the turkey off the pan bottom, and it worked fine. Don’t let missing equipment stop you from making this.
Preparation Method
- Preheat your oven to 425°F (220°C). Position the rack in the lower third of the oven. This high heat is the secret to crispy skin and juicy meat — trust it.
- Pat the turkey breast completely dry with paper towels. This is the most important step for crispy skin. If the skin is even slightly damp, it will steam instead of crisp. Take your time here.
- Make the herb butter. In a small bowl, combine the softened butter, chopped rosemary, thyme, sage, minced garlic, salt, and pepper. Mash it together with a fork until everything is evenly distributed. The mixture should be spreadable but not melted.
- Loosen the turkey skin. Using your fingers, gently separate the skin from the meat, starting at the top edge and working your way down. Be careful not to tear the skin — go slowly. This creates a pocket for the herb butter.
- Apply the herb butter. Take about three-quarters of the herb butter and spread it directly onto the meat under the skin. Use your fingers to distribute it evenly. Then spread the remaining butter all over the outside of the skin. Drizzle with the olive oil and rub it in — this extra fat helps the skin crisp up beautifully.
- Place the turkey on the roasting rack. Set it breast-side up in the roasting pan. Pour 1/2 cup of chicken broth into the bottom of the pan — this prevents the drippings from burning and creates the base for your gravy.
- Roast for 15 minutes at 425°F. This initial blast of high heat kickstarts the browning process. Set a timer — don’t wander off.
- Reduce the oven temperature to 375°F (190°C). Without opening the door, lower the temperature. Continue roasting for about 45-60 minutes, depending on the size of your turkey breast. A 5-pound breast typically takes about 50 minutes at this stage.
- Check the internal temperature. Insert your instant-read thermometer into the thickest part of the breast, avoiding the bone. You are looking for 155°F (68°C) — the temperature will rise to 160°F (71°C) as it rests. If it’s not there yet, continue roasting and check every 10 minutes.
- Let the turkey rest. Once the turkey hits 155°F, remove it from the oven. Transfer it to a cutting board and tent loosely with foil. Let it rest for 15-20 minutes. This is crucial — the juices redistribute during this time, giving you moist, tender meat.
- Make the pan gravy while the turkey rests. Place the roasting pan over two burners on the stovetop over medium heat. If the drippings have burned, scrape up the browned bits with a wooden spoon. Whisk in the flour and cook for 1 minute, stirring constantly. Slowly pour in the broth and wine (if using), whisking continuously to prevent lumps. Simmer for 3-5 minutes until thickened. Season with salt and pepper to taste.
- Strain the gravy (optional but recommended). Pour the gravy through a fine-mesh strainer into a serving boat for a silky-smooth finish. If you don’t mind a few herb bits, skip this step.
- Carve and serve. Slice the turkey against the grain into thick pieces. Drizzle with gravy and serve immediately.
Cooking Tips & Techniques
Here is the thing about roasting turkey — most people overcook it because they are scared of undercooking it. I have been there. The first time I made this recipe, I left it in an extra 10 minutes because I was nervous, and it came out slightly dry. Now I trust my thermometer completely.
Don’t skip the resting step. I know it’s tempting to carve right away, especially when the kitchen smells incredible and everyone is hungry. But if you cut into that turkey immediately, all those juices you worked so hard to keep inside will run right out onto the cutting board. Fifteen minutes makes a world of difference.
Watch for carryover cooking. Your turkey will continue cooking after it leaves the oven. That is why I pull it at 155°F instead of 165°F. By the time it rests, it will reach the safe temperature naturally, and the meat stays juicier. I learned this the hard way after pulling a turkey at 165°F and ending up with dry meat.
If the skin is browning too quickly, tent the turkey loosely with foil for the last 15-20 minutes of roasting. Every oven runs differently — mine runs hot, so I usually need to do this. Check yours early to avoid burnt skin.
For extra-crispy skin, let the turkey sit uncovered in the refrigerator for a few hours before roasting. This dries out the skin surface even more. I do this when I remember, but honestly, the high-heat method works well enough that I don’t stress about it.
Multitasking tip: While the turkey roasts, prepare your side dishes. Mashed potatoes, roasted vegetables, or a simple salad all work beautifully. The gravy comes together during the resting period, so your timing lines up perfectly.
Variations & Adaptations
Herb Variations
Not a fan of sage? Swap it for equal parts tarragon or marjoram. Both add a lovely, slightly sweet note. In summer, I sometimes use fresh basil and lemon zest for a brighter flavor profile. It’s not traditional, but it is delicious.
Spicy Version
Add 1 teaspoon smoked paprika and 1/2 teaspoon cayenne pepper to the herb butter. The heat cuts through the richness beautifully. My brother-in-law requests this version every time he visits — it has become his signature request.
Citrus Twist
Add the zest of one lemon and one orange to the herb butter. The citrus brightens the whole dish and pairs wonderfully with the herbs. I tried this on a whim one winter when I had extra citrus on hand, and it has become my holiday go-to.
Dietary Adaptations
- Dairy-free: Use vegan butter or olive oil instead of butter. The texture will be slightly less rich, but the flavor is still excellent.
- Gluten-free: Skip the flour in the gravy and use cornstarch instead. Mix 1 tablespoon cornstarch with 2 tablespoons cold water, then whisk into the drippings at the end.
- Low-sodium: Use unsalted butter and low-sodium broth. Skip the added salt in the herb butter and rely on the herbs for flavor.
Different Cooking Methods
This recipe works beautifully on a grill or in an air fryer. For the grill, set it up for indirect heat at 375°F and roast for about the same time. For an air fryer, cook at 375°F for about 30-40 minutes for a smaller breast (2-3 pounds). I’ve done both, and the results are surprisingly good — the air fryer version has the crispiest skin of all.
Serving & Storage Suggestions
This turkey breast is best served warm, right after resting. Slice it thick — about 1/2-inch pieces — and arrange on a platter. Drizzle a little gravy over the top and serve the rest on the side. The contrast between the crispy skin and the tender meat is the whole point.
What to serve with it: Mashed potatoes are the classic choice, and for good reason — they soak up the gravy beautifully. Roasted Brussels sprouts, green beans with almonds, or a simple arugula salad with lemon vinaigrette all work wonderfully. For a complete meal, I often add a side of crusty bread to mop up every last drop of gravy.
Storage: Leftover turkey keeps in the refrigerator for up to 4 days. Store it in an airtight container, and keep the gravy separate. The meat stays moist and flavorful, making it perfect for sandwiches, salads, or soups.
Freezing: Slice the leftover turkey and freeze it in a single layer on a baking sheet, then transfer to a freezer bag. It keeps for up to 3 months. The gravy freezes well too — pour it into a freezer-safe container and thaw overnight in the refrigerator.
Reheating: The best way to reheat turkey without drying it out is in a low oven. Place slices in a baking dish, add a splash of broth, cover with foil, and warm at 300°F for about 15 minutes. For the gravy, reheat it gently on the stovetop, whisking in a little broth if it has thickened too much.
Flavor development: Honestly, leftover turkey often tastes even better the next day. The herbs have more time to meld, and the meat seems to absorb the flavors overnight. Cold turkey sandwiches with a smear of leftover herb butter are my secret indulgence the next day.
Nutritional Information & Benefits
Here is the approximate nutritional breakdown for a 4-ounce serving of turkey breast with 2 tablespoons of gravy:
| Nutrient | Amount |
|---|---|
| Calories | 280 |
| Protein | 35g |
| Fat | 14g |
| Saturated Fat | 7g |
| Carbohydrates | 3g |
| Fiber | 0g |
| Sugar | 0g |
| Sodium | 450mg |
Turkey breast is an excellent source of lean protein, which supports muscle health and keeps you feeling full longer. It is also rich in B vitamins, particularly B6 and B12, which help with energy metabolism. The herbs in this recipe — rosemary, thyme, and sage — contain antioxidants and anti-inflammatory compounds. Garlic adds immune-supporting properties, and the butter provides a small amount of vitamin A.
Dietary considerations: This recipe is naturally low-carb and keto-friendly. For a lower-fat version, reduce the butter to 2 tablespoons and use cooking spray on the skin instead of olive oil. The gravy can be made with cornstarch for gluten-free needs. Always check your broth and other packaged ingredients for hidden gluten or additives if you have specific dietary restrictions.
I personally love that this recipe feels indulgent but is actually quite balanced. A serving gives you plenty of protein to keep you satisfied, without the heavy feeling that sometimes comes with richer holiday meals.
FAQs
Can I use a boneless turkey breast for this recipe?
Yes, but the cooking time will be shorter — about 30-40 minutes total. Use the same temperature method, and start checking the internal temperature at the 25-minute mark. Boneless breasts cook faster because there is no bone to slow down heat transfer.
What if I don’t have fresh herbs?
Dried herbs work in a pinch. Use 1 teaspoon each of dried rosemary, thyme, and sage instead of the fresh amounts listed. Crush the dried herbs between your fingers before adding them to the butter to release their oils. The flavor won’t be quite as bright, but it will still be good.
How do I know when the turkey is done without a thermometer?
I really recommend using a thermometer — it is the only reliable way to know. But if you don’t have one, pierce the thickest part of the breast with a knife. The juices should run clear, not pink. The meat should feel firm but not hard, and the skin should be deep golden brown. This method is less precise, so watch carefully.
Can I make the herb butter ahead of time?
Absolutely. Mix the herb butter up to 3 days in advance and keep it covered in the refrigerator. Let it come to room temperature for about 30 minutes before using so it spreads easily. You can also freeze it for up to 3 months — just wrap it tightly in plastic wrap and thaw overnight in the fridge.
My gravy turned out lumpy. How do I fix it?
Don’t worry — lumpy gravy is fixable. Pour it through a fine-mesh strainer into a clean saucepan, pressing on the solids with a spoon. Then whisk vigorously while reheating. If it is still lumpy, use an immersion blender to smooth it out. Next time, whisk the flour into the drippings thoroughly before adding the liquid, and pour the liquid in slowly while whisking constantly.
Conclusion
This easy herb butter roasted turkey breast with pan gravy has become my most-requested recipe, and I completely understand why. It delivers everything you want from a roasted turkey — crispy skin, juicy meat, rich gravy — without the stress or the all-day commitment. Whether you are cooking for a small holiday gathering, a Sunday dinner, or just because you want something comforting on a Tuesday night, this recipe delivers.
I love that it taught me to trust simplicity. Sometimes the best cooking advice comes from someone who just asks, “Why don’t you try it this way?” Sarah’s suggestion changed how I roast turkey forever, and I hope this recipe does the same for you. Feel free to make it your own — swap the herbs, add some spice, or experiment with different cooking methods. That is the beauty of a solid recipe: it gives you a foundation to build on.
I would love to hear how yours turns out. Drop a comment below and let me know what variations you tried, or tag me in your photos on social media. Happy cooking, and here is to more weeknight dinners that feel like something special.
Pin This Recipe!
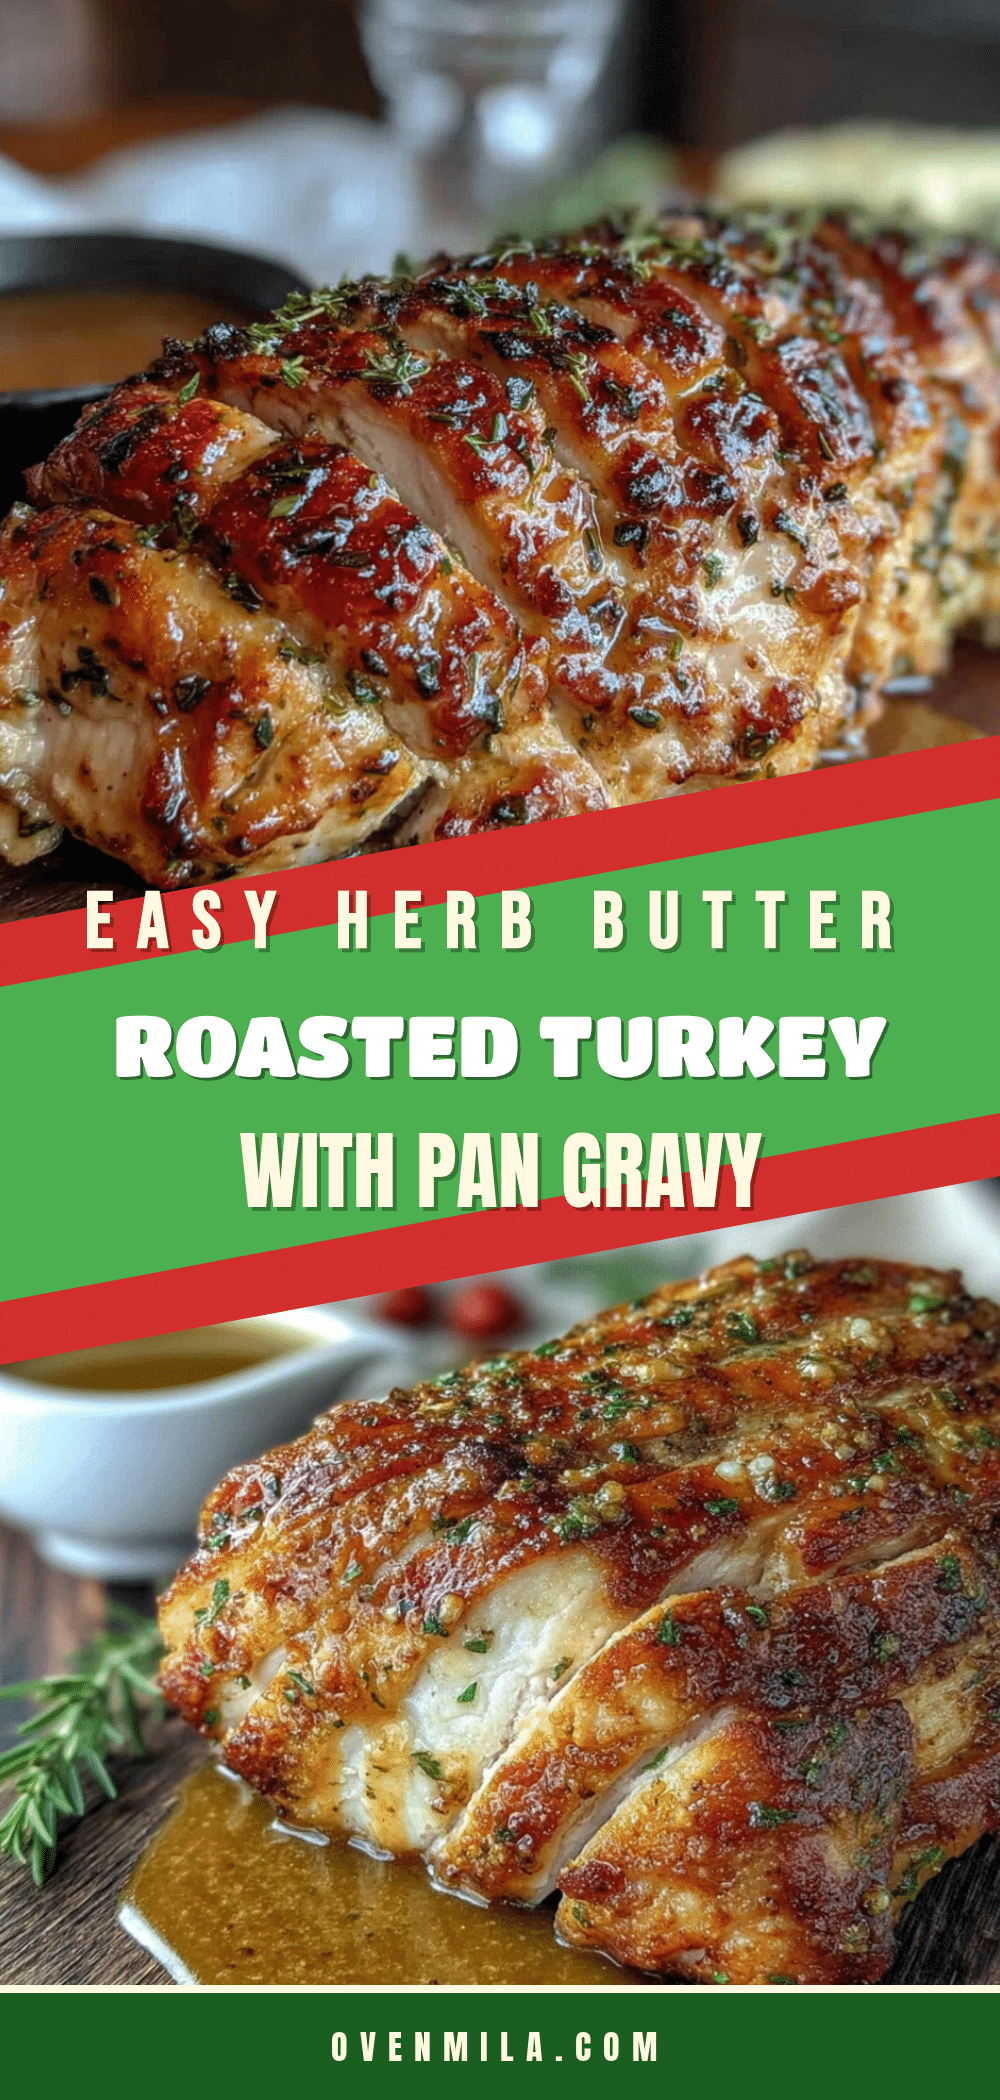
Easy Herb Butter Roasted Turkey Breast With Perfect Pan Gravy
A simple, foolproof method for roasting a turkey breast at high heat with herb butter, resulting in crispy skin and juicy meat, plus a rich pan gravy. Perfect for weeknight dinners or small holiday gatherings.
- Prep Time: 15 minutes
- Cook Time: 1 hour 5 minutes
- Total Time: 1 hour 20 minutes
- Yield: 6 servings 1x
- Category: Main Course
- Cuisine: American
Ingredients
- 1 bone-in, skin-on turkey breast (5–7 pounds / 2.3–3.2 kg)
- 4 tablespoons unsalted butter, softened
- 2 tablespoons fresh rosemary, finely chopped
- 2 tablespoons fresh thyme leaves
- 1 tablespoon fresh sage, finely chopped
- 3 cloves garlic, minced
- 1 teaspoon salt
- 1/2 teaspoon black pepper, freshly ground
- 1 tablespoon olive oil
- 2 tablespoons pan drippings (or butter, if drippings are scarce)
- 2 tablespoons all-purpose flour
- 1 cup chicken broth, low-sodium
- 1/2 cup dry white wine (optional)
- Salt and pepper to taste
Instructions
- Preheat your oven to 425°F (220°C). Position the rack in the lower third of the oven.
- Pat the turkey breast completely dry with paper towels.
- In a small bowl, combine the softened butter, chopped rosemary, thyme, sage, minced garlic, salt, and pepper. Mash together with a fork until evenly distributed.
- Using your fingers, gently separate the skin from the meat, starting at the top edge and working your way down. Be careful not to tear the skin.
- Take about three-quarters of the herb butter and spread it directly onto the meat under the skin. Spread the remaining butter all over the outside of the skin. Drizzle with olive oil and rub it in.
- Place the turkey breast-side up on a roasting rack in a roasting pan. Pour 1/2 cup of chicken broth into the bottom of the pan.
- Roast for 15 minutes at 425°F.
- Reduce the oven temperature to 375°F (190°C) without opening the door. Continue roasting for about 45-60 minutes, depending on the size of your turkey breast.
- Check the internal temperature with an instant-read thermometer inserted into the thickest part of the breast, avoiding the bone. Aim for 155°F (68°C).
- Once the turkey hits 155°F, remove it from the oven. Transfer to a cutting board and tent loosely with foil. Let it rest for 15-20 minutes.
- While the turkey rests, make the pan gravy: Place the roasting pan over two burners on the stovetop over medium heat. Whisk in the flour and cook for 1 minute, stirring constantly. Slowly pour in the broth and wine (if using), whisking continuously. Simmer for 3-5 minutes until thickened. Season with salt and pepper to taste.
- Strain the gravy through a fine-mesh strainer into a serving boat (optional but recommended).
- Slice the turkey against the grain into thick pieces. Drizzle with gravy and serve immediately.
Notes
Don’t skip the resting step; it allows juices to redistribute. Pull the turkey at 155°F due to carryover cooking. If skin browns too quickly, tent with foil. For extra-crispy skin, let the turkey sit uncovered in the refrigerator for a few hours before roasting.
Nutrition
- Serving Size: 4 ounces with 2 tabl
- Calories: 280
- Sodium: 450
- Fat: 14
- Saturated Fat: 7
- Carbohydrates: 3
- Protein: 35
Keywords: roasted turkey breast, herb butter turkey, easy turkey recipe, pan gravy, holiday turkey, weeknight dinner


