This was supposed to be a classic vanilla layer cake. A simple, dependable, no-fuss birthday cake for my friend Maria’s surprise party. I had the butter softening, the oven preheating, and the plan locked in. But somewhere between answering the door for a delivery and wiping flour off my glasses, I grabbed the wrong jar. Instead of the vanilla extract, I reached for a bottle of almond extract I’d bought on a whim. And then, in a moment of pure distraction, I dumped an entire container of rainbow sprinkles into the batter. I mean, the whole thing. My kitchen looked like a unicorn had sneezed on everything.
I stood there, staring into the bowl, convinced I’d just ruined a perfectly good cake. The almond extract was way too strong on its own, and the sprinkles? They felt like a desperate, last-ditch attempt to salvage a mistake. Honestly, I almost poured the whole thing down the sink. But I was out of time. So, I crossed my fingers, poured the speckled batter into the pans, and slid them into the oven, fully expecting a disaster. Maybe you’ve been there—that moment when you’re sure you’ve messed up, but you have to see it through anyway.
What came out of the oven was nothing like the plan. The cake was fluffy, tender, and dotted with tiny bursts of color that melted into the crumb. The almond flavor, which I’d been so worried about, was subtle and warm, playing perfectly off the sweet vanilla buttercream I whipped up to cover my tracks. It wasn’t just a cake. It was a party on a plate. That happy accident—the wrong extract and the avalanche of sprinkles—taught me something. Sometimes the best recipes come from the moments you stop trying so hard. And that’s why I’ve never made a plain vanilla birthday cake since.
Why You’ll Love This Recipe
This isn’t just another birthday cake. This is the one that makes everyone at the party stop mid-conversation to ask for the recipe. I’ve tested this cake more times than I can count—tweaking the flour ratio, adjusting the baking time, and even trying different sprinkle brands to find the ones that don’t bleed their color into the batter. It’s been family-approved, neighbor-approved, and even survived a taste test from my notoriously picky cousin. Here’s why it’s a keeper:
- Quick & Easy: From start to finish, this cake comes together in about an hour. Perfect for last-minute birthday celebrations or a Tuesday night that needs a little joy.
- Simple Ingredients: You probably have everything in your pantry right now. No fancy extracts, no obscure flours. Just real, everyday staples.
- Perfect for Birthdays and Beyond: Obviously, it’s a star at birthday parties. But I’ve also made it for baby showers, anniversaries, and even “just because” dinners.
- Crowd-Pleaser: Kids love the rainbow confetti, and adults love the tender, moist crumb. It’s a rare dessert that makes everyone happy.
- Unbelievably Delicious: The secret is in the balance. The almond extract adds a warmth you can’t quite place, and the buttermilk keeps the cake impossibly soft. It’s comfort food that feels like a celebration.
What makes this recipe different from the rest? It’s the texture. I use a reverse-creaming method that gives the cake a fine, velvety crumb without being dense. Plus, I’ve cracked the code on keeping the sprinkles vibrant without them dissolving into a gray mess. This isn’t just another version of confetti cake—it’s my best version. And honestly? It’s the kind of cake that makes you close your eyes after the first bite. It’s comfort food reimagined—faster, easier, but with the same soul-soothing satisfaction. Perfect for impressing guests without stress, or turning a simple evening into something memorable.
What Ingredients You Will Need
This recipe uses simple, wholesome ingredients to deliver a cake that’s both tender and full of flavor. Most of these are pantry staples, so you likely won’t need a special trip to the store. Here’s everything you’ll need, broken down by function.
For the Cake
- All-purpose flour, 2 ½ cups (315g) – spooned and leveled for accuracy. I prefer King Arthur Flour for consistent results.
- Granulated sugar, 1 ¾ cups (350g) – adds sweetness and helps create a tender crumb.
- Baking powder, 2 ½ teaspoons – for lift. Make sure it’s fresh.
- Baking soda, ½ teaspoon – helps balance the acidity of the buttermilk.
- Salt, 1 teaspoon – enhances all the flavors.
- Unsalted butter, ¾ cup (170g), softened – use good quality butter like Kerrygold for the best flavor.
- Vegetable oil, ¼ cup (60ml) – keeps the cake moist for days.
- Buttermilk, 1 cup (240ml), room temperature – this is key for a tender crumb. You can substitute with 1 cup milk mixed with 1 tablespoon lemon juice, let sit for 5 minutes.
- Large eggs, 3, room temperature – helps the batter emulsify properly.
- Vanilla extract, 2 teaspoons – pure, not imitation.
- Almond extract, ½ teaspoon – optional, but highly recommended for that “bakery” flavor.
- Rainbow sprinkles (jimmies), ½ cup (85g) – use jimmies, not nonpareils, as they hold their color better. I love the brand Sweetapolita for vibrant colors.
For the Vanilla Buttercream
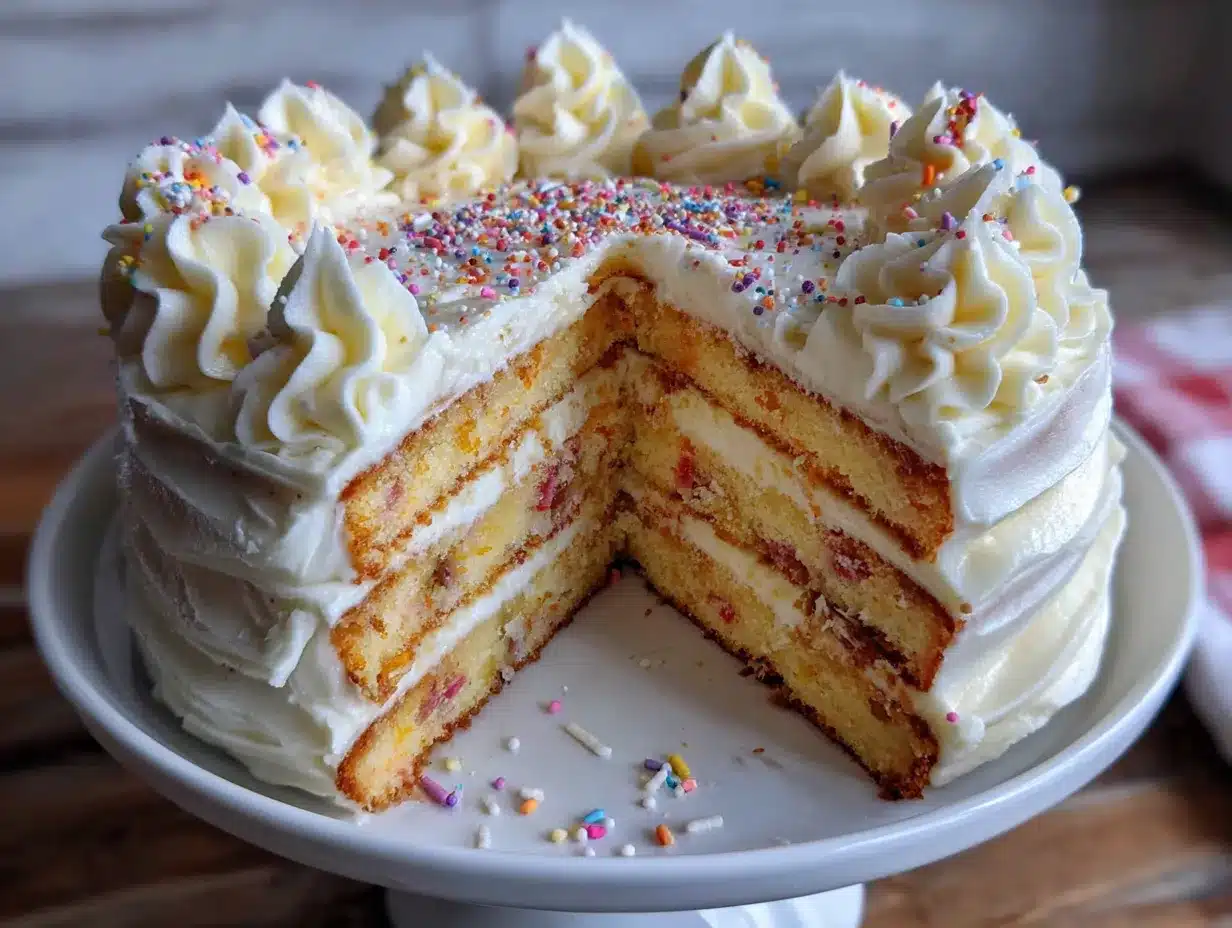
- Unsalted butter, 1 ½ cups (340g), softened – this is the base. Make sure it’s truly soft, not melted.
- Powdered sugar, 4 cups (480g), sifted – sifting prevents lumps.
- Heavy cream, 3-4 tablespoons (45-60ml) – for a silky texture. You can use milk, but heavy cream gives a richer result.
- Vanilla extract, 2 teaspoons – pure vanilla is non-negotiable here.
- Salt, ¼ teaspoon – balances the sweetness.
For Decoration (Optional)
- Extra rainbow sprinkles, ¼ cup (40g) – for the sides and top.
- Fresh berries or edible flowers – for a pretty, natural touch.
Equipment Needed
You don’t need a professional bakery setup to make this cake. Here’s what I use in my own kitchen, along with a few alternatives if you’re working with less.
- Two 9-inch round cake pans – I prefer light-colored metal pans for even baking. Dark pans can cause the edges to brown too quickly. If you only have one pan, you can bake the layers one at a time—just let the pan cool completely between batches.
- Stand mixer or hand mixer – A stand mixer makes the reverse-creaming method a breeze, but a hand mixer works just fine. I’ve even made this with a whisk and a strong arm in a pinch.
- Parchment paper – Cut circles to line the bottom of your pans. This guarantees the cake releases cleanly every time.
- Cooling rack – Essential for even cooling. If you don’t have one, you can use the wire rack from your oven—just make sure it’s clean and cool.
- Offset spatula – For smoothing the buttercream. A butter knife works, but an offset spatula makes it look professional.
- Cake stand or plate – For serving. A rotating cake turntable is nice but not necessary.
- Measuring cups and spoons – Accuracy matters in baking, so use dry measuring cups for dry ingredients and liquid measuring cups for wet.
One tip: invest in a good kitchen scale. Weighing your flour and sugar takes the guesswork out and ensures consistent results every time. I’ve been using the same Escali scale for years, and it’s never let me down.
Preparation Method
Let’s get baking. This method is broken down into clear steps, with time estimates and sensory cues to guide you. Take your time, and don’t skip the little details—they matter.
Step 1: Preheat and Prepare the Pans (5 minutes)
Preheat your oven to 350°F (175°C). Grease two 9-inch round cake pans with butter or non-stick spray. Cut two circles of parchment paper to fit the bottoms, place them in the pans, and grease the paper too. Dust the pans lightly with flour, tapping out the excess. This extra step guarantees your cakes will release without a fight.
Step 2: Combine Dry Ingredients (5 minutes)
In a large bowl, whisk together the 2 ½ cups all-purpose flour, 1 ¾ cups sugar, 2 ½ teaspoons baking powder, ½ teaspoon baking soda, and 1 teaspoon salt. Make sure there are no lumps. The mixture should look uniform and smell faintly of flour—that’s a good sign.
Step 3: Add the Butter and Oil (3 minutes)
This is the reverse-creaming method. Add the ¾ cup softened unsalted butter and ¼ cup vegetable oil directly to the dry ingredients. Using your stand mixer fitted with the paddle attachment (or a hand mixer), beat on low speed until the mixture looks like damp sand. It should clump together slightly when pressed between your fingers. This takes about 2 minutes. Don’t overmix—you’re just coating the flour in fat, which prevents gluten from developing and keeps the cake tender.
Step 4: Add the Buttermilk (2 minutes)
With the mixer on low, slowly pour in the 1 cup of room-temperature buttermilk. Mix until just combined. The batter will look thick and a little lumpy—that’s okay. Scrape down the sides and bottom of the bowl with a spatula.
Step 5: Add the Eggs and Extracts (3 minutes)
In a small bowl, whisk together the 3 room-temperature eggs, 2 teaspoons vanilla extract, and ½ teaspoon almond extract. With the mixer on medium-low, add the egg mixture in two additions, mixing for about 30 seconds after each. The batter will become smooth, glossy, and pale yellow. It should fall off a spatula in a thick ribbon. If it looks curdled, don’t panic—it will come together once the flour absorbs the liquid.
Step 6: Fold in the Sprinkles (2 minutes)
Remove the bowl from the mixer. Using a rubber spatula, gently fold in the ½ cup of rainbow sprinkles. Be careful not to overmix—just a few turns until the sprinkles are evenly distributed. The batter will look like a confetti explosion, and that’s exactly what you want. Scrape the bottom of the bowl to make sure no dry flour is hiding.
Step 7: Bake the Cakes (25-30 minutes)
Divide the batter evenly between the two prepared pans. Smooth the tops with a spatula. Bake for 25 to 30 minutes, or until a toothpick inserted in the center comes out clean with a few moist crumbs. The cakes should be golden brown on top and spring back lightly when touched. Let them cool in the pans for 10 minutes, then run a knife around the edges and turn them out onto a cooling rack. Peel off the parchment paper and let them cool completely—this is crucial. If you frost them while they’re warm, the buttercream will slide right off.
Step 8: Make the Vanilla Buttercream (10 minutes)
While the cakes cool, make the frosting. In a stand mixer fitted with the paddle attachment, beat the 1 ½ cups softened butter on medium speed until creamy and pale, about 3 minutes. Scrape down the bowl. With the mixer on low, gradually add the 4 cups sifted powdered sugar, about 1 cup at a time. The mixture will look dry at first—that’s normal. Add 2 tablespoons of heavy cream and the 2 teaspoons vanilla extract and ¼ teaspoon salt. Increase the speed to medium-high and beat for 3 to 4 minutes, until the frosting is light, fluffy, and spreadable. If it’s too thick, add another tablespoon of cream. If it’s too thin, add a little more powdered sugar.
Step 9: Assemble and Frost (15 minutes)
Place one cooled cake layer on your serving plate. Spread about ¾ cup of buttercream evenly over the top. Place the second layer on top, flat side up. Apply a thin crumb coat—a layer of frosting that traps any loose crumbs. Refrigerate for 15 minutes to set. Then, apply the final layer of buttercream, smoothing it with an offset spatula. Decorate the sides and top with extra sprinkles, pressing them gently into the frosting. For a clean look, use your hands to pat them on.
Cooking Tips & Techniques
Over the years, I’ve made this cake more times than I can count, and I’ve learned a few things the hard way. Here are my best tips to help you avoid my mistakes.
Don’t overmix the batter. I know it’s tempting to keep beating until it’s perfectly smooth, but that develops gluten and makes the cake tough. Mix until the flour is just incorporated, then stop. A few small lumps are fine—they’ll bake out.
Use room temperature ingredients. This is non-negotiable. Cold butter won’t cream properly, and cold eggs can cause the batter to curdle. Take everything out of the fridge an hour before you start. If you’re in a rush, you can warm the buttermilk in the microwave for 15 seconds and place the eggs in a bowl of warm water for 5 minutes.
Weigh your flour. I used to scoop flour directly from the bag, and my cakes were always a little dry. Now I weigh it. 315 grams is the sweet spot. If you don’t have a scale, spoon the flour into your measuring cup and level it off with a knife—don’t pack it down.
Watch the baking time. Every oven is different. My old oven used to run hot, and I’d end up with dry, dark edges. Start checking at 25 minutes. The cake is done when it smells fragrant, the top is golden, and a toothpick comes out clean. If the edges are browning too fast, tent the pans with foil for the last 5 minutes.
Let the cake cool completely. I once tried to rush this step and ended up with a melted mess of buttercream. Patience pays off. If you’re short on time, you can pop the layers in the freezer for 20 minutes to speed up cooling.
Use jimmies, not nonpareils. This is the sprinkle rule. Jimmies are the long, rod-shaped sprinkles. They hold their color and shape during baking. Nonpareils—the tiny round balls—bleed their color and can turn your batter gray. Trust me on this one.
Variations & Adaptations
One of the best things about this cake is how easily it adapts. Here are a few variations I’ve tried, and a few I’m still dreaming about.
Gluten-Free Version: Swap the all-purpose flour for a 1:1 gluten-free baking flour blend that contains xanthan gum. I’ve used Bob’s Red Mill with great results. The texture will be slightly more tender, but the flavor is spot on. Add an extra tablespoon of buttermilk to compensate for the dryness of gluten-free flours.
Chocolate Confetti Cake: Replace ½ cup of the all-purpose flour with ½ cup of unsweetened cocoa powder. Reduce the baking powder to 2 teaspoons. The result is a rich, chocolatey cake with rainbow sprinkles peeking through. It’s a showstopper for chocolate lovers.
Lemon Confetti Cake: Add the zest of two lemons to the dry ingredients and replace the almond extract with 1 teaspoon of lemon extract. The citrus brightness pairs beautifully with the vanilla buttercream. I made this for a spring brunch, and it disappeared in minutes.
Dairy-Free Adaptation: Use a high-quality vegan butter stick (like Miyoko’s) and replace the buttermilk with 1 cup of unsweetened almond milk mixed with 1 tablespoon of apple cider vinegar. The cake will be slightly less tender, but still delicious. For the buttercream, use vegan butter and a splash of oat milk.
Cupcake Version: This batter makes about 24 cupcakes. Fill lined muffin tins two-thirds full and bake at 350°F (175°C) for 18 to 20 minutes. The frosting recipe above will generously top all of them. Perfect for parties or bake sales.
Serving & Storage Suggestions
This cake is best served at room temperature, which allows the buttercream to soften and the crumb to relax. If you’ve refrigerated it, let it sit on the counter for 30 minutes before slicing. Use a sharp, serrated knife for clean slices, and wipe the blade between cuts.
For presentation, I like to pile fresh berries—raspberries, strawberries, or blueberries—on top of the cake. The tartness cuts through the sweetness of the buttercream. A few edible flowers, like pansies or violas, add a lovely, whimsical touch. Pair it with a cold glass of milk, a hot cup of coffee, or even a bubbly glass of Prosecco for a grown-up celebration.
Storage: This cake keeps beautifully. Store it in an airtight container at room temperature for up to 2 days. If you need to keep it longer, refrigerate it for up to 5 days. The crumb stays moist thanks to the buttermilk and oil. Before serving, let refrigerated slices come to room temperature for the best texture.
Freezing: You can freeze the unfrosted cake layers for up to 3 months. Wrap each layer tightly in plastic wrap, then in foil. When you’re ready to assemble, thaw them in the fridge overnight. You can also freeze the frosted cake—place it in the freezer unwrapped for 1 hour to harden the buttercream, then wrap it in plastic wrap and foil. Thaw in the fridge overnight.
Flavor Development: Honestly, this cake tastes even better the next day. The flavors meld together, and the crumb becomes even more tender. So if you’re making it for a party, bake it a day ahead. Your future self will thank you.
Nutritional Information & Benefits
Let’s be real—this is a celebration cake, not a health food. But that doesn’t mean it can’t have some redeeming qualities. Here’s a rough estimate per slice (based on 12 servings):
| Nutrient | Amount per Serving |
|---|---|
| Calories | 520 |
| Total Fat | 28g |
| Saturated Fat | 16g |
| Cholesterol | 95mg |
| Sodium | 310mg |
| Total Carbohydrates | 65g |
| Dietary Fiber | 1g |
| Sugars | 48g |
| Protein | 4g |
The buttermilk adds a small amount of calcium and probiotics, while the eggs provide protein and vitamin D. The butter, in moderation, contains fat-soluble vitamins like A and E. If you’re looking to lighten it up, you can reduce the sugar in the buttercream by using a sugar-free powdered sugar alternative, but honestly, a birthday cake should feel indulgent. It’s about joy, not macros.
This recipe is not gluten-free, dairy-free, or nut-free as written, but the variations above offer alternatives for common dietary needs. Always check your sprinkle labels—some brands use gluten-containing ingredients or artificial dyes that may be a concern for some.
Conclusion
This homemade birthday confetti cake is more than just a dessert. It’s a little piece of joy, baked into a tender, buttery crumb and topped with a cloud of vanilla buttercream. It’s the cake I turn to when I want to make someone feel special, whether it’s for a milestone birthday or a random Tuesday that needs a lift. And honestly? It’s the cake that taught me to embrace my kitchen mistakes. That accidental almond extract and avalanche of sprinkles turned into something I now make on purpose.
I hope you give this recipe a try. Don’t be afraid to make it your own—swap in different extracts, try a new sprinkle color, or pile on the berries. The best recipes are the ones that feel like you. And when you take that first bite, surrounded by people you love, I think you’ll understand why this cake has a permanent spot in my recipe box.
If you make it, I’d love to hear about it. Leave a comment below, tag me in your photos, or tell me about your own happy accident in the kitchen. Until then, happy baking—and happy celebrating.
Frequently Asked Questions
Can I use a different type of sprinkles?
Yes, but stick with jimmies (the long, rod-shaped ones) for best results. Nonpareils, sanding sugar, and sparkling sugar tend to bleed their color into the batter and can turn the cake gray. If you only have nonpareils, toss them in a tablespoon of flour before folding them in to help prevent color bleeding.
Can I make this cake without a stand mixer?
Absolutely. A hand mixer works perfectly for the reverse-creaming method. You can even mix by hand with a whisk and a lot of elbow grease—just make sure the butter is very soft. The key is to not overmix, which is easier to control when you’re working by hand.
Why did my cake sink in the middle?
This usually happens for one of three reasons: the oven temperature was too low, the batter was overmixed, or the cake was underbaked. Make sure your oven is fully preheated to 350°F (175°C) and that you’re not opening the door too often during baking. Also, check your baking powder—if it’s expired, it won’t provide enough lift.
Can I use a different frosting?
Of course. This cake pairs beautifully with cream cheese frosting, chocolate ganache, or even a simple dusting of powdered sugar. If you’re using a lighter frosting, like a whipped cream, keep the cake refrigerated until serving to prevent it from sliding off.
How do I get clean slices of cake?
Use a long, serrated knife and a gentle sawing motion. Dip the knife in hot water, wipe it dry, and then slice. The heat helps the knife glide through the buttercream without dragging. Wipe the blade clean between each slice for picture-perfect pieces.
Pin This Recipe!
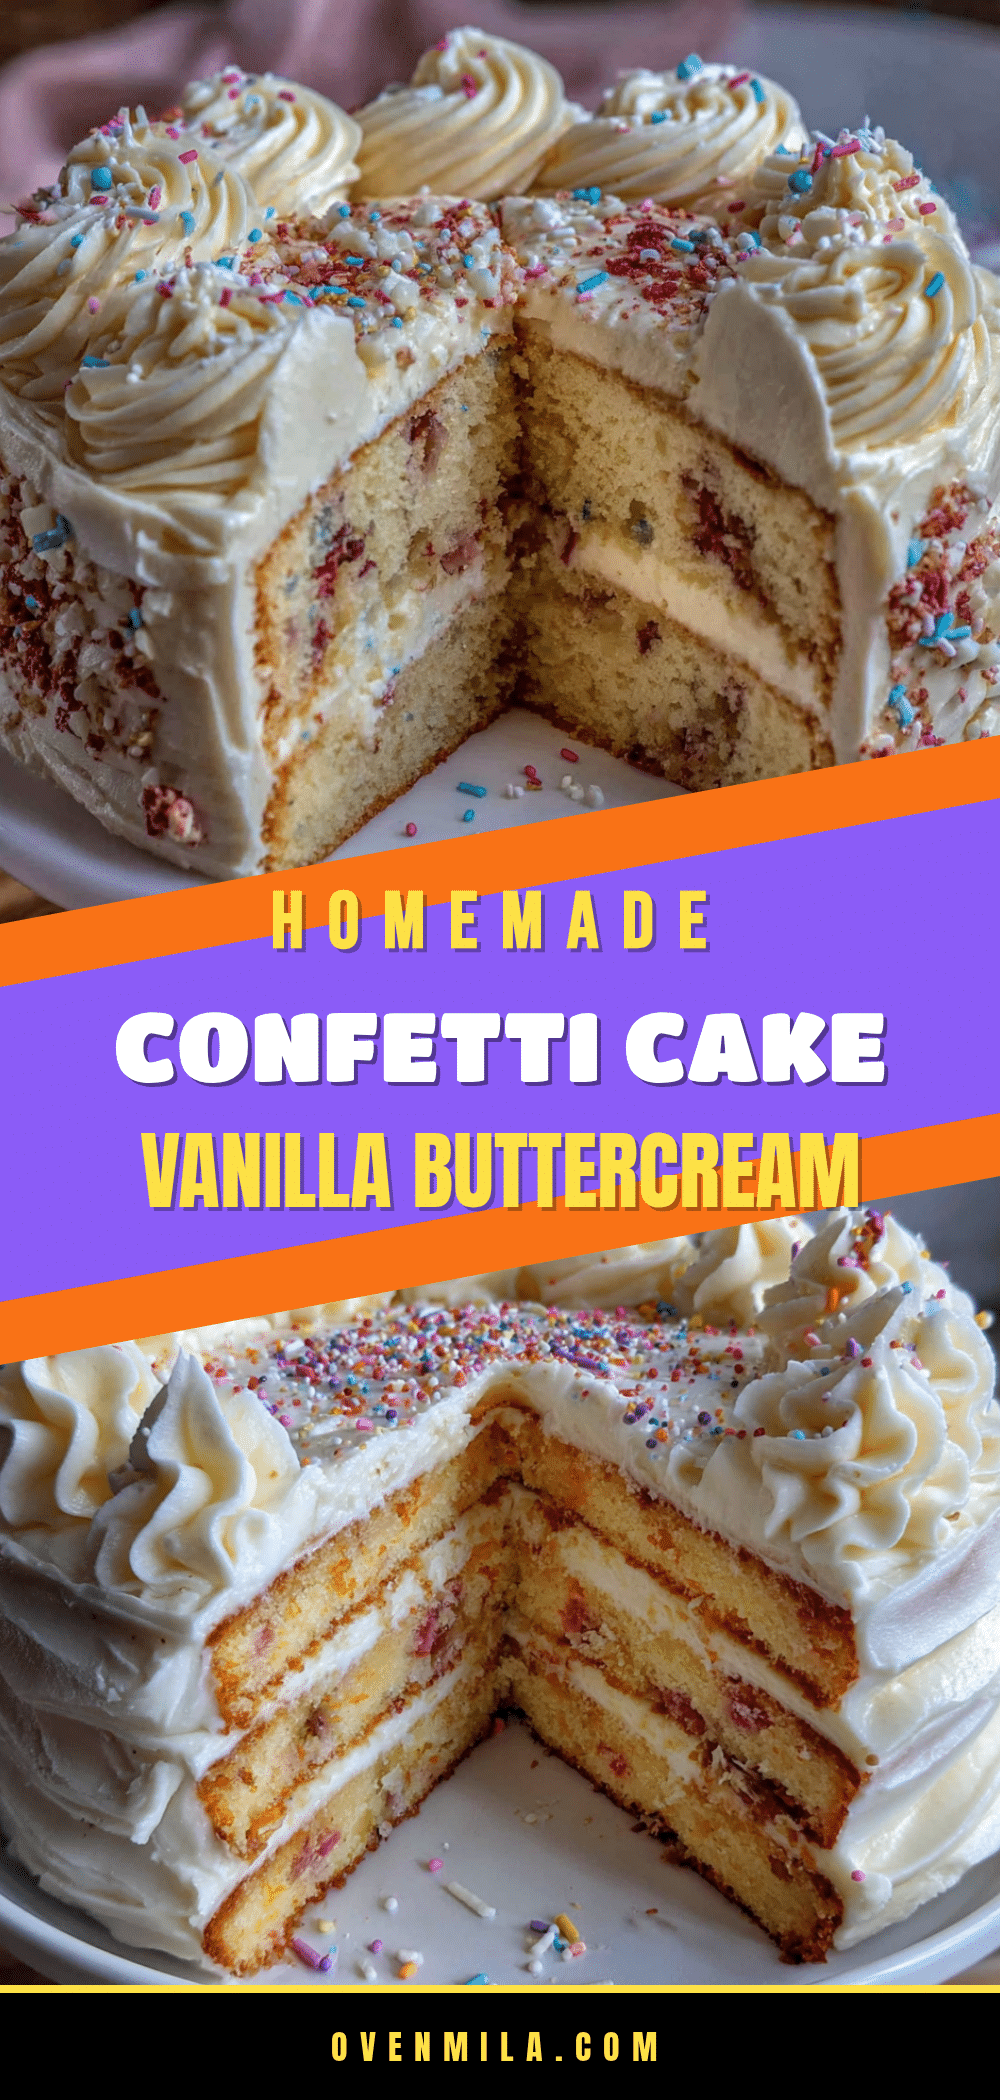
Easy Homemade Birthday Confetti Cake with Vanilla Buttercream
A tender, fluffy confetti cake with a subtle almond flavor and rainbow sprinkles, topped with a silky vanilla buttercream. This easy, crowd-pleasing birthday cake comes together in about an hour and is perfect for celebrations.
- Prep Time: 20 minutes
- Cook Time: 30 minutes
- Total Time: 1 hour 10 minutes
- Yield: 12 servings 1x
- Category: Dessert
- Cuisine: American
Ingredients
- 2 ½ cups (315g) all-purpose flour, spooned and leveled
- 1 ¾ cups (350g) granulated sugar
- 2 ½ teaspoons baking powder
- ½ teaspoon baking soda
- 1 teaspoon salt
- ¾ cup (170g) unsalted butter, softened
- ¼ cup (60ml) vegetable oil
- 1 cup (240ml) buttermilk, room temperature
- 3 large eggs, room temperature
- 2 teaspoons vanilla extract
- ½ teaspoon almond extract
- ½ cup (85g) rainbow sprinkles (jimmies)
- 1 ½ cups (340g) unsalted butter, softened (for buttercream)
- 4 cups (480g) powdered sugar, sifted (for buttercream)
- 3–4 tablespoons (45-60ml) heavy cream (for buttercream)
- 2 teaspoons vanilla extract (for buttercream)
- ¼ teaspoon salt (for buttercream)
- ¼ cup (40g) extra rainbow sprinkles (for decoration, optional)
- Fresh berries or edible flowers (for decoration, optional)
Instructions
- Preheat oven to 350°F (175°C). Grease two 9-inch round cake pans, line bottoms with parchment paper, grease paper, and dust with flour.
- In a large bowl, whisk together flour, sugar, baking powder, baking soda, and salt.
- Add softened butter and oil to dry ingredients. Beat on low speed with a stand mixer or hand mixer until mixture resembles damp sand (about 2 minutes).
- With mixer on low, slowly add buttermilk and mix until just combined. Scrape down bowl.
- In a small bowl, whisk together eggs, vanilla extract, and almond extract. With mixer on medium-low, add egg mixture in two additions, mixing for 30 seconds after each until batter is smooth and glossy.
- Remove bowl from mixer. Gently fold in rainbow sprinkles with a rubber spatula until evenly distributed.
- Divide batter evenly between prepared pans. Bake for 25-30 minutes, until a toothpick inserted in center comes out clean with a few moist crumbs. Cool in pans for 10 minutes, then turn out onto a cooling rack. Remove parchment and cool completely.
- For buttercream: Beat softened butter on medium speed until creamy and pale (about 3 minutes). Gradually add sifted powdered sugar on low speed. Add 2 tablespoons heavy cream, vanilla extract, and salt. Beat on medium-high for 3-4 minutes until light and fluffy. Add more cream if too thick.
- Place one cooled cake layer on serving plate. Spread about ¾ cup buttercream evenly on top. Place second layer on top. Apply a thin crumb coat, refrigerate 15 minutes, then apply final layer of buttercream. Decorate with extra sprinkles.
Notes
Use jimmies (rod-shaped sprinkles) not nonpareils to prevent color bleeding. Room temperature ingredients are crucial for best texture. Cake tastes even better the next day. For clean slices, use a serrated knife dipped in hot water and wiped dry between cuts.
Nutrition
- Serving Size: 1 slice
- Calories: 520
- Sugar: 48
- Sodium: 310
- Fat: 28
- Saturated Fat: 16
- Carbohydrates: 65
- Fiber: 1
- Protein: 4
Keywords: birthday cake, confetti cake, vanilla cake, buttercream, rainbow sprinkles, easy cake, homemade cake


