The woman at the community garden plot next to mine—her name is Rosa—watched me struggle with a bag of chicken thighs that wouldn’t fit in my cooler. She didn’t say anything at first. Then she reached into her own basket, pulled out a container of something warm, and handed it to me with a spoon tucked under the lid. “For your kids,” she said. “It’s just dip.” That dip was her Buffalo chicken dip, and I ate half of it sitting on a folding chair while she told me about her son’s soccer team and how this recipe feeds a crowd without feeding the trash can with leftovers nobody touched. Honestly, I almost forgot to ask for the recipe because I was too busy scraping the container clean with a carrot stick.
Rosa’s version used ingredients she buys in bulk from the warehouse club, and she told me she makes it every time her nephews come over. “They won’t eat anything else,” she said, laughing. “I’ve tried meatloaf, tacos, even mac and cheese. They want this.” So I took her formula home, fiddled with it to make it even more budget-friendly, and figured out how to dial back the heat just enough so my own kids wouldn’t run for the hills. Maybe you’ve been there—standing in the snack aisle wondering if there’s one thing that can please the whole crew without costing a small fortune. This is that thing.
The first time I made my version, my youngest dipped a chip, took a bite, and said, “Mom, this tastes like a party.” And that’s exactly what it is. It’s warm, creamy, a little tangy, and just slightly spicy—enough to feel like something special, but not so much that anyone reaches for the milk. It’s the dip that disappears before the game even starts, the one people stand around and talk about while they’re eating it. Rosa gave me more than a recipe that day; she gave me a way to feed a crowd without the stress, and I’ve been making it ever since.
Why You’ll Love This Recipe
This isn’t just another Buffalo chicken dip. I’ve tested a dozen versions over the years—some were too runny, some were too spicy, and some just didn’t come together right. This one hits the sweet spot. It’s thick enough to pile onto a chip without dripping down your chin, but creamy enough to feel indulgent. And here’s the thing: it costs less than ordering pizza for the same number of people. I’ve done the math, and trust me, this wins.
- Budget-Friendly: Uses affordable ingredients like canned chicken and cream cheese. No need for expensive cuts or fancy cheeses.
- Kid-Approved: The heat level is mild—just enough for grown-ups to enjoy, but not so much that kids will refuse it.
- Feeds a Crowd: This recipe makes a generous amount, perfect for game day, potlucks, birthday parties, or family gatherings.
- Quick & Easy: Comes together in about 20 minutes of prep and 25 minutes in the oven. Most of that is hands-off.
- Pantry Staples: You probably have most of these ingredients already. No special trips to the fancy grocery store.
- Always a Hit: I’ve brought this to at least six different gatherings, and it’s the first bowl to empty every single time.
What makes this different from the rest is the balance. I use just enough hot sauce to get that classic Buffalo flavor, but I round it out with extra cream cheese and a splash of ranch to keep it friendly for all ages. It’s the kind of dip that makes you close your eyes after the first bite—not because it’s fancy, but because it’s exactly what you wanted. Comfort food, reimagined for a crowd, without the stress or the price tag.
What Ingredients You Will Need
This recipe uses simple, everyday ingredients to deliver big flavor. Most of these are pantry or fridge staples, which is exactly what you want when you’re feeding a crowd on a budget. Here’s what you’ll need:
- Canned chicken breast (two 12.5-ounce cans, drained) – I prefer the Kirkland or Bumble Bee brand for texture. They’re flaky and not too mushy. You can also use leftover shredded rotisserie chicken if you have it.
- Cream cheese (16 ounces, softened) – Two standard blocks. Full-fat works best for creaminess, but reduced-fat is okay too. Just let it come to room temperature so it blends smoothly.
- Ranch dressing (1 cup) – Use your favorite brand. I like Hidden Valley for the classic flavor. You can also use homemade ranch if you’re feeling ambitious.
- Buffalo hot sauce (½ cup) – Frank’s RedHot is my go-to. It has that tangy, vinegary kick without being overwhelming. For a milder version, use only ⅓ cup.
- Shredded cheddar cheese (2 cups, divided) – Sharp cheddar adds the most flavor. I shred my own from a block because it melts better, but bagged works in a pinch.
- Shredded mozzarella cheese (1 cup) – This adds that stretchy, gooey texture. Low-moisture mozzarella is best.
- Green onions (¼ cup, sliced) – For garnish and a little freshness on top. Optional but nice.
- Salt and pepper (to taste) – Go easy on the salt since the hot sauce and cheese are already salty.
That’s it. No exotic ingredients, no expensive cuts of meat. Everything is available at a regular grocery store, and most of it keeps well in the pantry or fridge, so you can stock up when things go on sale. If you want to make it even more budget-friendly, watch for sales on cream cheese and canned chicken—I’ve seen them drop to half price around the holidays.
Equipment Needed
You don’t need a ton of fancy equipment for this recipe, which is another reason I love it. Here’s what you’ll want to have on hand:
- 9×13-inch baking dish (or a similar casserole dish) – This size works perfectly for a crowd. If you’re making a smaller batch, an 8×8 dish will do.
- Large mixing bowl – For combining the ingredients. Any big bowl works.
- Hand mixer or stand mixer – This makes blending the cream cheese and ranch a breeze. A sturdy spatula works too, but expect a little arm workout.
- Can opener – Obviously.
- Cheese grater – If you’re shredding your own cheese (which I recommend for better melting).
- Spatula or wooden spoon – For stirring and spreading the dip evenly in the dish.
- Oven mitts – The dish gets hot, and nobody wants a burned hand on game day.
If you don’t have a hand mixer, you can absolutely do this by hand. Just make sure the cream cheese is really soft—leave it out on the counter for an hour or so. I’ve made this dip with nothing but a fork and a lot of determination, and it turned out just fine. Budget-friendly cooking is all about making do with what you have.
Preparation Method
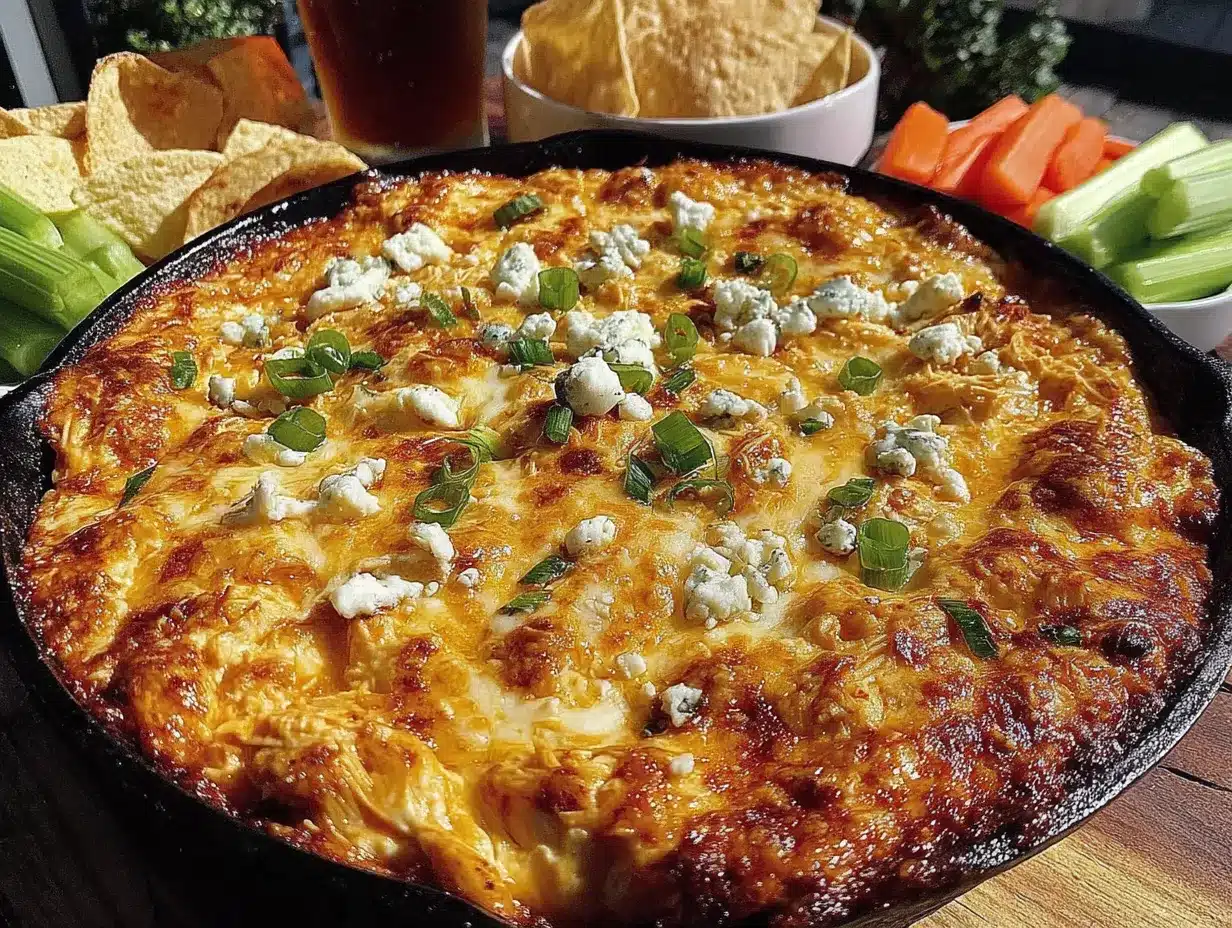
Let’s get cooking. This is straightforward, but I’ll walk you through each step so you know exactly what to expect. Trust me, even if you’ve never made a dip before, you can handle this.
- Preheat your oven to 375°F (190°C). While it’s heating up, get your ingredients ready. Take the cream cheese out of the fridge if you haven’t already—soft cream cheese is much easier to work with.
- Drain the canned chicken and dump it into a large mixing bowl. Use a fork to break it up into small, flaky pieces. You don’t want big chunks; you want it to blend into the dip evenly.
- Add the softened cream cheese to the bowl. If it’s still a little firm, microwave it for about 15 seconds to soften it further. Then pour in the ranch dressing and the Buffalo hot sauce. Start with ½ cup of hot sauce, and if you’re worried about spice, you can always add more later.
- Mix everything together using a hand mixer on low speed, or a sturdy spatula if you’re going old-school. You want the cream cheese to be fully incorporated—no white streaks left. The mixture should look creamy and slightly orange from the hot sauce.
- Stir in 1½ cups of the shredded cheddar cheese and all of the mozzarella cheese. Reserve the remaining ½ cup of cheddar for the top. Mix until the cheeses are evenly distributed throughout the dip.
- Transfer the mixture to your 9×13-inch baking dish and spread it into an even layer with your spatula. It doesn’t have to be perfect—just make sure it’s roughly the same thickness all over so it bakes evenly.
- Sprinkle the remaining ½ cup of cheddar cheese over the top. This will create a golden, bubbly crust that’s absolutely irresistible.
- Bake for 20 to 25 minutes, or until the dip is hot all the way through and the cheese on top is melted and starting to brown around the edges. You’ll know it’s ready when you see little bubbles breaking the surface.
- Remove from the oven and let it rest for about 5 minutes. This gives it time to set up so it doesn’t slide off your chips. Sprinkle the sliced green onions on top for a pop of color and freshness.
- Serve warm with tortilla chips, celery sticks, carrot sticks, or even crusty bread. Watch it disappear.
A quick note: if you’re making this ahead of time, you can assemble everything in the baking dish, cover it with foil, and refrigerate for up to 24 hours. When you’re ready to bake, just add about 10 extra minutes to the cooking time since you’re starting from cold.
Cooking Tips & Techniques
I’ve made this dip more times than I can count, and I’ve learned a few things along the way. Here are the tips that make the difference between a good dip and a great one:
- Don’t skip softening the cream cheese. I know it’s tempting to just throw cold blocks in the bowl, but you’ll end up with lumpy dip. Set it out for 30 to 60 minutes, or give it a quick 15-second zap in the microwave.
- Taste before you bake. This is your chance to adjust the heat. Dip a chip in the mixture and see if it’s spicy enough. If you want more kick, add another tablespoon of hot sauce. Remember, the cheese will mellow the heat a bit during baking.
- Use full-fat dairy for the best texture. Reduced-fat cream cheese and ranch can make the dip watery. If you’re watching calories, you can still use them, but know that the texture won’t be as thick and creamy.
- Shred your own cheese. Bagged shredded cheese has anti-caking agents that prevent it from melting smoothly. Shredding a block of cheddar takes two minutes and makes a noticeable difference in how the dip comes together.
- Let it rest after baking. I know it’s hard to wait, but that five-minute rest allows the dip to thicken. If you serve it straight out of the oven, it might be a little runny. Patience pays off.
- Keep it warm in a slow cooker. If you’re serving this at a party, transfer the baked dip to a small slow cooker set to “warm.” It’ll stay perfect for hours, and you can keep the chips on the side.
I once forgot to drain the canned chicken and ended up with a soupy mess. Don’t be me. Drain it well, and if the chicken seems extra wet, press it with a paper towel to soak up excess moisture. Little things like that make a big difference.
Variations & Adaptations
This recipe is flexible, which is great when you’re cooking for a crowd with different tastes. Here are some ways to change it up:
- Milder Version for Sensitive Kids: Use only ¼ cup of Buffalo hot sauce and add an extra ¼ cup of ranch dressing. You’ll still get that tangy flavor without any heat. My youngest prefers it this way.
- Spicier Version for Grown-Ups: Increase the hot sauce to ¾ cup and add a teaspoon of cayenne pepper or a few dashes of chipotle powder. Stir in some diced pickled jalapeños for extra kick.
- Healthier Twist: Use reduced-fat cream cheese and Greek yogurt instead of ranch dressing. Swap the canned chicken for shredded rotisserie chicken breast (remove the skin). Serve with veggie sticks instead of chips.
- Vegetarian Option: Replace the chicken with two cans of drained and rinsed chickpeas or a bag of frozen cauliflower florets (thawed and chopped small). The texture is different, but the flavor is still fantastic.
- Slow Cooker Method: Combine all ingredients in a slow cooker (except the top cheese) and cook on low for 2 to 3 hours, stirring occasionally. Sprinkle cheese on top, cover, and cook for another 15 minutes until melted. This is perfect for potlucks where you don’t have oven access.
- Add Some Crunch: Stir in ½ cup of crumbled cooked bacon or chopped water chestnuts for texture. I tried this once for a Super Bowl party, and people went crazy for it.
My personal favorite variation is the slow cooker version with extra bacon. It’s a little indulgent, but for a game day spread, it’s exactly what you want. Plus, it keeps warm for hours, so people can graze at their own pace.
Serving & Storage Suggestions
This dip is best served warm, straight from the oven or slow cooker. Here’s how to make it shine:
- Serving Temperature: Serve it hot, but not scorching. After it rests for five minutes, it’s perfect. If it cools down too much, pop it back in the oven for a few minutes or stir it in a warm slow cooker.
- What to Serve With It: Tortilla chips are the classic choice, but don’t stop there. Celery sticks, carrot chips, bell pepper strips, and cucumber rounds all work great. Crusty bread or baguette slices are also excellent for scooping. For a low-carb option, use pork rinds or endive leaves.
- Complementary Dishes: This dip pairs beautifully with a simple green salad, a bowl of chili, or a platter of sliders. If you’re hosting a party, set it out alongside a veggie tray and some crispy garlic chicken wings for a full spread.
- Storage: Let any leftover dip cool completely, then transfer it to an airtight container. It will keep in the refrigerator for up to 4 days. The flavors actually meld together and get even better overnight.
- Reheating: Reheat individual portions in the microwave for 30 to 60 seconds, stirring halfway through. For a larger batch, reheat in a 350°F oven for 10 to 15 minutes, or in a slow cooker on low for about an hour. Add a splash of milk or ranch if it seems too thick after reheating.
- Freezing: You can freeze this dip for up to 3 months. Assemble it in a freezer-safe dish, cover tightly with foil and plastic wrap, and freeze. Thaw overnight in the fridge before baking. The texture may be slightly different after freezing, but it’s still delicious.
I’ve found that this dip actually tastes better the next day. Something about the flavors settling together makes it even more addictive. Just don’t tell anyone—they’ll think you made it fresh.
Nutritional Information & Benefits
Here’s the honest truth: this is not health food, and I’m not going to pretend it is. But it’s made with real ingredients, and there are a few bright spots worth mentioning. Here’s the estimated nutritional breakdown per serving (based on 16 servings):
- Calories: Approximately 280
- Protein: 18 grams
- Fat: 20 grams
- Carbohydrates: 6 grams
- Fiber: 0 grams
- Sugar: 2 grams
- Sodium: 680 mg
The chicken provides a solid amount of protein, which helps keep everyone full longer—great for feeding hungry kids and adults alike. Cream cheese and cheddar offer calcium and vitamin A, though they’re also the main source of fat and calories. The hot sauce contains capsaicin, which can give your metabolism a tiny boost, but let’s be real: you’re eating this because it tastes amazing, not because it’s a superfood.
If you’re watching your sodium, use low-sodium canned chicken and reduce the added salt. You can also use a low-sodium ranch dressing. For a lighter version, follow the healthier twist variation above. This dip is also gluten-free as written, which is a bonus for anyone with celiac or gluten sensitivity. Just double-check that your ranch dressing and hot sauce are certified gluten-free if that’s a concern.
I’m not a nutritionist, and I don’t pretend to be one. This is comfort food, meant to be enjoyed in moderation with the people you love. Balance it out with some veggie sticks and a big glass of water, and you’re good to go.
Conclusion
This kid-friendly Buffalo chicken dip is more than just a recipe—it’s a solution. It solves the problem of what to feed a crowd without breaking the bank. It solves the stress of pleasing picky eaters while still offering something adults will love. And it solves the dilemma of wanting something homemade that doesn’t take all day to prepare. Rosa handed me that container of dip on a sunny Saturday morning, and I’ve been grateful ever since.
I want you to take this recipe and make it your own. Adjust the spice level, swap in your favorite cheese, or throw it in a slow cooker and forget about it. The beauty of a good dip is that it’s forgiving—it wants to be customized. So go ahead, experiment, and find the version that makes your family light up the way mine did.
When you make it—and I hope you do—come back and let me know how it turned out. Did your kids love it? Did you add something unexpected? Drop a comment below, share a photo, or tag me in your post. I read every single one, and nothing makes my day like hearing that a recipe worked for someone else. Now go preheat that oven. Your crowd is waiting.
Frequently Asked Questions
Can I make this dip ahead of time?
Absolutely. Assemble the dip in the baking dish, cover it with foil, and refrigerate for up to 24 hours. When you’re ready to bake, add about 10 extra minutes to the cooking time since it’s starting from cold. You can also freeze it for up to 3 months—just thaw overnight in the fridge before baking.
How do I make this dip less spicy for my kids?
Easy. Use only ¼ cup of Buffalo hot sauce instead of ½ cup, and add an extra ¼ cup of ranch dressing to keep the creamy balance. You can also use a mild hot sauce or even substitute with ketchup mixed with a little vinegar for a tangy but completely heat-free version.
Can I use fresh chicken instead of canned?
Yes, you can. Use about 2½ cups of shredded cooked chicken—rotisserie chicken works great. Just make sure it’s finely shredded so it blends into the dip evenly. Canned chicken is just more convenient and budget-friendly, which is why I recommend it for this recipe.
What’s the best way to keep this dip warm at a party?
Transfer the baked dip to a small slow cooker set to the “warm” setting. It will stay hot and creamy for hours without drying out. Stir it occasionally to keep the top from forming a skin. This is my go-to method for game days and potlucks.
Can I make this dairy-free?
You can try using dairy-free cream cheese, vegan shredded cheese, and a dairy-free ranch dressing. The texture will be slightly different—less creamy and more grainy—but the flavor can still be good. I’ve tested it once with a friend who’s lactose intolerant, and she enjoyed it, though she admitted it wasn’t quite the same as the original.
Pin This Recipe!

Easy Kid-Friendly Buffalo Chicken Dip for a Crowd

This warm, creamy, and slightly spicy Buffalo chicken dip is perfect for feeding a crowd on a budget. Made with simple ingredients like canned chicken and cream cheese, it’s a kid-approved appetizer that disappears fast at any gathering.
- Prep Time: 20 minutes
- Cook Time: 25 minutes
- Total Time: 45 minutes
- Yield: 16 servings 1x
- Category: Appetizer
- Cuisine: American
Ingredients
- 2 (12.5-ounce) cans canned chicken breast, drained
- 16 ounces cream cheese, softened
- 1 cup ranch dressing
- ½ cup Buffalo hot sauce (such as Frank’s RedHot)
- 2 cups shredded cheddar cheese, divided
- 1 cup shredded mozzarella cheese
- ¼ cup sliced green onions (for garnish)
- Salt and pepper to taste
Instructions
- Preheat your oven to 375°F (190°C).
- Drain the canned chicken and place it in a large mixing bowl. Use a fork to break it up into small, flaky pieces.
- Add the softened cream cheese to the bowl. If it’s still firm, microwave for about 15 seconds to soften. Pour in the ranch dressing and Buffalo hot sauce.
- Mix everything together using a hand mixer on low speed or a sturdy spatula until the cream cheese is fully incorporated and the mixture is creamy and slightly orange.
- Stir in 1½ cups of the shredded cheddar cheese and all of the mozzarella cheese. Reserve the remaining ½ cup of cheddar for the top. Mix until the cheeses are evenly distributed.
- Transfer the mixture to a 9×13-inch baking dish and spread it into an even layer.
- Sprinkle the remaining ½ cup of cheddar cheese over the top.
- Bake for 20 to 25 minutes, or until the dip is hot all the way through and the cheese on top is melted and starting to brown around the edges.
- Remove from the oven and let it rest for about 5 minutes. Sprinkle sliced green onions on top.
- Serve warm with tortilla chips, celery sticks, carrot sticks, or crusty bread.
Notes
For a milder version, use only ¼ cup of hot sauce and add an extra ¼ cup of ranch dressing. For a spicier version, increase hot sauce to ¾ cup and add cayenne pepper. To make ahead, assemble in the dish, cover with foil, and refrigerate for up to 24 hours; add 10 minutes to baking time. Leftovers can be stored in an airtight container in the refrigerator for up to 4 days. To keep warm at a party, transfer baked dip to a slow cooker set to ‘warm’.
Nutrition
- Serving Size: 1 serving (based on
- Calories: 280
- Sugar: 2
- Sodium: 680
- Fat: 20
- Saturated Fat: 10
- Carbohydrates: 6
- Protein: 18
Keywords: Buffalo chicken dip, kid-friendly, easy appetizer, game day dip, crowd-pleaser, budget-friendly


