It was 10:47 PM on a random Tuesday in late May, and I had an aggressive craving for something cold, creamy, and fruity. Not a cake-cake—that felt like too much effort at that hour. Not ice cream, because I had just finished the last pint the night before (don’t judge). I wanted that specific feeling of biting into a strawberry shortcake, but I didn’t want to turn on the oven. The apartment was finally cool from the evening breeze, and the thought of heating it up felt like a betrayal of the weather. So I stood there, fridge door open, bathed in that pale fluorescent light, surveying my options. I had a box of graham crackers that were dangerously close to their expiration date, a container of heavy cream that needed using up, and a basket of strawberries that were so fragrant they smelled like summer in a bowl. The idea hit me like a weird little lightning bolt—what if I just… layered them? Like a lasagna, but for dessert. No baking, no fuss, just stacking and waiting. I grabbed a glass dish, started layering, and honestly, I wasn’t sure if it would work. I mean, I was tired and kind of impulsive, and I definitely made a mess with the whipped cream—it got on the counter, on my hand, and somehow on my elbow. But I kept going, because something about the late night loosened the usual rules. I didn’t have a plan, just a hunch. And when I pulled that dish out of the fridge the next morning and took the first bite? Let me tell you, it was the kind of accidental magic that makes you feel like a kitchen genius at 8 AM. Maybe you’ve been there—late at night, no audience, just you and a weird idea that somehow works. That’s how this cozy no-bake strawberry shortcake icebox cake was born.
Why You’ll Love This Recipe
This isn’t just another dessert recipe you’ll bookmark and forget about. This is the one you’ll actually make, and then make again the next week because someone at the dinner party asked for it. I’ve tested this about seven times now (yes, seven—my neighbors have become very happy taste-testers), and every single time, it delivers the exact same feeling: pure, uncomplicated comfort.
- No Oven Required: It’s summer, or maybe you just don’t feel like heating up the kitchen. Either way, this recipe respects your decision to keep things cool. The fridge does all the work.
- Simple, Honest Ingredients: You need graham crackers, heavy cream, strawberries, and a few pantry staples. No weird extracts, no hard-to-find items. I promise you can find everything at a regular grocery store.
- Perfect for Lazy Gatherings: Whether it’s a backyard barbecue, a birthday party, or just a Tuesday that needs a little extra sweetness, this cake fits right in. It’s impressive without being stressful.
- Crowd-Pleaser Status: I’ve served this to kids, adults, and that one friend who claims they “don’t really like dessert.” They all went back for seconds. It’s the texture—the way the graham crackers soften into a cake-like layer, the cream stays light, and the strawberries burst with flavor.
- Unbelievably Delicious: Look, I know it sounds simple. But the first time you taste that cold, creamy, slightly softened cracker layer with the fresh strawberries, you’ll understand. It’s comfort food at its finest—nostalgic, soothing, and just sweet enough.
What makes this recipe different from all the other no-bake cakes out there? It’s the balance. I spent a lot of time figuring out the right ratio of cream to crackers so the layers don’t get soggy or dry. The strawberries are macerated just enough to release their juices but not so much that they turn into mush. And the cream? It’s stabilized with a tiny bit of powdered sugar and vanilla, so it holds its shape without being stiff. This is the version I keep coming back to, and I think you will too.
What Ingredients You Will Need
This recipe uses simple, wholesome ingredients that come together to create something truly special. Most of these are pantry or fridge staples, which is exactly what you want when a craving hits at 10 PM. Let’s break down what you’ll need and why each ingredient matters.
- Graham Crackers (about 2 sleeves or 24 full sheets): These are the backbone of the cake. They soften beautifully in the fridge, turning into a tender, cake-like layer. I prefer the classic honey-flavored graham crackers, but the cinnamon ones work in a pinch (they add a warm, spicy note). If you can’t find graham crackers, you can use digestive biscuits or even vanilla wafers—just know the texture will be slightly different.
- Fresh Strawberries (2 pounds, hulled and sliced): The star of the show. Look for strawberries that are deep red, fragrant, and firm but not rock-hard. If they’re not in season, you can use frozen strawberries, but thaw and drain them well first. I recommend slicing them about ¼-inch thick so they layer evenly. Trust me, the juice they release during the macerating process is liquid gold.
- Granulated Sugar (¼ cup, plus 1 tablespoon): This is divided—some goes into the strawberries to draw out their juices (macerating), and the rest goes into the whipped cream for sweetness. Don’t skip the macerating step; it’s what creates that syrupy, berry-packed layer.
- Heavy Whipping Cream (2 cups, cold): The creamy soul of this cake. You need heavy cream with at least 36% milk fat for the best results. It whips up light and fluffy, and when it chills overnight, it sets into a mousse-like texture. I’ve tried this with coconut cream for a dairy-free version, and it works, but the texture is a bit denser.
- Powdered Sugar (3 tablespoons): This stabilizes the whipped cream and adds a subtle sweetness without graininess. It also helps the cream hold its shape when you spread it over the crackers.
- Vanilla Extract (1 teaspoon): Pure vanilla extract makes a difference here. It rounds out the sweetness and adds a warm, cozy note. If you only have imitation vanilla, it’ll work, but the flavor won’t be as rich.
- Lemon Juice (1 tablespoon): A tiny splash goes into the strawberries to brighten their flavor. It also helps balance the sweetness. Don’t worry—the cake won’t taste lemony; it just makes the strawberries taste more like themselves.
Ingredient Tips from My Kitchen: When I make this, I always use organic strawberries if I can find them—they tend to be sweeter and more flavorful. For the graham crackers, I’ve found that the store-brand versions work just as well as the name brands, so save your money there. And please, please use cold heavy cream. If it’s even slightly warm, it won’t whip properly, and you’ll end up with a sad, soupy mess. I’ve been there, and it’s not fun.
Equipment Needed
You don’t need a fancy kitchen to pull this off, which is honestly one of my favorite things about this recipe. Here’s what you’ll need:
- 8×8-inch Baking Dish or 9-inch Square Pan: This is the perfect size for creating neat, stackable layers. If you only have a 9×13-inch dish, you can double the recipe—just know it’ll be a bigger cake.
- Electric Mixer or Whisk: An electric hand mixer makes whipping cream a breeze, but you can absolutely do it by hand with a whisk and some elbow grease. It’ll take about 5-7 minutes of vigorous whisking, but it’s a great arm workout.
- Large Mixing Bowls: You’ll need one for the strawberries and one for the whipped cream. Glass or stainless steel works best because they stay cold.
- Rubber Spatula: For folding the cream and spreading it evenly over the crackers. A flexible spatula is your best friend here.
- Sharp Knife and Cutting Board: For slicing the strawberries. A dull knife will squish them, and nobody wants that.
- Plastic Wrap or Aluminum Foil: To cover the cake while it chills. You want it airtight so it doesn’t absorb any weird fridge smells.
My Personal Take on Equipment: I’ve made this cake with a $10 hand mixer and a cheap baking dish, and it turned out just as good as when I used my fancy stand mixer. Don’t let the lack of “professional” gear stop you. That said, I do recommend chilling your mixing bowl and beaters for about 10 minutes before whipping the cream—it makes the process faster and the cream fluffier. It’s a little trick I picked up from a pastry chef friend, and it works like a charm.
Preparation Method
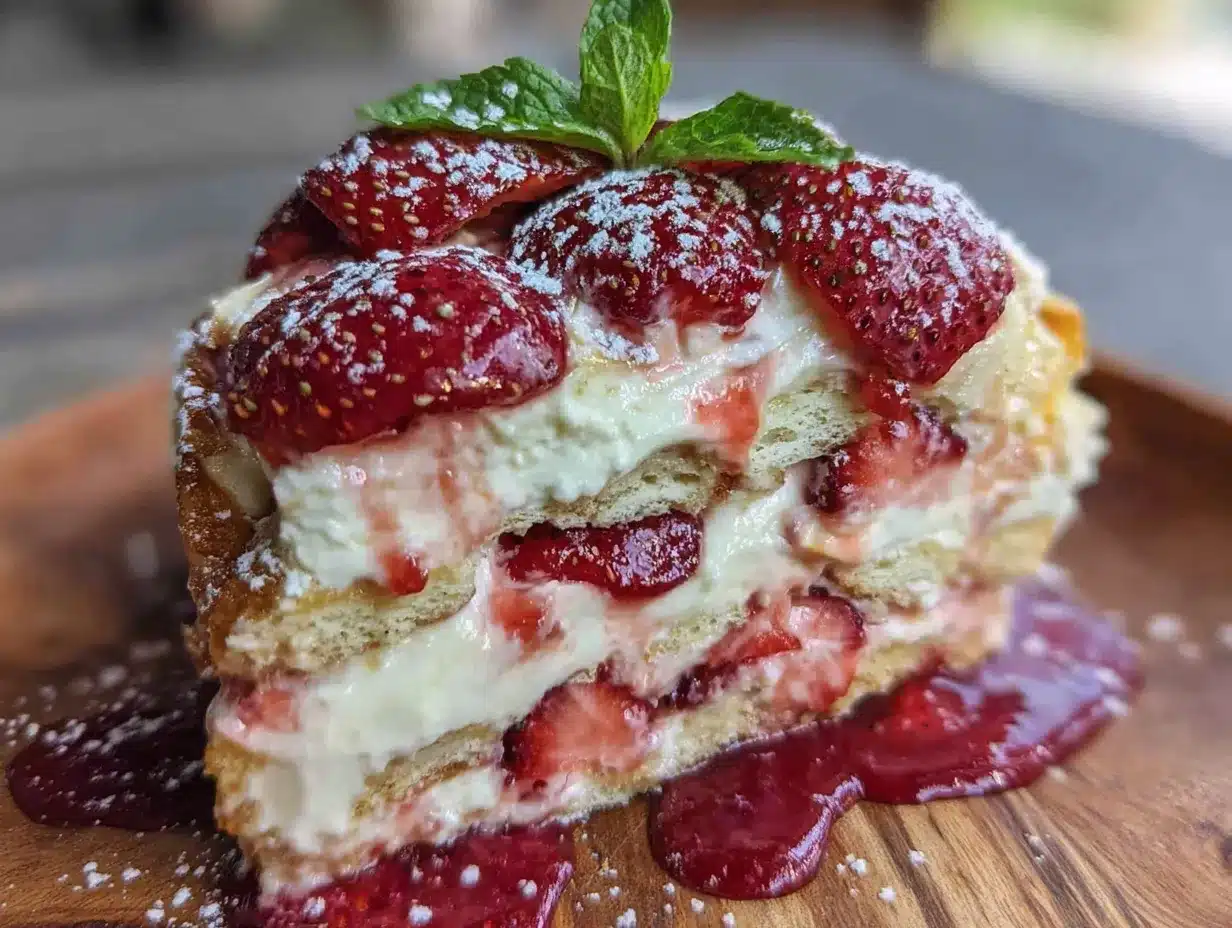
Alright, let’s get to the fun part. This recipe is incredibly forgiving, so don’t stress about perfection. Here’s exactly how to do it:
- Macerate the Strawberries (15 minutes): In a large bowl, combine the sliced strawberries, ¼ cup of granulated sugar, and the lemon juice. Toss everything together gently with a spatula until the sugar starts to dissolve. Let the strawberries sit for about 15 minutes, stirring once halfway through. You’ll notice they start releasing a beautiful red syrup—that’s exactly what you want. The sugar draws out the natural juices, creating a saucy layer that soaks into the graham crackers.
- Whip the Cream (5 minutes): In a separate large bowl (chilled if you remember), pour in the cold heavy cream, powdered sugar, and vanilla extract. Using an electric mixer on medium-high speed, whip the cream until soft peaks form. This means when you lift the beaters, the cream holds a gentle peak that droops slightly at the tip. Don’t over-whip it—if it looks grainy or curdled, you’ve gone too far. Stop as soon as it looks fluffy and smooth. If you’re whisking by hand, you’re looking for the same consistency; it’ll take a bit longer, but the arm workout is worth it.
- Layer the Base (2 minutes): Spread a thin, even layer of whipped cream on the bottom of your 8×8-inch dish. This helps the first layer of graham crackers stick and soften evenly. Don’t skip this step—I did once, and the bottom crackers stayed crunchy while the top ones got soggy. It was weird.
- First Layer of Crackers (2 minutes): Arrange a single layer of graham crackers over the cream, breaking them as needed to fit snugly. You want full coverage, but it’s okay if there are tiny gaps—the cream will fill them in. I usually fit about 6 full sheets per layer, depending on the brand.
- Add Strawberries and Cream (5 minutes): Spoon about one-third of the macerated strawberries (including the syrup) over the crackers, spreading them evenly. Then, dollop about one-third of the whipped cream on top and spread it gently with a spatula. Don’t press too hard—you don’t want to squish the strawberries into the crackers. Just a smooth, even layer.
- Repeat Layers (10 minutes): Repeat the process: graham crackers, strawberries with syrup, whipped cream. You should get about 3 to 4 layers total, depending on your dish. End with a final layer of whipped cream on top. Make it pretty—smooth it out with the spatula, creating little swirls if you’re feeling fancy.
- Top with Strawberries (2 minutes): Reserve a handful of the prettiest strawberry slices and arrange them on top of the final cream layer. This is purely for presentation, but it does make the cake look stunning. You can also add a few whole strawberries if you’re feeling extra.
- Chill Overnight (8 hours minimum, 24 hours ideal): Cover the dish tightly with plastic wrap or aluminum foil and refrigerate for at least 8 hours. Overnight is best. This is the magic step—the graham crackers absorb the moisture from the cream and strawberries, transforming into a soft, cake-like texture. The flavors meld together, and the whole thing becomes cohesive. I know it’s hard to wait, but trust me, it’s worth it.
- Serve Cold (5 minutes): When you’re ready to serve, remove the cake from the fridge. Slice it into squares with a sharp knife, wiping the blade clean between cuts for neat edges. Serve it straight from the dish—it’s a rustic, no-fuss dessert that looks beautiful on the table.
My Personal Note on Timing: I’ve made this cake in a rush and only chilled it for 4 hours. It was still good, but the crackers were a little too crunchy in the center. If you can, give it the full overnight rest. The texture becomes something truly special—soft, creamy, and almost pudding-like. It’s the difference between a good dessert and a great one.
Cooking Tips & Techniques
I’ve made this cake enough times to learn a few things the hard way. Here are my best tips to make sure yours turns out perfect:
- Don’t Over-Whip the Cream: This is the number one mistake I see people make. You want soft peaks—not stiff, not runny. If you over-whip, the cream becomes grainy and starts to separate. It’s still edible, but the texture won’t be as luxurious. Stop as soon as the cream looks like fluffy clouds.
- Maceration is Non-Negotiable: I know it’s tempting to just throw raw strawberries on top of the cream, but please don’t. The maceration process draws out the juices, creating a syrup that soaks into the graham crackers. Without it, the crackers stay dry and the strawberries don’t release their full flavor. It’s a small step that makes a huge difference.
- Use a Sharp Knife for Slicing: When you’re ready to serve, a dull knife will smoosh the layers and create a messy slice. Use a sharp chef’s knife and wipe it clean between cuts. For the cleanest slices, you can even run the knife under hot water and dry it before cutting.
- Let It Rest Fully: I know I’ve said this already, but it’s worth repeating. The cake needs at least 8 hours in the fridge. If you cut into it too early, the layers won’t have set, and you’ll end up with a soupy mess. Patience is a virtue, especially when dessert is involved.
- Keep It Cold: This cake is best served straight from the fridge. If it sits out for more than 30 minutes, the cream will start to soften and lose its structure. If you’re serving it at a party, keep it chilled until the last possible moment.
A Lesson I Learned the Hard Way: The first time I made this, I used whipped cream that was slightly over-whipped because I got distracted by a phone call. The texture was a bit grainy, and the cake didn’t set as well. It was still delicious, but it wasn’t as pretty. Now I set a timer and don’t walk away from the mixer. It’s a small thing, but it makes a difference.
Variations & Adaptations
One of the best things about this recipe is how flexible it is. Here are some variations I’ve tried and loved:
- Berry Medley Version: Swap half the strawberries for fresh blueberries, raspberries, or sliced peaches. The combination of flavors is incredible, and it makes the cake look even more colorful. I made this for a Fourth of July party, and it was a hit.
- Chocolate Strawberry Dream: Add a thin layer of chocolate ganache between the strawberry and cream layers. Just melt ½ cup of dark chocolate chips with ¼ cup of heavy cream, let it cool slightly, and drizzle it over the strawberries. It adds a rich, decadent twist that feels extra special.
- Dairy-Free Adaptation: Use full-fat coconut cream (chilled overnight) in place of the heavy cream. Whip it the same way, and add a tablespoon of powdered sugar for sweetness. The texture is slightly denser, but it’s still creamy and delicious. I’ve also used a dairy-free cream cheese alternative for a tangier version.
- Gluten-Free Option: Swap the graham crackers for gluten-free graham crackers or gluten-free digestive biscuits. Most brands work well, just check the texture after chilling—some soften faster than others. I’ve used Schär brand with great results.
- Lemon-Blueberry Twist: Add the zest of one lemon to the macerating strawberries, and swap the lemon juice for fresh lemon juice. Then, layer in fresh blueberries along with the strawberries. The lemon adds a bright, zesty note that pairs beautifully with the berries.
My Favorite Personal Variation: I once made this with a layer of crushed shortbread cookies mixed into the graham crackers. It added a buttery, crumbly texture that was absolutely divine. I called it “Shortbread Strawberry Dream,” and it disappeared in about 10 minutes at a family dinner.
Serving & Storage Suggestions
This cake is best served cold, straight from the fridge. Here’s how to make it shine:
- Serving Temperature: Serve it chilled, not frozen. If it’s been in the fridge overnight, it’s ready to go. I like to let it sit out for about 5 minutes before slicing—it makes the cream slightly softer and easier to cut.
- Presentation Ideas: Garnish each slice with a fresh mint leaf or a dusting of powdered sugar. You can also add a dollop of extra whipped cream on top for a truly indulgent look. For a rustic vibe, serve it in the baking dish with a big spoon—it’s a family-style dessert that feels warm and inviting.
- Complementary Beverages: This cake pairs beautifully with a cup of hot coffee, a glass of cold milk, or even a light rosé if you’re feeling fancy. The creaminess of the cake balances the acidity of the wine perfectly.
- Storage Instructions: Cover the dish tightly with plastic wrap or a lid and store it in the refrigerator for up to 3 days. The cake actually gets better after the first day as the flavors continue to meld. After 3 days, the strawberries may start to release too much liquid, making the cake slightly soggy.
- Freezing Instructions: You can freeze this cake for up to 1 month. Wrap the entire dish tightly in plastic wrap, then a layer of aluminum foil. To thaw, transfer it to the refrigerator overnight. The texture will be slightly softer after freezing, but it’s still delicious. I’ve done this for make-ahead holiday desserts, and it works great.
- Reheating (If You Must): This is a cold dessert, so reheating isn’t recommended. But if you have leftovers that have been in the fridge for a day or two, you can let them sit at room temperature for 10 minutes before serving. It takes the chill off without ruining the texture.
How Flavors Develop Over Time: The first day, the cake is light and fresh—the strawberries are bright, the cream is fluffy, and the crackers are just starting to soften. By day two, the flavors have deepened. The strawberries have released more juice, the cream has infused with berry flavor, and the crackers are fully tender. It’s almost like a different dessert, and honestly, I prefer it on day two.
Nutritional Information & Benefits
While this is definitely a treat, it does have some redeeming qualities. Here’s a rough estimate per serving (based on 9 servings):
- Calories: Approximately 320-350 per serving
- Fat: 18g (mostly from the heavy cream)
- Carbohydrates: 38g (from graham crackers and sugar)
- Protein: 3g
- Fiber: 2g (from strawberries)
- Sugar: 24g (naturally occurring and added)
Health Benefits of Key Ingredients: Strawberries are packed with vitamin C, antioxidants, and fiber. They’re great for immune health and skin. The heavy cream provides calcium and vitamin D, though it’s best enjoyed in moderation. If you’re watching your sugar intake, you can reduce the sugar in the macerating step or use a sugar substitute like monk fruit sweetener.
Dietary Considerations: This recipe is vegetarian and can be made gluten-free and dairy-free with the substitutions mentioned above. It contains dairy and gluten in its standard form. If you have nut allergies, this recipe is naturally nut-free, but always check your graham cracker labels for cross-contamination warnings.
My Personal Wellness Perspective: I believe in balance. This cake is a celebration dessert—it’s not something you eat every day, but when you do, it should be enjoyed fully. I like to serve it after a light meal, like a grilled chicken salad, so the indulgence feels earned and satisfying. Life is too short to skip dessert, you know?
Conclusion
This cozy no-bake strawberry shortcake icebox cake is the kind of recipe that feels like a hug in dessert form. It’s simple, forgiving, and absolutely delicious—the perfect combination for busy days, lazy evenings, or any time you need a little sweetness in your life. I love how it brings people together, whether it’s a quiet night at home or a lively gathering with friends. The way the layers soften and meld overnight is nothing short of magic, and every bite tastes like summer.
I encourage you to make this recipe your own. Swap in different berries, add a chocolate layer, or experiment with gluten-free crackers. The beauty of this cake is that it’s a blank canvas for your creativity. And when you take that first cold, creamy bite? You’ll understand why I keep coming back to it.
So go ahead—give it a try. I’d love to hear how it turns out! Leave a comment below, share your adaptations, or tag me in your photos. Let’s spread the joy of no-bake desserts, one slice at a time. Happy cooking, friends!
Frequently Asked Questions
Can I make this cake ahead of time for a party?
Absolutely! In fact, I recommend it. This cake needs to chill for at least 8 hours, so making it the day before is perfect. The flavors develop even more overnight, and you’ll have one less thing to worry about on party day. Just keep it covered in the fridge until you’re ready to serve.
Can I use frozen strawberries instead of fresh?
Yes, you can, but there’s a catch. Frozen strawberries release a lot of water when they thaw, which can make the cake soggy. If you use frozen berries, thaw them completely in a colander, drain off the excess liquid, and then proceed with the maceration step. You may need to add a little extra sugar since frozen berries can be less sweet.
Why did my graham crackers stay crunchy?
This usually happens when the cake hasn’t chilled long enough. The crackers need at least 8 hours to absorb the moisture from the cream and strawberries. If you’re in a rush, try slicing the strawberries thinner or adding a little extra cream between the layers. Also, make sure your dish is tightly covered so the moisture doesn’t escape into the fridge.
Can I use low-fat cream or milk instead of heavy cream?
I wouldn’t recommend it. Heavy cream is essential for the right texture—it whips up light and fluffy, and it sets into a mousse-like consistency as it chills. Low-fat cream or milk won’t whip properly and will result in a runny, watery cake. If you’re looking for a lighter option, try the dairy-free coconut cream version I mentioned earlier.
How do I get clean slices without the layers falling apart?
The key is to use a sharp knife and wipe it clean between each cut. You can also run the knife under hot water, dry it, and then slice—the heat helps the knife glide through the cream. For the neatest slices, chill the cake for the full 24 hours. The longer it rests, the more stable the layers become.
Pin This Recipe!
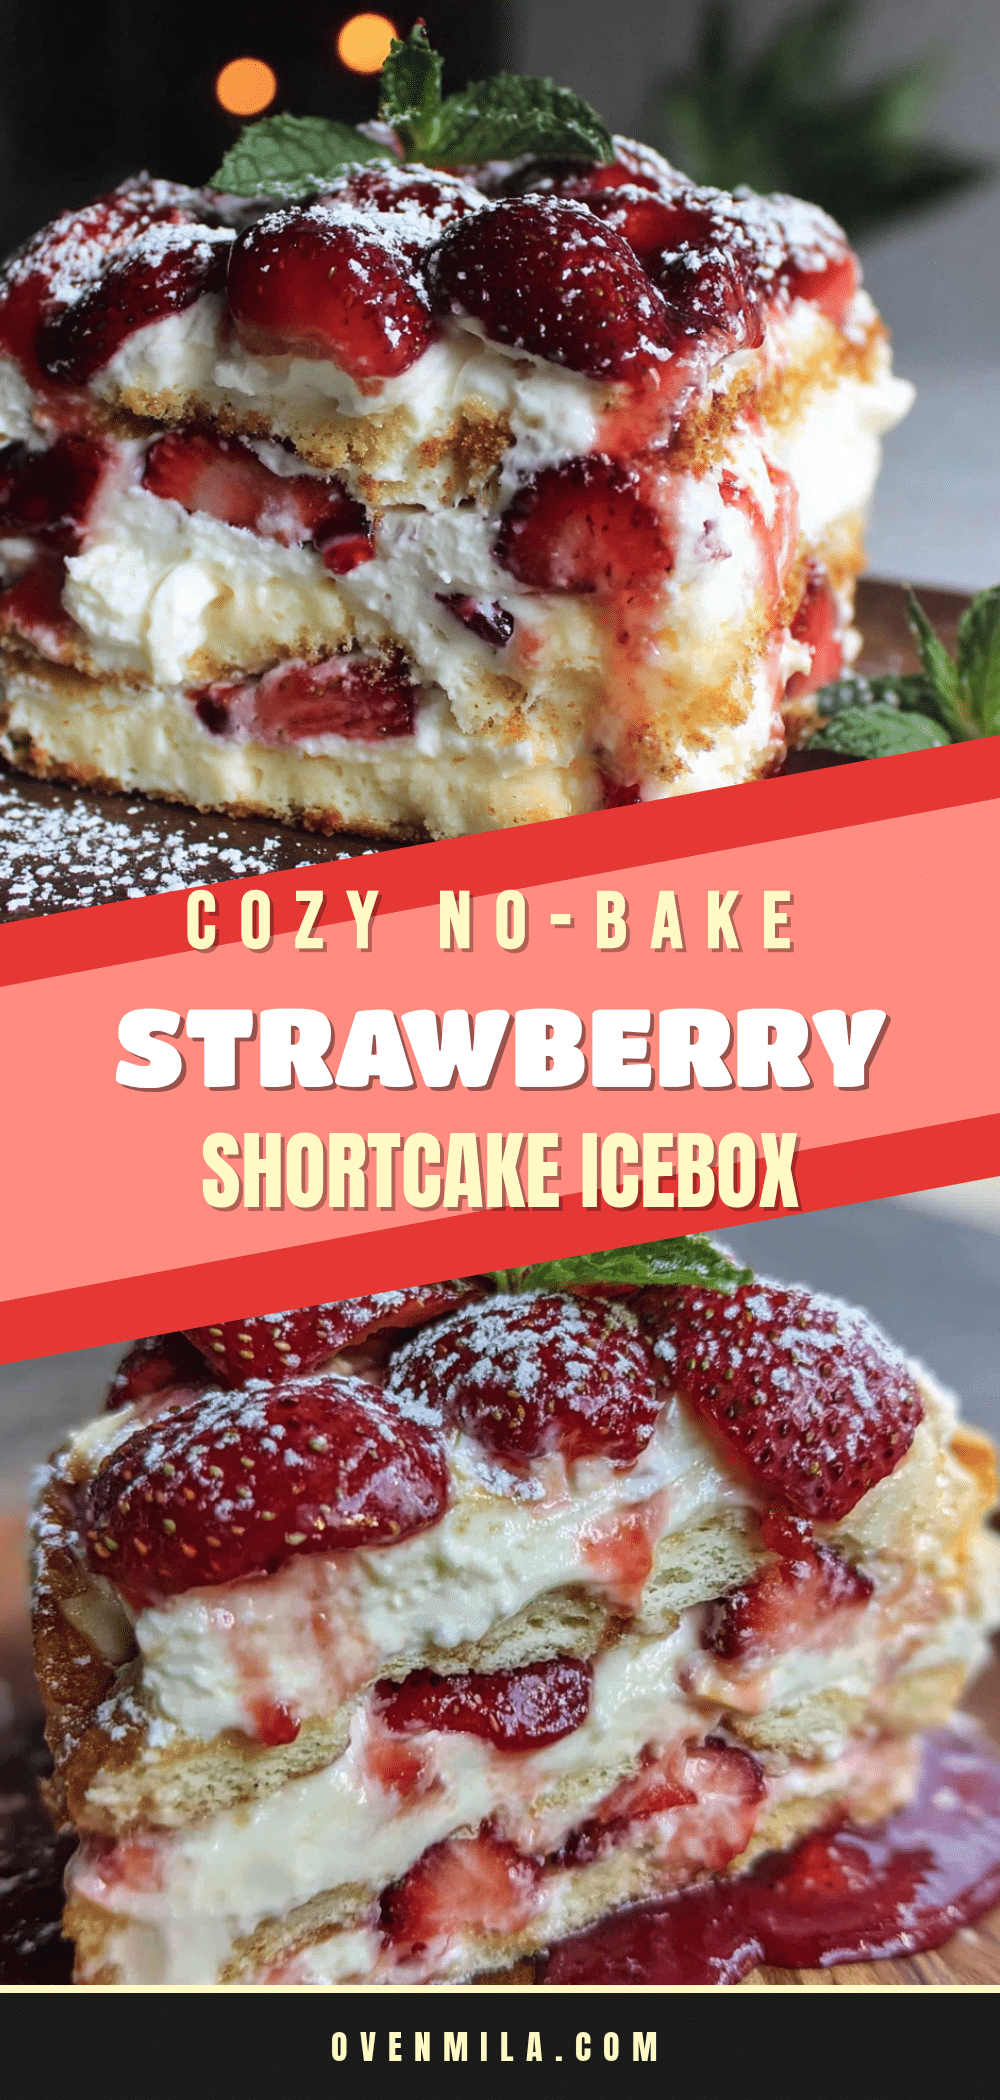
Easy No-Bake Strawberry Shortcake Icebox Cake
A simple, no-bake dessert made with layers of graham crackers, fresh strawberries, and whipped cream. Perfect for summer when you don’t want to turn on the oven.
- Prep Time: 20 minutes
- Cook Time: 0 minutes
- Total Time: 8 hours 20 minutes (includes chilling)
- Yield: 9 servings 1x
- Category: Dessert
- Cuisine: American
Ingredients
- 2 sleeves (about 24 full sheets) graham crackers
- 2 pounds fresh strawberries, hulled and sliced 1/4-inch thick
- 1/4 cup plus 1 tablespoon granulated sugar, divided
- 2 cups cold heavy whipping cream (at least 36% milk fat)
- 3 tablespoons powdered sugar
- 1 teaspoon pure vanilla extract
- 1 tablespoon lemon juice
Instructions
- Macerate the strawberries: In a large bowl, combine sliced strawberries, 1/4 cup granulated sugar, and lemon juice. Toss gently and let sit for 15 minutes, stirring once halfway through, until strawberries release their juices.
- Whip the cream: In a separate large chilled bowl, combine cold heavy cream, powdered sugar, and vanilla extract. Using an electric mixer on medium-high speed, whip until soft peaks form (about 5 minutes). Do not over-whip.
- Layer the base: Spread a thin, even layer of whipped cream on the bottom of an 8×8-inch baking dish.
- First layer of crackers: Arrange a single layer of graham crackers over the cream, breaking as needed to fit snugly.
- Add strawberries and cream: Spoon about one-third of the macerated strawberries (including syrup) over the crackers. Dollop about one-third of the whipped cream on top and spread gently.
- Repeat layers: Repeat the process (crackers, strawberries, cream) for 3 to 4 total layers, ending with a final layer of whipped cream on top.
- Top with strawberries: Reserve a handful of prettiest strawberry slices and arrange on top of the final cream layer.
- Chill: Cover tightly with plastic wrap or aluminum foil and refrigerate for at least 8 hours, ideally 24 hours, until graham crackers soften into a cake-like texture.
- Serve: Slice into squares with a sharp knife, wiping blade clean between cuts. Serve cold straight from the fridge.
Notes
For best results, chill the cake for the full 24 hours. The graham crackers will soften into a tender, cake-like texture. If using frozen strawberries, thaw and drain them first. The cake can be stored in the refrigerator for up to 3 days or frozen for up to 1 month.
Nutrition
- Serving Size: 1 square (1/9 of cak
- Calories: 335
- Sugar: 24
- Sodium: 180
- Fat: 18
- Saturated Fat: 11
- Carbohydrates: 38
- Fiber: 2
- Protein: 3
Keywords: no-bake dessert, strawberry shortcake, icebox cake, summer dessert, easy dessert, graham cracker dessert


