I was standing in the middle of the baking aisle at my local grocery store last October when a woman walked past me, and I caught it — the faintest trace of orange blossom water on her scarf. And just like that, I was eight years old again, sitting on a plastic-covered sofa in my Tía Rosario’s living room in East LA, watching her arrange pan de muerto on a cooling rack while the whole apartment smelled like sugar, yeast, and something floral I couldn’t name back then. She’d always make two batches — one for the ofrenda, and one for us to tear into while it was still warm. She passed away five years ago, and I haven’t had her pan de muerto since. Honestly, I’ve been scared to try making it myself. What if I couldn’t get it right? What if the memory tasted better than the bread?
But last week, I finally caved. I had a random Tuesday night craving — no, an ache — for that specific bread, and I didn’t have four hours to spare. So I did something my tía probably would’ve raised an eyebrow at: I shortcutted the whole thing. I used a stand mixer. I let the dough do a quick rise in a warm oven. I skipped the complicated shaping and went for a simpler round loaf. And you know what? It worked. The texture was soft, the orange blossom glaze soaked into the warm bread just like I remembered, and for a minute, standing in my own kitchen with flour on my jeans, I felt like I was back on that plastic-covered sofa. Maybe you’ve been there — chasing a taste from your childhood and worrying you’ll mess it up. This quick version is for you. It’s not traditional, I’ll be upfront about that. But it’s fast, it’s forgiving, and it brings that same floral, citrusy comfort to your table in under two hours instead of half a day.
Why You’ll Love This Recipe
Let me tell you why this quick pan de muerto has become my go-to fall bake, even when it’s not Día de Muertos season.
- Ready in Under 2 Hours: Traditional pan de muerto requires multiple rises and hours of patience. This version uses a warm-oven proofing method that cuts the time in half. Perfect for a weeknight baking project or a last-minute ofrenda addition.
- Simple Pantry Ingredients: No specialty flours, no hard-to-find yeast packets. You likely have flour, sugar, butter, eggs, and yeast in your kitchen right now. The only “special” ingredient is orange blossom water, and I’ll tell you exactly where to find it.
- Perfect for Día de Muertos or Any Fall Gathering: This bread works beautifully on an ofrenda, but it’s also fantastic for a cozy Sunday breakfast, a Halloween brunch, or even Thanksgiving morning. The orange blossom glaze makes it feel festive without being fussy.
- Crowd-Pleaser: I brought a loaf to my book club last week, and three people asked for the recipe. The combination of soft, slightly sweet bread and that floral, citrusy glaze is genuinely addictive. Kids love it, adults love it, and it’s different enough from regular sweet breads to feel special.
- Unbelievably Delicious: The texture is soft and pillowy — almost brioche-like — without requiring the same amount of butter or time. The orange blossom glaze seeps into the warm bread, creating this delicate floral sweetness that pairs perfectly with coffee or hot chocolate.
What makes this recipe different from the hundreds of other pan de muerto recipes out there? It’s the method. I tested this dough six times to find the perfect balance between speed and texture. The trick is using a slightly warmer liquid temperature and a shorter, more aggressive kneading time to develop gluten quickly. Most quick breads sacrifice texture for speed — this one doesn’t. It’s soft, it’s tender, and it has that signature orange blossom flavor without being overpowering. This isn’t just another version of pan de muerto. It’s the version for people who want the taste of tradition without spending their entire day in the kitchen.
What Ingredients You Will Need
This recipe uses straightforward ingredients, but a few of them do the heavy lifting when it comes to flavor. Here’s everything you need, plus a few notes on what to look for and what you can swap.
For the Dough
- All-purpose flour, 3 ½ cups (440g) — Spoon and level your flour for the best results. I prefer King Arthur Flour for its consistent protein content, but any brand works.
- Active dry yeast, 2 ¼ teaspoons (one standard packet) — Make sure your yeast isn’t expired. If you’re unsure, test it in warm water with a pinch of sugar first. It should bubble within 5-10 minutes.
- Warm milk, ½ cup (120ml), heated to about 110°F — Whole milk gives the richest flavor, but 2% works fine. Don’t use skim — the bread needs the fat for tenderness.
- Granulated sugar, ⅓ cup (65g) — Regular white sugar is perfect. You can reduce it to ¼ cup if you prefer a less sweet bread, but remember the dough itself isn’t overly sweet — the glaze provides most of the sweetness.
- Unsalted butter, 4 tablespoons (56g), softened to room temperature — Salted butter works if that’s all you have, just reduce the added salt slightly. I use Kerrygold for its rich flavor.
- Large eggs, 2, at room temperature — Cold eggs will slow down your dough. If you forgot to take them out of the fridge, place them in a bowl of warm water for 5 minutes.
- Orange zest, 1 tablespoon from about 1 large orange — Use a microplane for the finest zest. Avoid the white pith — it’s bitter.
- Orange blossom water, 1 teaspoon — This is the star flavor. You can find it in Middle Eastern grocery stores, Latin markets, or online. A little goes a long way. I recommend Cortas brand for its balanced floral notes.
- Salt, ½ teaspoon — Fine sea salt or table salt. Don’t skip this — it balances the sweetness and strengthens the gluten structure.
- Vanilla extract, 1 teaspoon — Pure vanilla extract is ideal, but imitation works in a pinch.
For the Orange Blossom Glaze
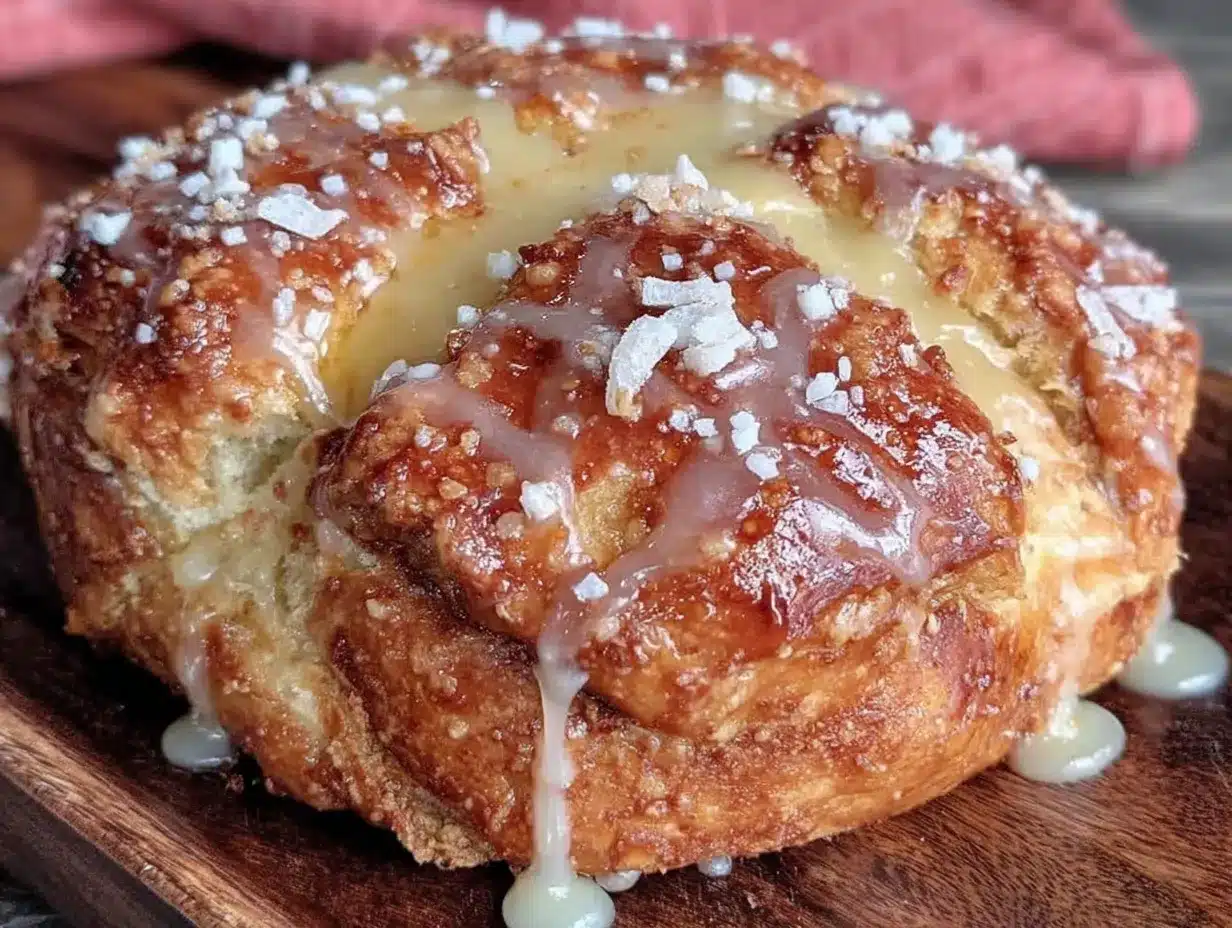
- Powdered sugar, 1 cup (120g), sifted — Sifting prevents lumps. If you don’t have a sifter, whisk it vigorously with a fork.
- Orange blossom water, 1 tablespoon — Yes, more of this. The glaze is where the floral flavor really shines.
- Fresh orange juice, 2-3 tablespoons — Freshly squeezed is non-negotiable here. Bottled juice lacks the brightness you need.
- Melted butter, 1 tablespoon (14g) — This adds richness and helps the glaze set with a slight sheen.
For Topping (Optional but Traditional)
- Granulated sugar, 2 tablespoons — For sprinkling over the glazed bread.
- Orange zest, ½ teaspoon — A pop of color and fresh citrus aroma.
Substitution Notes: If you can’t find orange blossom water, you can substitute with 1 teaspoon of orange extract plus 2 tablespoons of fresh orange juice in the dough. The flavor won’t be exactly the same — it will be more orange-forward and less floral — but it’s still delicious. For a dairy-free version, use melted coconut oil instead of butter and oat milk instead of whole milk. The texture will be slightly less tender but still good. And if you’re gluten-free, I honestly wouldn’t recommend this particular recipe — gluten-free flours struggle with the soft, pillowy texture that makes pan de muerto special. Look for a recipe specifically developed for gluten-free flour blends.
Equipment Needed
You don’t need fancy equipment for this quick pan de muerto, but a few tools will make the process smoother. Here’s what I used:
- Stand mixer with dough hook attachment — This is my number one recommendation for speed. Hand-kneading takes about 12-15 minutes; the stand mixer does it in 6-8. I use a KitchenAid Artisan, but any stand mixer with a dough hook works. If you don’t have one, you can knead by hand — just expect a longer, more arm-intensive process.
- Large mixing bowl — Glass or stainless steel works best. Avoid plastic bowls, which can retain odors and don’t hold heat as well during proofing.
- Measuring cups and spoons — Accurate measurements matter in bread baking. I prefer stainless steel measuring cups for dry ingredients and a glass liquid measuring cup for the milk.
- Kitchen scale — Optional but highly recommended. Weighing your flour gives you consistent results every time. I learned this the hard way after several dense, sad loaves.
- Microplane or fine grater — For zesting the orange. A box grater works too, but a microplane gives you finer zest that incorporates more evenly.
- Baking sheet — A standard half-sheet pan lined with parchment paper. Don’t skip the parchment — the glaze can get sticky.
- Cooling rack — Essential for letting the bread cool evenly before glazing. If you glaze it while it’s too hot, the glaze will just melt off.
- Pastry brush — For applying the melted butter and glaze evenly. A silicone brush is easier to clean than a natural bristle one.
- Plastic wrap or a clean kitchen towel — For covering the dough during proofing. A damp towel works if you don’t have plastic wrap.
If you’re just starting out and don’t own a stand mixer, don’t let that stop you. I made this recipe by hand for the first three tests, and it turned out perfectly fine. It just took a little more elbow grease and about 10 extra minutes of kneading. The warm-oven proofing method works the same either way.
Preparation Method
Let’s get to the actual baking. I’ve broken this down into clear steps with timestamps and sensory cues so you know exactly what to look for at each stage.
Step 1: Activate the Yeast (5 minutes)
In the bowl of your stand mixer (or a large mixing bowl if kneading by hand), combine the warm milk and 1 tablespoon of the sugar. Sprinkle the active dry yeast over the top and let it sit for 5-7 minutes. You’re looking for the mixture to become frothy and bubbly — it should smell like warm bread and yeast, not sour or alcoholic. If it doesn’t foam up, your yeast might be dead. I’ve had this happen with old packets, and it’s frustrating. Just start over with fresh yeast.
Step 2: Mix the Dough (8 minutes)
Add the remaining sugar, softened butter, eggs, orange zest, orange blossom water, vanilla extract, and salt to the yeast mixture. Add 2 cups of the flour and mix on low speed with the dough hook until combined, about 1 minute. Gradually add the remaining 1 ½ cups of flour, ½ cup at a time, while mixing on medium-low speed. The dough should come together into a shaggy ball that pulls away from the sides of the bowl. If it looks too sticky, add flour 1 tablespoon at a time. If it looks too dry and crumbly, add warm milk 1 teaspoon at a time. The dough should be soft and slightly tacky — like the inside of your cheek — but not sticky enough to leave residue on your fingers.
Step 3: Knead the Dough (6-8 minutes with mixer, 12-15 by hand)
Knead on medium speed for 6-8 minutes. The dough should become smooth, elastic, and slightly shiny. To test if it’s ready, perform the windowpane test: tear off a small piece of dough and stretch it gently between your fingers. If it stretches thin enough to see light through without tearing, it’s ready. If it tears easily, knead for another 2 minutes and test again. I failed this test on my first attempt and ended up with dense bread — don’t skip it.
Step 4: First Rise (30-40 minutes)
Shape the dough into a smooth ball and place it in a lightly greased bowl, turning once to coat the surface. Cover the bowl tightly with plastic wrap or a damp kitchen towel. Here’s my shortcut: place the bowl in your cold oven with the oven light on. The light generates just enough warmth (around 80-85°F) to speed up the rise without overheating the dough. Let it rise until doubled in size, about 30-40 minutes. The dough should feel puffy and spring back slowly when gently poked. If it springs back immediately, it needs more time. If it doesn’t spring back at all, you’ve over-proofed it.
Step 5: Shape the Loaf (10 minutes)
Punch down the dough gently to release the gas. Turn it out onto a lightly floured surface. Shape it into a round loaf by folding the edges toward the center and pinching them together at the bottom. Place the loaf seam-side down on your parchment-lined baking sheet. For the traditional bone-shaped decorations, roll out small pieces of leftover dough into thin ropes, cut them into short lengths, and arrange them on top of the loaf in a cross pattern. Or, if you’re like me and find that fussy, just leave it as a simple round loaf. It tastes the same.
Step 6: Second Rise (20-25 minutes)
Cover the shaped loaf loosely with plastic wrap or a kitchen towel and return it to the warm oven (with the light on) for 20-25 minutes. It should puff up noticeably but not double in size. Meanwhile, preheat your oven to 350°F (175°C).
Step 7: Bake (25-30 minutes)
Remove the plastic wrap and bake the loaf on the center rack for 25-30 minutes. The top should be golden brown and the internal temperature should reach 190°F if you have an instant-read thermometer. If the top is browning too quickly after 15 minutes, tent it loosely with aluminum foil. The bread is done when it sounds hollow when tapped on the bottom.
Step 8: Glaze and Serve (10 minutes)
Let the bread cool on the baking sheet for 5 minutes, then transfer it to a cooling rack. While it’s still warm — but not hot — whisk together the powdered sugar, orange blossom water, fresh orange juice, and melted butter until smooth. Brush the glaze generously over the warm bread. Sprinkle with granulated sugar and extra orange zest if using. Let the glaze set for about 5 minutes before slicing. The bread is best served warm, but it’s also fantastic at room temperature.
Cooking Tips & Techniques
After six rounds of testing this recipe, I’ve collected a few hard-earned lessons that will save you time and frustration.
Don’t skip the windowpane test. I know it sounds fussy, but under-kneaded dough is the number one reason pan de muerto turns out dense instead of pillowy. The gluten needs to be fully developed to create that soft, airy crumb. If you’re kneading by hand and your arms are tired, you’re probably almost there — push through for another 2-3 minutes.
Use room temperature ingredients. Cold eggs and cold butter will slow down your yeast activity and make the dough harder to knead. I’ve made the mistake of using cold eggs straight from the fridge, and the dough took almost 15 minutes longer to come together. Set your eggs and butter out 30 minutes before you start baking. If you forget, place the eggs in a bowl of warm water for 5 minutes and microwave the butter for 5-10 seconds (not melted, just softened).
The warm-oven proofing trick is a game-changer. Traditional recipes call for proofing at room temperature for 1-2 hours. My oven-light method cuts that in half. Just make sure your oven is completely off — you don’t want any residual heat. The light bulb generates about 80-85°F, which is the sweet spot for yeast activity. I’ve used this method for years, and it’s never failed me.
Watch the glaze consistency. The glaze should be thin enough to brush on easily but thick enough to cling to the bread. If it’s too thick, add more orange juice, ½ teaspoon at a time. If it’s too thin, add more powdered sugar, 1 tablespoon at a time. You want it to look like thick maple syrup. I accidentally made mine too thin on the fourth test, and it all pooled at the bottom of the bread instead of forming a nice coating. Learn from my mistake.
Multitask strategically. While the dough is doing its first rise, clean up your workspace and measure out your glaze ingredients. While the bread is baking, make the glaze and set out your serving plate. This recipe moves fast enough that you don’t have a lot of downtime, but the small gaps are perfect for prep work.
One mistake I made: On my second test, I forgot to add the salt. The bread rose beautifully but tasted flat and one-dimensional. Salt isn’t just for flavor — it also strengthens the gluten structure and controls yeast activity. Don’t skip it.
Variations & Adaptations
This quick pan de muerto is versatile, and I’ve played around with several variations. Here are my favorites:
1. Chocolate Orange Version
Add ¼ cup of unsweetened cocoa powder to the flour mixture and increase the sugar to ½ cup. The chocolate and orange blossom combination is surprisingly elegant — the floral notes cut through the richness of the cocoa. I made this for a Halloween party last year, and it disappeared in 10 minutes.
2. Dairy-Free Adaptation
Substitute the butter with melted coconut oil or vegan butter, and use oat milk or almond milk instead of whole milk. The texture will be slightly less tender — coconut oil creates a firmer crumb — but the flavor is still lovely. I tested this version for a friend with dairy allergies, and she said it was the best pan de muerto she’d had since leaving Mexico.
3. Spiced Autumn Version
Add 1 teaspoon of ground cinnamon, ½ teaspoon of ground nutmeg, and ¼ teaspoon of ground cloves to the flour mixture. This version pairs beautifully with the orange blossom glaze and gives the bread a warm, cozy flavor that’s perfect for fall. I’ve also tried adding ¼ cup of pumpkin puree to the dough, but it made the bread too dense — stick with the spices.
4. Gluten-Free Note
I’ve tested this with a 1:1 gluten-free flour blend, and honestly, the results were disappointing. The bread was crumbly and lacked the soft, pillowy texture that makes pan de muerto special. If you need a gluten-free version, I recommend finding a recipe specifically formulated for gluten-free flours rather than adapting this one.
5. Less Sweet Version
Reduce the sugar in the dough to 2 tablespoons and skip the glaze entirely. Instead, brush the warm bread with melted butter and sprinkle with a light dusting of powdered sugar. This version is closer to a dinner roll and works beautifully alongside savory dishes like mole or pozole.
Serving & Storage Suggestions
This pan de muerto is best served warm, fresh from the oven, with the glaze still slightly sticky. But here’s how to handle it in every scenario.
Serving Temperature: Warm is ideal — the glaze seeps into the bread and creates that soft, almost pudding-like texture in the center. Room temperature is also excellent, especially the next day. I don’t recommend serving it cold from the fridge; the texture becomes firmer and less tender.
What to Serve With It: A cup of Mexican hot chocolate is the classic pairing, and for good reason — the spicy, slightly bitter chocolate balances the sweet floral glaze beautifully. Coffee works too, especially a dark roast. For a breakfast version, serve it alongside scrambled eggs and fresh fruit. For dessert, a dollop of whipped cream or a scoop of vanilla ice cream turns it into something special.
Storage Instructions: Store the bread in an airtight container at room temperature for up to 3 days. Do not refrigerate — the cold dries out the bread and makes the glaze crack. If you live in a humid climate, the glaze might get sticky after a day; that’s normal and doesn’t affect the flavor.
Freezing Instructions: You can freeze the unglazed bread for up to 2 months. Wrap it tightly in plastic wrap, then in aluminum foil. When you’re ready to serve, thaw it at room temperature, then warm it in a 300°F oven for 10 minutes. Make the glaze fresh and brush it on while the bread is warm. I’ve done this for several Día de Muertos celebrations, and nobody could tell it wasn’t freshly baked.
Reheating Tips: The best way to reheat individual slices is in a toaster oven at 300°F for 3-4 minutes. For a whole loaf, wrap it in foil and warm it in a 325°F oven for 10-12 minutes. Avoid the microwave — it makes the bread rubbery and the glaze turns into a sticky mess. Trust me, I learned this the hard way when I was too impatient to wait for the oven.
Flavor Development Over Time: The orange blossom flavor actually mellows and becomes more integrated after a day. The bread on day two is less intensely floral but more balanced. Some people prefer it that way. I like it both ways, honestly — fresh for the immediate satisfaction, day-old for the deeper, more rounded flavor.
Nutritional Information & Benefits
Let’s be real — pan de muerto is a treat, not a health food. But here’s what you’re getting per slice (based on 12 slices):
| Nutrient | Amount Per Slice |
|---|---|
| Calories | 210 |
| Total Fat | 6g |
| Saturated Fat | 3.5g |
| Cholesterol | 35mg |
| Sodium | 115mg |
| Total Carbohydrates | 35g |
| Dietary Fiber | 1g |
| Sugars | 16g |
| Protein | 4g |
On the plus side, the orange zest provides a small amount of vitamin C and antioxidants, and the eggs add protein and choline, which is good for brain health. The orange blossom water is essentially calorie-free and adds a lovely aromatic quality without any artificial ingredients.
Dietary Considerations: This recipe contains gluten, dairy, and eggs. It is not suitable for vegans or those with celiac disease without significant modifications. The sugar content is moderate for a sweet bread, but if you’re watching your sugar intake, you can reduce the glaze or skip it entirely.
My personal take? This is a treat for special occasions — Día de Muertos, fall gatherings, or a cozy weekend morning. It’s not an everyday bread, and it shouldn’t be. The joy of pan de muerto is in its connection to tradition and memory, not in its nutritional profile. Enjoy it mindfully, share it with people you love, and don’t stress about the numbers.
Conclusion
This quick pan de muerto with orange blossom glaze is my love letter to my Tía Rosario and to everyone who’s ever wanted to recreate a childhood taste but didn’t have a whole day to spend in the kitchen. It’s not the most traditional version — I’ll say that again because I want to be honest with you — but it captures the spirit of the bread: soft, sweet, floral, and deeply comforting. The orange blossom glaze is the star here, transforming a simple yeasted bread into something that feels special and celebratory.
I hope you make this for your ofrenda, for your family, or just for yourself on a random Tuesday when you need a little taste of something warm and familiar. Customize it however you like — add chocolate, skip the glaze, double the orange zest. The recipe is a starting point, not a rulebook. And if you make it, I’d love to hear how it turns out. Drop a comment below and tell me about your own pan de muerto memories, or tag me in your photos on Pinterest. There’s something magical about sharing these traditions, even when we’re taking shortcuts and making them our own.
Go ahead, preheat that oven. Your kitchen is about to smell incredible.
Frequently Asked Questions
Can I make this pan de muerto without a stand mixer?
Absolutely. You can knead the dough by hand — it just takes about 12-15 minutes instead of 6-8. The key is to knead until the dough passes the windowpane test, whether you’re using a mixer or your hands. Your arms will get a workout, but the bread will turn out just as soft and delicious.
Where can I find orange blossom water?
Orange blossom water is available at most Middle Eastern grocery stores, Latin markets, and well-stocked supermarkets. You can also find it online. I recommend the Cortas brand — it has a balanced floral flavor without being overpowering. A bottle costs about $5-8 and will last you through many batches of this bread.
Can I use orange extract instead of orange blossom water?
You can, but the flavor will be different. Orange extract is more intensely citrusy and less floral. If you’re substituting, use 1 teaspoon of orange extract in the dough and 1 teaspoon in the glaze, then add fresh orange juice to thin the glaze to the right consistency. It won’t taste exactly like traditional pan de muerto, but it will still be delicious.
How do I know when the bread is fully baked?
The bread is done when the top is golden brown and the loaf sounds hollow when you tap it on the bottom. For the most accurate test, use an instant-read thermometer — the internal temperature should reach 190°F (88°C). If you don’t have a thermometer, insert a skewer into the center; it should come out clean or with just a few moist crumbs.
Can I double this recipe?
Yes, you can double all the ingredients to make two loaves. The rising times will stay roughly the same, but you may need to bake the loaves one at a time to ensure even heat distribution. If you’re baking them together, rotate the baking sheets halfway through and add 5-7 minutes to the baking time.
Pin This Recipe!
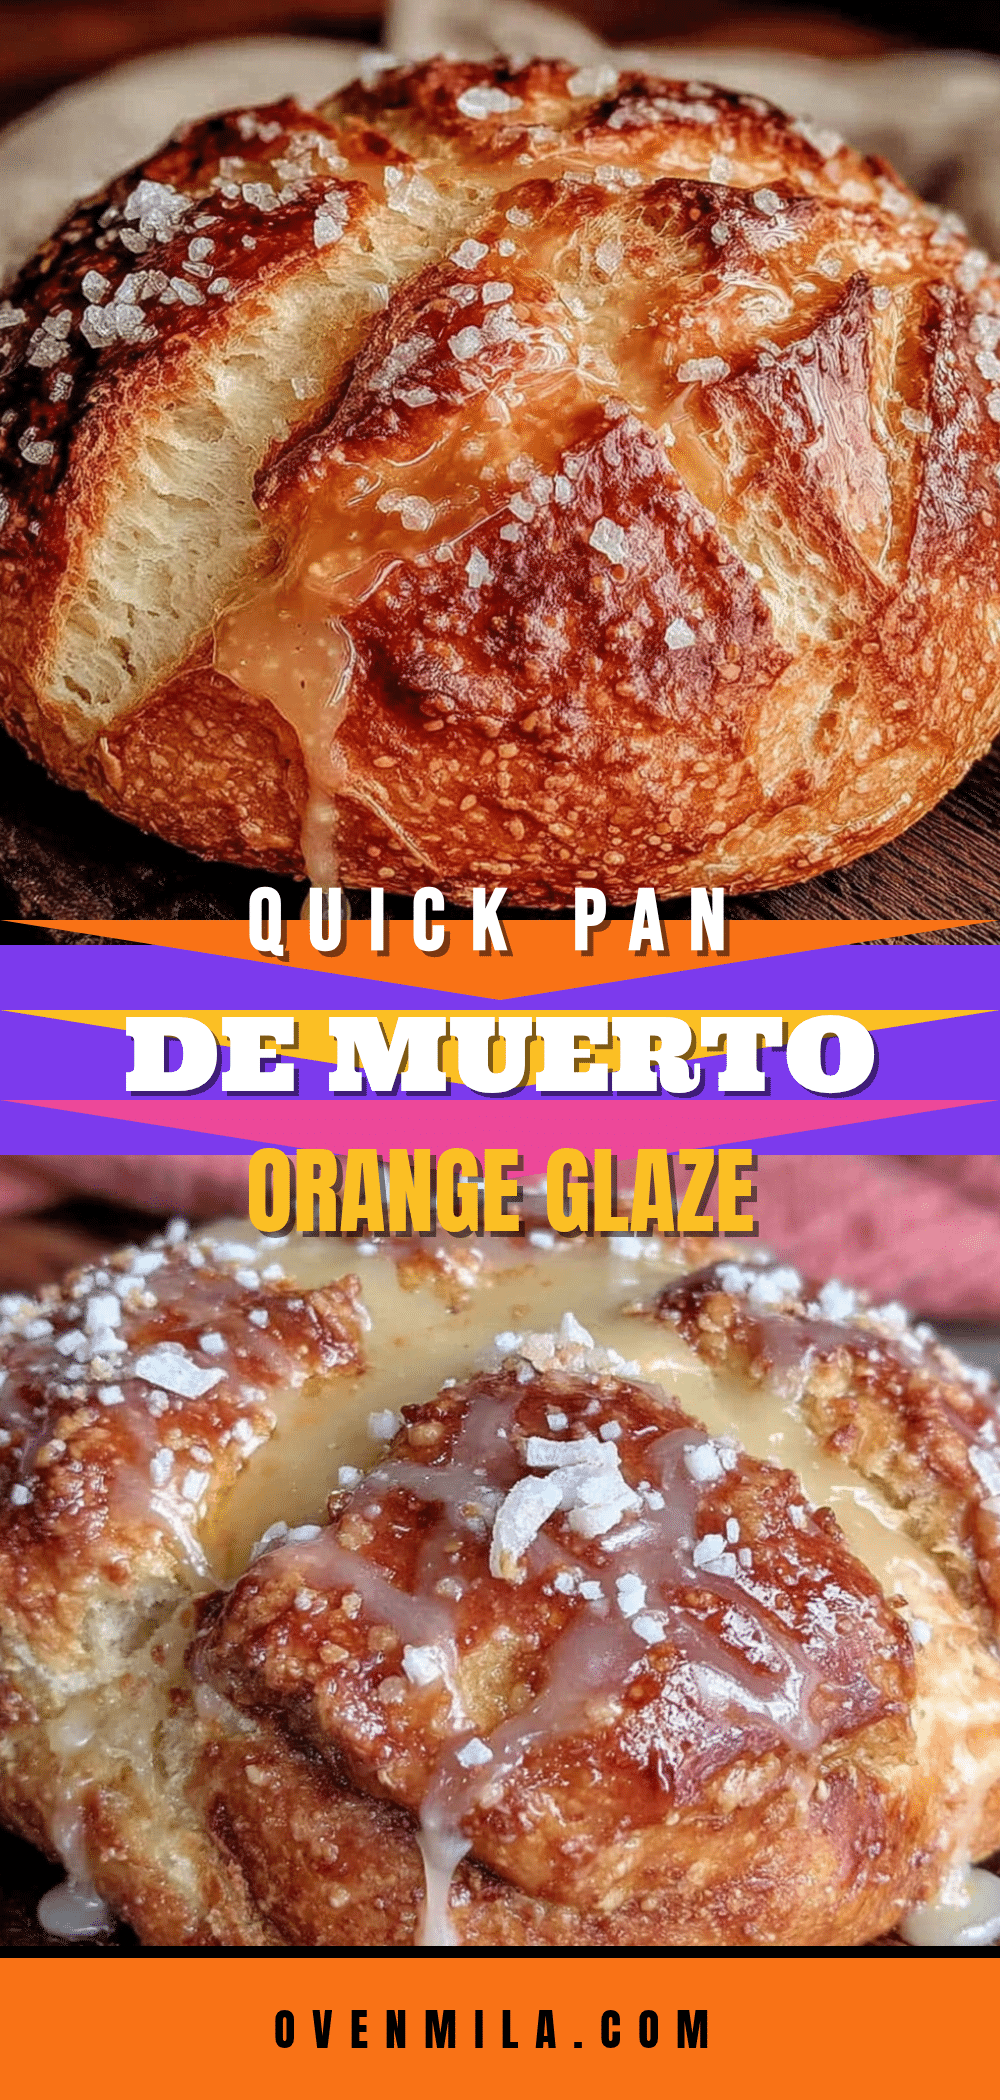
Easy Pan de Muerto with Orange Blossom Glaze
A quick version of the traditional Mexican Day of the Dead bread, featuring a soft, pillowy texture and a fragrant orange blossom glaze. Ready in under 2 hours, this recipe captures the spirit of the classic without the lengthy preparation.
- Prep Time: 15 minutes
- Cook Time: 30 minutes
- Total Time: 1 hour 45 minutes
- Yield: 12 servings 1x
- Category: Bread
- Cuisine: Mexican
Ingredients
- 3 ½ cups (440g) all-purpose flour
- 2 ¼ teaspoons active dry yeast (one standard packet)
- ½ cup (120ml) warm milk (about 110°F)
- ⅓ cup (65g) granulated sugar
- 4 tablespoons (56g) unsalted butter, softened
- 2 large eggs, room temperature
- 1 tablespoon orange zest (from about 1 large orange)
- 1 teaspoon orange blossom water
- ½ teaspoon salt
- 1 teaspoon vanilla extract
- 1 cup (120g) powdered sugar, sifted
- 1 tablespoon orange blossom water (for glaze)
- 2–3 tablespoons fresh orange juice
- 1 tablespoon (14g) melted butter (for glaze)
- 2 tablespoons granulated sugar (for topping, optional)
- ½ teaspoon orange zest (for topping, optional)
Instructions
- Activate the yeast: In the bowl of a stand mixer (or a large mixing bowl), combine warm milk and 1 tablespoon of the sugar. Sprinkle yeast over the top and let sit for 5-7 minutes until frothy and bubbly.
- Mix the dough: Add remaining sugar, softened butter, eggs, orange zest, orange blossom water, vanilla, and salt to the yeast mixture. Add 2 cups of flour and mix on low speed until combined. Gradually add remaining 1 ½ cups flour, ½ cup at a time, mixing on medium-low until a shaggy ball forms. Adjust with extra flour or milk as needed.
- Knead the dough: Knead on medium speed for 6-8 minutes (or 12-15 minutes by hand) until smooth, elastic, and passes the windowpane test.
- First rise: Shape dough into a smooth ball and place in a lightly greased bowl, turning to coat. Cover with plastic wrap or a damp towel. Place in a cold oven with the light on and let rise until doubled, about 30-40 minutes.
- Shape the loaf: Punch down dough and turn onto a lightly floured surface. Shape into a round loaf, folding edges toward center and pinching at the bottom. Place seam-side down on a parchment-lined baking sheet. Optionally, decorate with bone-shaped dough pieces.
- Second rise: Cover shaped loaf loosely and return to warm oven (light on) for 20-25 minutes until puffed. Meanwhile, preheat oven to 350°F (175°C).
- Bake: Bake on center rack for 25-30 minutes until golden brown and internal temperature reaches 190°F. Tent with foil if browning too quickly.
- Glaze and serve: Let bread cool on baking sheet for 5 minutes, then transfer to a cooling rack. Whisk together powdered sugar, orange blossom water, orange juice, and melted butter until smooth. Brush glaze over warm bread. Sprinkle with granulated sugar and extra orange zest if desired. Let set 5 minutes before slicing.
Notes
For best results, use room temperature ingredients. The warm-oven proofing method (oven light on) speeds up rising. Don’t skip the windowpane test to ensure proper gluten development. The glaze should be thick like maple syrup; adjust with more juice or powdered sugar as needed. Bread is best served warm.
Nutrition
- Serving Size: 1 slice
- Calories: 210
- Sugar: 16
- Sodium: 115
- Fat: 6
- Saturated Fat: 3.5
- Carbohydrates: 35
- Fiber: 1
- Protein: 4
Keywords: pan de muerto, day of the dead bread, orange blossom, mexican sweet bread, quick bread, fall baking


