The neighborhood Halloween block party was in six hours and I’d completely forgotten. I mean, completely. I’d been so wrapped up in work stuff and the chaos of everyday life that the calendar snuck up on me like a ghost in a bedsheet. Everyone else would be bringing elaborate themed treats—I’d seen the neighbor’s Instagram preview of her graveyard brownies with actual tombstone cookies sticking out of them. And there I was, staring into my pantry at 2 PM on a Saturday, wondering how I got myself into this mess.
I had butter. I had sugar. I had a bag of flour that was probably still good. And somewhere in the back of the spice cabinet, I found a bottle of black food coloring I’d bought for a unicorn cake disaster last year. Honestly, I almost just grabbed a bag of chips and called it a day. But you know that feeling when you refuse to show up empty-handed? Yeah, that.
So I made sugar cookies. Plain, simple, slightly panicked sugar cookies. And then I remembered the royal icing spiders I’d seen on Pinterest a million times but never actually tried. With trembling hands and a piping bag I’d rigged from a zip-top bag with the corner snipped off, I went to work. The cookies came out looking actually spooky—those little icing spiders crawling across a dark, glossy cookie surface. I threw them on a plate and ran out the door, fully expecting to be the sad last-minute entry.
Let me tell you, they were gone in fifteen minutes. People kept coming up to me asking where I bought them. The mom who made the graveyard brownies asked for the recipe. I just stood there with my cheap plastic cup of cider, trying to explain that these spooky Halloween sugar cookies with royal icing spiders were the product of pure desperation and a prayer. That’s the thing about this recipe—it doesn’t need to be fancy or complicated. It just needs to look like you tried harder than you actually did. And honestly? That’s my favorite kind of recipe.
Why You’ll Love This Recipe
Let me be real with you for a second. I’ve tested a lot of sugar cookie recipes over the years, and most of them fall into two categories: they either taste amazing but spread into a puddle in the oven, or they hold their shape perfectly but taste like cardboard. This recipe? It’s the one that finally broke the mold. I’ve made it at least a dozen times now, tweaking the butter temperature and the chilling time until I got it exactly right. These cookies hold their shape beautifully—even those spindly spider legs stay crisp—but they’re still soft and buttery on the inside. That’s not easy to pull off.
- Quick & Easy: From start to finish, you’re looking at about 90 minutes, but most of that is chilling and cooling time. Active work is maybe 30 minutes. Perfect for the night before a Halloween party when you realize you forgot to plan anything.
- Simple Ingredients: You probably have everything for the cookies in your kitchen right now. Butter, sugar, eggs, flour, vanilla. The only special thing you might need is the black food coloring, but regular grocery stores carry it now.
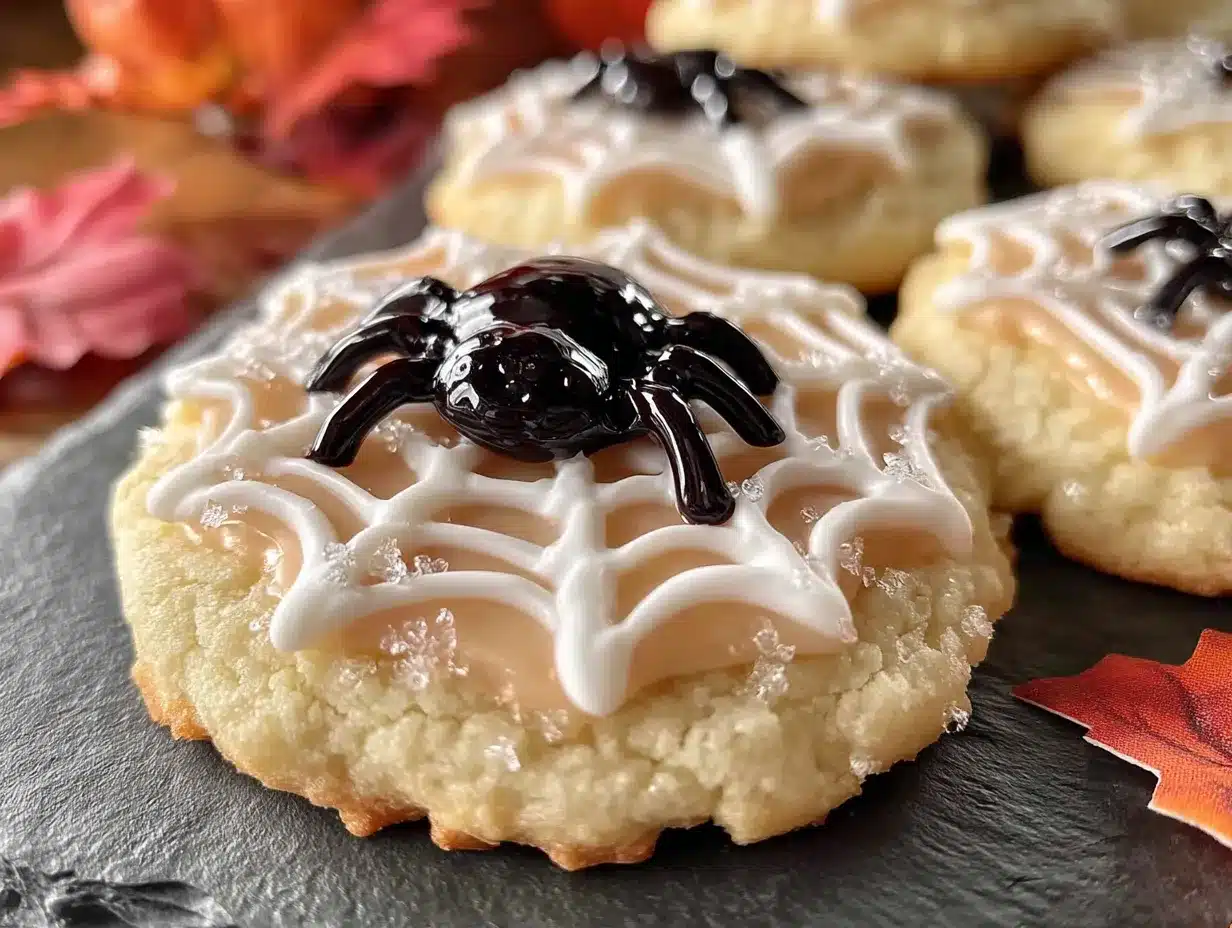
- Perfect for Halloween: These are made for spooky season. The dark cookies with the white icing spiders look genuinely creepy in the best way. Kids love them, adults love them, and they photograph beautifully for those obligatory Halloween food pics.
- Crowd-Pleaser: I’ve brought these to three different Halloween events now, and every single time, people ask for the recipe. The spiders are just unusual enough to be interesting without being intimidating.
- Unbelievably Delicious: The texture is what gets people. They expect a hard, crunchy cookie, but instead they get this tender, melt-in-your-mouth situation with just a hint of almond extract that makes everyone go “what’s in this?”
What makes this different from every other sugar cookie recipe out there is the technique. I use a combination of butter and shortening—I know, I know, shortening sounds old-school, but it’s the secret to cookies that hold their shape without spreading. And the almond extract? That’s the little touch that makes people think you did something fancy when really you just added a teaspoon of something to the bowl. These spooky Halloween sugar cookies with royal icing spiders are the kind of recipe that makes you look like a baking hero with half the effort everyone assumes you put in.
What Ingredients You Will Need
This recipe uses straightforward ingredients to create cookies that look complicated but aren’t. I’ve tested a few variations over the years, and this combination gives you the best balance of flavor, texture, and that all-important shape-holding ability. Here’s what you’ll need, broken down by component.
For the Sugar Cookies
- 1 cup (226g) unsalted butter, softened – I use Land O’Lakes because it has a consistent fat content. Let it sit out for about an hour before you start. You want it soft but not melty.
- 1/2 cup (100g) granulated sugar – Regular white sugar works perfectly here. Don’t substitute with brown sugar, it’ll change the texture and spread.
- 1/2 cup (60g) powdered sugar – This is my secret weapon. The powdered sugar gives the cookies a tender, almost shortbread-like texture while still holding their shape.
- 1 large egg, room temperature – Cold eggs will seize up your butter mixture. If you forgot to take it out ahead of time, put it in a bowl of warm water for 5 minutes.
- 1 teaspoon vanilla extract – Pure vanilla, not imitation. It makes a difference in the final flavor.
- 1/2 teaspoon almond extract – This is optional but highly recommended. It adds this subtle floral note that makes people think you used some fancy imported vanilla.
- 2 1/2 cups (312g) all-purpose flour – Spoon and level your flour. Don’t scoop directly with the measuring cup, or you’ll end up with too much and dry cookies.
- 1/2 teaspoon salt – Fine sea salt or table salt. It balances the sweetness.
- 1/4 teaspoon baking powder – Just enough to give them a tiny bit of lift without spreading.
- Black gel food coloring – I use Americolor Super Black. Liquid food coloring won’t get you that deep, dark color without throwing off the liquid balance.
For the Royal Icing Spiders
- 2 cups (240g) powdered sugar – Sift it if it’s lumpy. Nobody wants lumpy spider legs.
- 2 tablespoons meringue powder – You can find this in the baking aisle or online. It stabilizes the icing and makes it dry hard and shiny.
- 3-4 tablespoons warm water – You’ll add this slowly. The consistency should be like thick glue—it needs to hold its shape when piped.
- 1/2 teaspoon vanilla extract – For flavor, because even spiders deserve to taste good.
- Black sanding sugar or edible glitter (optional) – For dusting the cookie surface before the spiders go on. It gives a nice creepy texture.
Ingredient Tips from My Kitchen
I learned the hard way that not all food coloring is created equal. The first time I tried making these, I used liquid food coloring and ended up with grayish-green cookies that looked more like swamp monsters than spooky spiders. The gel coloring is worth the extra couple of dollars. Also, if you can’t find meringue powder, you can substitute with 1 egg white plus 2 cups of powdered sugar, but the meringue powder version is more stable and dries faster. For a dairy-free version, use vegan butter sticks (not the spreadable kind in a tub) and skip the meringue powder—just use the egg white version of royal icing.
Equipment Needed
You don’t need a fancy bakery setup for these spooky Halloween sugar cookies with royal icing spiders. Here’s what I actually use in my tiny, cluttered kitchen.
- Stand mixer or hand mixer – I use my KitchenAid for the cookie dough because it makes creaming the butter and sugar effortless. But a hand mixer works just fine—I’ve made these at my mom’s house with her ancient hand mixer and they came out great.
- Mixing bowls – You’ll need at least two: one for the wet ingredients and one for the dry.
- Rolling pin – I prefer a French rolling pin (the tapered kind without handles) because it gives me more control over even thickness. But any rolling pin works. If you don’t have one, a wine bottle works in a pinch—I’ve done it.
- Spider-shaped cookie cutter – This is the one specialty item. I found mine on Amazon for like eight bucks. You can also use a round cutter and pipe the legs on with icing, but the spider cutter makes it so much easier.
- Baking sheets – Two standard half-sheet pans. Line them with parchment paper or silicone baking mats. Silicone mats are worth the investment—they help cookies bake more evenly.
- Piping bags or zip-top bags – For the royal icing. I use disposable piping bags with a #2 round tip for the spider legs. But honestly, a zip-top bag with the tiniest corner snipped off works perfectly fine.
- Cooling rack – Essential for getting cookies to room temperature before icing. Stackable racks save space.
If you’re just starting out, don’t stress about having the perfect tools. I made my first batch of these with a wine bottle, a butter knife, and a sandwich bag. They looked a little rough, but they still tasted amazing and everyone at the party loved them.
Preparation Method
Alright, let’s make some spooky cookies. I’ll walk you through this step by step, including all the little things I’ve learned from messing up along the way.
Step 1: Make the Cookie Dough (15 minutes)
In your stand mixer bowl (or a large mixing bowl if using a hand mixer), cream together the softened butter, granulated sugar, and powdered sugar. Beat on medium speed for about 3 minutes until it’s light and fluffy. You want it to look like pale, pillowy clouds. Scrape down the sides of the bowl halfway through.
Add the egg, vanilla extract, and almond extract. Beat on low until just combined. Don’t overmix here—you’re not trying to incorporate air, just get everything mixed together. The mixture might look a little separated at this point. That’s normal.
In a separate bowl, whisk together the flour, salt, and baking powder. Add this to the wet mixture in two additions, mixing on low speed after each addition until just combined. The dough will look crumbly at first, but keep mixing and it’ll come together. Once it forms a cohesive dough, stop mixing. Overworking the dough makes tough cookies.
Step 2: Color and Chill the Dough (1 hour minimum)
Now for the fun part. Add your black gel food coloring to the dough. Start with a small amount—like 1/4 teaspoon—and knead it in with your hands. The dough will look streaky at first. Keep kneading until the color is even throughout. Add more coloring a little at a time until you reach your desired darkness. I usually end up using about 1 teaspoon total for a deep, dark black.
Divide the dough into two disks, wrap each in plastic wrap, and refrigerate for at least 1 hour. This is non-negotiable. Chilled dough holds its shape when baked. If you skip this step, your spider legs will spread into blobby puddles. Trust me, I learned this the hard way when I was in a hurry for that first Halloween party.
Step 3: Roll and Cut (20 minutes)
Preheat your oven to 350°F (175°C). Line your baking sheets with parchment paper.
Lightly flour your work surface and rolling pin. Take one disk of dough out of the fridge and let it sit for 5 minutes—it needs to soften just enough to roll without cracking. Roll the dough to about 1/4-inch thickness. I use two wooden spoons on either side of the dough as guides to keep it even. It’s a trick my grandmother taught me.
Cut out your spider shapes and transfer them to the prepared baking sheets, spacing them about 2 inches apart. They don’t spread much, but you still want some breathing room. Gather the scraps, re-roll, and cut again. You can re-roll the dough up to three times before it gets tough.
Step 4: Bake (8-10 minutes)
Bake for 8-10 minutes, rotating the pan halfway through. You want the edges to be just barely golden—like the faintest hint of color. The centers should look set but not browned. Let the cookies cool on the baking sheet for 5 minutes, then transfer to a cooling rack to cool completely. And I mean completely. If you try to ice warm cookies, the royal icing will slide right off.
Step 5: Make the Royal Icing (10 minutes)
While the cookies cool, make the royal icing. In a medium bowl, whisk together the powdered sugar and meringue powder. Add 3 tablespoons of warm water and the vanilla extract. Beat on medium speed for 4-5 minutes until the icing is thick, glossy, and holds stiff peaks. You know it’s ready when you lift the beater and the icing forms a peak that doesn’t droop. If it’s too thick, add water a teaspoon at a time. If it’s too thin, add more powdered sugar.
Transfer the icing to a piping bag fitted with a #2 round tip, or to a zip-top bag with a tiny corner snipped off.
Step 6: Decorate the Spiders (15-20 minutes per batch)
This is where the magic happens. Take a cooled black cookie and pipe eight spider legs coming out from the sides—four on each side. I do two curved lines on each side, then two more slightly shorter ones behind them. Don’t worry about perfection. Real spiders have slightly uneven legs anyway.
For the spider body, pipe a small oval shape in the center of the cookie. Then pipe a smaller circle at the front for the head. Use a toothpick to gently drag the icing from the body to the head to create a smooth connection. Add two tiny dots of white icing for eyes—or skip them if you want them to look extra creepy.
Let the icing dry completely, about 2 hours at room temperature. The royal icing will harden to a glossy, snappy finish that makes the spiders look almost real.
Cooking Tips & Techniques
I’ve made these spooky Halloween sugar cookies with royal icing spiders more times than I care to count, and I’ve definitely made every mistake in the book. Here’s what I’ve learned so you don’t have to repeat my failures.
The Dough Temperature Trap: The first time I made these, I was in a rush and only chilled the dough for 20 minutes. Big mistake. The cookies spread into amorphous blobs that looked more like spiders that had been run over than creepy crawlies. Give the dough the full hour. If you’re really pressed for time, pop it in the freezer for 30 minutes instead.
The Food Coloring Struggle: Getting dough to turn truly black takes more coloring than you think. Start with a small amount and add gradually. But here’s the thing—the color deepens as the dough rests. So if it looks dark gray after you’ve mixed it, let it sit for 10 minutes and check again. It’ll probably have darkened on its own. If not, add a tiny bit more. Also, wear gloves when kneading in the color unless you want black-stained hands for the rest of the day.
Royal Icing Consistency: This is the trickiest part. Your icing needs to be thick enough to hold its shape when piped but thin enough to pipe smoothly. The test I use: spoon a tiny bit of icing back into the bowl. It should sit on top for a few seconds before slowly sinking in and disappearing. If it sinks immediately, it’s too thin. If it sits on top and never sinks, it’s too thick. Add water or powdered sugar accordingly.
The Drying Game: Royal icing needs time to set. I usually make the cookies one day and decorate them the next morning. If you’re doing it all in one day, start early. The icing needs at least 2 hours to dry completely, and longer if your kitchen is humid. Don’t stack the cookies until the icing is fully hard, or you’ll end up with a pile of spider carnage.
Multitasking Strategy: While the dough chills, make your royal icing and set it aside covered with a damp paper towel so it doesn’t crust over. While the cookies bake and cool, clean up your workspace. While the icing dries, you can prep other Halloween treats or, you know, finally clean that pile of mail on the counter.
Variations & Adaptations
One of the best things about this recipe is how easily you can adapt it. I’ve experimented with quite a few versions, and here are some of my favorites.
Gluten-Free Version: Substitute the all-purpose flour with a 1:1 gluten-free baking flour blend. I’ve used Bob’s Red Mill and King Arthur Measure for Measure with good results. The texture is slightly more crumbly, so handle the dough gently. Also, add an extra tablespoon of butter to compensate for the dryness of gluten-free flours.
Vegan Adaptation: Use vegan butter sticks (I like Miyoko’s or Country Crock Plant Butter) and substitute the egg with a flax egg (1 tablespoon ground flaxseed mixed with 3 tablespoons water, let sit for 5 minutes). For the royal icing, use 3 tablespoons aquafaba (the liquid from a can of chickpeas) instead of the meringue powder and water. It works surprisingly well.
Different Spooky Shapes: Don’t limit yourself to spiders. This same dough and icing technique works for bats, ghosts, pumpkins, or any Halloween shape you can find a cutter for. I made a batch of black cat cookies last year using a cat-shaped cutter and the same royal icing technique for whiskers.
Flavor Twists: Add 1 tablespoon of cocoa powder to the dough for a chocolate version that’s even darker. Or swap the almond extract for peppermint extract for a cool, minty twist. I tried a cinnamon version once—added 1 teaspoon of cinnamon to the dry ingredients—and it gave the cookies a warm, spicy note that was perfect for fall.
Colored Spider Webs: Instead of black cookies with white spiders, try white cookies with black spiders for a different look. Or make the cookies orange and pipe green spiders. The possibilities are endless, and honestly, that’s half the fun.
Serving & Storage Suggestions
These cookies are best served at room temperature, and they actually taste better the day after you make them—the flavors have time to meld and the royal icing sets to that perfect snappy texture. I usually arrange them on a black platter or a dark cake stand to make the white spiders pop. For a Halloween party, I like to scatter them on a tray with some fake spider webs and plastic spiders for a really creepy effect.
They pair beautifully with hot apple cider, pumpkin spice lattes, or a simple glass of cold milk. If you’re serving them at a party, set them out about 30 minutes before guests arrive so they’re at peak room temperature. Nobody wants a cold cookie.
Storage: Store these cookies in an airtight container at room temperature for up to 1 week. Layer them between sheets of parchment paper to prevent the icing from sticking together. Do not refrigerate—the moisture in the fridge will make the royal icing soft and sticky.
Freezing: You can freeze the baked, undecorated cookies for up to 3 months. Wrap them tightly in plastic wrap and then foil. When you’re ready to decorate, thaw them at room temperature and then pipe on the spiders. I’ve also frozen the raw dough disks for up to 2 months—just thaw in the fridge overnight before rolling and cutting.
Reheating: These don’t really need reheating, but if you want that just-baked warmth, pop them in a 300°F oven for 3-4 minutes. Let them cool slightly before serving, as the royal icing can get a bit melty if they’re too hot.
One thing I love about these cookies is that the flavors actually improve over the first couple of days. The almond extract mellows out and melds with the vanilla, and the cookie texture softens just slightly into this perfect tender bite. So don’t stress about making them at the last minute—they’re actually better if you make them a day ahead.
Nutritional Information & Benefits
Let’s be real—these are cookies, not health food. But I know some of you like to have the numbers, so here’s the breakdown per cookie (based on making about 24 spiders with this recipe).
| Nutrient | Amount Per Cookie |
|---|---|
| Calories | 145 |
| Total Fat | 7g |
| Saturated Fat | 4g |
| Cholesterol | 25mg |
| Sodium | 85mg |
| Total Carbohydrates | 20g |
| Sugars | 12g |
| Protein | 2g |
On the positive side, these cookies do contain some butter, which provides vitamin A and healthy fats in moderation. The eggs add protein and B vitamins. And honestly? There’s something to be said for the mental health benefits of baking—the process is meditative, the result is satisfying, and sharing them with others brings joy. That counts for something, right?
If you’re watching your sugar intake, you can reduce the sugar in the cookie dough by about 25% without affecting the texture too much. The royal icing is harder to reduce since the sugar is what gives it structure. Just enjoy these as a treat, not an everyday snack, and you’ll be fine.
Conclusion
These spooky Halloween sugar cookies with royal icing spiders have become my go-to Halloween recipe for a reason. They look impressive enough to win a neighborhood block party (trust me, I know), but they’re simple enough that you can throw them together on a Saturday afternoon when you realize the holiday snuck up on you. The combination of the buttery, tender cookie with the snappy royal icing is just perfect, and the spider design is creepy without being gross.
What I love most about this recipe is how forgiving it is. Your spiders don’t have to be perfect. In fact, the slightly uneven, wonky legs make them look more real. That’s the beauty of Halloween baking—imperfection adds to the spooky charm. So don’t stress about getting every leg exactly the same length or every spider body perfectly oval. Just have fun with it.
I’d love to hear how yours turn out. Drop a comment below and let me know if you tried any variations, if your kids helped with the decorating, or if you managed to convince anyone they were store-bought. And if you’re looking for more Halloween treats, check out my pumpkin spice cookies or these creepy crawly cupcakes for more spooky inspiration. Happy Halloween, and happy baking!
Frequently Asked Questions
Can I make these cookies ahead of time?
Absolutely! I actually prefer making them a day ahead. Bake and cool the cookies, then decorate them the next day. The royal icing needs about 2 hours to dry completely, so plan accordingly. You can also freeze the baked, undecorated cookies for up to 3 months.
Why did my cookies spread in the oven?
This usually happens when the dough isn’t chilled enough. Make sure you refrigerate it for at least 1 hour. Also, check that your butter was softened but not melted, and that you didn’t over-cream the butter and sugar. If your kitchen is very warm, chill the cut-out cookies on the baking sheet for 10 minutes before baking.
Can I use regular food coloring instead of gel?
You can, but you’ll need a lot more to get a deep black color, and the extra liquid can affect the dough’s texture. Gel food coloring is much more concentrated and doesn’t add excess moisture. I’ve found it’s worth the small investment for the best results.
How do I get the royal icing to dry faster?
Royal icing dries best in a cool, dry environment with good air circulation. You can use a fan to speed things up, or place the cookies in front of a dehumidifier if you have one. Avoid putting them in the refrigerator or oven, as the moisture will make the icing sticky.
My royal icing is too runny. Can I fix it?
Yes! Just add more powdered sugar, a tablespoon at a time, and beat it in until the icing reaches the right consistency. If it’s too thick, add water a few drops at a time. The key is to make small adjustments and test frequently until you get that perfect thick-but-pipeable texture.
Pin This Recipe!
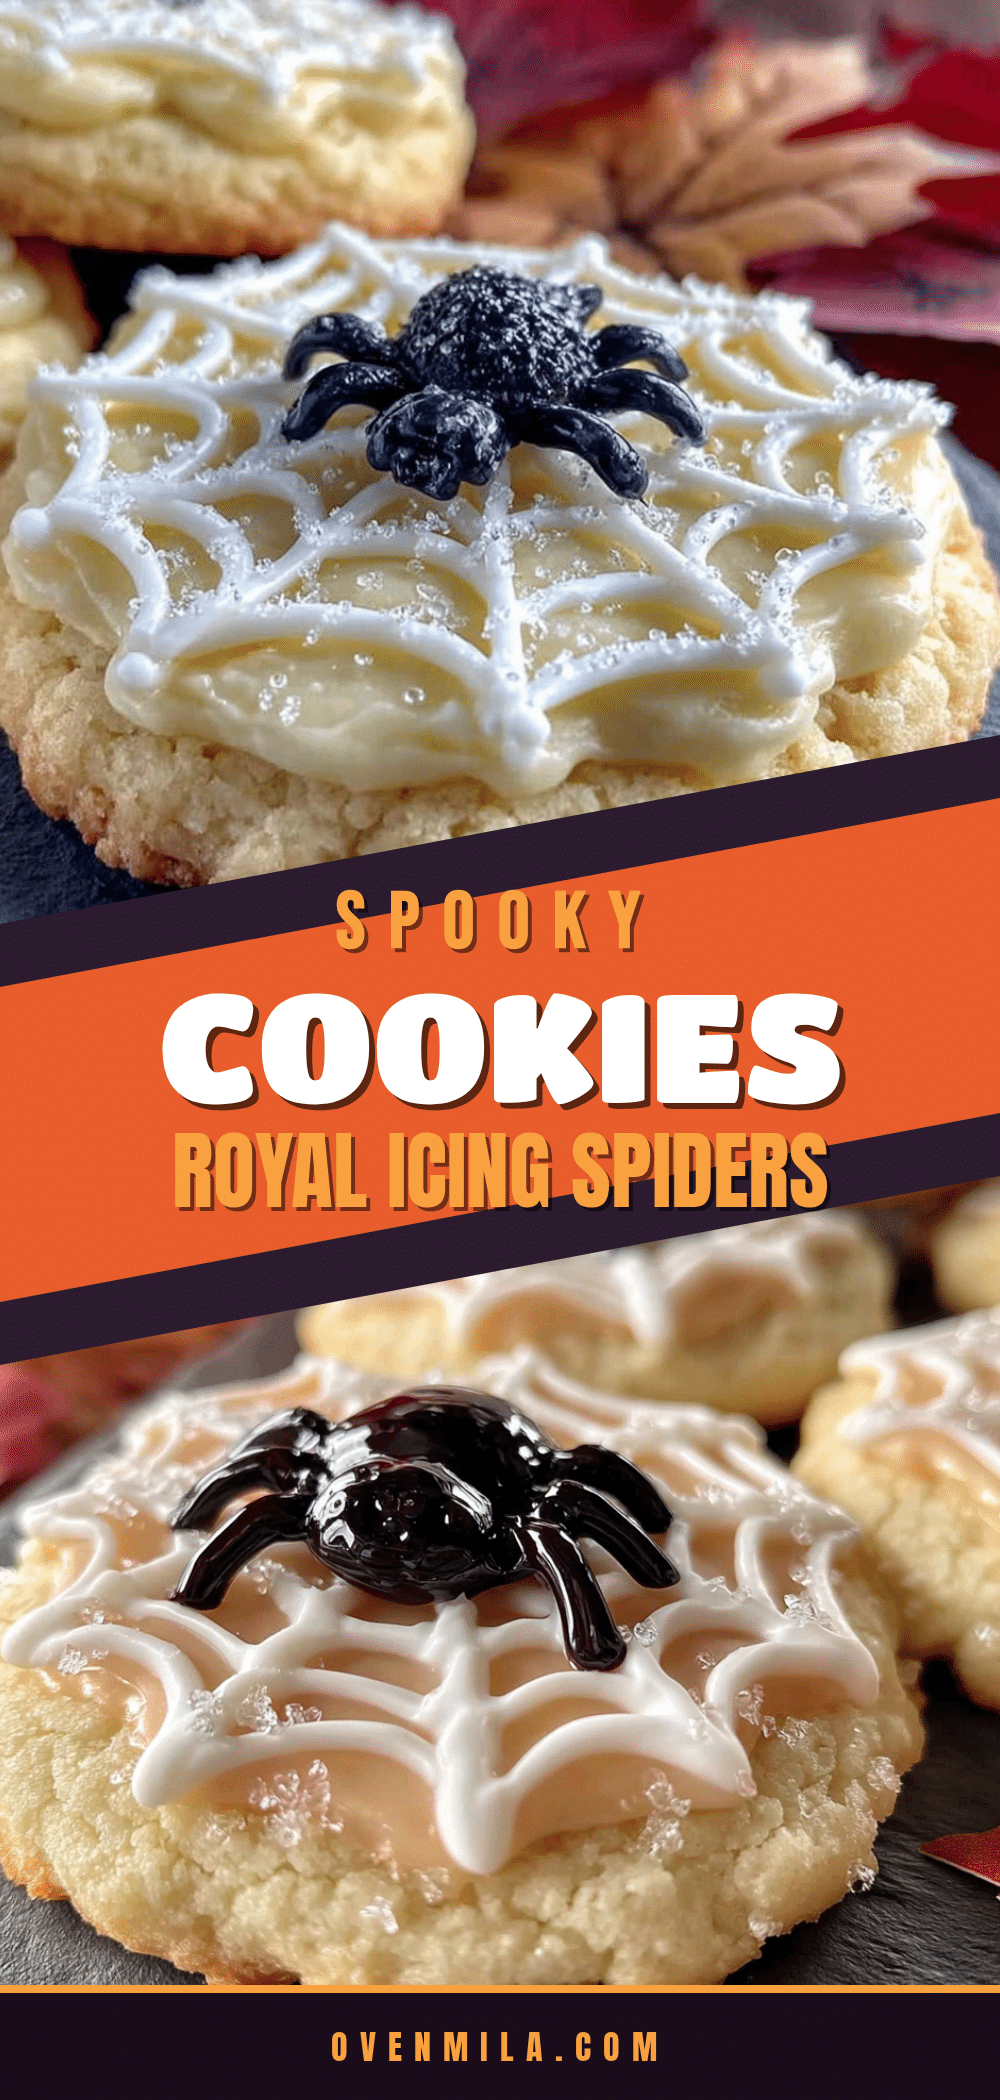
Easy Spooky Halloween Sugar Cookies with Royal Icing Spiders
These spooky Halloween sugar cookies with royal icing spiders are quick, easy, and perfect for last-minute Halloween parties. The cookies hold their shape beautifully and are soft, buttery, and delicious.
- Prep Time: 30 minutes
- Cook Time: 10 minutes
- Total Time: 1 hour 40 minutes
- Yield: 24 servings 1x
- Category: Dessert
- Cuisine: American
Ingredients
- 1 cup (226g) unsalted butter, softened
- 1/2 cup (100g) granulated sugar
- 1/2 cup (60g) powdered sugar
- 1 large egg, room temperature
- 1 teaspoon vanilla extract
- 1/2 teaspoon almond extract
- 2 1/2 cups (312g) all-purpose flour
- 1/2 teaspoon salt
- 1/4 teaspoon baking powder
- Black gel food coloring
- 2 cups (240g) powdered sugar
- 2 tablespoons meringue powder
- 3–4 tablespoons warm water
- 1/2 teaspoon vanilla extract
- Black sanding sugar or edible glitter (optional)
Instructions
- In a stand mixer or large bowl, cream together softened butter, granulated sugar, and powdered sugar on medium speed for about 3 minutes until light and fluffy.
- Add egg, vanilla extract, and almond extract. Beat on low until just combined.
- In a separate bowl, whisk together flour, salt, and baking powder. Add to wet mixture in two additions, mixing on low after each until just combined.
- Knead in black gel food coloring until dough is evenly dark. Divide dough into two disks, wrap in plastic wrap, and refrigerate for at least 1 hour.
- Preheat oven to 350°F (175°C). Line baking sheets with parchment paper.
- Roll dough to 1/4-inch thickness on a lightly floured surface. Cut out spider shapes and place on prepared baking sheets, spacing 2 inches apart.
- Bake for 8-10 minutes, rotating pan halfway through, until edges are just barely golden. Cool on baking sheet for 5 minutes, then transfer to a cooling rack to cool completely.
- For royal icing: whisk together powdered sugar and meringue powder. Add 3 tablespoons warm water and vanilla extract. Beat on medium speed for 4-5 minutes until thick, glossy, and holds stiff peaks.
- Transfer icing to a piping bag fitted with a #2 round tip or a zip-top bag with a tiny corner snipped off.
- Pipe eight spider legs on each cooled cookie (four on each side), then pipe a small oval body and a smaller head in the center. Use a toothpick to smooth connections. Add white icing dots for eyes if desired.
- Let icing dry completely, about 2 hours at room temperature.
Notes
Chill dough for at least 1 hour to prevent spreading. Use gel food coloring for deep black color. Royal icing needs 2 hours to dry completely. Cookies can be made a day ahead and taste better the next day.
Nutrition
- Serving Size: 1 cookie
- Calories: 145
- Sugar: 12
- Sodium: 85
- Fat: 7
- Saturated Fat: 4
- Carbohydrates: 20
- Protein: 2
Keywords: Halloween cookies, sugar cookies, royal icing spiders, spooky cookies, easy Halloween dessert


