My neighbor Carla wasn’t trying to impress anyone. I’d stopped by to borrow a baking sheet—mine had mysteriously vanished during a cookie swap—and the smell hit me before I even got past her screen door. Butter, vanilla, and something warm and familiar that I couldn’t quite place. She was standing at her kitchen counter, flour dusted across her apron, with her three-year-old perched on a stool beside her. And there, lined up on parchment paper, were what looked like the most perfect little turkey shapes I’d ever seen.
“Oh, these?” she said when I asked, barely looking up. “They’re just hand cookies. My mom used to make them with us. Takes like ten minutes.”
Just hand cookies. Like it was nothing special. But let me tell you—I stood there watching her trace her son’s little hand onto rolled-out sugar cookie dough, and something clicked. This wasn’t fancy piping or intricate cutters. This was pure, messy, beautiful holiday creativity that anyone could do. Honestly, I felt a little embarrassed I’d never thought of it myself. I mean, I’ve spent years wrestling with those delicate cookie cutters that never seem to release the dough properly. And here Carla was, using her own kid’s hand like it was the most obvious thing in the world.
I left with my baking sheet and a new obsession. That night, I made my own batch of Easy Turkey Hand Sugar Cookies, and let me tell you—they turned out even better than hers. Maybe it was the extra vanilla extract I snuck in, or maybe it was just the joy of finally having a holiday cookie that didn’t make me want to throw my rolling pin across the kitchen. Either way, these cookies have become a tradition in my house, and I think they’re about to become one in yours too.
Maybe you’ve been there—staring at a complicated cookie recipe, wondering why you bother every single year. These Easy Turkey Hand Sugar Cookies are the answer. They’re simple, they’re adorable, and they actually taste incredible. Not just cute—actually, genuinely delicious. And the best part? You probably have everything you need in your kitchen right now.
Why You’ll Love This Recipe
Let’s be real for a second. Holiday baking can feel like a whole production. By the time you’ve chilled the dough, rolled it out perfectly, used three different cookie cutters, and decorated each one with precision, you’re exhausted. And the kids? They’ve lost interest somewhere around step four. These Easy Turkey Hand Sugar Cookies flip that whole script.
- Quick & Easy: From start to finish, you’re looking at about 45 minutes. No chilling required, no complicated techniques. Just mix, roll, trace, bake, and decorate. Perfect for a weeknight baking session when you’re short on time but big on holiday spirit.
- Simple Ingredients: Butter, sugar, flour, eggs, vanilla—things you probably already have in your pantry. No specialty baking supplies needed. I’m all for fancy ingredients in other recipes, but for these cookies, simple is better.
- Perfect for Thanksgiving or Any Fall Gathering: These cookies are basically made for Thanksgiving week. They’re a hit at classroom parties, family dinners, and Friendsgiving gatherings. Plus, they’re a fantastic activity to keep little hands busy while the turkey roasts.
- Crowd-Pleaser: I’ve brought these to three different gatherings this season, and every single time, people stop and smile. There’s something about a cookie shaped like a real hand that just makes people happy. Kids love them, adults love them, and nobody can resist grabbing one.
- Unbelievably Delicious: Here’s the thing—these aren’t just cute. The sugar cookie base is soft, buttery, and perfectly sweet. I’ve tested this recipe at least six times to get the texture just right. Not too thin, not too puffy. Just the perfect cookie that holds its shape and melts in your mouth.
What makes these different from every other turkey cookie out there? It’s the personal touch. When you trace a real hand—your hand, your kid’s hand, your friend’s hand—each cookie becomes unique. No two are exactly alike. That’s not something you can get from a cookie cutter. And honestly, that’s what makes them so special. These cookies have soul.
This recipe isn’t just good—it’s the kind that makes you pause after the first bite and close your eyes for a second. It’s comfort food reimagined for the holiday season. Faster, simpler, but with the same warmth and satisfaction that holiday baking is supposed to bring.
What Ingredients You Will Need
This recipe uses simple, wholesome ingredients that come together to create a soft, buttery sugar cookie with just the right amount of sweetness. Most of these are pantry staples, which means you can whip up a batch whenever the holiday mood strikes—no last-minute grocery run required.
For the Sugar Cookies
- 1 cup unsalted butter, softened (I prefer using unsalted so I can control the salt level. If you only have salted butter on hand, just reduce the added salt by half)
- 1 cup granulated sugar (Adds the perfect sweetness and helps the cookies spread just enough without losing their shape)
- 1 large egg, room temperature (Room temperature egg blends more evenly into the butter-sugar mixture, giving you a smoother dough)
- 1 teaspoon vanilla extract (Pure vanilla extract makes a noticeable difference here. I’m partial to Nielsen-Massey, but any good quality extract works)
- 1/2 teaspoon almond extract (Optional, but trust me—this tiny addition gives the cookies a subtle, almost nutty depth that makes people wonder what’s different about them)
- 2 1/2 cups all-purpose flour (Spoon and level your flour for best results. Scooping directly from the bag can pack in too much flour and make the cookies dense)
- 1/2 teaspoon baking powder (Helps the cookies puff up just slightly without losing their traced shape)
- 1/4 teaspoon salt (Balances the sweetness and enhances the buttery flavor)
For the Decorating
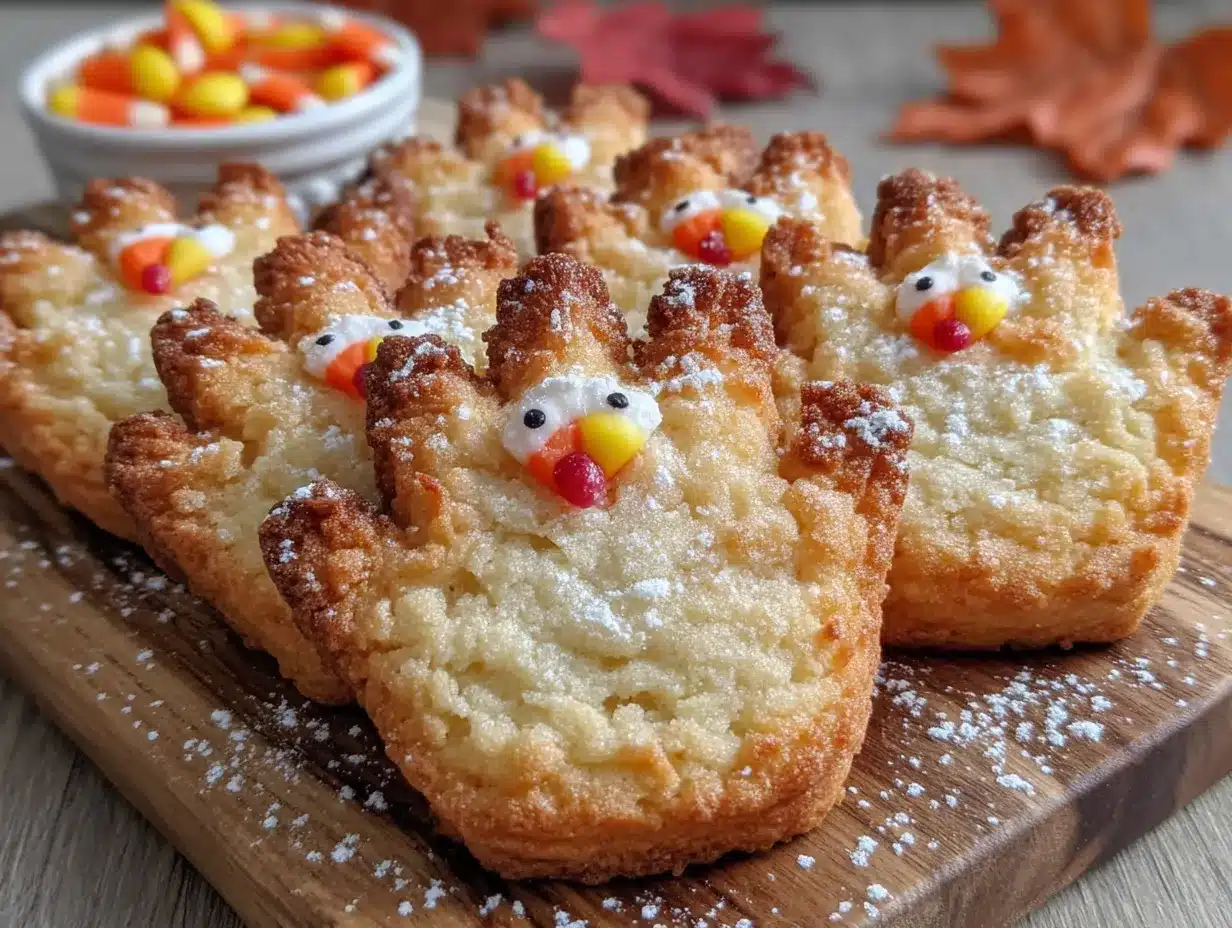
- 1 can (16 oz) vanilla frosting (Store-bought is totally fine here—we’re keeping things easy. If you want to make your own, go for it, but I won’t judge you for taking the shortcut)
- Orange food coloring (For the turkey feathers. Gel food coloring works best—it gives you vibrant color without thinning out the frosting)
- Red and yellow candy corn (These make the perfect turkey beaks and snoods. Trust me on the snood—it’s the little red dangly thing on a turkey’s beak, and candy corn is the perfect shape for it)
- Candy eyes (You can find these at any craft store or baking supply section. They add instant personality to your turkeys)
- Orange sprinkles or small orange candies (Optional, for extra detail on the feathers)
- Parchment paper (For tracing and baking—this is non-negotiable for easy cleanup)
Ingredient Tip: For the best texture, make sure your butter is truly softened—soft enough that your finger leaves an indent when you press it, but not melted. I usually take mine out of the fridge about an hour before I start baking. If you’re short on time, cut the butter into small cubes and let it sit for 15-20 minutes. It’ll soften faster.
Equipment Needed
You don’t need a fancy bakery setup for these cookies. In fact, you probably already own most of what you’ll need. Here’s the full list:
- Large mixing bowl (Any bowl works, but a wide, shallow one makes mixing easier)
- Electric hand mixer or stand mixer (You can mix by hand if you’ve got strong arms, but a mixer makes creaming the butter and sugar much faster)
- Rolling pin (I use a standard wooden one. If you don’t have one, a clean wine bottle works in a pinch—I’ve done it before)
- Parchment paper (This is your best friend for tracing hands and for easy cleanup. Get the pre-cut sheets if you can)
- Baking sheets (At least two, so you can prep one batch while another bakes)
- Sharp knife or pizza cutter (For cutting around the traced hand shapes. A pizza cutter actually works surprisingly well for this)
- Offset spatula or butter knife (For transferring the cut cookies to the baking sheet)
- Piping bags or small zip-top bags (For decorating. Snip a tiny corner off a zip-top bag, and you’ve got an instant piping bag)
- Cooling rack (Helps the cookies cool evenly. If you don’t have one, a clean dish towel laid flat works too)
Budget-Friendly Tip: Don’t go out and buy specialty decorating tools. A small zip-top bag with the corner snipped off works perfectly for piping frosting. I’ve been using this method for years, and honestly, I prefer it to fancy piping tips.
Preparation Method
Alright, let’s get to the fun part. Here’s exactly how to make these Easy Turkey Hand Sugar Cookies, step by step. I’ve broken it down so clearly that even a first-time baker can nail this.
- Preheat your oven to 350°F (175°C). Line two baking sheets with parchment paper. This prevents sticking and makes cleanup a breeze. Set them aside for now.
- Cream the butter and sugar. In your large mixing bowl, beat the softened butter and granulated sugar together on medium speed until light and fluffy—about 3 minutes. You want the mixture to look pale and almost doubled in volume. Scrape down the sides of the bowl halfway through to make sure everything’s incorporated evenly.
- Add the wet ingredients. Beat in the egg, vanilla extract, and almond extract (if using) until fully combined. The mixture might look a little curdled at this point—don’t panic, that’s normal. It’ll come together once you add the dry ingredients.
- Mix the dry ingredients. In a separate bowl, whisk together the all-purpose flour, baking powder, and salt. This ensures the baking powder and salt are evenly distributed throughout the flour.
- Combine wet and dry ingredients. Gradually add the dry ingredients to the wet mixture, mixing on low speed. Stop as soon as the dough comes together—overmixing will make the cookies tough. The dough should be soft but not sticky. If it feels too sticky, add a tablespoon of flour at a time until it’s manageable.
- Roll out the dough. Lightly flour your work surface and rolling pin. Place the dough on the floured surface and roll it out to about 1/4-inch thickness. Don’t go thinner than this, or the cookies will be too fragile to transfer. If the dough sticks to your rolling pin, dust a little more flour on top.
- Trace the hands. Here’s where the magic happens. Place a piece of parchment paper over the rolled-out dough. Have your “hand model” (you, your kid, your neighbor—whoever) press their hand flat onto the parchment paper. Using a sharp knife or pizza cutter, carefully trace around the hand, cutting through both the parchment and the dough. Leave about 1/2 inch of space around the hand for a clean shape. Lift the parchment paper, and voilà—you’ve got a hand-shaped cookie.
- Transfer to baking sheet. Use your offset spatula or butter knife to carefully lift each hand-shaped cookie onto the prepared baking sheets. Space them about 2 inches apart—they’ll spread slightly as they bake. If the dough starts to feel soft, pop it in the fridge for 10 minutes to firm up.
- Bake the cookies. Bake for 8-10 minutes, or until the edges are just barely golden. The centers should still look slightly underdone—they’ll continue to set as they cool. Pro tip: rotate the baking sheets halfway through for even baking. Let the cookies cool on the baking sheet for 5 minutes before transferring them to a cooling rack.
- Cool completely. Let the cookies cool completely on the cooling rack before decorating. This usually takes about 15-20 minutes. If you try to decorate warm cookies, the frosting will slide right off—learned that one the hard way.
- Prepare the frosting. Divide your vanilla frosting into two bowls. Color one portion with orange food coloring for the turkey feathers. Leave the other portion white for the turkey’s body and head. If you want to get fancy, you can also color a small amount red for the snood, but I usually just use candy corn for that.
- Decorate the turkeys. Here’s the fun part. Frost the “palm” area of the hand cookie with white frosting—this becomes the turkey’s body. Frost the “fingers” with orange frosting—these are the feathers. Use a piping bag or zip-top bag with a snipped corner for precise application. Place candy eyes on the white frosting, and use a piece of candy corn for the beak (pointy side down) and another for the snood (pointy side up). Let the frosting set for about 15 minutes before serving.
Sensory Cue: When the cookies are done, your kitchen should smell like warm butter and vanilla. The edges will be just barely golden, and the centers will look soft and slightly puffed. They should feel firm to the touch but not hard.
Cooking Tips & Techniques
After making these cookies about a dozen times (seriously, I lost count), I’ve picked up a few tricks that make the process smoother and the results better. Here are my best tips:
Chill the dough if it gets too soft. This is probably the number one mistake I see people make. If your dough feels sticky or starts losing its shape as you transfer it, pop it in the fridge for 10-15 minutes. Cold dough holds its shape much better in the oven. I’ve definitely had a few batches turn into blobby hand-shaped pancakes because I skipped this step.
Don’t overbake. I know it’s tempting to leave them in for that extra minute to get a deeper golden color, but please resist. Sugar cookies go from perfectly baked to overdone in about 30 seconds. Pull them out when the edges are just barely golden. They’ll look slightly underdone in the center, but that’s exactly what you want. They finish setting as they cool.
Use a pizza cutter for tracing. I discovered this by accident when I couldn’t find my paring knife. A pizza cutter glides through the dough effortlessly and gives you clean, smooth edges. Plus, it’s way faster than using a knife. Just make sure your pizza cutter is sharp—dull ones will drag through the dough.
Let the cookies cool completely before decorating. I cannot stress this enough. I once decorated a batch of slightly warm cookies, and the frosting melted into a sad, runny mess. Those turkeys looked like they’d been through a rainstorm. Wait the full 20 minutes. Trust me.
Make a template if you’re doing multiple hands. If you’re making these with a group of kids or want consistent shapes, trace one hand onto a piece of cardboard, cut it out, and use it as a template. Just place it on the dough, cut around it with your pizza cutter, and lift. This saves time and keeps the shapes uniform.
Use gel food coloring for vibrant feathers. Liquid food coloring works, but it can thin out your frosting and make it runny. Gel colors give you bright, bold colors without changing the frosting’s consistency. A little goes a long way—start with a tiny drop and add more until you get the shade you want.
Variations & Adaptations
One of the best things about this recipe is how flexible it is. Here are some variations I’ve tried and loved:
Gluten-Free Version
Swap the all-purpose flour with a 1:1 gluten-free baking flour blend. I’ve had great results with Bob’s Red Mill Gluten-Free 1-to-1 Baking Flour. The texture is slightly more tender, but honestly, nobody at my Thanksgiving table noticed the difference. Just make sure your blend contains xanthan gum for structure.
Vegan Sugar Cookies
Use vegan butter (I like Earth Balance) and a flax egg (1 tablespoon ground flaxseed mixed with 3 tablespoons water, let sit for 5 minutes). The cookies will be slightly less buttery, but they still hold their shape beautifully. For the frosting, use a vegan vanilla frosting or make your own with powdered sugar and plant-based milk.
Spiced Autumn Version
Add 1 teaspoon of cinnamon, 1/2 teaspoon of nutmeg, and 1/4 teaspoon of cloves to the dry ingredients. This gives the cookies a warm, cozy fall flavor that pairs perfectly with the turkey theme. I made these for a Friendsgiving last year, and they disappeared before the main course even hit the table.
Chocolate Hand Cookies
Replace 1/4 cup of the flour with unsweetened cocoa powder. The chocolate version is rich and decadent, and it looks stunning with white frosting feathers. Just be careful not to overbake—chocolate cookies are harder to gauge by color alone. Start checking at the 8-minute mark.
Mini Hand Cookies
Use a child’s hand for smaller cookies. These are perfect for classroom parties or cookie exchanges where you want to make a lot of cookies. Reduce the baking time to 7-8 minutes since they’re smaller. Little hands also make cuter turkeys—the proportions just work better.
Serving & Storage Suggestions
These cookies are best enjoyed at room temperature, which makes them perfect for setting out on a dessert table or cookie platter. The frosting should be fully set—about 15 minutes after decorating—before you stack or serve them.
Presentation Ideas: Arrange the cookies on a platter with the “feathers” fanning out for maximum turkey effect. I like to place them on a rustic wooden board or a white platter to make the orange frosting pop. For a fun touch, add a few fall leaves or mini pumpkins around the platter.
What to Serve With Them: These cookies pair beautifully with a warm cup of apple cider, hot chocolate, or a spiced chai latte. If you’re serving them as part of a Thanksgiving dessert spread, they go great alongside pumpkin pie, pecan bars, or a classic pumpkin roll.
Storage Instructions: Store the decorated cookies in an airtight container at room temperature for up to 5 days. Layer them between sheets of parchment paper to prevent the frosting from smudging. Do not refrigerate—the fridge can make the cookies dry and the frosting weep.
Freezer Instructions: You can freeze the undecorated cookies for up to 3 months. Place them in a single layer on a baking sheet and freeze until solid, then transfer to a freezer-safe bag or container. When you’re ready to decorate, thaw them at room temperature for about 30 minutes, then frost as usual. I do this all the time during the holiday season—bake a big batch one weekend, then decorate throughout the week as needed.
Reheating: These cookies don’t really need reheating, but if you want that fresh-from-the-oven warmth, pop them in a 300°F oven for 3-4 minutes. Let them cool slightly before serving. The frosting will soften but won’t melt completely.
Flavor Development: Here’s a little secret—these cookies actually taste better the next day. The flavors meld together, and the texture softens just slightly. If you can resist eating them all on day one, you’ll be rewarded on day two.
Nutritional Information & Benefits
Let’s be honest—these are a treat, not a health food. But knowing what’s in them helps with mindful indulgence. Here’s the approximate nutritional breakdown per cookie (based on a standard adult hand-sized cookie, undecorated):
- Calories: 180-200
- Fat: 9g
- Carbohydrates: 25g
- Sugar: 12g
- Protein: 2g
- Fiber: 0.5g
Health Highlights: The butter provides a small amount of vitamin A, and the eggs add protein and B vitamins. If you use the almond extract variation, you’re getting a tiny amount of antioxidants. But honestly, the biggest benefit here is the joy and connection these cookies bring. There’s something genuinely good for the soul about gathering around a kitchen counter, flour on your hands, laughing as you trace each other’s fingers.
Dietary Considerations: This recipe contains gluten, dairy, and eggs. For gluten-free, dairy-free, or vegan options, check the variations section above. The cookies are nut-free if you skip the almond extract. Always check your ingredient labels if you’re serving someone with allergies.
My Take: I believe in balance. These cookies are a holiday tradition, not an everyday snack. Enjoy them, savor them, share them with people you love. That’s the real nutrition here.
Conclusion
These Easy Turkey Hand Sugar Cookies are more than just a recipe—they’re a memory in the making. Every time I make them, I think back to that afternoon at Carla’s house, watching her trace her son’s tiny hand onto cookie dough like it was the most natural thing in the world. And honestly? It is. That’s the beauty of this recipe. It takes something simple—your own hand, your own kitchen, your own family—and turns it into something magical.
I hope you give these a try. Make them with your kids, your friends, your partner, or just yourself on a quiet Sunday afternoon. Trace your own hand. Decorate your turkeys however you want. Mess up the frosting. Laugh at the lopsided ones. Eat one warm from the oven. That’s what this is all about.
And when you do make them, I’d love to hear about it. Drop a comment below and tell me how your turkeys turned out. Did you use a child’s hand or an adult’s? Did you try any of the variations? Share a photo if you’ve got one—I’m genuinely excited to see your creations. Happy baking, friend. You’ve got this.
Frequently Asked Questions
Can I make the dough ahead of time?
Absolutely. You can prepare the dough up to 3 days in advance and keep it wrapped tightly in plastic wrap in the refrigerator. When you’re ready to bake, let it sit at room temperature for about 10-15 minutes to soften slightly before rolling. You can also freeze the dough for up to 3 months—just thaw it overnight in the fridge before using.
Why did my cookies spread too much?
This usually happens for one of three reasons: the dough was too warm when it went into the oven, the butter was too soft (almost melted), or you didn’t use enough flour. Next time, chill the shaped cookies on the baking sheet for 10 minutes before baking. And make sure you’re measuring your flour correctly—spoon it into the measuring cup and level it off rather than scooping directly from the bag.
Can I use a different frosting?
Of course! Cream cheese frosting works beautifully and adds a tangy contrast to the sweet cookie. Royal icing gives you a harder, more durable finish that’s great for stacking or shipping. Even a simple powdered sugar glaze (powdered sugar mixed with a little milk and vanilla) works in a pinch. Just keep in mind that different frostings have different drying times.
How do I get clean hand shapes without ragged edges?
A sharp pizza cutter is your best friend here. Make sure your dough is well-chilled and your cutter is sharp. Cut with one smooth, continuous motion rather than sawing back and forth. If you’re using a knife, use a sharp paring knife and cut in one fluid motion. You can also use a small, sharp pair of kitchen scissors to trim any rough edges after cutting.
Can I make these cookies with kids?
Yes, and I highly recommend it! Kids can help with tracing their hands, placing candy eyes and candy corn, and of course, eating the finished product. Just handle the cutting and baking parts yourself for safety. For younger kids, you can pre-cut the hand shapes and let them focus on decorating. It’s a wonderful way to create holiday memories together.
Pin This Recipe!
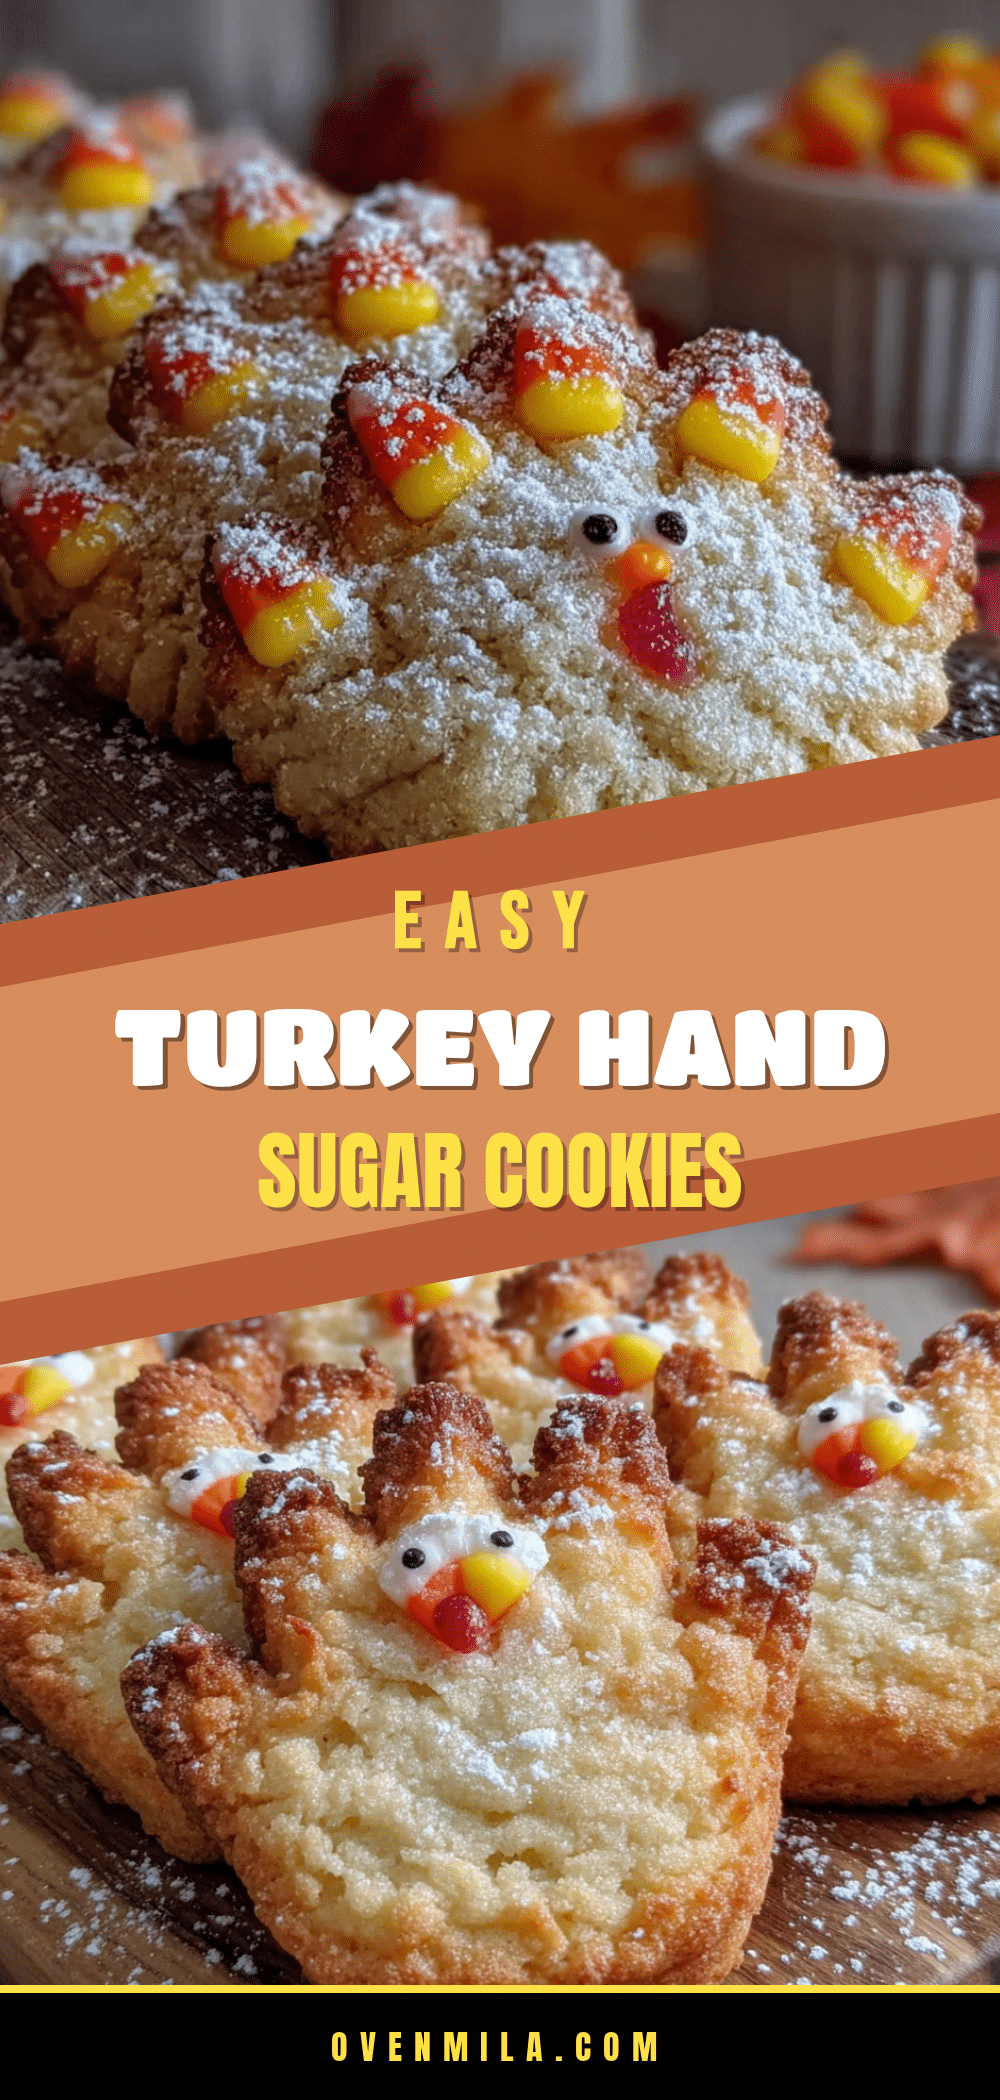
Easy Turkey Hand Sugar Cookies: Perfect Holiday Treat

These adorable hand-shaped sugar cookies are a fun and easy holiday treat. Trace your own hand to create unique turkey cookies that are perfect for Thanksgiving or any fall gathering.
- Prep Time: 15 minutes
- Cook Time: 10 minutes
- Total Time: 45 minutes
- Yield: 12 servings 1x
- Category: Dessert
- Cuisine: American
Ingredients
- 1 cup unsalted butter, softened
- 1 cup granulated sugar
- 1 large egg, room temperature
- 1 teaspoon vanilla extract
- 1/2 teaspoon almond extract (optional)
- 2 1/2 cups all-purpose flour
- 1/2 teaspoon baking powder
- 1/4 teaspoon salt
- 1 can (16 oz) vanilla frosting
- Orange food coloring
- Red and yellow candy corn
- Candy eyes
- Orange sprinkles or small orange candies (optional)
- Parchment paper
Instructions
- Preheat your oven to 350°F (175°C). Line two baking sheets with parchment paper.
- In a large mixing bowl, beat the softened butter and granulated sugar together on medium speed until light and fluffy, about 3 minutes.
- Beat in the egg, vanilla extract, and almond extract (if using) until fully combined.
- In a separate bowl, whisk together the all-purpose flour, baking powder, and salt.
- Gradually add the dry ingredients to the wet mixture, mixing on low speed until just combined. The dough should be soft but not sticky.
- Lightly flour your work surface and rolling pin. Roll out the dough to about 1/4-inch thickness.
- Place a piece of parchment paper over the rolled-out dough. Have someone press their hand flat onto the parchment. Using a sharp knife or pizza cutter, carefully trace around the hand, cutting through both the parchment and the dough.
- Use an offset spatula or butter knife to lift each hand-shaped cookie onto the prepared baking sheets, spacing them about 2 inches apart.
- Bake for 8-10 minutes, or until the edges are just barely golden. Let cool on the baking sheet for 5 minutes, then transfer to a cooling rack to cool completely.
- Divide the vanilla frosting into two bowls. Color one portion with orange food coloring for the turkey feathers. Leave the other portion white for the turkey’s body and head.
- Frost the ‘palm’ area of the hand cookie with white frosting (the turkey’s body) and the ‘fingers’ with orange frosting (the feathers). Place candy eyes on the white frosting, and use candy corn for the beak and snood. Let the frosting set for about 15 minutes before serving.
Notes
Chill the dough if it gets too soft. Don’t overbake; pull cookies when edges are just golden. Use a pizza cutter for tracing. Let cookies cool completely before decorating. Make a template for multiple hands. Use gel food coloring for vibrant feathers.
Nutrition
- Serving Size: 1 cookie
- Calories: 190
- Sugar: 12
- Sodium: 95
- Fat: 9
- Saturated Fat: 5
- Carbohydrates: 25
- Fiber: 0.5
- Protein: 2
Keywords: turkey cookies, hand cookies, sugar cookies, Thanksgiving cookies, fall cookies, easy holiday cookies


