Rummaging through the fridge when I realized the usual Fourth of July pie was nowhere to be found—just a half-empty carton of berries and some leftover cream cheese staring back at me. The clock was ticking, and guests were on their way. Honestly, that’s how this Flavorful Red White and Blue Berry Cheesecake Trifle came to life: a little chaotic, a bit thrown together, but somehow exactly what the holiday table needed. The tang of cream cheese mixed with the fresh burst of berries, layered in a glass bowl that showed off all those vibrant red, white, and blue colors—it was like a mini celebration in every spoonful.
It’s funny how sometimes the best recipes don’t come from hours of prep but from quick thinking and using whatever’s at hand. I wasn’t aiming for a Pinterest-perfect dessert that day; I just wanted something delicious and festive fast. Turns out, this trifle does the trick every time, whether it’s a last-minute addition or the star of the show. The creamy texture with a crumbly crust base and juicy berries hitting all the right notes—it’s a real crowd-pleaser.
What stuck with me was how this unplanned dessert brought everyone to the kitchen, asking for seconds, and that quiet moment of realizing that sometimes the simplest, most straightforward ideas become the most cherished traditions. So here we are, sharing my go-to recipe for a Flavorful Red White and Blue Berry Cheesecake Trifle that’s as easy as it is delicious, and honestly, a little bit special.
Why You’ll Love This Recipe
Trust me, this isn’t your average berry trifle. I’ve tested this recipe countless times, tweaking it between busy weekends and holiday chaos, and here’s why it keeps earning a spot on my dessert table:
- Quick & Easy: Comes together in under 30 minutes, perfect for those moments when you’re juggling a million things but still want something sweet and festive.
- Simple Ingredients: No scavenger hunt required—most are pantry staples or fresh berries you can grab on any grocery run.
- Perfect for Patriotic Celebrations: Whether it’s July 4th, Memorial Day, or just a summer BBQ, this trifle screams red, white, and blue—and taste.
- Crowd-Pleaser: Kids love the creamy sweetness and adults appreciate the balance of tart berries and smooth cheesecake flavor.
- Unbelievably Delicious: The mix of textures—the crumbly graham base, fluffy cream cheese layer, and juicy berries—creates a next-level comfort dessert.
This trifle stands apart because of its perfectly balanced cheesecake layer, which isn’t overly sweet but creamy enough to feel indulgent. I usually blend the cream cheese with just a touch of whipped cream and a hint of lemon zest for brightness. Plus, layering the berries in a way that the red strawberries and blue blueberries peek through the white cheesecake makes it almost too pretty to eat. Almost.
Honestly, this dessert feels like a warm hug after a long day—familiar, festive, and totally satisfying. It’s a recipe that’s won over picky eaters and impressed guests, all without the fuss of baking a full cheesecake. If you want a dessert that looks stunning but doesn’t stress you out, this is your go-to.
What Ingredients You Will Need
This recipe uses simple, wholesome ingredients to deliver bold flavor and satisfying texture without the fuss. The ingredients mostly come from your pantry or fresh produce section, and you can swap things easily depending on what you have on hand.
- For the Crust Layer:
- Graham cracker crumbs (about 1 ½ cups / 150g) – I like using Honey Maid for that classic crunch and sweetness.
- Unsalted butter, melted (6 tablespoons / 85g) – helps bind the crust and adds richness.
- Granulated sugar (2 tablespoons / 25g) – just a touch to sweeten the base.
- For the Cheesecake Layer:
- Cream cheese, softened (16 ounces / 450g) – room temperature for smooth blending.
- Powdered sugar (¾ cup / 90g) – for that silky sweetness without graininess.
- Heavy whipping cream (1 cup / 240ml) – whipped to soft peaks to lighten the cream cheese.
- Vanilla extract (1 teaspoon) – pure vanilla makes all the difference.
- Lemon zest (1 teaspoon) – brightens the cheesecake layer with fresh citrus notes.
- For the Berry Layers:
- Fresh strawberries, hulled and sliced (1 ½ cups / 225g) – ripe and juicy for sweetness.
- Fresh blueberries (1 ½ cups / 225g) – look for firm berries without bruises.
- Fresh raspberries (optional, 1 cup / 150g) – adds a tart punch if you want extra color and flavor.
- Optional Toppings:
- Fresh mint leaves for garnish – adds a refreshing touch and color contrast.
- White chocolate shavings or sprinkles – for a little extra festivity.
For a lighter twist, you can swap heavy cream for coconut cream, which adds a subtle tropical note and makes this dairy-free. If you’re avoiding gluten, almond flour mixed with a bit of coconut sugar can replace the graham crumbs nicely.
Equipment Needed
- Mixing bowls – a medium and a large one for whipping cream and mixing the cheesecake layer.
- Electric hand mixer or stand mixer – absolutely helpful for achieving that smooth, fluffy cheesecake texture.
- Spatula – for folding whipped cream into cream cheese without deflating it.
- 9×13 inch trifle dish or clear glass bowl – the layers look best when you can see those beautiful colors.
- Measuring cups and spoons – precision matters, especially for the crust and cheesecake layers.
If you don’t have a mixer, you can use a whisk, but be prepared to put in some elbow grease to get the cream cheese smooth and the cream whipped. I’ve also used smaller individual trifle cups for portion control when hosting bigger groups; they look adorable and make serving a breeze.
Preparation Method
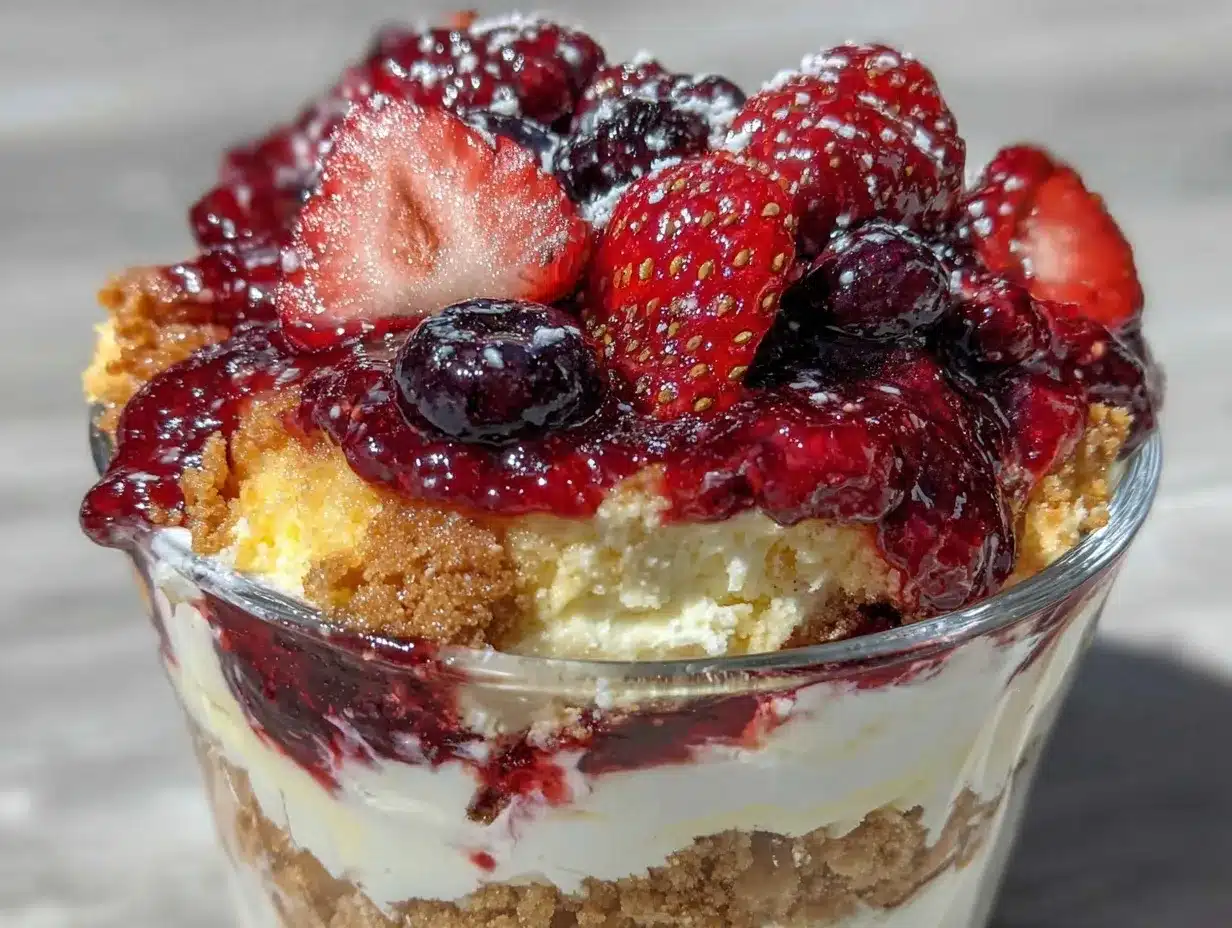
- Make the Crust: In a medium bowl, combine 1 ½ cups (150g) graham cracker crumbs, 6 tablespoons (85g) melted unsalted butter, and 2 tablespoons (25g) granulated sugar. Mix until the crumbs are evenly coated and clump together when pressed. Press this mixture firmly into the bottom of your trifle dish (about 9×13 inches). Chill in the fridge for 10 minutes to set while you prepare the cheesecake layer.
- Prepare the Cheesecake Layer: In a large bowl, beat 16 ounces (450g) softened cream cheese using an electric mixer on medium speed until smooth and creamy, about 2-3 minutes. Gradually add ¾ cup (90g) powdered sugar and continue beating until fully incorporated. Add 1 teaspoon vanilla extract and 1 teaspoon lemon zest, mixing briefly. In a separate bowl, whip 1 cup (240ml) heavy cream to soft peaks. Gently fold the whipped cream into the cream cheese mixture with a spatula, careful not to deflate the air you just whipped in.
- Layer the Trifle: Spoon about half of the cheesecake mixture evenly over the chilled crust layer. Smooth gently with an offset spatula. Add a layer of fresh sliced strawberries (about ¾ cup / 112g), followed by a layer of blueberries (about ¾ cup / 112g). Spoon the remaining cheesecake mixture over the berries, spreading it evenly. Top with the remaining strawberries and blueberries, arranging them so the colors pop through the glass.
- Chill the Trifle: Cover with plastic wrap and refrigerate for at least 2 hours, preferably overnight. This resting time lets the flavors meld and the layers set firmly.
- Garnish and Serve: Just before serving, add a few fresh mint leaves on top for a pop of color and optional white chocolate shavings if you’re feeling fancy. Scoop into dessert bowls and enjoy the creamy, fruity delight.
Pro tip: If your cream cheese isn’t fully softened, you’ll get lumps in the cheesecake layer. Take it out of the fridge about an hour before starting. Also, when folding the whipped cream, do it slowly and gently to keep that fluffy texture intact.
Cooking Tips & Techniques
Honestly, the secret to this trifle’s success lies in the texture contrasts and freshness of ingredients. Here are a few tips I’ve picked up after some trial-and-error:
- Softening Cream Cheese: Patience here is key. If it’s too cold, the cheesecake layer won’t be smooth. I learned to take it out early or microwave in 10-second bursts if in a rush (watch it closely!).
- Whipping Cream: Use cold heavy cream and chilled bowls for the best volume. Under-whip, and it won’t hold; over-whip, and it turns to butter. Stop at soft peaks—when it just holds shape but still looks smooth.
- Layering: Make sure each layer is even and smooth to get those pretty stripes of red, white, and blue. Don’t rush here—presentation makes a big impression, especially if you’re serving guests.
- Berry Prep: Rinse berries gently and pat dry to avoid watery layers. If berries are super juicy, drain them a bit on paper towels before layering.
- Make Ahead: This trifle benefits from sitting overnight. The flavors meld, and the crust softens just enough without getting soggy—honestly, it tastes better the next day.
One time, I forgot to chill the crust first and the base turned out crumbly and loose. Lesson learned: chilling helps firm it up and makes scooping easier. Also, I once tried using frozen berries without thawing, and it made the cheesecake layer watery—always go fresh or fully thawed and drained.
Variations & Adaptations
This recipe is pretty forgiving and easy to customize depending on your mood or dietary needs. Here are a few ways I’ve tweaked it:
- Dairy-Free Version: Swap cream cheese for a vegan alternative and heavy cream for coconut cream. The lemon zest really helps brighten the flavors here.
- Seasonal Berry Swap: In late summer, fresh blackberries or even sliced peaches work beautifully instead of raspberries. Frozen berries can work too but thaw and drain first to avoid extra moisture.
- Lower Sugar: Reduce powdered sugar in the cheesecake layer by a quarter or swap for a natural sweetener like maple syrup, but add it gradually to keep texture smooth.
- Crunchy Twist: Add a layer of toasted pecans or almonds between the crust and cheesecake layer for some nutty crunch.
- Mini Trifles: Use individual clear cups for portion control and a cute presentation—great for potlucks or kid parties.
Personally, I once added a thin drizzle of homemade strawberry coulis between berry layers for an extra burst of flavor, and it was a hit. If you love the idea of mixing textures, try pairing this with a side of fresh black bean cowboy caviar for a contrasting savory touch at your summer get-together.
Serving & Storage Suggestions
Serve this trifle chilled straight from the fridge for the best texture and flavor. The creamy cheesecake layer tastes dreamy when cold, and the berries stay fresh and juicy.
For presentation, adding fresh mint leaves and a few white chocolate shavings on top makes it look extra festive—and that’s perfect for patriotic celebrations or summer parties. It pairs wonderfully with light, bubbly drinks or even a tangy iced tea.
Store leftovers covered tightly in the refrigerator for up to 3 days. The flavors deepen, and the crust softens just right. If you want to prep ahead, making the trifle the day before is ideal.
To reheat (if you prefer it slightly less cold), let it sit at room temperature for 10-15 minutes before serving. But honestly, this dessert shines best chilled.
Nutritional Information & Benefits
Here’s an estimate per serving (assuming 8 servings): approximately 350 calories, 22g fat, 32g carbohydrates, and 5g protein.
The cream cheese provides a good source of calcium and protein, while the fresh berries bring antioxidants, vitamins C and K, and dietary fiber to the mix. Using fresh berries instead of sugary preserves keeps the sugar content moderate.
This dessert can easily fit into a balanced diet when enjoyed in moderation. For gluten-free guests, swapping the graham crumbs for almond flour makes it accessible without sacrificing flavor.
Conclusion
This Flavorful Red White and Blue Berry Cheesecake Trifle is more than just a dessert—it’s a quick, stress-free way to bring a splash of color and a burst of flavor to any patriotic celebration. I love how it’s simple enough to throw together when time’s tight but still impressive enough to make guests smile.
Feel free to play around with the layers and berries, tailoring it to your taste or what’s in season. It’s flexible, forgiving, and, honestly, pretty addictive.
Give it a try and see how this trifle can become your new go-to for summer holidays or any time you want a taste of festive comfort. And if you’re in the mood for another easy, crowd-pleasing dessert, the fresh cream cheese fruit pizza might just be your next favorite.
FAQs About Flavorful Red White and Blue Berry Cheesecake Trifle
Can I make this trifle ahead of time?
Absolutely! It actually tastes better after chilling overnight, giving the layers time to meld and the crust to soften slightly.
What can I use if I don’t have graham crackers?
Digestive biscuits or vanilla wafers work well as substitutes for the crust. You can also try crushed pretzels for a salty twist.
How do I keep the berries from making the trifle soggy?
Drain berries on paper towels if they’re especially juicy, and layer them on top of the cheesecake layer rather than directly on the crust to avoid sogginess.
Can I use frozen berries for this recipe?
Yes, but thaw and drain them thoroughly first to prevent excess moisture from watering down the cheesecake layer.
Is there a way to make this trifle dairy-free?
Yes! Use dairy-free cream cheese alternatives and coconut cream whipped to soft peaks instead of heavy cream. The lemon zest helps keep the flavor fresh.
Pin This Recipe!

Flavorful Red White and Blue Berry Cheesecake Trifle
A quick and easy patriotic dessert featuring layers of creamy cheesecake, crumbly graham cracker crust, and fresh red, white, and blue berries. Perfect for Fourth of July and summer celebrations.
- Prep Time: 15 minutes
- Cook Time: 0 minutes
- Total Time: 2 hours 15 minutes
- Yield: 8 servings 1x
- Category: Dessert
- Cuisine: American
Ingredients
- 1 ½ cups graham cracker crumbs (about 150g)
- 6 tablespoons unsalted butter, melted (about 85g)
- 2 tablespoons granulated sugar (about 25g)
- 16 ounces cream cheese, softened (about 450g)
- ¾ cup powdered sugar (about 90g)
- 1 cup heavy whipping cream (240ml), whipped to soft peaks
- 1 teaspoon vanilla extract
- 1 teaspoon lemon zest
- 1 ½ cups fresh strawberries, hulled and sliced (about 225g)
- 1 ½ cups fresh blueberries (about 225g)
- 1 cup fresh raspberries (optional, about 150g)
- Fresh mint leaves for garnish (optional)
- White chocolate shavings or sprinkles (optional)
Instructions
- Make the Crust: In a medium bowl, combine graham cracker crumbs, melted unsalted butter, and granulated sugar. Mix until crumbs are evenly coated and clump together when pressed. Press mixture firmly into the bottom of a 9×13 inch trifle dish. Chill in the fridge for 10 minutes to set.
- Prepare the Cheesecake Layer: In a large bowl, beat softened cream cheese with an electric mixer on medium speed until smooth and creamy, about 2-3 minutes. Gradually add powdered sugar and continue beating until fully incorporated. Add vanilla extract and lemon zest, mixing briefly. In a separate bowl, whip heavy cream to soft peaks. Gently fold whipped cream into the cream cheese mixture with a spatula.
- Layer the Trifle: Spoon half of the cheesecake mixture evenly over the chilled crust. Smooth gently. Add a layer of sliced strawberries (about ¾ cup), followed by a layer of blueberries (about ¾ cup). Spoon remaining cheesecake mixture over the berries, spreading evenly. Top with remaining strawberries and blueberries, arranging for color contrast.
- Chill the Trifle: Cover with plastic wrap and refrigerate for at least 2 hours, preferably overnight, to let flavors meld and layers set.
- Garnish and Serve: Just before serving, add fresh mint leaves and optional white chocolate shavings on top. Scoop into dessert bowls and enjoy.
Notes
Use room temperature cream cheese for smooth blending. Whip heavy cream to soft peaks to keep the cheesecake layer light and fluffy. Chill crust before layering to prevent crumbliness. Drain berries if very juicy to avoid soggy layers. The trifle tastes better after chilling overnight. For dairy-free, substitute cream cheese and heavy cream with vegan alternatives and coconut cream. For gluten-free, replace graham cracker crumbs with almond flour and coconut sugar.
Nutrition
- Serving Size: 1/8 of the trifle
- Calories: 350
- Fat: 22
- Carbohydrates: 32
- Protein: 5
Keywords: berry trifle, cheesecake trifle, patriotic dessert, Fourth of July dessert, easy trifle, no bake cheesecake, summer dessert


