I want rich, silky, deeply savory turkey gravy right now, but I have absolutely zero patience for the chaos of Thanksgiving morning. That’s the thought that sparked this whole recipe. I was standing in my kitchen last November, staring at a bag of turkey necks and wings in my freezer, and I just decided—I’m not waiting until the big day to figure out gravy. I’m making it now, freezing it, and crossing one more thing off my list. And honestly? It was the best decision I made all holiday season.
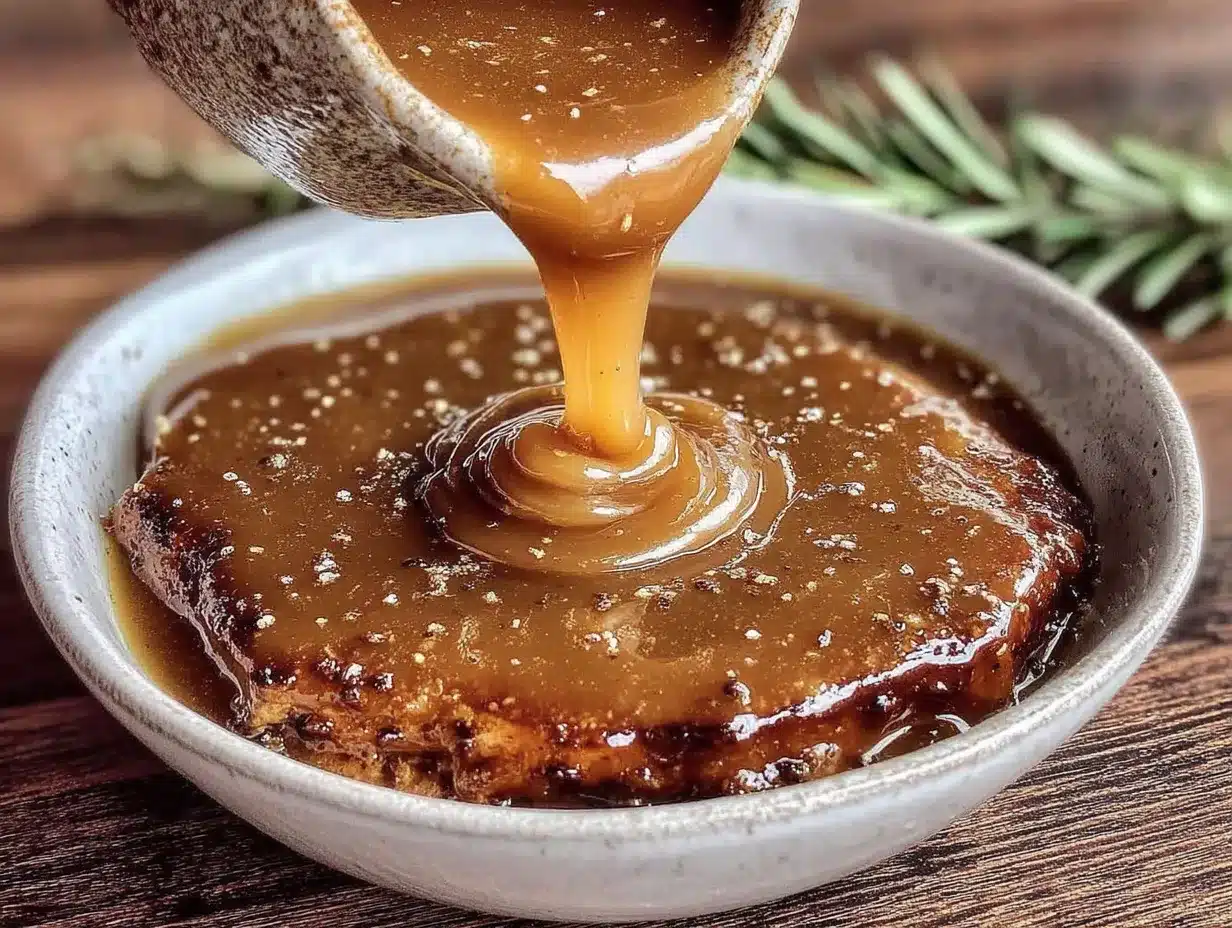
This homemade make-ahead turkey gravy is everything you want from a classic gravy—rich, velvety, packed with turkey flavor—except you don’t have to stress over it while your turkey rests and your guests are waiting. You make it ahead of time, freeze it flat, and reheat it in minutes when you need it. No lumps, no last-minute panic, no bland results.
Let me tell you, the first time I pulled a bag of this gravy out of the freezer on Thanksgiving morning, I felt like I had cheated the system. And you know what? I had. This recipe gives you back precious oven space, stovetop real estate, and mental energy on the day that matters most. It’s the kind of recipe that makes you look like a hero while you’re actually just being smart with your time. And that’s a feeling worth freezing.
Why You’ll Love This Recipe
I’ve tested this gravy more times than I can count, and every single time, it delivers that deep, homemade turkey flavor that makes people close their eyes after the first bite. Here’s what makes it a keeper:
- Completely Make-Ahead : This gravy is designed to be made weeks or even months before your holiday meal. Just thaw, reheat, and serve.
- Freezer-Friendly for Up to 3 Months : It freezes beautifully without separating or losing flavor. I’ve tested it at 30 days, 60 days, and 90 days—still perfect.
- No Drippings Required : You don’t need to wait for your turkey to finish roasting. This gravy is built from turkey parts, so you get that authentic flavor without the timing headache.
- Silky Smooth Every Time : The roux method ensures a lump-free, velvety texture that coats the back of a spoon perfectly.
- Stress-Free Holidays : Imagine not having to whisk frantically while your turkey rests. That’s the gift this recipe gives you.
This isn’t just another gravy recipe. It’s the one that saves your sanity. It’s the one that lets you actually enjoy your meal instead of hovering over a pot. And honestly, it tastes better than most last-minute gravies I’ve ever had. The secret is in the roasted turkey parts—they give you a depth of flavor that drippings alone just can’t match.
What Ingredients You Will Need
This recipe uses simple, affordable ingredients that come together to create something truly special. Most of these are pantry staples or easy to find at any grocery store.
- Turkey wings or turkey necks (2-3 pounds) – These are the backbone of your gravy. They’re inexpensive and packed with flavor. I prefer a mix of wings and necks for the best balance of meat and collagen. (You can also use turkey drumsticks if that’s what’s available.)
- Unsalted butter (1/2 cup, or 1 stick) – This forms the base of your roux. I use unsalted so I can control the salt level. If you only have salted butter, just reduce the added salt later.
- All-purpose flour (1/2 cup) – This thickens your gravy. For a gluten-free version, you can use a 1:1 gluten-free flour blend, though the texture will be slightly different.
- Onion (1 large, roughly chopped) – Adds sweetness and depth. Yellow or white onions work best here.
- Carrots (2 medium, roughly chopped) – They add a subtle sweetness and help build a more complex flavor base.
- Celery (2 stalks, roughly chopped) – Classic aromatic that rounds out the savory profile.
- Garlic (4 cloves, smashed) – Don’t skip this. It adds a gentle warmth that elevates the whole gravy.
- Fresh thyme (4-5 sprigs) – Earthy and aromatic. If you only have dried, use 1 teaspoon.
- Fresh rosemary (2 sprigs) – Piney and fragrant. Goes beautifully with turkey.
- Bay leaves (2) – Adds a subtle herbal note that builds over time.
- Chicken or turkey broth (6 cups) – Use low-sodium so you can control the salt. I like Swanson or Kitchen Basics for consistent flavor.
- Dry white wine (1/2 cup, optional) – Adds acidity and brightness. Use something you’d drink, like a Sauvignon Blanc. You can skip it and use extra broth if you prefer.
- Salt and black pepper (to taste) – Start with 1 teaspoon of salt and 1/2 teaspoon of pepper, then adjust at the end.
One thing I’ve learned is that the quality of your broth really matters here. If you use a cheap, watery broth, your gravy will taste thin. Splurge a little on a good brand, or better yet, use homemade broth if you have it. I also recommend Bell’s Seasoning if you want that classic Thanksgiving flavor—just add 1/2 teaspoon along with the herbs.
Equipment Needed
You don’t need anything fancy for this recipe. Most of these tools you probably already have in your kitchen.
- Large roasting pan or heavy-bottomed pot – For roasting the turkey parts and vegetables. A Dutch oven works beautifully here.
- Large saucepan or pot – For making the gravy after you’ve built the stock.
- Fine-mesh strainer – Essential for straining out all the solids and getting that silky texture. A chinois works even better if you have one.
- Whisk – For making the roux and ensuring no lumps form.
- Measuring cups and spoons – Accuracy matters, especially with the flour and butter.
- Sharp knife and cutting board – For chopping vegetables.
- Freezer-safe bags or containers – I prefer quart-sized freezer bags because they lay flat and stack easily.
- Ladle – For transferring hot liquid safely.
If you don’t have a fine-mesh strainer, you can use a colander lined with cheesecloth. It works just as well, though it takes a little longer. And honestly, I’ve used a clean dish towel in a pinch—just make sure it’s not the fuzzy kind!
Preparation Method
This process takes about 2-3 hours total, but most of that is hands-off roasting and simmering. You can absolutely do this while you’re doing other things around the house.
- Preheat your oven to 400°F (200°C). While it’s heating, pat the turkey wings or necks dry with paper towels. This helps them brown better.
- Arrange the turkey parts in a single layer in your roasting pan or Dutch oven. Add the chopped onion, carrots, and celery around them. Drizzle everything with a little olive oil and toss to coat. Roast for 45-50 minutes, turning once halfway through, until the turkey is deep golden brown and the vegetables are caramelized.
- Transfer the roasted turkey and vegetables to a large pot or Dutch oven. Set the roasting pan aside—you’re going to deglaze it.
- Place the roasting pan over medium heat on your stovetop (if it’s stovetop-safe). Add the white wine and scrape up all the browned bits from the bottom. This is where so much flavor lives. Let it simmer for 2 minutes, then pour this liquid into the pot with the turkey and vegetables.
- Add the broth, garlic, thyme, rosemary, and bay leaves to the pot. Bring everything to a boil, then reduce the heat to low and let it simmer, partially covered, for 1 hour. The liquid will reduce slightly and become deeply flavorful.
- While the stock simmers, make the roux. In a separate large saucepan, melt the butter over medium heat. Once it’s foaming, whisk in the flour. Cook, whisking constantly, for 3-4 minutes until the mixture turns a light golden color and smells nutty. This step is crucial—raw flour taste is not what we’re after.
- Slowly whisk in 4 cups of the hot turkey stock (you’ll strain it first—see next step). Adding cold liquid to a hot roux can cause lumps, so make sure your stock is warm. Whisk until smooth, then let it simmer gently for 5-7 minutes until it thickens to your desired consistency.
- Strain the remaining stock through your fine-mesh strainer into a large bowl or measuring cup. Discard the solids. You should have about 5-6 cups of rich, golden stock. Reserve any extra for thinning the gravy later if needed.
- Add the strained stock to the roux mixture a cup at a time, whisking after each addition. Bring to a gentle simmer and let it cook for 10-15 minutes, stirring occasionally, until the gravy is thick enough to coat the back of a spoon.
- Season with salt and pepper to taste. Start with 1 teaspoon of salt and 1/2 teaspoon of pepper, then adjust. Remember that flavors will concentrate slightly as the gravy cools and reheats, so go easy on the salt.
- Let the gravy cool completely at room temperature. This is important—if you put hot gravy in the freezer, it can cause temperature fluctuations that affect texture.
- Pour the cooled gravy into freezer-safe bags or containers. If using bags, lay them flat in the freezer. This saves space and allows for quick thawing. Label each bag with the date and amount (I write “Turkey Gravy – 2 cups – Nov 2024”).
One thing I always do is taste the gravy at the end and ask myself, “Would I be happy to serve this on Thanksgiving?” If the answer is yes, I freeze it. If it needs a little more salt or a pinch of pepper, I adjust now. Once it’s frozen, it’s harder to fix.
Cooking Tips & Techniques
I’ve made this gravy more times than I care to count, and I’ve learned a few things the hard way. Let me save you the trouble.
Don’t rush the browning. The deep color on your turkey parts and vegetables is where the flavor comes from. If you pull them out too early, your gravy will taste pale and weak. Let them get really dark—almost too dark. That caramelization is pure gold.
Watch your roux carefully. I once walked away from my roux to answer the phone, and by the time I came back, it was burnt. Burnt roux means burnt gravy, and there’s no fixing that. Stay close, keep whisking, and pull it off the heat the second it turns golden.
Season in layers. Don’t dump all your salt in at the beginning. Add a little at the roux stage, a little after you add the stock, and then adjust at the end. This gives you more control and prevents an overly salty gravy.
If your gravy is too thin after reheating, you can thicken it with a cornstarch slurry (1 tablespoon cornstarch mixed with 2 tablespoons cold water). Whisk it in and let it simmer for a minute. If it’s too thick, just whisk in a splash of warm broth or water.
Multitasking is your friend. While the turkey parts are roasting, chop your vegetables and measure your ingredients. While the stock simmers, make your roux and wash your dishes. This recipe flows beautifully if you plan ahead.
Always taste before serving. Frozen gravy can lose a tiny bit of seasoning over time. When you reheat it, give it a taste and add a pinch of salt or pepper if needed. It’s a small step that makes a big difference.
Variations & Adaptations
This gravy is wonderfully adaptable. Here are a few ways I’ve tweaked it over the years.
Herb variations: I love using fresh sage instead of rosemary sometimes. It gives the gravy a more traditional Thanksgiving flavor. Just use 3-4 leaves instead of the rosemary. You can also add a teaspoon of poultry seasoning for that classic taste.
Giblet gravy: If you have the giblets from your turkey (heart, gizzard, liver), you can chop them finely and add them to the stock while it simmers. Strain them out with the vegetables, then stir the chopped giblets back into the finished gravy. It adds incredible richness and texture.
Dairy-free version: Use olive oil or a plant-based butter alternative instead of butter, and make sure your broth is dairy-free. The roux will work the same way, though the flavor will be slightly different. I’ve done this for friends with dairy allergies, and it still gets rave reviews.
Gluten-free version: Swap the all-purpose flour for a 1:1 gluten-free flour blend or cornstarch. If using cornstarch, make a slurry (3 tablespoons cornstarch mixed with 3 tablespoons cold water) and whisk it into the hot stock at the end. It thickens faster, so watch it closely.
Slow cooker method: After roasting the turkey parts and vegetables, transfer everything to a slow cooker. Add the broth and herbs, and cook on low for 6-8 hours. Strain, then make the roux on the stovetop and proceed as usual. This is perfect for a busy weekend when you want the flavor without hovering.
I once made a batch with a splash of apple cider vinegar at the very end, just to see what would happen. It brightened the whole thing up in a way I didn’t expect. Now I sometimes add a teaspoon of cider vinegar to my gravy before freezing. It’s not traditional, but it works.
Serving & Storage Suggestions
This gravy is designed to be made ahead, but how you serve and store it matters.
Serving: Reheat the gravy gently on the stovetop over low heat, whisking occasionally. If it seems too thick, add a splash of warm broth or water until it reaches your desired consistency. You can also reheat it in the microwave in 30-second bursts, stirring between each. Serve it hot in a gravy boat or a warm bowl alongside your turkey, mashed potatoes, and stuffing.
Storage: The gravy will keep in the refrigerator for up to 5 days if you don’t freeze it. For longer storage, freeze it flat in bags. I like to freeze it in 2-cup portions because that’s usually what I need for a standard holiday meal. If you’re feeding a crowd, go with 4-cup portions.
Thawing: The night before you need it, move the frozen gravy from the freezer to the refrigerator. It will thaw overnight. If you forget, you can thaw the bag in a bowl of cold water for about 30 minutes, then reheat directly from there.
Flavor development: Here’s something I’ve noticed—this gravy actually tastes better after it’s been frozen and reheated. The flavors meld together and deepen in a way that fresh gravy doesn’t always achieve. It’s one of those happy accidents that makes this recipe even more worth it.
What to serve it with: This gravy is incredible over mini turkey meatloaf muffins for a non-traditional twist, or alongside crockpot turkey chili for a cozy weeknight meal. It also pairs beautifully with turkey and cheddar roll-ups for a quick lunch that feels special.
Nutritional Information & Benefits
While gravy isn’t exactly health food, this version is made with real, wholesome ingredients and no artificial thickeners or preservatives. Here’s a rough estimate per 1/4 cup serving:
- Calories: 90-110
- Fat: 7-9g (mostly from butter)
- Carbohydrates: 5-7g
- Protein: 2-3g
- Sodium: 200-300mg (varies based on broth and added salt)
The collagen from the turkey parts adds a small amount of protein and gives the gravy its silky body. The carrots and onions contribute vitamins A and C, along with antioxidants. And because you’re controlling the salt and fat, you can make this gravy fit your dietary needs more easily than store-bought versions.
If you’re watching your sodium, use low-sodium broth and go easy on the added salt. You can also reduce the butter slightly, though the texture will be less rich. For a lighter option, try using turkey stock made from the carcass—it has less fat than using wings and necks.
Conclusion
This homemade make-ahead turkey gravy is the kind of recipe that changes how you approach holiday cooking. It’s not just about saving time—it’s about reclaiming your peace of mind. When you have a bag of this gravy in your freezer, you’re not just prepared; you’re ahead of the game.
I love this recipe because it lets me focus on what really matters on Thanksgiving: the people around the table, the laughter, the messy conversations, and the moments that don’t involve a whisk. And honestly, the gravy tastes better because I’m not stressed when I’m making it. That calm energy finds its way into the food.
I’d love to hear how this recipe works for you. Did you add your own twist? Did it save your holiday? Drop a comment below and let me know. And if you share this recipe with a friend who’s hosting their first Thanksgiving, even better. We all need a little help sometimes.
Now go make some gravy and freeze it. Your future self will thank you.
Frequently Asked Questions
Can I use chicken instead of turkey parts?
Absolutely. Chicken wings or drumsticks work perfectly and give you a similar flavor. The gravy will taste slightly less “turkey-like,” but it’s still delicious and works great for chicken dishes.
How long can I keep this gravy in the freezer?
Up to 3 months for best quality. After that, it’s still safe to eat, but the texture may start to break down slightly. I always label my bags with the date so I know which batch to use first.
My gravy is lumpy. Can I fix it?
Yes! Pour the lumpy gravy through a fine-mesh strainer, pressing it through with a spatula. Then whisk it well. If it’s still not smooth, use an immersion blender for a few seconds. Lumps happen to everyone—don’t stress.
Can I double this recipe?
Definitely. Just make sure you have a large enough pot for the stock and a big enough saucepan for the roux. The cooking times stay the same. I often make a double batch in November and freeze it for both Thanksgiving and Christmas.
Do I have to use wine?
No, the wine is optional. If you prefer not to use it, just deglaze the roasting pan with a splash of broth or water instead. The gravy will still have great flavor, though it might be slightly less complex.
Pin This Recipe!
Homemade Make-Ahead Turkey Gravy (Best Freezer-Friendly Recipe)

Rich, silky, deeply savory turkey gravy made ahead of time and frozen for stress-free holidays. No drippings required, and it tastes better than last-minute gravy.
- Prep Time: 20 minutes
- Cook Time: 2 hours 30 minutes
- Total Time: 2 hours 50 minutes
- Yield: 6 cups (about 24 servings of 1/4 cup each) 1x
- Category: Sauce
- Cuisine: American
Ingredients
- 2–3 pounds turkey wings or turkey necks
- 1/2 cup unsalted butter (1 stick)
- 1/2 cup all-purpose flour
- 1 large onion, roughly chopped
- 2 medium carrots, roughly chopped
- 2 stalks celery, roughly chopped
- 4 cloves garlic, smashed
- 4–5 sprigs fresh thyme (or 1 teaspoon dried)
- 2 sprigs fresh rosemary
- 2 bay leaves
- 6 cups low-sodium chicken or turkey broth
- 1/2 cup dry white wine (optional)
- Salt and black pepper to taste
- Olive oil for roasting
Instructions
- Preheat oven to 400°F (200°C). Pat turkey parts dry with paper towels.
- Arrange turkey parts in a single layer in a roasting pan or Dutch oven. Add chopped onion, carrots, and celery. Drizzle with olive oil and toss to coat. Roast for 45-50 minutes, turning once halfway, until deep golden brown and vegetables are caramelized.
- Transfer roasted turkey and vegetables to a large pot or Dutch oven. Set roasting pan aside.
- Place roasting pan over medium heat on stovetop. Add white wine and scrape up browned bits. Simmer for 2 minutes, then pour liquid into pot with turkey and vegetables.
- Add broth, garlic, thyme, rosemary, and bay leaves to the pot. Bring to a boil, then reduce heat to low and simmer partially covered for 1 hour.
- While stock simmers, make the roux: In a separate large saucepan, melt butter over medium heat. Whisk in flour and cook, whisking constantly, for 3-4 minutes until light golden and nutty.
- Slowly whisk in 4 cups of hot turkey stock (strained first). Whisk until smooth, then simmer gently for 5-7 minutes until thickened.
- Strain remaining stock through a fine-mesh strainer into a large bowl or measuring cup. Discard solids. You should have about 5-6 cups of stock.
- Add strained stock to roux mixture a cup at a time, whisking after each addition. Bring to a gentle simmer and cook for 10-15 minutes, stirring occasionally, until gravy coats the back of a spoon.
- Season with salt and pepper to taste (start with 1 teaspoon salt and 1/2 teaspoon pepper).
- Let gravy cool completely at room temperature.
- Pour cooled gravy into freezer-safe bags or containers. Lay flat to freeze. Label with date and amount.
Notes
Don’t rush the browning of turkey parts and vegetables for maximum flavor. Watch the roux carefully to avoid burning. Season in layers. If gravy is too thin after reheating, thicken with a cornstarch slurry (1 tablespoon cornstarch mixed with 2 tablespoons cold water). If too thick, whisk in warm broth or water. Always taste before serving after freezing.
Nutrition
- Serving Size: 1/4 cup
- Calories: 100
- Sugar: 1
- Sodium: 250
- Fat: 8
- Saturated Fat: 4
- Carbohydrates: 6
- Protein: 2
Keywords: turkey gravy, make-ahead gravy, freezer-friendly gravy, Thanksgiving gravy, homemade gravy, no drippings gravy


