My sister swore she hated baking with her kids. For years. “Too much mess,” she’d say, waving a hand while I stood there covered in flour. “They lose interest halfway through. I end up doing everything myself.” Then one rainy November afternoon, I showed up at her house with a batch of these Thanksgiving sugar cookies and a few bags of royal icing. I found her an hour later, sitting at the kitchen table with my niece and nephew, all three of them elbow-deep in sprinkles. My nephew had icing on his nose. My niece was carefully placing tiny candy corn “teeth” on a turkey cookie that looked more like a happy monster. And my sister? She was laughing. Honestly, I didn’t even say “I told you so.” I just sat down and grabbed a cookie. That’s the thing about this recipe—it doesn’t just make cute cookies. It makes a moment. Maybe you’ve been there, thinking holiday baking with little ones is more trouble than it’s worth. I get it. But these cookies? They changed my sister’s mind. And they might just change yours too.
Why You’ll Love This Recipe
Let me tell you why this recipe has become my go-to for every Thanksgiving gathering. I’ve tested it more times than I can count, tweaking the sugar cookie base until it was soft enough for little hands to roll but sturdy enough to hold icing without crumbling. My friend, who’s a pastry chef, even gave it her seal of approval—and she’s not easy to impress.
- Kid-Friendly from Start to Finish: The dough is forgiving. The icing sets fast. And the decorating? That’s where the magic happens. Kids as young as three can help, and they’ll actually stay engaged because the steps are simple and the payoff is instant.
- Simple Pantry Ingredients: Butter, sugar, flour, eggs—you probably have most of this in your kitchen right now. No fancy extracts or hard-to-find supplies. I mean it when I say this is a stress-free holiday project.
- Perfect for Thanksgiving Gatherings: Whether you’re hosting a big family dinner or just want a fun afternoon activity before the big day, these cookies fit right in. They’re great for classroom parties, playdates, or just a quiet afternoon with your own kids.
- Crowd-Pleaser for All Ages: The adults will sneak them off the platter before dinner even starts. The kids will be proud to show off their creations. Honestly, I’ve never seen a cookie disappear faster.
- Unbelievably Delicious: This isn’t just a pretty cookie. The texture is soft with slightly crisp edges—the kind of cookie that makes you close your eyes after the first bite. The royal icing adds just the right amount of sweetness without being overwhelming.
What makes this recipe different from the rest? It’s the balance. The dough isn’t too sticky, the icing isn’t too runny, and the whole process is designed to accommodate little helpers without driving you crazy. I’ve burned through plenty of recipes that promised to be “kid-friendly” and ended up being anything but. This one? It’s the real deal. It’s comfort food reimagined—faster, simpler, but with the same soul-soothing satisfaction of a homemade holiday treat.
What Ingredients You Will Need
This recipe uses simple, wholesome ingredients to deliver bold flavor and satisfying texture without the fuss. Most of these are pantry staples, so you likely already have everything you need to get started.
For the Sugar Cookies
- 1 cup (226g) unsalted butter, softened (I prefer Kerrygold for its rich flavor, but any good-quality butter works fine)
- 1 cup (200g) granulated sugar
- 1 large egg, room temperature
- 1 teaspoon vanilla extract (use pure vanilla if you have it—it makes a difference)
- ½ teaspoon almond extract (optional, but adds a lovely subtle flavor)
- 2½ cups (312g) all-purpose flour (spoon and level for accuracy)
- ½ teaspoon baking powder
- ¼ teaspoon salt
For the Royal Icing
- 3 tablespoons meringue powder (I recommend Wilton brand for consistent results)
- 4 cups (480g) powdered sugar, sifted
- 5-6 tablespoons warm water (add slowly—you can always add more but can’t take it out)
- ½ teaspoon vanilla extract (or clear vanilla if you want a pure white base)
- Gel food coloring (avoid liquid coloring—it thins the icing too much)
For Decorating
- Sprinkles in fall colors (orange, brown, gold, red)
- Candy corn (great for turkey “feathers” or pumpkin stems)
- Edible glitter or sanding sugar (kids love the sparkle)
- Piping bags or squeeze bottles (small zip-top bags with a corner snipped off work perfectly for little hands)
Ingredient Selection Tips: For the best texture, make sure your butter is truly softened—not melted, not cold. If you forgot to take it out of the fridge, cut it into small cubes and let it sit for 15 minutes. For the royal icing, meringue powder is key because it stabilizes the icing and helps it dry hard and shiny. You can substitute with fresh egg whites if you prefer, but meringue powder is more consistent and safer for kids.
Substitution Guidance: Need a dairy-free option? Use vegan butter sticks (not spreadable tubs) and substitute the egg with a flax egg (1 tablespoon ground flaxseed mixed with 3 tablespoons water). The texture will be slightly different but still delicious. For a gluten-free version, swap the all-purpose flour with a 1:1 gluten-free baking flour blend—I’ve had good luck with Bob’s Red Mill brand.
Equipment Needed
You don’t need a lot of fancy equipment for this recipe, which is part of what makes it so approachable. Here’s what you’ll need:
- Stand mixer or hand mixer: A stand mixer makes creaming the butter and sugar effortless, but a hand mixer works just fine. I’ve used both, and honestly, the cookies turn out the same either way.
- Rolling pin: I prefer a French rolling pin (the tapered kind) because it gives me more control, but any rolling pin will do. If you don’t have one, a clean wine bottle works in a pinch—I’ve done it before!
- Thanksgiving-themed cookie cutters: Look for turkey, pumpkin, leaf, and acorn shapes. You can find affordable sets at most craft stores or online. If you only have basic shapes, that’s fine too—round “pumpkin” cookies and square “gift” cookies work beautifully.
- Baking sheets: At least two, so you can rotate batches. Line them with parchment paper or silicone baking mats for easy cleanup.
- Piping bags or squeeze bottles: For the royal icing. I’ve found that squeeze bottles are actually easier for kids to handle than piping bags. Dollar stores often carry small condiment squeeze bottles that work perfectly.
- Cooling rack: Essential for letting the cookies cool completely before icing. If you don’t have one, a clean kitchen towel on the counter works temporarily.
- Small bowls and toothpicks: For mixing colors and popping air bubbles in the icing.
Budget-Friendly Tip: Don’t rush out to buy specialty cookie cutters. You can use a knife to freehand cut simple shapes, or use the rim of a glass to make round cookies and decorate them as pumpkins or turkeys. The kids won’t care about perfection—they’ll care about the sprinkles.
Preparation Method
- Make the cookie dough. In a large bowl (or stand mixer fitted with the paddle attachment), cream together the softened butter and granulated sugar until light and fluffy—about 3 minutes. You’re looking for a pale yellow color and a texture that’s almost like whipped butter. Scrape down the sides of the bowl halfway through. Add the egg, vanilla extract, and almond extract (if using), and beat until combined. The mixture might look slightly curdled at this point—that’s normal, don’t panic.
- Mix the dry ingredients. In a separate bowl, whisk together the flour, baking powder, and salt. Add the dry ingredients to the wet mixture in two additions, mixing on low speed until just combined. The dough should come together in a soft, cohesive ball. If it feels too sticky, add a tablespoon more flour. If it feels dry and crumbly, add a teaspoon of cold water. I’ve had both happen depending on humidity—it’s totally normal.
- Chill the dough. Divide the dough into two discs, wrap each tightly in plastic wrap, and refrigerate for at least 1 hour (or up to 3 days). This step is non-negotiable, I’m sorry to say. Chilling prevents the cookies from spreading too much in the oven and makes the dough much easier for little hands to roll. If you’re short on time, you can pop the dough in the freezer for 20-30 minutes.
- Preheat and prep. When you’re ready to bake, preheat your oven to 350°F (175°C). Line your baking sheets with parchment paper or silicone mats. Take one disc of dough out of the fridge and let it sit at room temperature for 5 minutes—just enough to make it rollable without being too soft.
- Roll and cut. On a lightly floured surface, roll the dough to about ¼-inch thickness. I like to roll between two sheets of parchment paper—it prevents sticking and makes cleanup a breeze. Let the kids help cut out shapes! Place the cutouts about 1 inch apart on the prepared baking sheets. If the dough starts getting sticky, pop it back in the fridge for 10 minutes.
- Bake. Bake for 8-10 minutes, or until the edges are just barely golden. The centers should still look pale and slightly soft. Don’t overbake! They’ll continue to set as they cool. Let the cookies cool on the baking sheet for 5 minutes, then transfer to a cooling rack to cool completely. This is a good time to remind impatient little ones that icing on warm cookies is a recipe for a puddle—trust me, I learned this the hard way.
- Make the royal icing. In a large bowl, combine the meringue powder and sifted powdered sugar. Add 5 tablespoons of warm water and the vanilla extract. Beat on low speed for 4-5 minutes until the icing is stiff and glossy. If it’s too thick, add water a teaspoon at a time. If it’s too thin, add more powdered sugar. The consistency should be like thick toothpaste—it should hold a ribbon when you lift the beater.
- Color and thin the icing. Divide the icing into small bowls and add gel food coloring to achieve your desired shades. For flooding (filling in large areas), thin the icing with a few drops of water until it flows like honey. For outlining, keep it thicker. Test the consistency by lifting a spoon—the icing should drizzle back into the bowl and smooth out within 10 seconds.
- Decorate! This is where the fun begins. Let the kids pipe outlines, flood the cookies, and go wild with sprinkles. I’ve found that giving each child one or two cookies at a time prevents overwhelm and keeps them focused. Plus, it gives you a chance to sneak a few perfectly decorated ones for the adults—no judgment here.
- Let the icing set. Place the decorated cookies on a baking sheet and let them sit at room temperature for 2-4 hours, or overnight. The royal icing needs time to harden completely. Once set, you can stack them or store them in an airtight container.
Cooking Tips & Techniques
After making these cookies more times than I can count (and ruining a few batches along the way), I’ve picked up some tricks that make the process smoother and the results more consistent.
Don’t skip the chill time. I know it’s tempting to rush, especially when excited kids are waiting. But warm dough spreads into unrecognizable blobs in the oven. One time, my nephew’s carefully cut turkey cookie turned into a shapeless puddle because I was in a hurry. He was disappointed, and I felt terrible. Now I’m strict about that hour in the fridge.
Use a light hand with flour. When rolling out the dough, use just enough flour to prevent sticking. Too much flour makes the cookies tough and dry. I keep a small bowl of flour nearby and dust sparingly. If the dough starts sticking, I chill it again rather than adding more flour.
Test your icing consistency. Before you let the kids loose with the piping bags, do a quick test on a piece of parchment paper. The icing should flow smoothly but hold its shape. If it’s too runny, it’ll drip off the cookies. If it’s too thick, it’ll be hard to pipe. I’ve had batches that looked perfect and then turned into a mess—testing saves you from disappointment.
Let kids make mistakes. Honestly, the best advice I can give is to embrace imperfection. The cookies with lopsided turkeys and clumpy sprinkles? Those are the ones everyone fights over. My niece once decorated a cookie that looked like a rainbow explosion, and my brother-in-law claimed it was his favorite. Let them have fun. The memories matter more than the aesthetics.
Multitask strategically. While the dough is chilling, make the royal icing and set up the decorating station. While the cookies are baking, clean up the flour mess. Breaking the process into chunks makes it feel manageable, even with little helpers underfoot.
Variations & Adaptations
One of the best things about this recipe is how flexible it is. Here are some variations I’ve tried and loved:
Dietary Adaptations
- Gluten-Free: Substitute the all-purpose flour with a 1:1 gluten-free baking blend. Add an extra tablespoon of flour if the dough feels too sticky. The cookies will be slightly more delicate, so handle them gently.
- Dairy-Free: Use vegan butter sticks and a flax egg. The texture is a bit less tender, but the flavor is still wonderful. I’ve served these to dairy-free friends and they didn’t miss a thing.
- Egg-Free Royal Icing: Skip the meringue powder and use 3 tablespoons of aquafaba (the liquid from a can of chickpeas) instead. Whip it with the powdered sugar until stiff peaks form. It works surprisingly well!
Flavor Variations
- Spiced Sugar Cookies: Add 1 teaspoon of cinnamon, ½ teaspoon of nutmeg, and ¼ teaspoon of cloves to the dry ingredients. This gives the cookies a warm, autumnal flavor that pairs beautifully with the royal icing.
- Citrus Twist: Replace the vanilla extract with lemon or orange extract in both the cookies and the icing. The bright flavor cuts through the sweetness and feels refreshing.
- Chocolate Base: Replace ¼ cup of the flour with unsweetened cocoa powder. These are great for making “dirt” cookies with orange icing on top—perfect for a Thanksgiving twist.
Decoration Variations
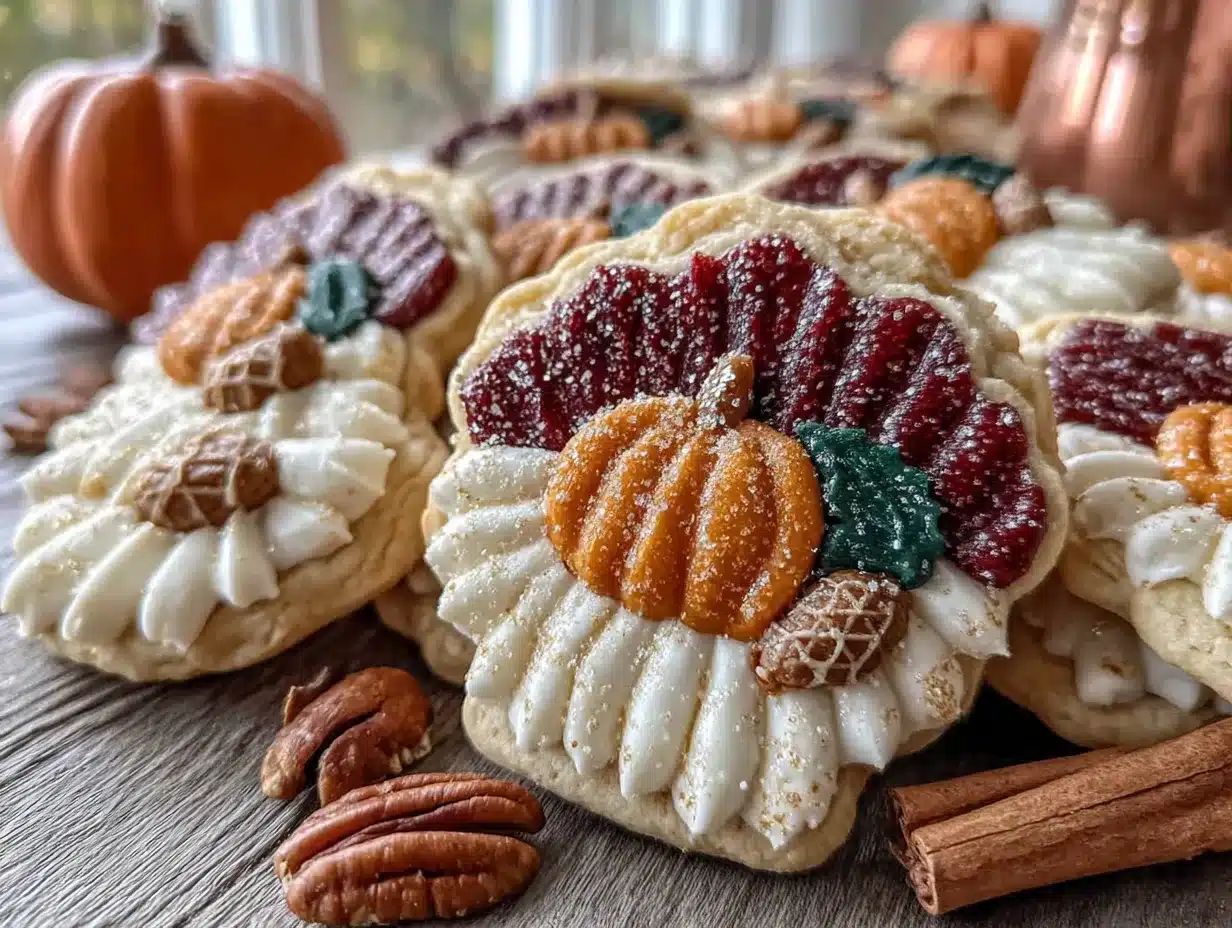
- Pumpkin Patch: Use round cookies, flood with orange icing, and add a green candy stem. Pipe on lines for the pumpkin ridges. So simple, so cute.
- Turkey Feathers: Use a turkey-shaped cutter, flood the body with brown icing, and let kids create “feathers” by placing candy corn in a fan pattern. My nephew’s looked like a peacock—it was hilarious.
- Leaf Pile: Use leaf-shaped cutters and flood with different fall colors—orange, red, yellow, brown. Sprinkle with sanding sugar for a frosty effect.
Serving & Storage Suggestions
These cookies are best served at room temperature, once the royal icing has fully set. I like to arrange them on a large platter or tiered stand for maximum visual impact. The kids love seeing their creations displayed proudly before the adults start sneaking them.
Complementary Dishes: These cookies pair beautifully with a warm cup of apple cider or a mug of hot chocolate. If you’re serving them at a Thanksgiving gathering, they’re a great addition to a dessert table alongside pumpkin pie or pecan bars. I’ve also been known to crumble them over vanilla ice cream for a quick and fun dessert.
Storage Instructions: Store the decorated cookies in an airtight container at room temperature for up to 2 weeks. Layer them between sheets of parchment paper to prevent the icing from sticking. Do not refrigerate—the moisture in the fridge can make the icing sticky and cause the cookies to soften.
Freezer Instructions: You can freeze the undecorated baked cookies for up to 3 months. Wrap them tightly in plastic wrap and place them in a freezer-safe bag. When you’re ready to decorate, thaw them at room temperature and proceed with the icing. I do this every year—bake a big batch of cookies in advance, then decorate with the kids the week of Thanksgiving.
Reheating Tips: These cookies don’t need reheating, but if you want a slightly warm, gooey texture, pop them in a 300°F oven for 3-4 minutes. Note that the royal icing will melt, so only do this with undecorated cookies or cookies you plan to eat immediately.
Flavor Development: Honestly, these cookies taste even better the next day. The flavors meld together, and the texture becomes perfectly soft. So don’t stress about making them fresh on the day of your gathering—baking them a day or two ahead actually improves the result.
Nutritional Information & Benefits
Let’s be real—these are cookies, not health food. But that doesn’t mean they can’t fit into a balanced lifestyle, especially during the holidays when indulgence is part of the joy.
Estimated Nutritional Values (per cookie, based on 24 cookies):
- Calories: 180
- Fat: 8g
- Carbohydrates: 26g
- Sugar: 18g
- Protein: 2g
Health Benefits of Key Ingredients: The butter provides vitamin A and healthy fats, while the eggs offer protein and choline. If you use the almond extract, you’re getting a tiny amount of antioxidants. I mean, it’s not a salad, but every little bit counts, right?
Dietary Considerations: This recipe can be adapted to be gluten-free and dairy-free (see variations above). It contains eggs and dairy in the standard version, so be mindful of allergies. The royal icing with meringue powder is egg-free, which is a bonus for those with egg sensitivities.
Personal Wellness Perspective: I believe in the “everything in moderation” approach. These cookies are a treat, meant to be enjoyed with family and friends. The real nutritional benefit? The quality time spent baking and decorating with loved ones. That’s good for the soul, and honestly, that counts for something.
Conclusion
These Kid-Friendly Thanksgiving Sugar Cookies with Royal Icing have become a staple in my holiday rotation for one simple reason: they bring people together. My sister, who swore she’d never bake with her kids again, now asks me for the recipe every November. My niece and nephew look forward to “cookie day” all year long. And me? I love watching the chaos unfold—flour on the floor, sprinkles in the hair, and smiles all around.
This recipe is worth trying because it delivers on every promise. It’s simple enough for young children to help with. It’s forgiving enough for beginners. And it’s delicious enough that even the most imperfect cookie gets devoured with joy. Don’t stress about making them look perfect. Let the kids take the lead. You might be surprised at what they create—and how much fun you have along the way.
I’d love to hear how your cookie decorating session goes! Drop a comment below and share your favorite Thanksgiving cookie designs. Did your kids come up with something unexpected? Did you discover a new favorite variation? Let me know—and don’t forget to share this recipe with a friend who needs a little holiday cheer. Happy baking, friends!
Frequently Asked Questions
Can I make the dough ahead of time?
Absolutely! The dough can be refrigerated for up to 3 days or frozen for up to 3 months. Just wrap it tightly in plastic wrap and place it in a freezer bag. Thaw in the refrigerator overnight before rolling and cutting.
My royal icing is too runny. How do I fix it?
Add more sifted powdered sugar, a tablespoon at a time, until it reaches the right consistency. If it’s too thick, add water a few drops at a time. The ideal consistency should hold a ribbon when you lift the beater but flow smoothly when piped.
Can I use store-bought icing instead of making royal icing?
You can, but the results won’t be the same. Store-bought icing doesn’t harden properly, so the cookies will be sticky and difficult to stack. If you’re short on time, look for a ready-to-use royal icing mix—just add water.
How do I prevent the cookies from spreading in the oven?
Make sure your dough is well-chilled before baking. If the cookies still spread, try chilling the cut-out shapes on the baking sheet for 10 minutes before putting them in the oven. Also, check that your baking powder isn’t expired—old leavening agents can cause spreading.
Can I freeze the decorated cookies?
It’s not recommended. The royal icing can become sticky and lose its shine when thawed. Instead, freeze the undecorated baked cookies and decorate them after thawing. The icing will set perfectly on the thawed cookies.
Pin This Recipe!

Kid-Friendly Thanksgiving Sugar Cookies | Easy Royal Icing Recipe

These soft, buttery sugar cookies are perfect for Thanksgiving decorating with kids. The royal icing sets fast and the dough is forgiving, making this a stress-free holiday project that creates lasting memories.
- Prep Time: 20 minutes
- Cook Time: 10 minutes
- Total Time: 1 hour 30 minutes (includes chilling)
- Yield: 24 cookies 1x
- Category: Dessert
- Cuisine: American
Ingredients
- 1 cup (226g) unsalted butter, softened
- 1 cup (200g) granulated sugar
- 1 large egg, room temperature
- 1 teaspoon vanilla extract
- ½ teaspoon almond extract (optional)
- 2½ cups (312g) all-purpose flour
- ½ teaspoon baking powder
- ¼ teaspoon salt
- 3 tablespoons meringue powder
- 4 cups (480g) powdered sugar, sifted
- 5–6 tablespoons warm water
- ½ teaspoon vanilla extract
- Gel food coloring
- Sprinkles in fall colors
- Candy corn
- Edible glitter or sanding sugar
- Piping bags or squeeze bottles
Instructions
- Make the cookie dough. In a large bowl, cream together the softened butter and granulated sugar until light and fluffy—about 3 minutes. Scrape down the sides halfway through. Add the egg, vanilla extract, and almond extract (if using), and beat until combined.
- Mix the dry ingredients. In a separate bowl, whisk together the flour, baking powder, and salt. Add to the wet mixture in two additions, mixing on low speed until just combined. The dough should come together in a soft, cohesive ball.
- Chill the dough. Divide the dough into two discs, wrap each tightly in plastic wrap, and refrigerate for at least 1 hour (or up to 3 days).
- Preheat and prep. When ready to bake, preheat oven to 350°F (175°C). Line baking sheets with parchment paper or silicone mats. Take one disc of dough out of the fridge and let it sit at room temperature for 5 minutes.
- Roll and cut. On a lightly floured surface, roll the dough to about ¼-inch thickness. Cut out shapes and place about 1 inch apart on prepared baking sheets.
- Bake. Bake for 8-10 minutes, or until edges are just barely golden. Let cool on baking sheet for 5 minutes, then transfer to a cooling rack to cool completely.
- Make the royal icing. In a large bowl, combine meringue powder and sifted powdered sugar. Add 5 tablespoons warm water and vanilla extract. Beat on low speed for 4-5 minutes until stiff and glossy. Adjust consistency as needed.
- Color and thin the icing. Divide icing into small bowls and add gel food coloring. For flooding, thin with a few drops of water until it flows like honey. For outlining, keep it thicker.
- Decorate! Pipe outlines, flood cookies, and add sprinkles. Let kids decorate one or two cookies at a time.
- Let the icing set. Place decorated cookies on a baking sheet and let sit at room temperature for 2-4 hours, or overnight, until hardened.
Notes
Don’t skip the chill time—it prevents spreading. Use a light hand with flour when rolling. Test icing consistency before decorating. Let kids make mistakes; imperfect cookies are the most memorable. Store decorated cookies in an airtight container at room temperature for up to 2 weeks.
Nutrition
- Serving Size: 1 cookie
- Calories: 180
- Sugar: 18
- Sodium: 80
- Fat: 8
- Saturated Fat: 5
- Carbohydrates: 26
- Protein: 2
Keywords: Thanksgiving cookies, sugar cookies, royal icing, kid-friendly, holiday baking, easy cookie recipe


