There used to be a tiny Lebanese spot on the corner of 7th and Maple in my old neighborhood that made a lemon chicken that I still dream about. When they closed suddenly two summers ago—boarded up with a handwritten “Thanks for the memories” sign taped to the door—I actually stood there for a minute feeling ridiculous for being so sad about a restaurant. But that chicken, you know? It was something else. The skin was impossibly crispy, almost shattery, and the meat underneath was so juicy it barely needed teeth. The lemon hit you first, bright and sharp, then this gentle herb warmth that lingered. I tried explaining it to my husband that night and just sounded crazy.
After maybe twelve attempts—some burnt, some soggy, one that my neighbor’s dog politely refused to eat—I finally cracked it. And honestly, the answer was sitting on my counter the whole time. The air fryer. I mean, I’d been using mine for frozen fries and reheating pizza like everyone else, but it turns out it’s basically a magic box for chicken. The hot circulating air does something that ovens just can’t—it crisps the outside while keeping the inside tender in about half the time. Let me tell you, the first time I pulled a batch out and heard that crackle when I pressed the skin, I almost teared up again. But this time for a better reason.
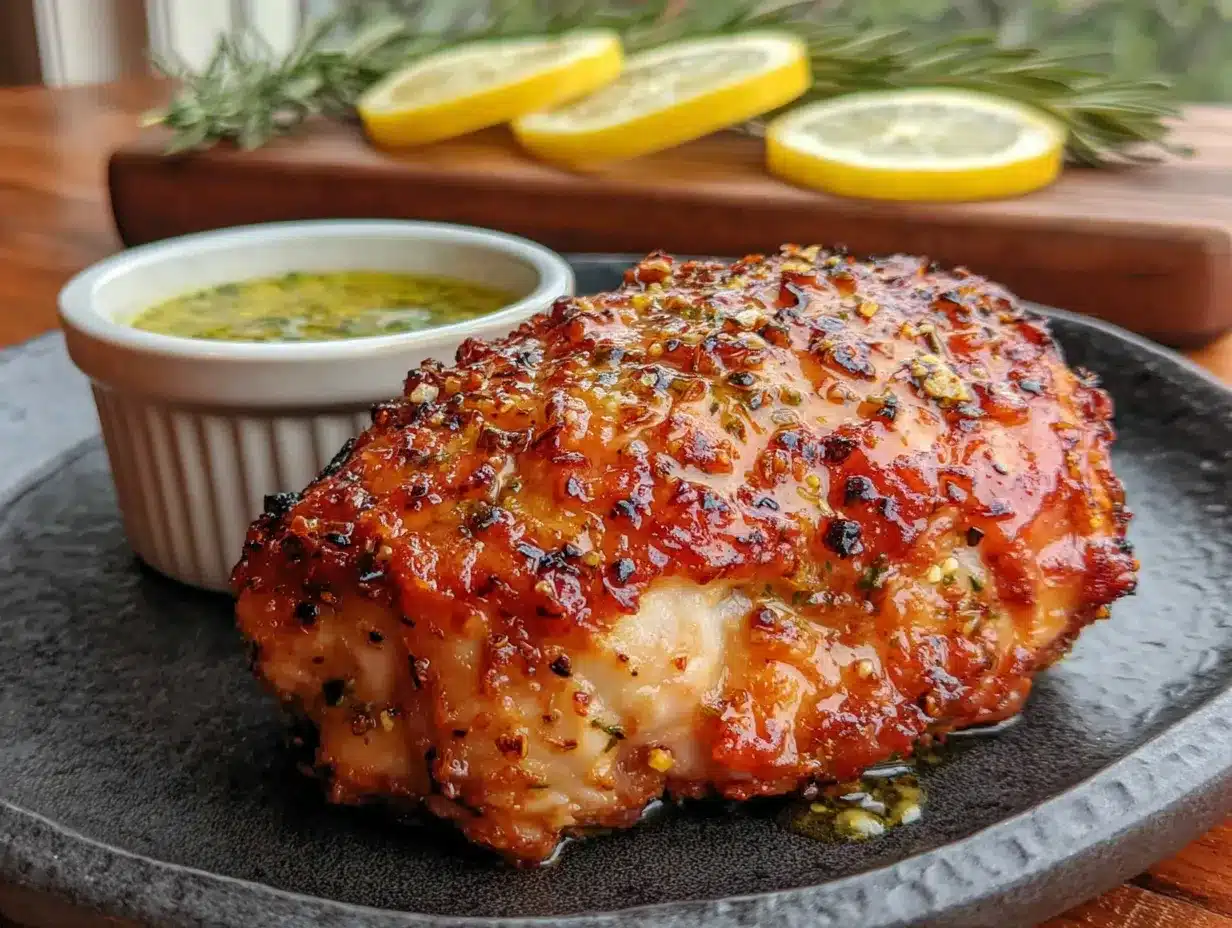
This light and crispy air fryer lemon herb chicken is my love letter to that little restaurant. It’s not a copycat recipe—I stopped trying to replicate theirs exactly and started making my own version that hits the same notes. The lemon is front and center, the herbs are generous, and the texture is that perfect golden crunch you usually only get from deep frying. If you’ve ever had a restaurant dish haunt your thoughts for years, you’ll understand why I kept going back to the kitchen. This one’s for all of us chasing a memory with a fork in hand.
Why You’ll Love This Recipe
Let me be straight with you—I’ve tested this recipe more times than I care to admit. Some batches went straight to the compost bin. But the version I’m sharing today? This is the one that made my picky-eating sister ask for the recipe. Twice. Here’s what makes it special:
- Quick & Easy: From fridge to plate in under 30 minutes. No brining, no marinating overnight, no complicated steps. Perfect for those nights when you want something that feels fancy but takes less time than ordering takeout.
- Simple Ingredients: You probably have everything except maybe the fresh herbs. No weird specialty items, no trips to three different stores. Just good, honest ingredients that work together beautifully.
- Perfect for Healthy Weeknights: This is exactly the kind of meal I make when I’m trying to eat well but refuse to eat boring food. It’s light—there’s barely any oil—but it doesn’t taste like a “healthy” recipe. The flavor is bold and satisfying.
- Crowd-Pleaser: I’ve served this to my family, to friends, to neighbors who stopped by unexpectedly. Every single person has asked how I got the skin so crispy without frying it. Kids love it too—the lemon-herb flavor is bright but not overwhelming.
- Unbelievably Delicious: The texture is what gets everyone. That audible crunch when you bite through the skin, followed by tender, juicy meat that’s packed with lemon and herb flavor. It’s comfort food that doesn’t weigh you down.
What makes this different from every other lemon chicken recipe out there? Two things. First, the technique—a light coating of seasoned flour and a quick rest in the fridge creates that shatteringly crisp exterior without any heavy breading. Second, the balance. I spent a lot of batches adjusting the lemon-to-herb ratio until it hit that perfect note where neither overpowers the other. This isn’t just another version of air fryer chicken. This is the one I’d serve to anyone who says healthy food can’t be exciting.
What Ingredients You Will Need
This recipe uses simple, wholesome ingredients to deliver bold flavor and satisfying texture without the fuss. Most of these are pantry staples, which is exactly how I like to cook on busy weeknights.
For the Chicken
- 4 boneless, skin-on chicken thighs (about 6 ounces each) — Skin-on is non-negotiable here if you want that crispy texture. The skin acts like a protective blanket, keeping the meat moist while it crisps up. I prefer thighs for their flavor and forgiving nature, but breasts work too (just watch the cooking time).
- 2 tablespoons olive oil — A good quality extra virgin works, but regular olive oil is fine. The oil helps the seasoning stick and encourages browning. Don’t skip it—even in an air fryer, a little fat goes a long way.
- 1 teaspoon salt — I use fine sea salt. If you’re using kosher salt, you’ll need a bit more—about 1 ½ teaspoons.
- ½ teaspoon black pepper — Freshly ground is always better, but pre-ground works in a pinch.
- ½ teaspoon garlic powder — Not garlic salt. Garlic powder gives you that savory depth without extra moisture that fresh garlic would add.
- ½ teaspoon onion powder — Rounds out the savory notes and adds a subtle sweetness.
For the Lemon Herb Coating
- 2 tablespoons all-purpose flour — This is the secret to the crunch. Just a light dusting creates a thin, crispy shell. For gluten-free, use rice flour or cornstarch—both work beautifully.
- Zest of 1 large lemon — The zest is where all the concentrated lemon flavor lives. Make sure you only get the yellow part—the white pith is bitter. I recommend using a Microplane for the finest zest.
- 2 tablespoons fresh lemon juice — Bottled lemon juice won’t give you the same brightness. Trust me on this one. Fresh makes a noticeable difference.
- 2 tablespoons fresh parsley, finely chopped — Flat-leaf or curly both work. Parsley adds freshness and color without being overpowering.
- 1 tablespoon fresh thyme leaves — Strip the leaves from the stems. Thyme and lemon are a classic pairing for good reason—the earthy notes balance the citrus perfectly.
- 1 tablespoon fresh rosemary, finely chopped — Go easy on the rosemary—it’s potent. Too much and it’ll taste like Christmas tree. One tablespoon is the sweet spot.
- 1 teaspoon dried oregano — I know we’re using fresh herbs, but a little dried oregano adds an earthy backbone that fresh alone can’t provide.
For Serving (Optional)
- Lemon wedges — For squeezing over the finished chicken. It brightens everything up right before eating.
- Fresh herb sprigs — A little garnish makes it look restaurant-quality, but it’s totally optional.
I usually buy my chicken from the local butcher counter—they always have better-quality skin-on thighs than the pre-packaged ones. For the herbs, I grab a bundle from the farmers market when I can, but the grocery store herb packs work fine. Just make sure they look fresh, not wilted. And if you’re wondering about dried herbs versus fresh—don’t substitute dried for the parsley and thyme. The fresh herbs are what give this dish its bright, lively character. The only exception is the oregano, which I actually prefer dried here because it’s less floral and more earthy.
Equipment Needed
You don’t need a professional kitchen to make this recipe work. Here’s what you’ll actually use:
- Air fryer — Any brand works. I use a 5.8-quart basket-style air fryer, but even the smaller ones can handle this recipe if you work in batches. The key is not overcrowding the basket—air needs to circulate around each piece of chicken.
- Mixing bowls — One medium bowl for the flour mixture, one small bowl for the herbs. Nothing fancy needed.
- Microplane or fine grater — For zesting the lemon. A box grater works too, but a Microplane gives you the fluffiest zest that sticks to the chicken better.
- Sharp knife and cutting board — For chopping herbs and trimming any excess fat from the chicken.
- Tongs — For flipping the chicken halfway through cooking. Please use tongs, not a fork—piercing the skin lets juices escape and ruins the crispiness.
- Paper towels — For patting the chicken dry. This step is more important than you think. Wet skin won’t crisp.
- Instant-read thermometer — I consider this essential. Chicken is done at 165°F, and guessing by color alone is risky. A good thermometer costs about $15 and saves you from dry or undercooked chicken.
If you don’t have an air fryer yet, I get it—I was skeptical too. But honestly, they’re worth the counter space for chicken alone. If you really want to try this recipe without one, you can bake the chicken at 425°F on a wire rack set over a baking sheet. It won’t get quite as crispy, but it’ll still be delicious. Just add about 10-15 minutes to the cooking time.
Preparation Method
Alright, let’s make some chicken. I’ve broken this down into clear steps so you can follow along without any guesswork. Trust the process, especially the resting step—it makes a real difference.
- Prep the chicken (5 minutes) — Start by patting the chicken thighs completely dry with paper towels. I mean really dry—press firmly and use fresh paper towels if needed. Moisture is the enemy of crispy skin. Trim any excess skin or fat hanging off the edges, but leave enough skin to cover the meat. Place the chicken on a plate and let it sit at room temperature for 10 minutes while you prepare the coating.
- Make the lemon herb coating (5 minutes) — In a medium bowl, whisk together the flour, lemon zest, salt, pepper, garlic powder, and onion powder. In a small separate bowl, combine the chopped parsley, thyme, rosemary, and dried oregano. Keep the herbs separate from the flour mixture for now—if you mix them together too early, the herbs get clumpy and don’t stick evenly.
- Season the chicken (3 minutes) — Drizzle the olive oil over the chicken thighs and use your hands to rub it into the skin and underneath the skin too (gently lift the skin and rub a little oil directly on the meat). This extra step keeps the meat moist. Now sprinkle the flour mixture evenly over both sides of each thigh, pressing gently so it adheres. Don’t dump it all on at once—work in a little at a time for even coverage. Shake off any excess.
- Add the herbs (2 minutes) — Sprinkle the fresh herb mixture over the floured chicken, pressing the herbs into the coating with your fingers. This is where the magic happens—the herbs get trapped in the flour coating and toast up beautifully in the air fryer. Don’t skip this step or rush through it.
- Rest the chicken (10 minutes, minimum) — Place the coated chicken thighs on a wire rack set over a baking sheet (or just on a plate if you don’t have a rack). Refrigerate uncovered for at least 10 minutes, or up to 30 if you have time. This rest lets the coating adhere better and helps the skin dry out further, which means maximum crispiness. I know waiting is hard, but this step is worth it.
- Preheat the air fryer (3 minutes) — Preheat your air fryer to 375°F (190°C). Most air fryers need about 3 minutes to preheat. If yours doesn’t have a preheat setting, just run it empty for 3 minutes.
- Arrange the chicken (2 minutes) — Place the chicken thighs in the air fryer basket in a single layer, skin-side down. Make sure they’re not touching—air needs to circulate around each piece. Depending on your air fryer size, you might need to cook in batches. Crowding the basket is the number one mistake people make. If the pieces are touching, they’ll steam instead of crisp.
- Cook the first side (10 minutes) — Air fry at 375°F for 10 minutes. You’ll hear a lovely sizzling sound—that’s the fat rendering and the skin crisping up. Don’t open the basket to check too early; let the air fryer do its thing.
- Flip and cook the second side (8-10 minutes) — Using tongs, carefully flip each thigh over so the skin side is now facing up. Cook for another 8-10 minutes, until the internal temperature reaches 165°F (74°C) when tested with an instant-read thermometer inserted into the thickest part of the meat. The skin should be golden brown and crispy, and the herbs should look toasted, not burnt.
- Rest before serving (5 minutes) — Transfer the chicken to a clean plate or cutting board and let it rest for 5 minutes. This is crucial—the juices need time to redistribute. If you cut into it immediately, all that beautiful moisture will run out onto the plate instead of staying in the meat. Squeeze a fresh lemon wedge over the top right before serving, and garnish with extra herb sprigs if you’re feeling fancy.
One thing I learned the hard way—don’t walk away during the last few minutes of cooking. Air fryers can vary wildly in temperature, and those last couple of minutes are when things can go from perfectly golden to slightly burnt. I always check mine at the 8-minute mark after flipping, just to see how things are progressing.
Cooking Tips & Techniques
After more failed batches than I’d like to admit, I’ve gathered some hard-won wisdom. Here’s what I wish someone had told me before I started:
Patience with patting dry. I cannot stress this enough. Water creates steam, and steam prevents crisping. Use three or four paper towels if you have to. The drier the skin, the crunchier the result. I once made the mistake of rinsing my chicken and not drying it thoroughly—the coating turned into a sad, pasty mess.
Don’t skip the rest in the fridge. That 10-minute chill isn’t just for show. It helps the flour coating adhere to the skin like a second layer, and it further dries out the surface. I’ve tested this recipe with and without the rest, and the rested chicken is noticeably crispier every single time. If you’re planning ahead, you can coat the chicken and refrigerate it for up to an hour before cooking.
Watch the temperature. Air fryers are all slightly different. My friend’s runs hot, and she has to cook at 360°F instead of 375°F. The first time you make this, check the chicken at the 8-minute mark after flipping. If the herbs look like they’re browning too fast, lower the temperature by 10-15 degrees. You can always cook longer, but you can’t un-burn something.
One mistake I made early on—I used too much flour. I thought a thicker coating would mean more crunch. Instead, I got a thick, doughy layer that tasted raw in spots. A light dusting is all you need. The flour is there to create texture, not to be the main event. Think of it as a supporting actor, not the star.
Multitasking tip: While the chicken rests in the fridge, prep your side dishes. This chicken pairs beautifully with a simple arugula salad or roasted vegetables. I usually toss some asparagus or green beans with olive oil and salt, and throw them in the air fryer with the chicken during the last 5 minutes of cooking. Two birds, one appliance.
Variations & Adaptations
One of the best things about this recipe is how flexible it is. Here are some ways I’ve adapted it depending on what I have on hand or who I’m cooking for:
Lemon Pepper Version: Swap the fresh herbs for 2 teaspoons of coarsely ground black pepper and add an extra teaspoon of lemon zest. This gives you a bolder, peppier kick that’s perfect with roasted potatoes. My husband actually prefers this version—he says the original is “too fancy” for him, whatever that means.
Spicy Herb Version: Add ½ teaspoon of red pepper flakes or cayenne pepper to the flour mixture, and swap the parsley for cilantro. The heat cuts through the lemon beautifully, and the cilantro adds a fresh, almost citrusy note. This is my go-to when I want something with a little more excitement.
Gluten-Free Adaptation: Replace the all-purpose flour with rice flour or cornstarch. Rice flour gives you an incredibly light, delicate crunch—almost like tempura. Cornstarch creates a slightly thicker, crunchier crust. Both work well, so it’s really a matter of preference. I’ve also used almond flour in a pinch, but it doesn’t crisp up the same way.
Dairy-Free Note: This recipe is already dairy-free, which is great. But if you want to add a little richness without dairy, try brushing the cooked chicken with a tiny bit of garlic-infused olive oil right before serving. It adds a luxurious finish without weighing things down.
Oven Method: If you don’t have an air fryer, bake the chicken on a wire rack set over a baking sheet at 425°F for 25-30 minutes, flipping halfway through. The wire rack is important—it lets air circulate underneath so the bottom doesn’t get soggy. You won’t get quite the same level of crispiness, but it’s still really good.
One variation I tried that I wouldn’t recommend—adding Parmesan cheese to the coating. I thought it would add flavor and crunch, but it just burned in the air fryer and tasted bitter. Stick with the herbs, and save the cheese for something else.
Serving & Storage Suggestions
This chicken is versatile enough for a casual weeknight dinner or a special weekend meal. Here’s how I like to serve it:
Serving temperature: Serve the chicken hot, straight from the air fryer. The skin is at its crispiest within the first 10 minutes of coming out. If you let it sit too long, the steam from the meat will soften the coating. That’s why I always have my side dishes ready before the chicken finishes cooking.
What to serve with it: The bright lemon-herb flavor pairs beautifully with simple sides. I love it with a lemony arugula salad (just arugula, shaved Parmesan, lemon juice, and olive oil), roasted asparagus, or garlicky green beans. For something heartier, try it with quinoa or roasted potatoes. The chicken also makes amazing leftovers for salads or wraps the next day—just slice it up and toss it over greens with a light vinaigrette.
Storage instructions: Store leftover chicken in an airtight container in the refrigerator for up to 3 days. The skin will lose its crispiness, but the flavor will still be great. I don’t recommend freezing this chicken—the texture suffers too much during thawing and reheating.
Reheating tips: The air fryer is your best friend for reheating. Pop the chicken back in at 350°F for 3-4 minutes, and the skin will crisp right back up. The microwave will make it soggy, so avoid that if you can. If you’re in a rush, a hot skillet with a tiny bit of oil works too—just reheat skin-side down for a couple of minutes.
How flavors develop: Honestly, this chicken is best fresh. Unlike soups or stews that get better overnight, the crispy skin is at its peak right after cooking. But the flavor of the meat itself is still lovely the next day—the lemon and herbs infuse beautifully into the chicken, so even if the texture isn’t perfect, the taste is still there.
Nutritional Information & Benefits
Here’s the thing—I’m not a nutritionist, and I don’t pretend to be one. But I do care about what I put in my body, and this recipe makes me feel good about dinner. Here’s a rough breakdown per serving (one chicken thigh):
- Calories: Approximately 280-320
- Protein: 24-28 grams
- Fat: 18-22 grams (mostly from the skin and olive oil)
- Carbohydrates: 4-6 grams (from the flour and lemon)
- Fiber: Less than 1 gram
The chicken thighs provide a solid dose of high-quality protein, which is great for muscle repair and keeping you full. The olive oil adds heart-healthy monounsaturated fats, and the herbs are packed with antioxidants—thyme and rosemary especially have anti-inflammatory properties. The lemon juice provides a decent hit of vitamin C, which supports your immune system.
If you’re watching your sodium, you can reduce the salt to ½ teaspoon without sacrificing too much flavor—the lemon and herbs do a lot of the heavy lifting. And if you’re following a low-carb or keto diet, this recipe fits perfectly. Just keep the flour to a minimum, or swap it for almond flour.
One thing I love about this recipe is that it feels indulgent without actually being unhealthy. You get the satisfaction of crispy, golden chicken without deep frying or heavy breading. It’s the kind of meal that makes eating well feel effortless.
Conclusion
This light and crispy air fryer lemon herb chicken is more than just a recipe to me. It’s the result of persistence, a few burnt batches, and a whole lot of love for that little restaurant that’s no longer there. Every time I make it, I think about standing in my kitchen at 9 PM on a Tuesday, determined to get it right, with lemons rolling off the counter and herb clippings stuck to my arms. And now, when I take that first bite and hear the crunch, I feel like I’ve won something.
I hope you give this recipe a try and make it your own. Maybe you’ll add more lemon, or swap in your favorite herbs, or serve it with something totally unexpected. That’s the beauty of cooking—you take the bones of a recipe and build something that works for you. If you do make it, I’d love to hear how it turned out. Drop a comment below and let me know if you got that perfect crunch, or if you came up with a variation I haven’t tried yet.
Here’s to chasing flavors that matter, and to never settling for soggy chicken. You deserve better than that, and honestly, this recipe delivers.
Frequently Asked Questions
Can I use chicken breasts instead of thighs?
Yes, you can. Boneless, skin-on chicken breasts work, but they’ll cook faster—check for doneness at the 15-minute total mark (about 8 minutes on the first side, 7 on the second). The skin might not get as crispy because breast skin is thinner, but it’ll still be good. If you use boneless, skinless breasts, you’ll lose the crispy texture entirely, so I don’t recommend it.
Do I have to use fresh herbs, or can I use dried?
Fresh herbs really make a difference here. Dried herbs will burn in the air fryer because they’re more concentrated and less moist. If dried herbs are all you have, add them to the flour mixture instead of sprinkling them on top, and use about half the amount. The flavor won’t be as bright, but it’ll still be tasty.
Why is my coating falling off the chicken?
This usually happens for two reasons: the chicken wasn’t patted dry enough, or you didn’t press the coating into the skin firmly. Make sure the chicken is very dry before adding the oil and flour. And when you apply the coating, press it gently but firmly into the skin—don’t just sprinkle it on. The rest in the fridge also helps the coating adhere better.
Can I prep this recipe ahead of time?
Absolutely. You can coat the chicken and refrigerate it on a wire rack for up to 24 hours before cooking. In fact, an overnight rest in the fridge makes the skin even crispier because it dries out more. Just take it out of the fridge 10 minutes before air frying to take the chill off, then cook as directed.
How do I prevent the herbs from burning?
If your herbs tend to burn, your air fryer might run hot. Try lowering the temperature to 360°F and cooking for an extra 2-3 minutes. You can also add the fresh herbs halfway through cooking instead of at the beginning—just sprinkle them on after you flip the chicken. The residual heat will toast them gently without burning.
Pin This Recipe!

Light and Crispy Air Fryer Lemon Herb Chicken

This light and crispy air fryer lemon herb chicken is a love letter to a beloved restaurant dish. With shatteringly crispy skin and tender, juicy meat infused with bright lemon and aromatic herbs, it’s a quick and easy weeknight dinner that feels indulgent but is surprisingly healthy.
- Prep Time: 15 minutes
- Cook Time: 18-20 minutes
- Total Time: 33-35 minutes
- Yield: 4 servings 1x
- Category: Main Course
- Cuisine: American
Ingredients
- 4 boneless, skin-on chicken thighs (about 6 ounces each)
- 2 tablespoons olive oil
- 1 teaspoon fine sea salt
- ½ teaspoon black pepper, freshly ground
- ½ teaspoon garlic powder
- ½ teaspoon onion powder
- 2 tablespoons all-purpose flour
- Zest of 1 large lemon
- 2 tablespoons fresh lemon juice
- 2 tablespoons fresh parsley, finely chopped
- 1 tablespoon fresh thyme leaves
- 1 tablespoon fresh rosemary, finely chopped
- 1 teaspoon dried oregano
- Lemon wedges, for serving (optional)
- Fresh herb sprigs, for garnish (optional)
Instructions
- Prep the chicken: Pat the chicken thighs completely dry with paper towels. Trim any excess skin or fat. Place on a plate and let sit at room temperature for 10 minutes.
- Make the lemon herb coating: In a medium bowl, whisk together flour, lemon zest, salt, pepper, garlic powder, and onion powder. In a small bowl, combine parsley, thyme, rosemary, and dried oregano. Keep separate.
- Season the chicken: Drizzle olive oil over the chicken and rub into the skin and underneath. Sprinkle the flour mixture evenly over both sides, pressing gently. Shake off excess.
- Add the herbs: Sprinkle the fresh herb mixture over the floured chicken, pressing into the coating with your fingers.
- Rest the chicken: Place coated chicken on a wire rack over a baking sheet (or a plate). Refrigerate uncovered for at least 10 minutes (up to 30 minutes).
- Preheat the air fryer to 375°F (190°C) for 3 minutes.
- Arrange the chicken in the air fryer basket in a single layer, skin-side down, without touching. Cook in batches if needed.
- Cook the first side: Air fry at 375°F for 10 minutes.
- Flip and cook the second side: Using tongs, flip each thigh skin-side up. Cook for another 8-10 minutes until internal temperature reaches 165°F (74°C).
- Rest before serving: Transfer to a plate and let rest for 5 minutes. Squeeze fresh lemon wedge over top and garnish with herb sprigs if desired.
Notes
Pat the chicken very dry for maximum crispiness. Don’t skip the rest in the fridge—it helps the coating adhere and dries the skin. Air fryer temperatures vary; check at 8 minutes after flipping. For gluten-free, use rice flour or cornstarch instead of all-purpose flour. Leftovers can be reheated in the air fryer at 350°F for 3-4 minutes.
Nutrition
- Serving Size: 1 chicken thigh
- Calories: 300
- Sodium: 600
- Fat: 20
- Saturated Fat: 5
- Carbohydrates: 5
- Protein: 26
Keywords: air fryer chicken, lemon herb chicken, crispy chicken thighs, healthy chicken recipe, quick weeknight dinner, gluten-free option


