I was hunched over a broken cash register at a dusty antiques shop in rural Ohio when the plumber, of all people, started talking about pumpkin pie. He was on his knees, wrench in hand, muttering about the pipe situation under the sink, and I was just hoping my credit card would work on this vintage Pyrex I’d found. “That pie you’re buying,” he said, nodding at the dish in my hands, “needs a light touch. Most folks make it too heavy.” I blinked. I wasn’t expecting cooking advice from a man elbow-deep in someone else’s plumbing, but there I was, listening to him describe exactly how to make a pumpkin pie that wouldn’t sit like a brick in your stomach. He told me his grandmother used to say the secret was in the air—literally, in how much air you could get into the filling. I honestly thought he was joking until I tried it.
That conversation stuck with me for weeks. I mean, I’d made pumpkin pie a dozen times before, always following the standard recipe on the back of the can. It was fine. Good, even. But it was never light. It was always that dense, heavy slice that left you needing a nap. So I went home, grabbed a sugar pumpkin, and started experimenting with his advice. The first attempt was a disaster—I over-whipped the eggs and ended up with something that looked like a soufflé that gave up. But the second batch? That was it. The filling was so airy it practically floated on my fork, and the crust was flaky enough to shatter. Let me tell you, that pie changed everything for me.
Maybe you’ve been there, staring at a slice of pumpkin pie and wishing it felt a little less like a lead weight. Or maybe you’ve never found a version that feels both indulgent and light. This recipe is for you. It’s the one I keep making every fall, the one that surprised me from the most unlikely source—a grumpy plumber in a dusty shop. Honestly, sometimes the best recipes come from the last place you’d expect.
Why You’ll Love This Recipe
This isn’t just another pumpkin pie recipe. It’s the result of a lot of trial and error, a chance conversation, and a deep desire to make a classic dessert that doesn’t weigh you down. I’ve tested this version more times than I can count, tweaking the ratios and the technique until it was just right. It’s the kind of recipe that makes you feel good about having a second slice—because let’s face it, you’re going to want one.
- Light & Fluffy Texture: The secret is in the method. By whipping the eggs and incorporating air at the right moments, you get a filling that’s almost mousse-like, not dense or heavy.
- Simple, Whole Ingredients: No boxes of pre-made mix or weird additives. Just real pumpkin, fresh eggs, warm spices, and a crust made from scratch with butter and flour.
- Perfect for Thanksgiving or Any Fall Day: It’s impressive enough for the holiday table but easy enough for a random Tuesday when you’re craving comfort.
- Health-Conscious Twist: This pie uses less sugar than traditional recipes and relies on the natural sweetness of the pumpkin. It feels indulgent without the guilt.
- Crowd-Pleaser: I’ve served this to kids, grandparents, and picky eaters. Everyone loves the texture. It’s the pie that gets asked for by name.
What makes this recipe different is the technique. Most pumpkin pies just mix everything together and call it a day. Here, we take the extra step of whipping the egg whites separately and folding them in, which creates that signature light and airy texture. It’s a small change that makes a huge difference. This isn’t just another version—it’s the best version I’ve ever made.
What Ingredients You Will Need
This recipe uses simple, wholesome ingredients to deliver a bold pumpkin flavor and a satisfying, light texture. Most of these are pantry staples, which makes it easy to whip up on a whim. Here’s what you’ll need, broken down by part of the recipe.
For the Homemade Crust
- All-purpose flour – 1 ¼ cups (150g). I prefer King Arthur Flour for its consistent protein content, which gives a tender crust.
- Unsalted butter – ½ cup (113g), cold and cut into small cubes. The cold butter is key for flaky layers.
- Ice water – 3 to 4 tablespoons (45-60ml). You might need a little more or less depending on the humidity.
- Salt – ½ teaspoon. A must for flavor.
- Sugar – 1 teaspoon. Just a touch to balance the savory notes.
For the Light & Fluffy Filling
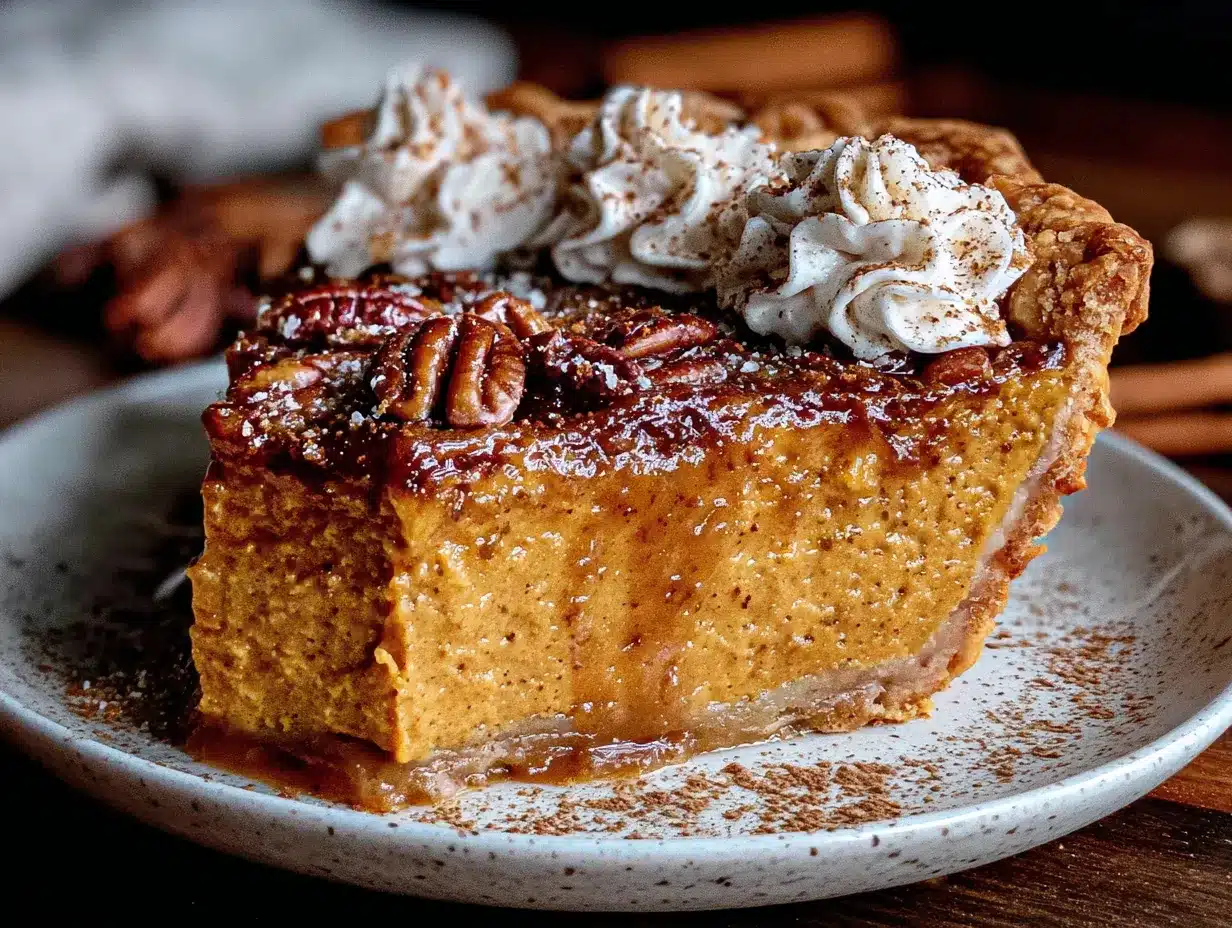
- Pumpkin purée – 1 ½ cups (about 340g). Use pure pumpkin purée, not pumpkin pie filling. I like Libby’s for its consistent texture.
- Large eggs – 3, separated. You’ll use the yolks in the base and whip the whites separately for lightness.
- Brown sugar – ½ cup (100g), packed. Adds a deep, molasses-like sweetness.
- Granulated sugar – ¼ cup (50g). For a cleaner sweetness.
- Heavy cream – ½ cup (120ml). Adds richness without making it heavy.
- Milk – ¼ cup (60ml). Whole milk works best, but 2% is fine.
- Pumpkin pie spice – 2 teaspoons. You can use store-bought or make your own with cinnamon, nutmeg, ginger, and cloves.
- Vanilla extract – 1 teaspoon. Pure vanilla is always better.
- Salt – ¼ teaspoon. To enhance all the flavors.
Ingredient Selection Tips
For the best texture, make sure your eggs are at room temperature. Cold eggs won’t whip up as well. If you’re in a hurry, place them in a bowl of warm water for 5 minutes. For the pumpkin, look for a brand that lists “pumpkin” as the only ingredient. Some brands add spices or sugar, which will throw off the balance. And for the butter in the crust, don’t even think about using margarine. Real butter is non-negotiable for that flaky, golden crust.
Equipment Needed
You don’t need a fancy kitchen to make this pie, but a few key tools will make the process much smoother. Here’s what I recommend.
- 9-inch pie dish – A standard glass or ceramic dish works perfectly. I’ve used my grandmother’s old Pyrex dish for years, and it bakes evenly every time.
- Rolling pin – A simple wooden one is fine. If you don’t have one, a clean wine bottle works in a pinch.
- Mixing bowls – You’ll need at least two: one for the crust and one for the filling.
- Electric mixer or whisk – A hand mixer or stand mixer makes whipping the egg whites much easier. Doing it by hand is possible, but your arm will get a workout.
- Parchment paper – For blind baking the crust. It keeps the sides from collapsing.
- Pie weights or dried beans – These weigh down the parchment so the crust doesn’t puff up.
- Sharp knife or pastry cutter – For cutting the butter into the flour.
If you don’t have pie weights, don’t worry. A cup of dried beans works just as well, and you can reuse them for years. I keep a jar of “pie beans” in my pantry specifically for this purpose.
Preparation Method
Follow these steps carefully, and you’ll end up with a pie that’s light, fluffy, and absolutely delicious. The key is to take your time with each step—don’t rush the process.
Step 1: Make the Crust
In a large bowl, whisk together the flour, salt, and sugar. Add the cold butter cubes and use a pastry cutter or your fingers to work the butter into the flour until it looks like coarse meal with some pea-sized butter pieces remaining. This is crucial for flakiness. Drizzle in 3 tablespoons of ice water and stir with a fork until the dough just comes together. If it seems dry, add the extra tablespoon of water. Form the dough into a disk, wrap it in plastic wrap, and refrigerate for at least 1 hour. This resting time relaxes the gluten, making the crust tender.
Step 2: Blind Bake the Crust
Preheat your oven to 375°F (190°C). On a lightly floured surface, roll the dough out to a 12-inch circle, about ⅛-inch thick. Gently transfer it to your pie dish, pressing it into the bottom and sides. Trim the excess dough and crimp the edges. Line the crust with parchment paper and fill it with pie weights or dried beans. Bake for 15 minutes, then remove the parchment and weights. Bake for another 5-7 minutes, until the bottom looks dry and lightly golden. Set aside to cool slightly.
Step 3: Prepare the Filling Base
Lower the oven temperature to 350°F (175°C). In a large bowl, whisk together the pumpkin purée, egg yolks, brown sugar, granulated sugar, heavy cream, milk, pumpkin pie spice, vanilla extract, and salt. Mix until everything is smooth and well combined. Set this aside while you work on the egg whites.
Step 4: Whip the Egg Whites
In a separate, clean bowl, beat the egg whites with an electric mixer on medium speed until soft peaks form. This usually takes about 2-3 minutes. You’re looking for peaks that hold their shape but droop slightly at the tips. Don’t over-whip them, or they’ll become dry and grainy. The egg whites are the secret to the light and fluffy texture, so this step is important.
Step 5: Fold Everything Together
Take about a third of the whipped egg whites and gently fold them into the pumpkin mixture. This lightens the base. Then, add the remaining egg whites and fold them in with a rubber spatula. Use a gentle, sweeping motion—don’t stir. You want to keep as much air in the mixture as possible. The final batter should be pale and airy, with no streaks of white.
Step 6: Bake the Pie
Pour the filling into the pre-baked crust and smooth the top. Bake for 45-55 minutes, until the edges are set but the center still jiggles slightly. A knife inserted near the center should come out mostly clean. The top will be lightly golden and might have a few small cracks—that’s normal. Let the pie cool completely on a wire rack. This can take 2-3 hours. The filling will continue to set as it cools.
Cooking Tips & Techniques
I’ve made this pie enough times to know where things can go wrong. Here are a few tips to help you avoid my mistakes.
- Don’t skip the blind bake. I once tried to skip this step to save time, and the bottom crust came out soggy. Blind baking ensures a crisp, flaky base that can hold up to the filling.
- Room temperature eggs are non-negotiable. Cold eggs won’t whip up to their full volume, which means a denser filling. If you forget to take them out of the fridge, place them in a bowl of warm water for 10 minutes.
- Fold gently. I’ll admit, I’ve been too aggressive with folding before, and the pie came out flat. Use a light hand and a gentle motion to keep the air in the batter.
- Watch the baking time. Every oven is different. Start checking your pie at the 40-minute mark. The center should still have a slight wobble when you shake the dish. It will firm up as it cools.
- Cool completely. I know it’s tempting to slice into a warm pie, but patience pays off. Cutting into it too early will result in a runny filling. Let it sit for at least 2 hours.
Variations & Adaptations
This recipe is flexible, and I’ve tried a few different versions over the years. Here are some ideas to make it your own.
- Gluten-Free Crust: Swap the all-purpose flour for a gluten-free 1-to-1 baking blend. I’ve used Bob’s Red Mill with good results. The crust will be a bit more crumbly, but the flavor is still great.
- Dairy-Free Filling: Replace the heavy cream and milk with full-fat coconut milk. It adds a subtle coconut flavor that pairs beautifully with the pumpkin and spices.
- Spice It Up: Add a pinch of cayenne pepper or black pepper to the filling for a warm, spicy kick. It sounds weird, but it really enhances the pumpkin flavor.
- Maple Sweetener: Replace the brown sugar with ⅓ cup of maple syrup. You’ll need to reduce the milk by a tablespoon to keep the consistency right. The result is a more complex, earthy sweetness.
- No-Bake Version: For a summer twist, use a pre-made graham cracker crust and skip the baking. Just fold the whipped egg whites into the pumpkin mixture, pour it into the crust, and refrigerate for 4 hours. It’s more like a pumpkin mousse pie, but it’s still delicious.
Serving & Storage Suggestions
This pie is best served at room temperature or slightly chilled. I like to let it sit out for about 20 minutes after taking it out of the fridge to take the chill off. A dollop of lightly sweetened whipped cream is the perfect topping—it adds a touch of creaminess without overwhelming the light texture.
For a complete dessert spread, serve this alongside a warm apple crisp or a slice of pecan pie. A cup of hot coffee or a spiced chai latte is the perfect drink pairing. If you’re feeling fancy, drizzle a little caramel sauce over the top before serving.
To store leftovers, cover the pie loosely with plastic wrap or foil and keep it in the refrigerator. It will stay fresh for up to 4 days. The flavor actually gets better on the second day as the spices meld together. You can also freeze the pie for up to a month. Wrap it tightly in plastic wrap and then foil, and thaw it in the refrigerator overnight before serving.
To reheat individual slices, place them in a 300°F (150°C) oven for 10-15 minutes. The microwave works in a pinch, but it can make the crust soggy, so I don’t recommend it.
Nutritional Information & Benefits
This pie is a treat, but it’s made with real, wholesome ingredients that offer some nutritional benefits. Here’s a rough estimate per slice (based on 8 servings).
- Calories: Approximately 280
- Fat: 14g
- Carbohydrates: 35g
- Protein: 5g
- Fiber: 2g
- Sugar: 18g
Pumpkin is packed with vitamin A, which is great for your eyes and immune system. It’s also a good source of fiber, which helps with digestion. The eggs provide high-quality protein, and the spices like cinnamon and ginger have anti-inflammatory properties. Compared to traditional pumpkin pie recipes, this version has about 30% less sugar and uses less butter in the filling, making it a lighter option for those watching their intake. It’s not a health food, but it’s a dessert you can feel good about enjoying.
Conclusion
This Light & Fluffy Pumpkin Pie from Scratch with Homemade Crust is more than just a recipe—it’s a little piece of kitchen magic, born from an unlikely conversation with a plumber in a dusty shop. It’s the pie that changed how I think about fall desserts, and I hope it does the same for you. The texture is unlike anything you’ve tried before, and the homemade crust is the perfect flaky companion to that airy filling.
I’d love to hear how it turns out for you. Did you try any of the variations? Did your family go back for seconds? Leave a comment below and let me know. And if you’re looking for more lightened-up desserts, you might want to try my fluffy pumpkin bundt cake or my healthy apple crisp. Happy baking, friends—and remember, sometimes the best recipes come from the most unexpected places.
Frequently Asked Questions
Can I use canned pumpkin pie filling instead of pure pumpkin purée?
No, I wouldn’t recommend it. Canned pumpkin pie filling already has sugar and spices added, which will throw off the balance of this recipe. Stick with pure pumpkin purée for the best results.
Why did my pie crack on top?
A few small cracks are normal, but large cracks usually mean the pie was overbaked. The center should still jiggle slightly when you take it out of the oven. It will continue to set as it cools. Also, cooling it slowly on a wire rack helps prevent cracking.
Can I make this pie a day ahead?
Absolutely. In fact, I often make it a day ahead. The flavors meld together overnight, and the texture stays perfect. Just keep it covered in the refrigerator and let it come to room temperature before serving.
How do I know when the egg whites are whipped enough?
You’re looking for soft peaks. When you lift the whisk, the egg whites should form a peak that holds its shape but droops slightly at the tip. If the peaks stand straight up, you’ve gone too far into stiff peaks, which can make the filling a bit dry.
Can I use a store-bought crust instead of making my own?
You can, but the homemade crust really makes a difference. It’s flakier and more flavorful than anything you’ll buy at the store. If you’re short on time, look for a refrigerated pie crust in the dairy section—it’s better than the frozen ones.
Pin This Recipe!
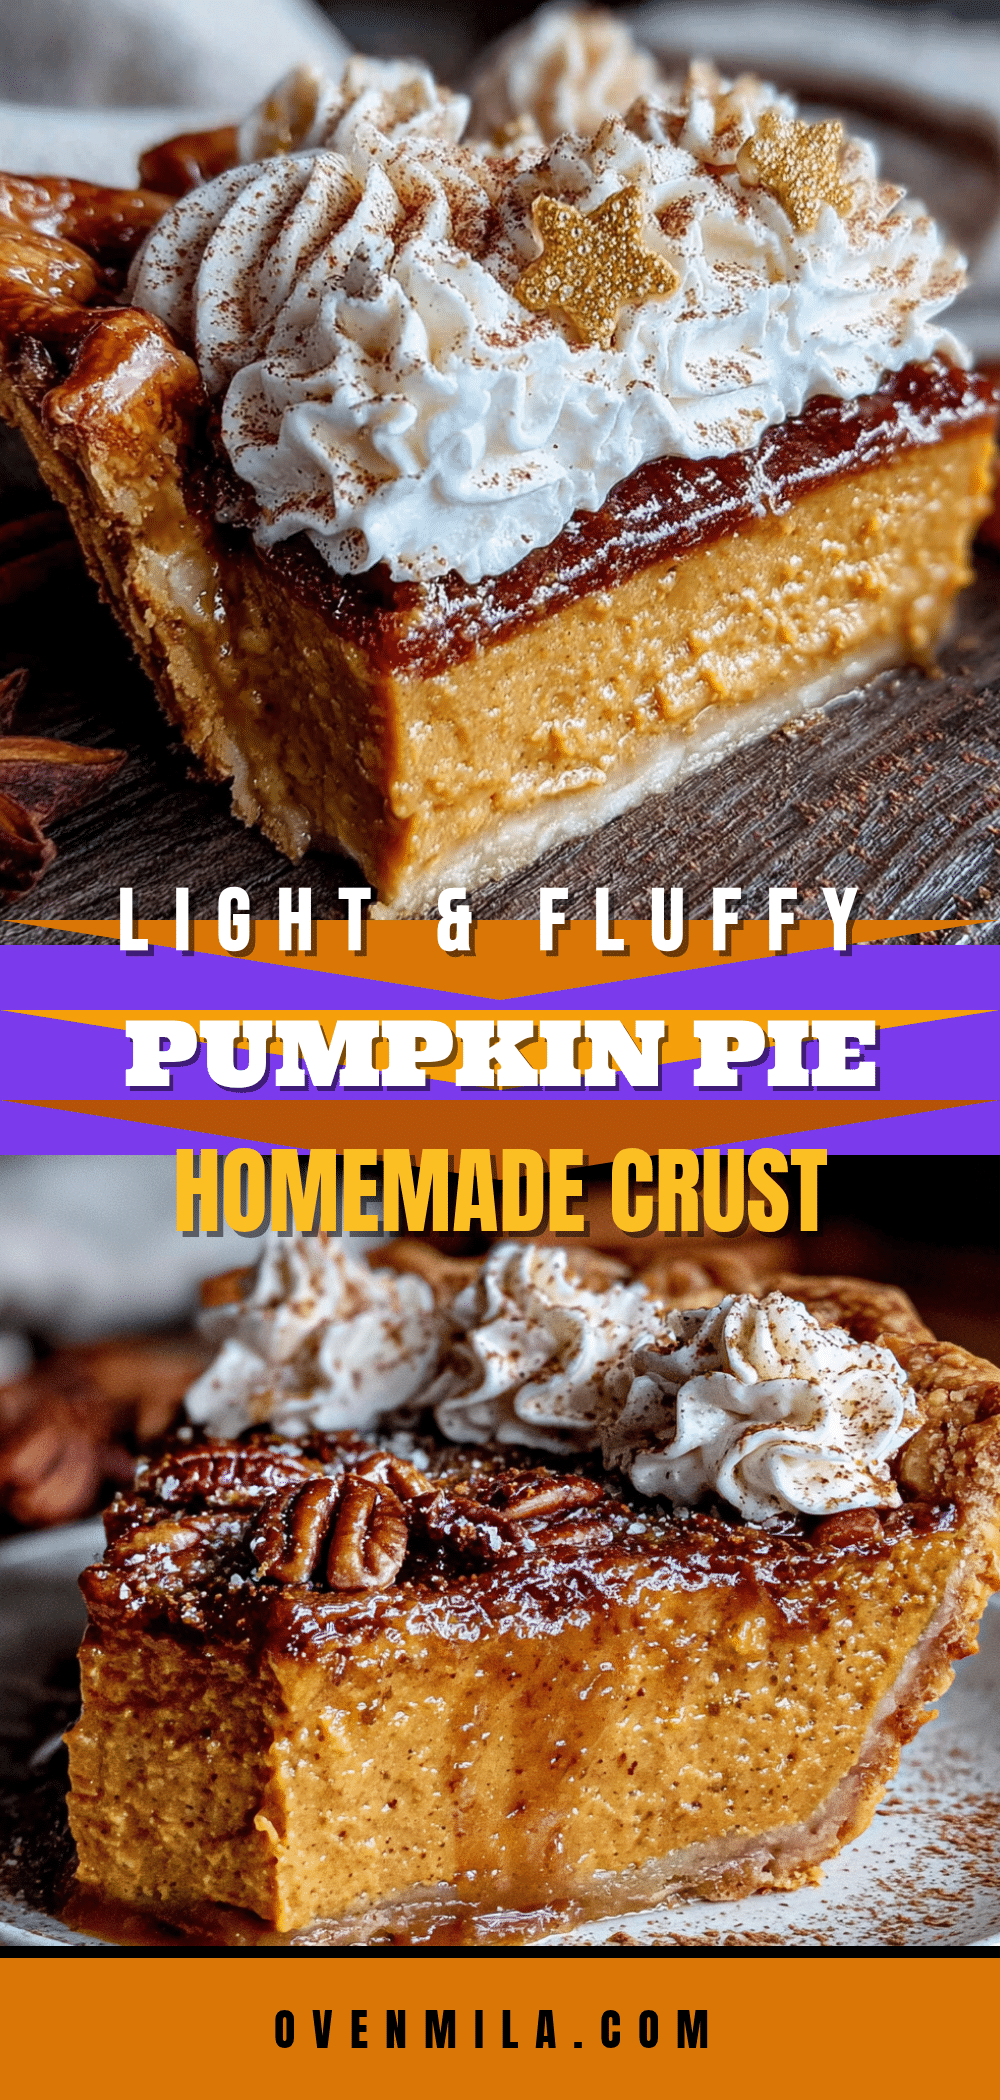
Light & Fluffy Pumpkin Pie from Scratch with Homemade Crust
This light and fluffy pumpkin pie features a homemade crust and a mousse-like filling that’s airy and not heavy. It’s the perfect fall dessert, made with simple, whole ingredients and a special technique of whipping egg whites separately for an ethereal texture.
- Prep Time: 1 hour 30 minutes
- Cook Time: 1 hour 5 minutes
- Total Time: 2 hours 35 minutes
- Yield: 8 servings 1x
- Category: Dessert
- Cuisine: American
Ingredients
- 1 ¼ cups (150g) all-purpose flour
- ½ cup (113g) unsalted butter, cold and cut into small cubes
- 3 to 4 tablespoons (45-60ml) ice water
- ½ teaspoon salt
- 1 teaspoon sugar
- 1 ½ cups (about 340g) pumpkin purée
- 3 large eggs, separated
- ½ cup (100g) packed brown sugar
- ¼ cup (50g) granulated sugar
- ½ cup (120ml) heavy cream
- ¼ cup (60ml) milk
- 2 teaspoons pumpkin pie spice
- 1 teaspoon vanilla extract
- ¼ teaspoon salt
Instructions
- Make the crust: In a large bowl, whisk together flour, salt, and sugar. Add cold butter cubes and use a pastry cutter or fingers to work butter into flour until it resembles coarse meal with some pea-sized butter pieces. Drizzle in 3 tablespoons ice water and stir with a fork until dough just comes together. Add more water if needed. Form dough into a disk, wrap in plastic wrap, and refrigerate for at least 1 hour.
- Blind bake the crust: Preheat oven to 375°F (190°C). On a lightly floured surface, roll dough to a 12-inch circle, about ⅛-inch thick. Transfer to a 9-inch pie dish, pressing into bottom and sides. Trim and crimp edges. Line with parchment paper and fill with pie weights or dried beans. Bake for 15 minutes, then remove parchment and weights. Bake for another 5-7 minutes until bottom is dry and lightly golden. Set aside to cool slightly.
- Prepare the filling base: Lower oven temperature to 350°F (175°C). In a large bowl, whisk together pumpkin purée, egg yolks, brown sugar, granulated sugar, heavy cream, milk, pumpkin pie spice, vanilla extract, and salt until smooth.
- Whip the egg whites: In a separate clean bowl, beat egg whites with an electric mixer on medium speed until soft peaks form, about 2-3 minutes.
- Fold everything together: Take about a third of the whipped egg whites and gently fold into the pumpkin mixture. Add remaining egg whites and fold gently with a rubber spatula until no streaks remain, keeping as much air as possible.
- Bake the pie: Pour filling into pre-baked crust and smooth the top. Bake for 45-55 minutes, until edges are set but center still jiggles slightly. A knife inserted near center should come out mostly clean. Cool completely on a wire rack for 2-3 hours.
Notes
For best results, use room temperature eggs. Cold eggs won’t whip up well. If you forget, place them in a bowl of warm water for 5 minutes. Don’t skip blind baking the crust to avoid a soggy bottom. Fold the egg whites gently to keep the filling airy. Cool the pie completely before slicing to allow the filling to set properly.
Nutrition
- Serving Size: 1 slice
- Calories: 280
- Sugar: 18
- Sodium: 220
- Fat: 14
- Saturated Fat: 8
- Carbohydrates: 35
- Fiber: 2
- Protein: 5
Keywords: pumpkin pie, light pumpkin pie, fluffy pumpkin pie, homemade crust, fall dessert, Thanksgiving pie, from scratch


