There used to be a little bakery called Sweet Laurel on a side street in Portland that made the most incredible blondies. They weren’t your typical heavy, fudgy squares—they were light, almost airy, with this perfect chewy edge and a crumb that practically dissolved on your tongue. When Sweet Laurel closed its doors three summers ago, I honestly felt a little lost. I mean, I’d stop in every Friday after my yoga class, grab one blondie and an iced coffee, and just sit there watching the rain. It was my thing.
After maybe a dozen attempts—some too dense, some too cakey, one that I accidentally forgot the sugar in (don’t ask)—I finally cracked it. The secret? A little less butter than you’d think, and a technique I picked up from an old baking forum. And then, because it’s October and I can’t help myself, I threw in a bag of candy corn and some white chocolate chips. Let me tell you, the combination of that light, buttery blondie base with the chewy, sugary candy corn and creamy white chocolate is just magic. It’s like fall in a square, but without that heavy feeling afterward.
You know that feeling when you bite into something and it just tastes like a happy memory? That’s these blondies. I’ve brought them to pumpkin carving parties and book club, and they always vanish before anything else. Maybe you’ve been there—looking for that one treat that feels festive but doesn’t weigh you down. Well, this is it. This is the one I kept making until I got it right.
Why You’ll Love This Recipe
These Light & Tasty Candy Corn Blondies aren’t just another fall dessert. They’re the result of some serious trial and error in my kitchen, and I’m pretty proud of how they turned out. Here’s why they’re going to become your new go-to for the season:
- Quick & Easy: From start to finish, you’re looking at about 35 minutes. That’s mixing, baking, and cooling enough to cut. Perfect for when you need a last-minute treat for a school bake sale or a cozy night in.
- Simple Ingredients: No weird extracts or hard-to-find flours. You probably have most of this in your pantry right now. The candy corn and white chocolate chips are the only special trip you might need to make.
- Perfect for Fall Gatherings: These blondies scream Halloween and Thanksgiving. They’re great for parties, potlucks, or just a fun weekend baking project with the kids.
- Crowd-Pleaser: I’ve yet to meet someone who doesn’t love these. The texture is spot-on—chewy edges, tender center—and the mix of candy corn and white chocolate is just plain fun.
- Unbelievably Delicious: The key here is the light texture. Most blondies are so heavy they sit in your stomach like a brick. These are different. They’re satisfying without being overwhelming, which means you can easily have two. Or three. No judgment.
What makes this recipe different from all the other candy corn blondies out there? It’s the technique. By reducing the butter and using a specific mixing method, you get a blondie that’s sturdy enough to hold the mix-ins but light enough to feel like a treat you can feel good about. I tested this at least five times to get the balance right, and I think you’ll agree it was worth the effort.
This isn’t just another recipe—it’s the kind that makes you close your eyes after the first bite. It’s comfort food reimagined: lighter, faster, but with the same soul-soothing satisfaction. Perfect for impressing guests without stress, or turning a simple Tuesday into something memorable.
What Ingredients You Will Need
This recipe uses simple, wholesome ingredients to deliver that light, tender texture and all the festive flavor. Most of these are pantry staples, so you’re probably already halfway there.
- Unsalted butter, melted and slightly cooled (½ cup, 1 stick) — The reduced amount here is the secret to the lighter texture. I use Kerrygold because the flavor is just better.
- Light brown sugar, packed (¾ cup) — This gives the blondies that subtle molasses flavor and helps with the chewy texture. Don’t use dark brown sugar; it’s too intense here.
- Granulated sugar (¼ cup) — Just enough to add sweetness without making things heavy.
- Large egg, room temperature (1) — Room temperature is important! It mixes in more evenly and creates a better crumb. If you forgot to take it out, pop it in a bowl of warm water for 5 minutes.
- Egg yolk (1) — This is my trick for extra tenderness without adding more butter. The extra yolk gives richness and structure.
- Vanilla extract (1½ teaspoons) — Pure vanilla, not imitation. It makes a difference, I promise. I’m a fan of Nielsen-Massey.
- All-purpose flour (1 cup plus 2 tablespoons) — Spoon and level it! Scooping directly from the bag packs in too much flour and makes dense blondies.
- Baking powder (½ teaspoon) — Helps them rise just a little for that light texture.
- Salt (¼ teaspoon) — Balances the sweetness. I use fine sea salt.
- Candy corn (¾ cup) — The star of the show! Use fresh candy corn for the best texture. Stale candy corn gets hard and chewy in a bad way.
- White chocolate chips (½ cup) — I prefer Ghirardelli white chocolate chips. They melt into creamy pockets that pair perfectly with the candy corn. If you’re dairy-free, there are good options from Enjoy Life.
A quick note on candy corn: I know some people love to hate it, but in these blondies, it softens and becomes this lovely, chewy little surprise. If you’re really not a fan, you can swap in butterscotch chips or chopped dried apricots for a similar color and chew.
Equipment Needed
You don’t need a fancy bakery setup for these. Just a few basics that you probably already have in your kitchen.
- 8×8-inch baking pan — Glass or metal works fine. I use a metal one because it gives slightly crispier edges. If you use glass, you might need to add a couple of minutes to the bake time.
- Parchment paper — This is non-negotiable for me. It makes lifting the blondies out so easy, and cleanup is a breeze. Leave an overhang on two sides for handles.
- Mixing bowls — One medium for the wet ingredients, one small for the dry. I use glass bowls because they don’t hold onto smells.
- Whisk — For combining the wet ingredients. A fork works in a pinch, but a whisk is better for getting that egg mixture smooth.
- Rubber spatula — For folding in the dry ingredients and mix-ins. It helps you get every bit of batter without overmixing.
- Measuring cups and spoons — Dry measuring cups for the flour and sugars, liquid measuring cup for the melted butter. It matters, honestly.
- Cooling rack — Lets air circulate around the pan so the blondies cool evenly. If you don’t have one, you can use the oven rack (just make sure it’s clean).
My first batch of these, I used a 9×9 pan because I thought it wouldn’t matter. Spoiler: it mattered. They came out paper-thin and overbaked in like 15 minutes. Stick with the 8×8 for that perfect thick-but-not-too-thick blondie.
Preparation Method
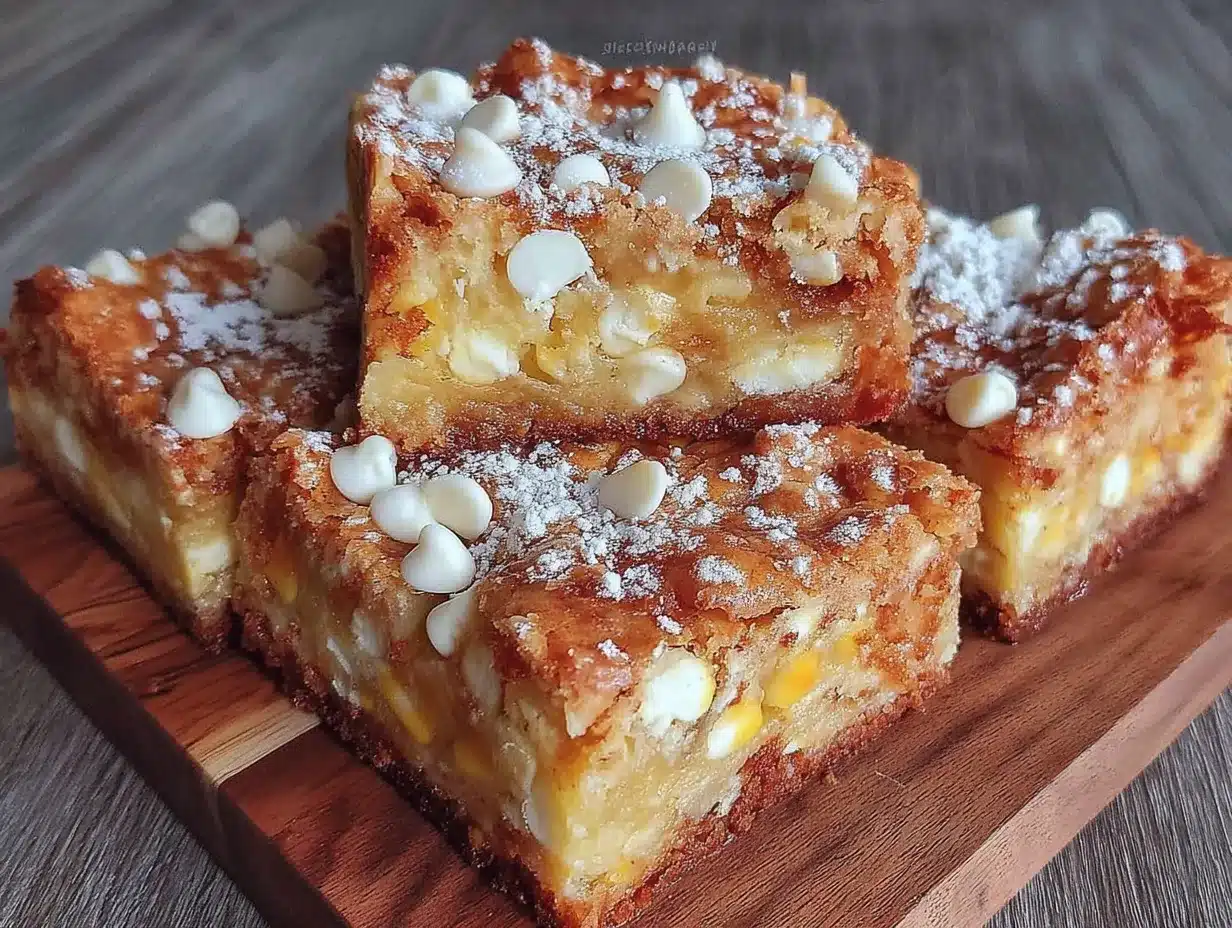
Alright, let’s get baking. This is straightforward, but I’ll walk you through every step with all the little details I’ve learned along the way.
- Preheat your oven to 350°F (175°C). Line your 8×8-inch baking pan with parchment paper, leaving an overhang on two opposite sides. This creates handles so you can lift the whole blondie block out later. Lightly grease the parchment with a little butter or non-stick spray, just to be safe.
- In a medium bowl, whisk together the melted butter, brown sugar, and granulated sugar. Make sure your butter is melted but not hot—you don’t want to scramble the egg later. Whisk until it’s smooth and well combined, about 30 seconds. The mixture will look a bit grainy, and that’s totally fine.
- Add the egg, egg yolk, and vanilla extract. Whisk vigorously for about a minute until the mixture is pale, smooth, and slightly thickened. This is where the lightness starts to happen. You want it to look like a thin caramel sauce. If you see any streaks of egg, keep whisking until it’s uniform.
- In a small bowl, whisk together the flour, baking powder, and salt. This ensures the baking powder is evenly distributed. No one wants a pocket of baking powder in their blondie.
- Add the dry ingredients to the wet ingredients. Use a rubber spatula to fold them together gently. Stir just until you no longer see streaks of flour. Overmixing at this stage develops gluten and makes tough blondies. Stop as soon as it comes together—a few lumps are okay.
- Fold in the candy corn and white chocolate chips. Reserve about 2 tablespoons of each to press on top later. Gently fold until they’re evenly distributed. The batter will be thick and a little sticky, which is exactly what you want.
- Spread the batter into the prepared pan. Use your spatula to push it into an even layer. It’ll be thick, so take your time. Don’t be tempted to add more butter or milk to thin it out—this is the right consistency.
- Press the reserved candy corn and white chocolate chips on top. This makes the blondies look gorgeous and ensures every bite has a little something extra on the surface. Gently push them into the batter so they stay put during baking.
- Bake for 20-24 minutes. Start checking at 20 minutes. The edges should be golden brown and pulling away from the sides of the pan slightly. The center will look just set and might still jiggle a tiny bit. A toothpick inserted in the center should come out with a few moist crumbs, not wet batter. Remember, they’ll continue to bake as they cool in the pan.
- Let the blondies cool in the pan on a wire rack for at least 20 minutes. Then use the parchment handles to lift them out and transfer to the rack to cool completely. This step is crucial—if you try to cut them while they’re warm, they’ll crumble. I learned this the hard way after serving what looked like blondie rubble to my neighbors.
- Once completely cool, cut into 16 squares. Use a sharp knife and wipe it clean between cuts for neat edges. Store in an airtight container at room temperature for up to 4 days.
Cooking Tips & Techniques
I’ve made these Light & Tasty Candy Corn Blondies more times than I care to admit, and I’ve picked up a few tricks along the way. Here’s what I wish someone had told me before my first attempt.
Don’t overmix the batter. This is the number one mistake people make with blondies. Once you add the flour, mix just until it disappears. Overmixing develops gluten, and that leads to tough, rubbery blondies. You want them tender and light, not something you can bounce off the floor.
Use room temperature eggs. I know, I know, it’s annoying to wait. But cold eggs seize up the melted butter and create a lumpy batter. If you forgot to set yours out, place the egg in a bowl of warm water for 5 minutes. It works every time.
Check your candy corn for freshness. Stale candy corn is hard and dry, and it won’t soften properly during baking. Give the bag a squeeze—if it feels rock hard, get a fresh bag. Trust me on this one. I once used an old bag and ended up with crunchy bits that were not pleasant.
Watch the bake time carefully. Ovens vary, and these blondies go from perfectly done to overbaked fast. Start checking at 20 minutes. The edges should be golden, and the center should look set but still soft. Remember, they’ll continue cooking from residual heat after you pull them out. Underbaked is better than overbaked here.
Let them cool completely. I know it’s tempting to cut into a warm blondie, but patience pays off. Warm blondies are fragile and will fall apart. Give them the full cooling time, and you’ll get clean, beautiful squares.
Line your pan properly. Parchment paper with overhangs is your best friend. It makes lifting the entire block of blondies out so easy, and it keeps your pan clean. I’ve tried the butter-and-flour method, and it’s just not worth the hassle.
Variations & Adaptations
One of the best things about this recipe is how easy it is to tweak. Here are some variations I’ve tried and loved.
Gluten-Free Version: Swap the all-purpose flour for a 1:1 gluten-free baking blend. I’ve used Bob’s Red Mill and King Arthur Measure for Measure, and both worked great. Just be careful not to overmix, as gluten-free batters can get gummy.
Dairy-Free Version: Use a plant-based butter stick (like Miyoko’s or Country Crock plant butter) and dairy-free white chocolate chips. Enjoy Life makes a good one. The texture will be slightly different, but still delicious.
Halloween Mix-In Swap: Not a fan of candy corn? No problem. Use chopped Reese’s Pieces, M&M’s, or even chopped peanut butter cups. The blondie base is so versatile that you can really go wild.
Fall Spice Twist: Add ½ teaspoon of cinnamon and ¼ teaspoon of nutmeg to the dry ingredients. It gives the blondies a warm, cozy flavor that pairs beautifully with the white chocolate. I did this for a Thanksgiving potluck and got asked for the recipe three times.
Nutty Addition: Fold in ½ cup of toasted pecans or walnuts along with the candy corn. The crunch adds a nice contrast to the chewy blondie. Toast the nuts first at 350°F for 5-7 minutes to bring out their flavor.
Chocolate Drizzle: Once the blondies are cool, drizzle melted dark chocolate over the top. It looks fancy and adds a little bitterness to balance the sweetness. Just melt ¼ cup of dark chocolate chips with 1 teaspoon of coconut oil and drizzle with a fork.
Serving & Storage Suggestions
These Light & Tasty Candy Corn Blondies are perfect just as they are, but here are a few ways to make them even more special.
Serving Temperature: Room temperature is ideal. The texture is at its best—chewy, tender, and not too firm. If you’ve stored them in the fridge, let them sit out for about 15 minutes before serving.
Presentation Ideas: Stack them on a pretty plate or arrange them on a tiered stand for a Halloween party. A dusting of powdered sugar makes them look extra festive. For a fun touch, serve them with a scoop of vanilla ice cream and a drizzle of caramel sauce.
Perfect Pairings: These blondies are amazing with a cup of hot apple cider, a pumpkin spice latte, or a cold glass of milk. If you’re serving them at a party, set out some apple slices and sharp cheddar cheese for a sweet-and-savory contrast.
Storage Instructions: Store in an airtight container at room temperature for up to 4 days. Layer them with parchment paper if stacking to prevent sticking. Do not refrigerate—the fridge dries them out and makes the candy corn hard.
Freezing Instructions: These freeze beautifully! Wrap individual blondies tightly in plastic wrap, then place them in a freezer bag. They’ll keep for up to 3 months. To thaw, just leave them at room temperature for about 30 minutes. You can also pop a frozen blondie in the microwave for 10-15 seconds for a warm treat.
Flavor Development: Honestly, these blondies are even better the next day. The flavors meld together overnight, and the texture becomes even more tender. If you can resist eating them all on day one, you’re in for a treat on day two.
Nutritional Information & Benefits
While these are definitely a treat, they’re lighter than traditional blondies, and that’s worth celebrating. Here’s a rough breakdown per blondie (based on 16 servings):
| Nutrient | Amount per Blondie |
|---|---|
| Calories | 185 |
| Total Fat | 8g |
| Saturated Fat | 5g |
| Cholesterol | 35mg |
| Sodium | 95mg |
| Total Carbohydrates | 27g |
| Dietary Fiber | 0g |
| Sugars | 19g |
| Protein | 2g |
The reduced butter and careful sugar balance keep these from being overly indulgent. Plus, the egg yolk adds a little protein and richness without extra fat. If you’re looking for a treat that fits into a balanced lifestyle, these are a great option. They satisfy that sweet tooth without derailing your day.
For those watching their sugar intake, you can reduce the candy corn to ½ cup or swap in sugar-free white chocolate chips. The texture will be slightly different, but the blondie base itself is forgiving.
Potential allergens: Contains wheat, dairy, and eggs. Not suitable for vegans as written, but the dairy-free version works well.
Conclusion
These Light & Tasty Candy Corn Blondies are everything I wanted them to be—festive, delicious, and light enough to enjoy without guilt. They bring back that feeling of sitting in Sweet Laurel with my iced coffee, but now I can have that experience anytime I want. And honestly, that’s the best kind of recipe to have in your back pocket.
I hope you give these a try and make them your own. Maybe you’ll add a little cinnamon, or swap in your favorite fall candy. That’s the beauty of a good blondie—it’s a blank canvas for whatever you’re craving. I’d love to hear how yours turn out. Drop a comment below and let me know what variations you tried, or tag me in your photos on social media. Happy baking, friends!
Frequently Asked Questions
Can I use salted butter instead of unsalted?
Yes, you can. Just reduce the added salt to a pinch or omit it entirely. Salted butter has about ¼ teaspoon of salt per stick, so you’ll still have enough to balance the sweetness.
Why did my blondies turn out dense?
This usually happens from overmixing the batter or using too much flour. Make sure you’re spooning and leveling your flour, and stop mixing as soon as the dry ingredients are incorporated. Also, check that your baking powder is fresh—it loses potency over time.
Can I use a different pan size?
An 8×8 pan is ideal for the right thickness. If you use a 9×9 pan, the blondies will be thinner and bake faster, so start checking at 15 minutes. A 9×13 pan will give you very thin blondies, so I don’t recommend it.
How do I keep candy corn from sinking to the bottom?
Tossing the candy corn in a tablespoon of flour before folding it into the batter helps prevent sinking. Also, make sure your batter is thick enough—if it’s too thin, the mix-ins will fall. Pressing some on top before baking guarantees you’ll have visible candy corn in every bite.
Can I make these ahead of time?
Absolutely! These blondies actually taste better the next day. Bake them up to 2 days in advance and store them in an airtight container at room temperature. You can also freeze them for up to 3 months. Just thaw at room temperature before serving.
Pin This Recipe!
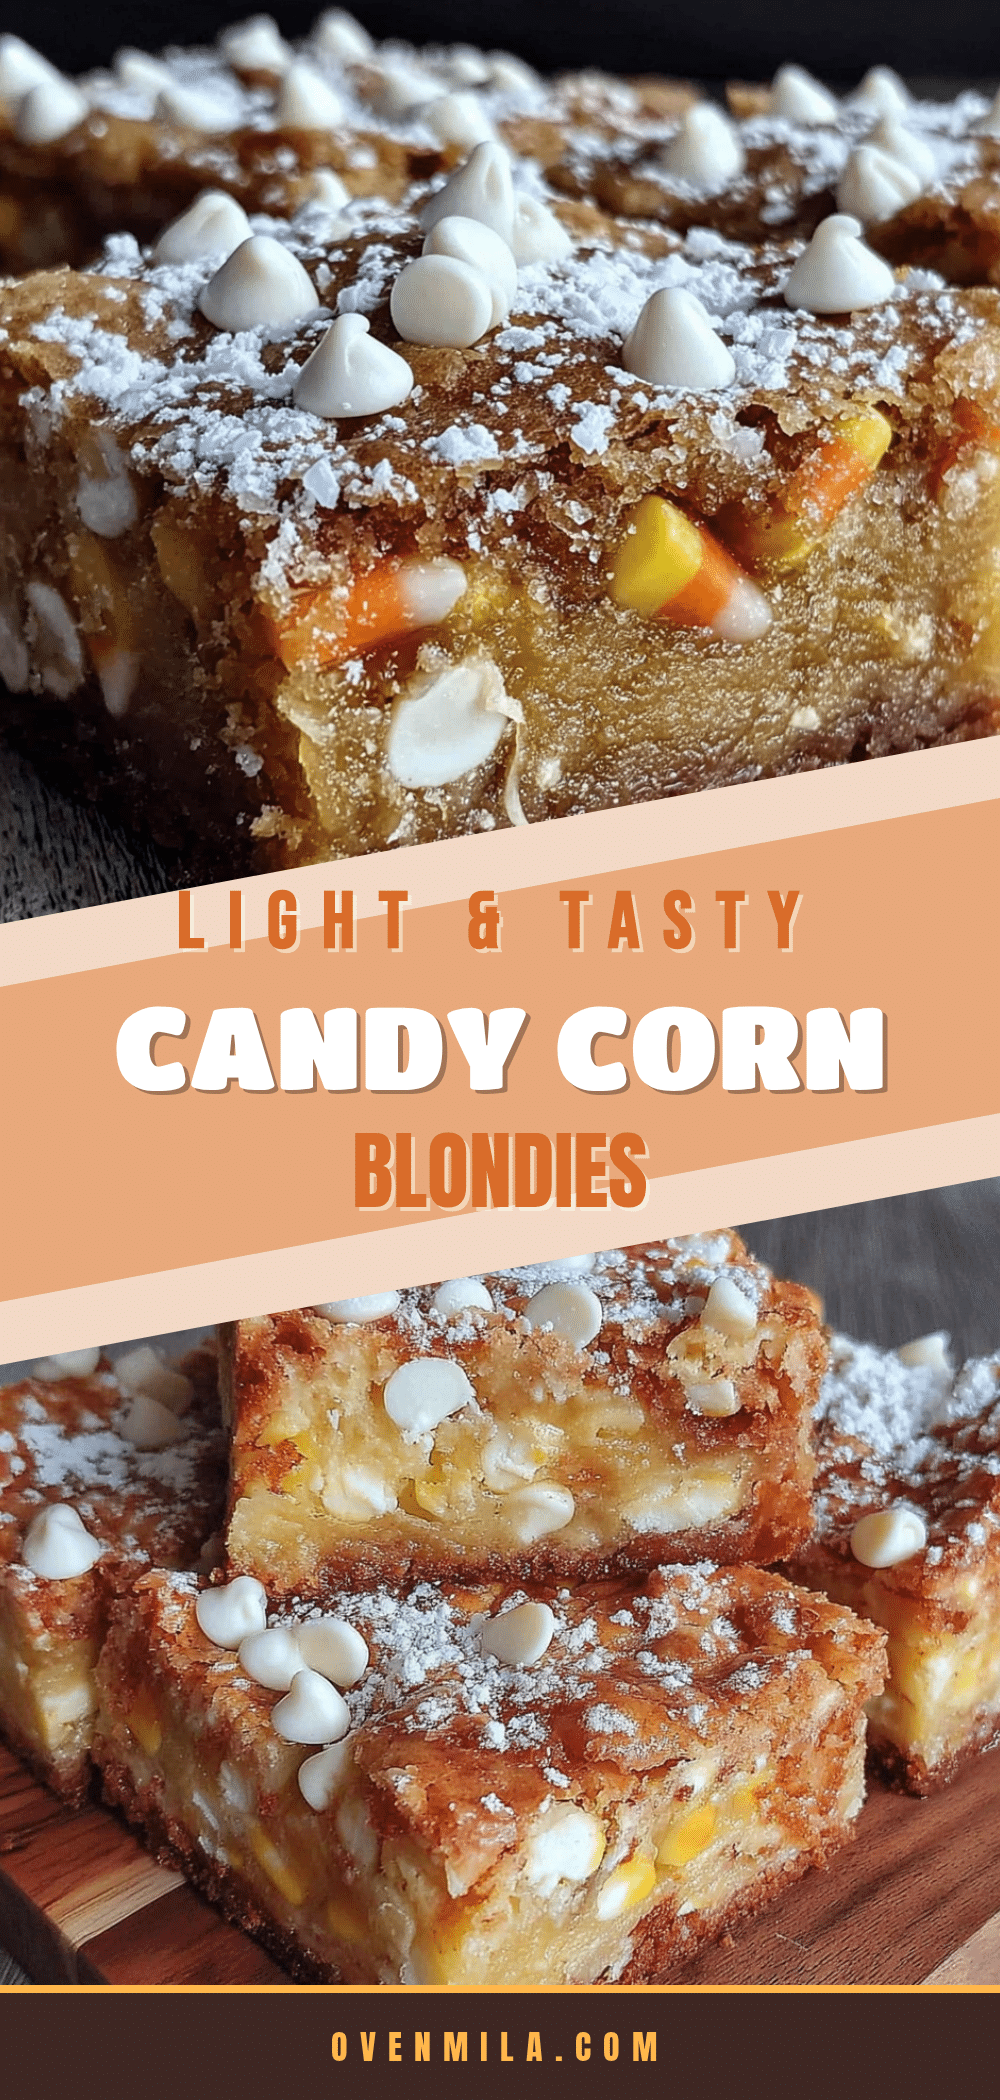
Light & Tasty Candy Corn Blondies: Easy White Chocolate Chip Treat
These light, airy blondies combine a buttery, chewy base with candy corn and white chocolate chips for a festive fall treat that’s quick and easy to make. Perfect for Halloween parties or cozy nights in, they’re satisfying without being heavy.
- Prep Time: 15 minutes
- Cook Time: 20-24 minutes
- Total Time: 35 minutes
- Yield: 16 servings 1x
- Category: Dessert
- Cuisine: American
Ingredients
- ½ cup (1 stick) unsalted butter, melted and slightly cooled
- ¾ cup light brown sugar, packed
- ¼ cup granulated sugar
- 1 large egg, room temperature
- 1 egg yolk
- 1½ teaspoons vanilla extract
- 1 cup plus 2 tablespoons all-purpose flour
- ½ teaspoon baking powder
- ¼ teaspoon salt
- ¾ cup candy corn
- ½ cup white chocolate chips
Instructions
- Preheat your oven to 350°F (175°C). Line an 8×8-inch baking pan with parchment paper, leaving an overhang on two opposite sides. Lightly grease the parchment with butter or non-stick spray.
- In a medium bowl, whisk together the melted butter, brown sugar, and granulated sugar until smooth and well combined, about 30 seconds.
- Add the egg, egg yolk, and vanilla extract. Whisk vigorously for about a minute until the mixture is pale, smooth, and slightly thickened.
- In a small bowl, whisk together the flour, baking powder, and salt.
- Add the dry ingredients to the wet ingredients. Use a rubber spatula to fold them together gently until no streaks of flour remain. Do not overmix.
- Fold in the candy corn and white chocolate chips, reserving about 2 tablespoons of each to press on top later.
- Spread the batter evenly into the prepared pan. Press the reserved candy corn and white chocolate chips on top, gently pushing them into the batter.
- Bake for 20-24 minutes, until the edges are golden brown and the center is just set. A toothpick inserted in the center should come out with a few moist crumbs.
- Let the blondies cool in the pan on a wire rack for at least 20 minutes. Then use the parchment handles to lift them out and transfer to the rack to cool completely.
- Once completely cool, cut into 16 squares. Store in an airtight container at room temperature for up to 4 days.
Notes
Use room temperature eggs for best results. Don’t overmix the batter to keep blondies tender. Check candy corn for freshness; stale candy corn won’t soften properly. Let blondies cool completely before cutting to avoid crumbling. For gluten-free, use a 1:1 gluten-free baking blend. For dairy-free, use plant-based butter and dairy-free white chocolate chips.
Nutrition
- Serving Size: 1 blondie
- Calories: 185
- Sugar: 19
- Sodium: 95
- Fat: 8
- Saturated Fat: 5
- Carbohydrates: 27
- Protein: 2
Keywords: candy corn blondies, white chocolate chip blondies, fall dessert, Halloween treats, easy blondie recipe, light blondies


