I was standing in line at the post office—a Tuesday, just before noon—when the man in front of me turned around and said, “You look like someone who appreciates a good cheesecake.” He was holding a small, beat-up tin box tied with kitchen twine. I blinked at him, honestly a little startled. I mean, I was holding a package of my own, but I certainly didn’t look like a cheesecake connoisseur. I was wearing sweatpants and a coat that had seen better days. But there he was, this older gentleman with flour dusted on his sleeve, telling me about his wife’s “secret recipe” for a light eggnog cheesecake with a gingersnap crust.
Turns out, his wife had been a home economics teacher in the 1970s, and she’d spent years perfecting a holiday dessert that didn’t leave you feeling like you’d swallowed a brick. She passed away a few years back, he said, but he still made her cheesecake every December. “It’s the only thing I know how to bake,” he admitted with a shrug. He handed me the tin box—it was the recipe, handwritten on index cards, stained with vanilla extract and what looked like a decades-old eggnog spill. I tried to refuse, but he insisted. “She’d want someone to keep making it,” he said. “And you look like you’d actually use it.”
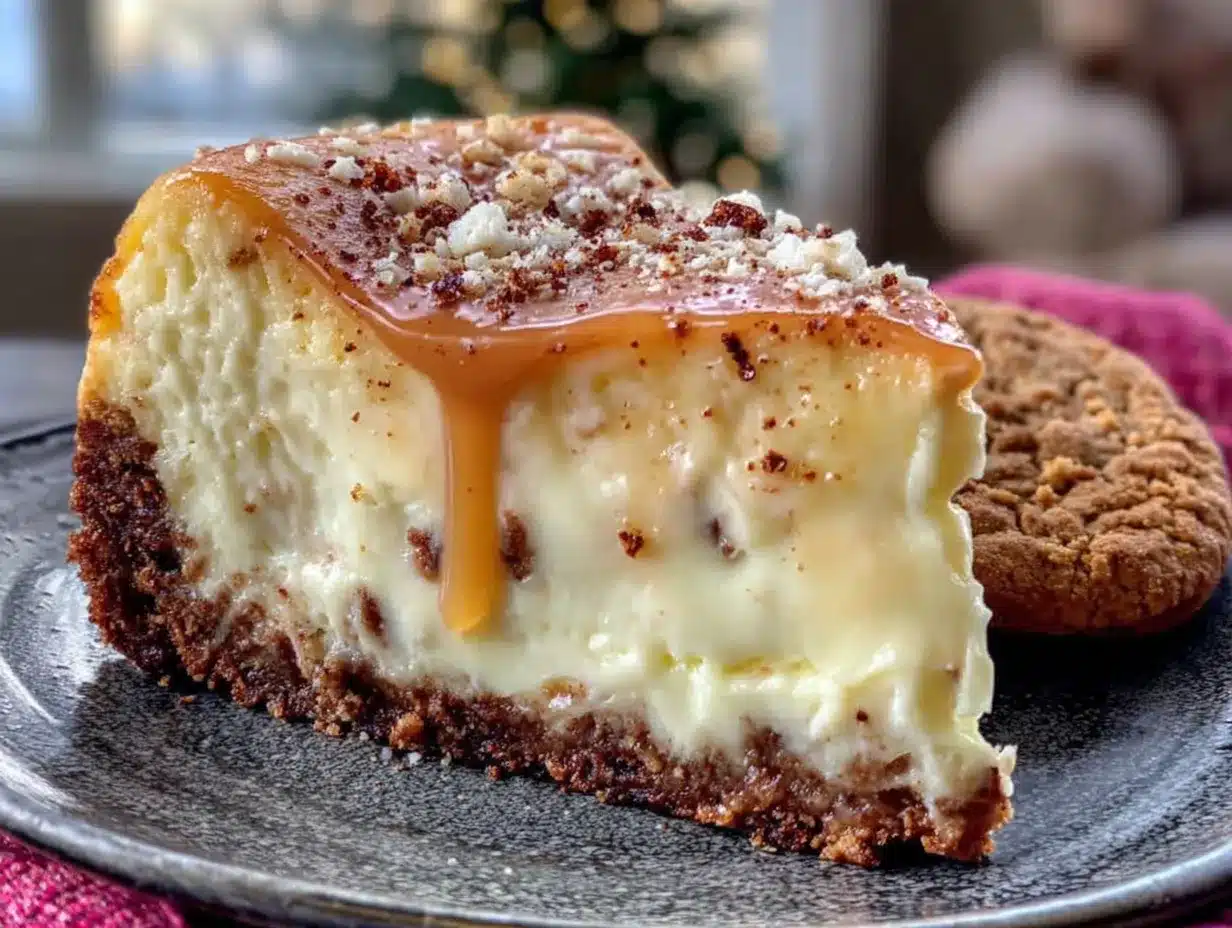
So there I was, standing in the post office lobby, holding a stranger’s family heirloom. I thanked him, tucked the tin under my arm, and honestly, I almost forgot about it for a week. But then December hit, and I was craving something festive but not heavy. I remembered that tin box. I pulled out the cards, squinted at the faded handwriting, and got to work. The first attempt was a disaster—I overmixed the batter and it cracked right down the middle. But the second time? Let me tell you, it was magic. That light, creamy texture with just a whisper of nutmeg and bourbon, all sitting on that crunchy, spiced gingersnap crust. It was like the holidays in a slice, but without the food coma.
Maybe you’ve been there—looking for a dessert that feels special but doesn’t weigh you down. Or maybe you just love eggnog and cheesecake and the idea of combining them sounds too good to pass up. Either way, this recipe is the one I keep coming back to. It’s the one I make for Christmas Eve dinner, for New Year’s brunch, and honestly, sometimes just for a random Tuesday in January when I need a little holiday cheer. That man at the post office was right. This recipe deserves to be shared.
Why You’ll Love This Recipe
This isn’t just another holiday cheesecake. It’s the result of decades of trial and error from a home economics teacher who knew her way around a kitchen. I’ve tested it myself—multiple times—and I can tell you with confidence that this version hits all the right notes.
- Light & Creamy: Unlike traditional cheesecakes that can feel like a brick of cream cheese, this one uses a clever combination of reduced-fat cream cheese and Greek yogurt. The texture is silky, airy, and absolutely dreamy.
- Simple Ingredients: No hunting down obscure ingredients at specialty stores. You probably have most of these in your pantry right now—eggnog, cream cheese, eggs, sugar, and gingersnaps.
- Perfect for Holiday Gatherings: Whether it’s Christmas dinner, a cookie exchange, or just a cozy night in, this cheesecake fits right in. It’s festive without being fussy.
- Crowd-Pleaser: I’ve served this to everyone from my picky aunt who “doesn’t do dairy” to my cousin’s kids who only eat dessert. It gets rave reviews every single time.
- Unbelievably Delicious: The combination of the spiced gingersnap crust with the light, eggnog-infused filling is next-level comfort food. It’s the kind of dessert that makes you close your eyes after the first bite.
What makes this recipe different from all the other eggnog cheesecakes out there? It’s the technique. Blending the cream cheese with Greek yogurt creates a lighter texture that doesn’t sacrifice richness. And the crust? It’s not just crushed gingersnaps—it’s a carefully balanced mixture of butter, sugar, and a pinch of cinnamon that complements the filling perfectly. This isn’t just another version. It’s the best version.
This recipe is comfort food reimagined—healthier, faster to come together than you’d think, but with the same soul-soothing satisfaction. It’s perfect for impressing guests without stress, or turning a simple holiday meal into something truly memorable.
What Ingredients You Will Need
This recipe uses simple, wholesome ingredients to deliver that classic holiday flavor without the heavy feeling. Most of these are pantry staples during the holiday season, and the substitutions are easy if you need them.
For the Gingersnap Crust
- 1 ½ cups crushed gingersnap cookies (about 30 cookies) — I prefer the Anna’s brand for their consistent spice level, but any crisp gingersnap works. You want a fine, sandy texture, so a food processor is your best friend here.
- ¼ cup granulated sugar — Adds a touch of sweetness to balance the spice of the cookies.
- ½ teaspoon ground cinnamon — This enhances the ginger flavor without overpowering it. Trust me on this one.
- 5 tablespoons unsalted butter, melted — Use the real stuff here. It binds the crust together and adds richness.
For the Light Cheesecake Filling
- 16 ounces reduced-fat cream cheese, softened — I use Philadelphia because it’s consistently smooth. Let it sit out for at least 30 minutes before mixing—cold cream cheese leads to lumps.
- ¾ cup granulated sugar — Just enough to sweeten without masking the eggnog flavor.
- 2 tablespoons all-purpose flour — This helps stabilize the filling and prevents cracking.
- 1 cup plain Greek yogurt (full-fat or 2%) — This is the secret ingredient for lightness. It adds tang and creaminess without the extra calories of more cream cheese. I like Fage for its thick texture.
- 3 large eggs, room temperature — Room temperature eggs incorporate more smoothly into the batter. If you forget to take them out early, place them in a bowl of warm water for 5 minutes.
- 1 cup eggnog — Use a good-quality eggnog. I’ve tried this with both store-bought and homemade, and honestly, a brand like Southern Comfort or Hood works beautifully. Avoid the light versions—they have too much water content and can make the cheesecake runny.
- 1 teaspoon vanilla extract — Pure vanilla, not imitation. It makes a difference.
- ½ teaspoon ground nutmeg — Freshly grated if you have it, but pre-ground works fine. This is the signature spice of eggnog, so don’t skip it.
- ¼ teaspoon ground cinnamon — A warm background note.
- 2 tablespoons bourbon (optional) — This is the “secret” from that index card. It adds depth without making the cheesecake boozy. You can leave it out or substitute with 1 teaspoon of rum extract.
For the Topping (Optional but Recommended)
- ½ cup heavy cream — For whipping into a light, fluffy topping.
- 1 tablespoon powdered sugar — Sweetens the cream without making it grainy.
- ½ teaspoon vanilla extract — For flavor.
- Freshly grated nutmeg — For garnish.
- Crushed gingersnaps — For a little crunch on top.
Substitution Notes: For a gluten-free version, use gluten-free gingersnaps (I’ve had success with Mi-Del brand). For a dairy-free option, use dairy-free cream cheese and coconut yogurt, and substitute the butter with coconut oil. The texture will be slightly different, but still delicious. If you don’t have bourbon, just leave it out—the cheesecake will still be fantastic.
Equipment Needed
You don’t need a professional bakery setup for this recipe, but a few key tools will make your life easier.
- 9-inch springform pan — This is non-negotiable for cheesecake. The removable sides make it easy to release the cake without destroying it. I’ve had my Williams Sonoma one for years, and it’s never let me down.
- Food processor — For crushing the gingersnaps into a fine crumb. You can also use a rolling pin and a zip-top bag, but it takes more elbow grease and the texture won’t be as even.
- Electric hand mixer or stand mixer — You need this to get the cream cheese smooth and fluffy. A whisk won’t cut it here—you’ll end up with lumps and sore arms.
- Large mixing bowls — At least two: one for the crust mixture and one for the filling.
- Measuring cups and spoons — Accurate measurements are key for baking.
- Rubber spatula — For scraping down the sides of the bowl and folding in ingredients gently.
- Aluminum foil — For wrapping the bottom of the springform pan to prevent water from seeping in during the water bath.
- Large roasting pan — For the water bath. It needs to be big enough to hold your springform pan with room for water around the sides.
- Cooling rack — For cooling the cheesecake gradually.
Budget-Friendly Alternatives: If you don’t have a food processor, place the gingersnaps in a zip-top bag and crush them with a rolling pin or even a heavy skillet. It’s a bit of a workout, but it works. No springform pan? You can use a deep-dish pie plate, but you won’t get the same clean slices. I’d recommend investing in a springform pan—they’re not expensive and they open up a world of cheesecake possibilities.
Preparation Method
This recipe takes about 30 minutes of active prep time, plus about an hour of baking and at least 4 hours of chilling. Plan ahead, and you’ll be rewarded with a stunning dessert.
Step 1: Prepare the Crust
- Preheat your oven to 350°F (175°C).
- In a food processor, pulse the gingersnap cookies until they become fine crumbs. You should have about 1 ½ cups.
- In a medium bowl, combine the gingersnap crumbs, ¼ cup sugar, and ½ teaspoon cinnamon. Stir to combine.
- Pour the 5 tablespoons of melted butter over the crumb mixture and stir with a fork until all the crumbs are moistened. The mixture should look like wet sand.
- Press the mixture firmly into the bottom of a 9-inch springform pan. Use the bottom of a measuring cup or a glass to press it down evenly. Don’t forget to go slightly up the sides—about ½ inch—to create a little lip for the filling.
- Bake the crust for 10 minutes. It should be fragrant and just starting to brown at the edges. Set it aside to cool while you make the filling.
Step 2: Prepare the Filling
- Reduce the oven temperature to 325°F (160°C).
- In a large mixing bowl, beat the softened cream cheese with an electric mixer on medium speed until smooth and creamy—about 2 minutes. Scrape down the sides and bottom of the bowl with a spatula.
- Add the ¾ cup sugar and 2 tablespoons flour, and beat until combined, about 1 minute. Scrape the bowl again.
- Add the Greek yogurt and beat on low speed until just combined. Don’t overmix here—you don’t want to incorporate too much air.
- Add the eggs one at a time, beating on low speed after each addition until just combined. Overmixing at this stage can cause the cheesecake to crack.
- Add the eggnog, vanilla extract, nutmeg, cinnamon, and bourbon (if using). Beat on low speed until the mixture is smooth and uniform. The batter will be thinner than traditional cheesecake batter—that’s normal.
- Give the batter a final stir with a spatula to make sure everything is incorporated from the bottom.
Step 3: Assemble and Bake
- Wrap the bottom and sides of the springform pan with a double layer of aluminum foil. This prevents water from seeping in during the water bath.
- Pour the filling into the cooled crust. It will fill the pan almost to the top—that’s okay.
- Place the springform pan in a large roasting pan. Carefully pour hot water into the roasting pan until it reaches about halfway up the sides of the springform pan. Be careful not to splash water onto the cheesecake.
- Bake at 325°F (160°C) for 55-65 minutes. The edges should be set and slightly puffed, but the center should still jiggle slightly when you gently shake the pan. It will continue to set as it cools.
- Turn off the oven and crack the oven door open. Let the cheesecake cool in the oven for 1 hour. This gradual cooling helps prevent cracking.
- Remove the cheesecake from the water bath and place it on a cooling rack. Remove the aluminum foil. Let it cool completely at room temperature—about 2 hours.
- Once cool, cover the pan with plastic wrap and refrigerate for at least 4 hours, but preferably overnight. This is crucial for the texture to set properly.
Step 4: Serve
- When ready to serve, run a thin knife around the edge of the pan to loosen the cheesecake. Release the springform clamp and remove the sides.
- If making the whipped topping, beat the heavy cream, powdered sugar, and vanilla extract in a chilled bowl until soft peaks form. Spread or pipe it over the top of the cheesecake.
- Garnish with freshly grated nutmeg and a sprinkle of crushed gingersnaps.
- Slice with a sharp knife, wiping the blade clean between cuts for neat slices.
Troubleshooting Tip: If your cheesecake cracks, don’t panic. It happens to the best of us. Just cover the crack with whipped cream or a dusting of nutmeg. No one will ever know. I’ve had to do this more times than I care to admit.
Cooking Tips & Techniques
Over the years, I’ve learned a few tricks that make this recipe foolproof. Let me share them so you don’t have to learn the hard way.
Room Temperature is Your Friend: I cannot stress this enough. Cold cream cheese and cold eggs will give you a lumpy batter that never fully smooths out. Take them out of the fridge at least 30 minutes before you start. Set a timer if you have to—I’ve forgotten and ended up with lumpy cheesecake more than once.
Don’t Overmix: When you add the eggs and eggnog, beat on low speed and stop as soon as everything is combined. Overmixing incorporates too much air, which can cause the cheesecake to puff up and then collapse, leading to cracks. I know it’s tempting to keep going until it’s perfectly smooth, but trust me—stop early.
The Water Bath is Non-Negotiable: I tried skipping the water bath once because I was in a hurry. The result was a dry, cracked mess that tasted okay but looked terrible. The water bath provides gentle, even heat that keeps the cheesecake moist and prevents the edges from cooking faster than the center. Wrap the pan well with foil, and you’ll be fine.
Patience is a Virtue: The hardest part of this recipe is waiting. You want to slice into it as soon as it comes out of the oven? Don’t. It needs to cool gradually, then chill for hours to set properly. Overnight is ideal. I’ve made the mistake of cutting it after only 3 hours, and it was a runny, sad mess. Learn from my impatience.
The Jiggle Test: When you think the cheesecake is done, gently shake the pan. The center should jiggle like a custard, not like soup. If the whole thing wobbles like Jell-O, it needs more time. If it’s completely firm and starting to brown around the edges, you’ve overbaked it. The jiggle test takes practice, but you’ll get the hang of it.
Clean Cuts: For perfect slices, use a sharp knife and wipe it clean with a damp paper towel between each cut. I keep a small bowl of warm water and a towel nearby. It makes a huge difference in presentation.
Variations & Adaptations
This recipe is wonderfully adaptable. Here are a few variations I’ve tried and loved.
Gluten-Free Version
Swap the gingersnaps for gluten-free gingersnaps (I like Mi-Del brand) and use a gluten-free all-purpose flour blend in the filling. The texture is slightly more delicate, but the flavor is spot-on. I’ve served this to gluten-intolerant friends and they couldn’t tell the difference.
Dairy-Free Version
Use dairy-free cream cheese (like Kite Hill or Violife), coconut yogurt, and a vegan butter substitute. The crust works well with coconut oil instead of butter. The filling will be a bit softer, so I recommend chilling it for a full 24 hours. It’s not exactly the same, but it’s still creamy and delicious.
Boozy Eggnog Cheesecake
If you want a more adult version, increase the bourbon to 3 tablespoons and add 1 tablespoon of dark rum. The alcohol bakes off, but the flavor lingers beautifully. I made this for a New Year’s Eve party and it was a hit—just be careful with the extra liquid, as it can make the filling slightly softer.
Pumpkin Eggnog Cheesecake
For a fall twist, substitute ½ cup of the eggnog with ½ cup of pumpkin puree. Add an extra ½ teaspoon of pumpkin pie spice. The texture will be denser, but the flavor combination is incredible. I tested this one Thanksgiving and it disappeared before the pumpkin pie.
Mini Cheesecakes
Line a muffin tin with paper liners and press the crust mixture into the bottom of each cup. Fill with the batter and bake for 18-22 minutes at 325°F (160°C). These are perfect for parties or portion control. Just reduce the chilling time to 2 hours.
Serving & Storage Suggestions
This cheesecake is best served cold, straight from the refrigerator. The texture is firm but creamy, and the flavors are more pronounced when it’s chilled.
Presentation Tips: For a stunning presentation, run a thin knife around the edge of the pan before releasing the springform. Slide the cheesecake onto a serving plate using a large spatula. Top with a generous layer of whipped cream, a dusting of nutmeg, and a few crushed gingersnaps. It looks like something from a bakery window.
Complementary Dishes: This cheesecake pairs beautifully with a cup of hot coffee or spiced tea. For a dessert spread, serve it alongside a platter of fresh fruit (pomegranate seeds and sliced pears are lovely) or a simple chocolate tart. If you’re feeling indulgent, a drizzle of caramel sauce over the top is never a bad idea.
Storage Instructions: Leftover cheesecake can be stored in the refrigerator, covered, for up to 5 days. The flavors actually deepen after a day or two—it’s even better the next day. To freeze, wrap the whole cheesecake (or individual slices) tightly in plastic wrap, then in aluminum foil. Freeze for up to 3 months. Thaw in the refrigerator overnight before serving.
Reheating Note: This cheesecake is meant to be served cold. If you prefer it slightly warmer, let a slice sit at room temperature for 15 minutes before serving. Do not microwave it—you’ll end up with a puddle of sadness.
Flavor Development: I’ve noticed that the bourbon and spice flavors become more pronounced after a day or two in the fridge. So if you’re making this for a holiday gathering, bake it two days ahead. Your future self will thank you.
Nutritional Information & Benefits
This cheesecake is lighter than traditional versions, but it’s still a dessert. Here’s the approximate nutritional breakdown per slice (based on 12 servings):
| Nutrient | Amount Per Serving |
|---|---|
| Calories | 310 |
| Total Fat | 18g |
| Saturated Fat | 10g |
| Cholesterol | 95mg |
| Sodium | 280mg |
| Total Carbohydrates | 30g |
| Dietary Fiber | 1g |
| Sugars | 22g |
| Protein | 7g |
Health Benefits of Key Ingredients: Greek yogurt adds protein and probiotics, which are great for gut health. Gingersnaps contain ginger, which has anti-inflammatory properties and can aid digestion. Eggnog provides calcium and vitamin D from the milk and eggs. And while it’s not a health food, this version has about 40% fewer calories than a traditional eggnog cheesecake.
Dietary Considerations: This recipe contains dairy, gluten, and eggs. For gluten-free and dairy-free options, see the variations section above. It’s not suitable for vegans, but you can try the dairy-free version with egg substitutes if needed.
I love that this dessert lets me enjoy a holiday classic without feeling like I need a nap afterward. It’s indulgent enough to feel special, but light enough that I don’t regret that second slice.
FAQs
Can I use low-fat cream cheese?
I don’t recommend it. Low-fat cream cheese has a higher water content, which can make the cheesecake runny and prevent it from setting properly. Reduced-fat (Neufchâtel) works well, but avoid the fat-free versions.
Why did my cheesecake crack?
Cracks happen for a few reasons: overmixing the batter, overbaking, or cooling too quickly. Make sure you’re not overbeating the eggs, use a water bath, and let the cheesecake cool gradually in the oven. But honestly, a little crack is no big deal—just cover it with whipped cream and no one will know.
Can I make this without a water bath?
You can, but I don’t recommend it. The water bath ensures even, gentle heat that prevents the edges from cooking too fast. Without it, you’re more likely to get cracks and a dry texture. If you’re determined to skip it, place a pan of hot water on the rack below the cheesecake to create steam.
How far ahead can I make this cheesecake?
You can make it up to 3 days in advance. In fact, I prefer to make it at least a day ahead because the flavors meld and deepen overnight. Just keep it covered in the refrigerator.
Can I use homemade eggnog?
Absolutely! If you’re using homemade eggnog, make sure it’s well-chilled and has a similar consistency to store-bought. Homemade eggnog can be thinner or thicker depending on the recipe, so you may need to adjust the baking time slightly. Keep an eye on it.
Conclusion
This light eggnog cheesecake with gingersnap crust is more than just a recipe—it’s a little piece of holiday history, passed from a stranger’s hands to mine, and now to yours. It’s the dessert that proves you don’t have to choose between indulgence and feeling good. It’s creamy, spiced, and just the right amount of festive.
I hope you give it a try. Maybe you’ll make it for Christmas dinner, or maybe you’ll make it for a random Tuesday when you need a little joy. Either way, I’d love to hear how it turns out. Did you add the bourbon? Did you try the pumpkin variation? Did your family fight over the last slice? Drop a comment below and let me know. And if you have a recipe story of your own—maybe one that came from an unexpected place—I’d love to hear that too.
Happy baking, friends. Here’s to finding magic in the most unexpected places—and sharing it with the people we love.
Pin This Recipe!
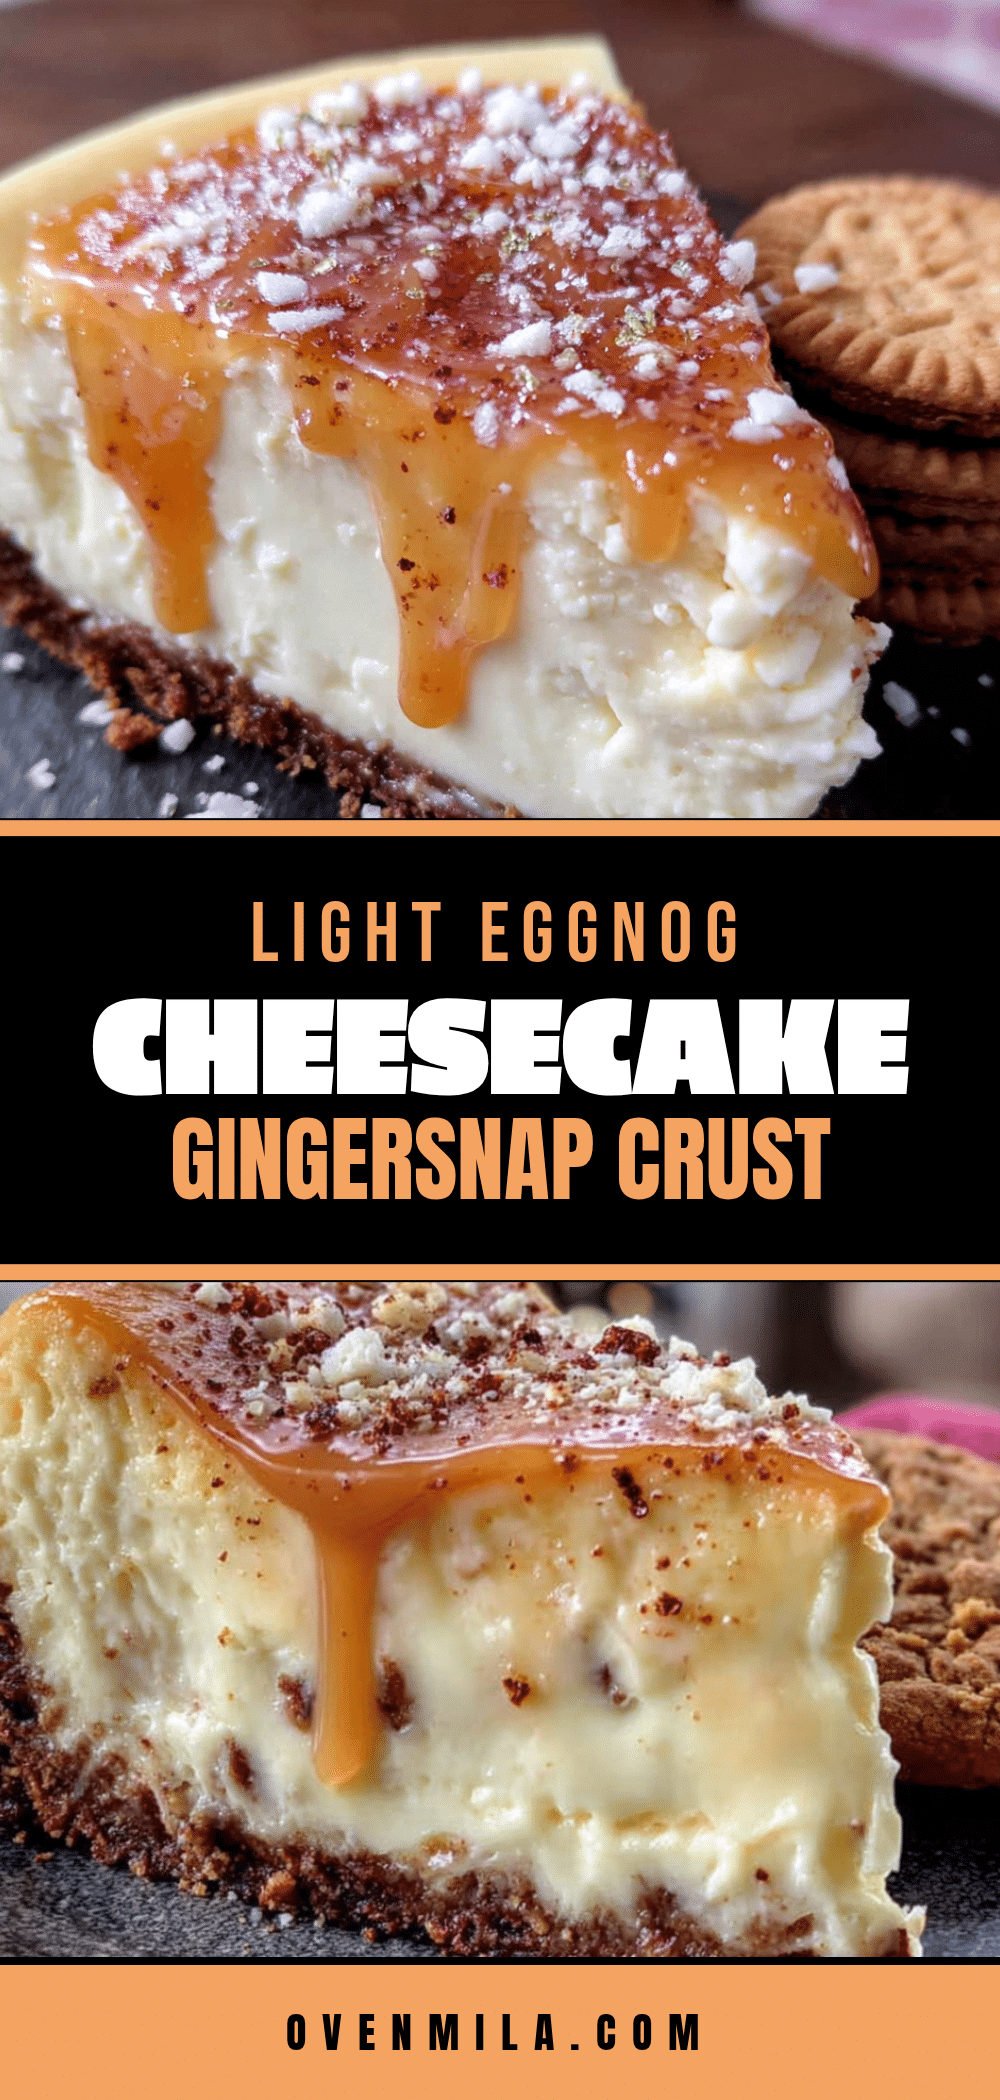
Light Eggnog Cheesecake with Gingersnap Crust
A light and creamy eggnog cheesecake with a spiced gingersnap crust, perfect for holiday gatherings without the heavy feeling.
- Prep Time: 30 minutes
- Cook Time: 55-65 minutes
- Total Time: 1 hour 30 minutes (plus cooling and chilling)
- Yield: 12 servings 1x
- Category: Dessert
- Cuisine: American
Ingredients
- 1 ½ cups crushed gingersnap cookies (about 30 cookies)
- ¼ cup granulated sugar
- ½ teaspoon ground cinnamon
- 5 tablespoons unsalted butter, melted
- 16 ounces reduced-fat cream cheese, softened
- ¾ cup granulated sugar
- 2 tablespoons all-purpose flour
- 1 cup plain Greek yogurt (full-fat or 2%)
- 3 large eggs, room temperature
- 1 cup eggnog
- 1 teaspoon vanilla extract
- ½ teaspoon ground nutmeg
- ¼ teaspoon ground cinnamon
- 2 tablespoons bourbon (optional)
- ½ cup heavy cream (for topping)
- 1 tablespoon powdered sugar (for topping)
- ½ teaspoon vanilla extract (for topping)
- Freshly grated nutmeg (for garnish)
- Crushed gingersnaps (for garnish)
Instructions
- Preheat oven to 350°F (175°C).
- In a food processor, pulse gingersnap cookies into fine crumbs. Combine crumbs with ¼ cup sugar and ½ teaspoon cinnamon in a medium bowl.
- Pour melted butter over crumb mixture and stir until moistened. Press firmly into bottom and ½ inch up sides of a 9-inch springform pan.
- Bake crust for 10 minutes until fragrant and lightly browned. Set aside to cool.
- Reduce oven temperature to 325°F (160°C).
- In a large bowl, beat softened cream cheese with an electric mixer on medium speed until smooth, about 2 minutes. Scrape bowl.
- Add ¾ cup sugar and 2 tablespoons flour; beat until combined, about 1 minute. Scrape bowl.
- Add Greek yogurt and beat on low speed until just combined.
- Add eggs one at a time, beating on low after each addition until just combined.
- Add eggnog, vanilla extract, nutmeg, cinnamon, and bourbon (if using). Beat on low until smooth.
- Stir batter with a spatula to ensure even mixing.
- Wrap bottom and sides of springform pan with double layer of aluminum foil.
- Pour filling into cooled crust.
- Place springform pan in a large roasting pan. Pour hot water into roasting pan until halfway up sides of springform pan.
- Bake at 325°F (160°C) for 55-65 minutes until edges are set and center jiggles slightly.
- Turn off oven, crack door open, and let cheesecake cool in oven for 1 hour.
- Remove from water bath, remove foil, and cool completely at room temperature, about 2 hours.
- Cover with plastic wrap and refrigerate for at least 4 hours, preferably overnight.
- To serve, run a thin knife around edge of pan, release springform clamp, and remove sides.
- For topping, beat heavy cream, powdered sugar, and vanilla extract until soft peaks form. Spread or pipe over cheesecake.
- Garnish with freshly grated nutmeg and crushed gingersnaps. Slice with a sharp knife, wiping blade clean between cuts.
Notes
For best results, use room temperature cream cheese and eggs. Do not overmix the batter to prevent cracking. The water bath is essential for even baking. Chill overnight for optimal texture. If cheesecake cracks, cover with whipped cream.
Nutrition
- Serving Size: 1 slice
- Calories: 310
- Sugar: 22
- Sodium: 280
- Fat: 18
- Saturated Fat: 10
- Carbohydrates: 30
- Fiber: 1
- Protein: 7
Keywords: eggnog cheesecake, light cheesecake, gingersnap crust, holiday dessert, Christmas dessert, New Year's dessert


