I was standing in the baking aisle of the grocery store last Tuesday when the smell of peanut butter from a nearby sample cup hit me—and suddenly I was seven years old at my Aunt Maggie’s tiny kitchen table, watching her press a fork into a peanut butter ball with that crisscross pattern I could never get quite right. She’d laugh and say, “Honey, the crooked ones taste better anyway.” She passed away five years ago, and I still can’t make her peanut butter cookies without messing up the fork marks on purpose. But last week, I needed something easier. Something that didn’t require turning on the oven in the middle of a heatwave. Something that felt like her kitchen—warm, a little messy, full of peanut butter—but without the flour clouding up the air.
So I grabbed a box of graham crackers, a bag of chocolate chips, and a jar of peanut butter, and I went home to figure this out. Honestly, I didn’t have a plan. I just started mixing things in a bowl, hoping something good would happen. And let me tell you, something really good happened. These Cozy No-Bake Peanut Butter Spiderweb Bars came together in about fifteen minutes, and the first bite? I closed my eyes. It was that kind of moment. Maybe you’ve been there—standing in your kitchen, tasting something you just threw together, and realizing you accidentally made magic.
These bars are perfect for Halloween, sure, but honestly? I make them year-round. The spiderweb drizzle on top is just chocolate and peanut butter swirled together with a toothpick, and it looks way fancier than it actually is. That’s my favorite kind of recipe—one that makes you look like a kitchen genius when all you really did was melt, stir, and chill. And the best part? No oven required. None. Zero. Your kitchen stays cool, your energy bill stays low, and you get a pan of peanut butter-chocolate goodness that tastes like you spent hours on it. I keep making these bars because they remind me of Aunt Maggie’s crooked fork marks. Imperfect, simple, and absolutely unforgettable.
Why You’ll Love This Recipe
I’ve tested this recipe six times in the last month—yes, six—and I can tell you with complete confidence that it works every single time. I brought a batch to my neighbor Carol, and she texted me later that night asking for the recipe because her kids had eaten the entire pan before dinner. That’s the kind of power these bars have. They’re not just good; they’re the kind of treat that makes people hover around the kitchen counter, waiting for you to cut another piece.
- Quick & Easy: These bars come together in just 15 minutes of active prep time. After that, the fridge does all the work. Perfect for busy weeknights, last-minute Halloween parties, or those days when you just need a little something sweet without a big production.
- Simple Ingredients: You probably already have most of these in your pantry right now. Peanut butter, butter, powdered sugar, graham crackers, chocolate chips—that’s it. No fancy grocery store trips required.
- Perfect for Halloween & Beyond: The spiderweb design makes them a hit at fall parties, but you can skip the web pattern and call them peanut butter bars any other time of year. They’re equally delicious in March or July, trust me.
- Crowd-Pleaser: Every single person I’ve shared these with has asked for the recipe. Kids love them. Adults love them. Even my friend who claims she doesn’t like peanut butter ate three pieces (she later admitted she might have been wrong about peanut butter).
- Unbelievably Delicious: The texture is what gets me every time. The crust is buttery and slightly crumbly from the graham crackers, the filling is rich and creamy, and the chocolate topping cracks a little when you bite into it. It’s comfort food in bar form.
What makes these bars different from other no-bake recipes is the balance. I’ve tried versions that were too sweet, too dense, or too crumbly. This one hits that perfect middle ground. The graham cracker crust gives it structure without being hard, and the peanut butter filling stays soft and scoopable. And that spiderweb design? It’s not just for looks—swirling the chocolate and peanut butter together creates little pockets of flavor in every bite. You get pure chocolate in some spots, pure peanut butter in others, and the magical swirl where they meet. This isn’t just another no-bake bar. It’s the one you’ll come back to again and again.
What Ingredients You Will Need
This recipe uses simple, everyday ingredients to create something that tastes like you put way more effort into it than you actually did. Most of these are pantry staples, so you might not even need a shopping trip. Here’s what you’ll need and why each one matters.
- Graham crackers (1 ½ cups crushed, about 9 full sheets): These form the base of the crust. I recommend using the honey-flavored kind for a touch of sweetness, but cinnamon graham crackers work beautifully too if you want a little warmth. Pulse them in a food processor until they’re fine crumbs, or put them in a zip-top bag and crush them with a rolling pin—that’s what I do when I want to feel a little therapeutic.
- Unsalted butter (½ cup, melted): This binds the graham cracker crumbs together and adds richness. I use unsalted so I can control the salt level, but if you only have salted butter, just skip the pinch of salt later. Let the butter cool slightly before mixing so it doesn’t melt the chocolate later.
- Creamy peanut butter (1 cup, divided): This is the star of the show. I use ¾ cup in the filling and reserve ¼ cup for the spiderweb swirl on top. Go with a standard creamy peanut butter like Jif or Skippy—natural peanut butters that separate can make the filling grainy. Trust me, I learned this the hard way on test batch number two.
- Powdered sugar (1 ½ cups, sifted): This sweetens the filling without making it grainy. Sifting is important here—lumps in powdered sugar create lumps in your filling, and nobody wants a chunk of sugar in their otherwise smooth bar. I use a fine-mesh strainer and tap it gently over the bowl.
- Vanilla extract (1 teaspoon): A little vanilla rounds out the flavors and makes the peanut butter taste even more peanut-buttery. Use pure vanilla extract if you have it, but imitation works fine in a pinch.
- Salt (¼ teaspoon): Just a pinch to balance the sweetness. Salt and peanut butter are best friends, and this tiny amount makes a big difference.
- Semi-sweet chocolate chips (1 cup): These get melted down for the top layer. I prefer semi-sweet because it’s not too sugary and it contrasts nicely with the sweet filling. Ghirardelli or Guittard are my go-to brands—they melt smoothly and taste rich without being bitter.
- Coconut oil or vegetable oil (1 teaspoon): This helps the chocolate melt smoothly and gives it that nice shine when it sets. Don’t skip it—plain melted chocolate can get dull and streaky.
Substitution notes: For a gluten-free version, use gluten-free graham crackers or crushed gluten-free cookies. For a dairy-free option, use vegan butter and dairy-free chocolate chips. And if you’re nut-free, sunflower seed butter works surprisingly well here, though the flavor will be a little different.
Equipment Needed
You don’t need a fancy kitchen to make these bars. Here’s what you’ll need, along with a few tips I’ve picked up along the way.
- 8×8-inch baking pan: This is the perfect size for these bars. A 9×9 pan works too, but your bars will be slightly thinner. Line it with parchment paper, leaving some overhang on two sides—this makes lifting the whole block out so much easier. I learned this after destroying my first batch trying to pry it out with a spatula.
- Food processor or zip-top bag and rolling pin: For crushing the graham crackers. A food processor gives you the most consistent crumbs, but there’s something satisfying about smashing them by hand. Plus, it’s a great way to release some frustration.
- Medium mixing bowls (2-3): One for the crust, one for the filling, and one for the chocolate topping. Glass or stainless steel work best.
- Microwave-safe bowl or small saucepan: For melting the butter and chocolate. I use the microwave because it’s faster, but a double boiler works if you prefer gentle heat.
- Spatula or wooden spoon: For mixing everything together. A rubber spatula is great for scraping every last bit of filling into the pan.
- Toothpick or skewer: This is your spiderweb tool. A toothpick works perfectly for creating the swirl pattern on top.
- Measuring cups and spoons: Standard set for accurate measurements. I cannot stress this enough—eyeballing the graham cracker crumbs will mess up the crust texture.
- Refrigerator: The most important piece of equipment! These bars need at least 2 hours to set, so make sure you have space in your fridge.
Budget-friendly tip: If you don’t have an 8×8 pan, a 9-inch pie plate works in a pinch. The bars will be round instead of square, but they’ll taste exactly the same.
Preparation Method
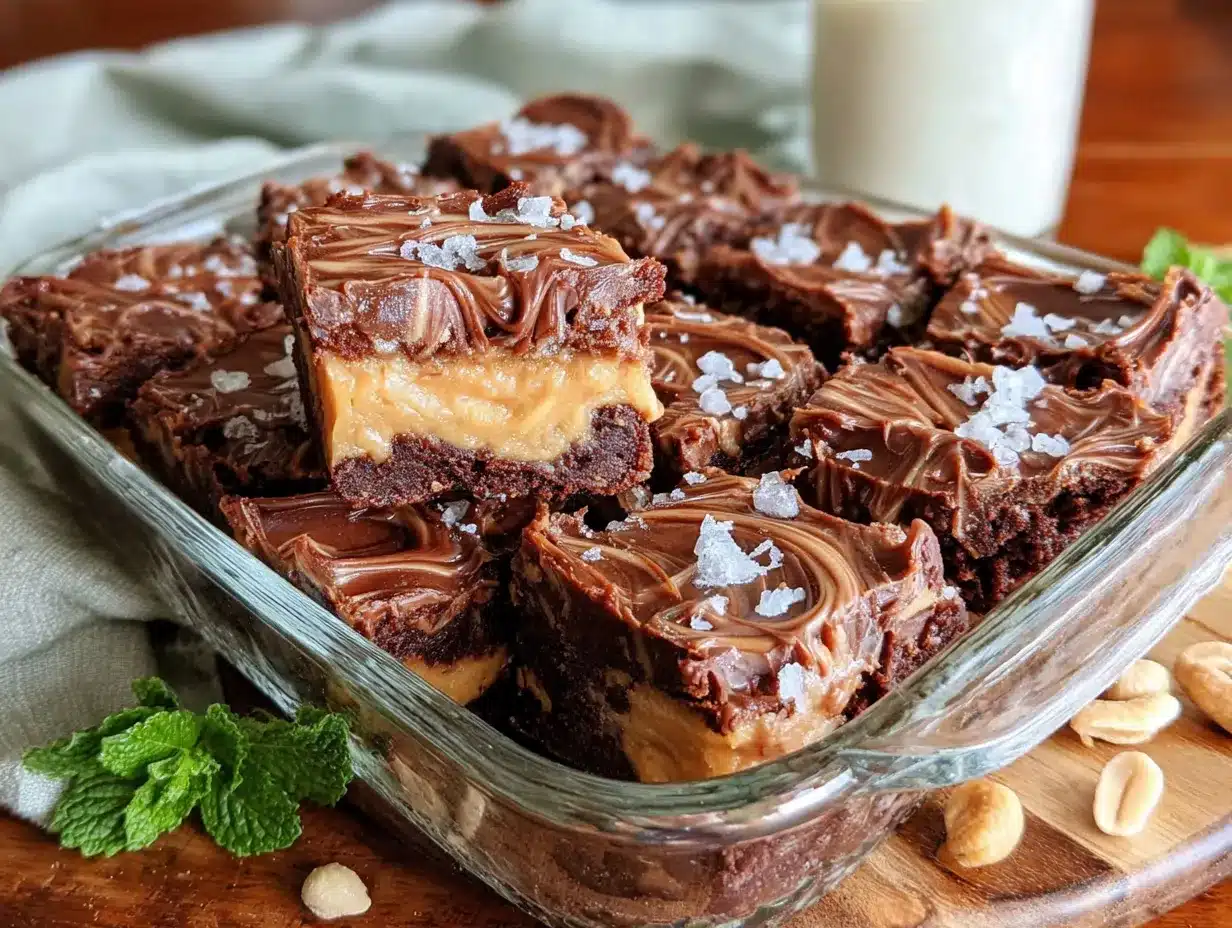
Let me walk you through this step by step. I’ve included all the little details I wish someone had told me the first time I made these.
- Prepare your pan. Line an 8×8-inch baking pan with parchment paper, leaving about 2 inches of overhang on two opposite sides. This creates handles that let you lift the entire block of bars out later. Lightly spray the parchment with non-stick cooking spray just to be safe—peanut butter filling is sticky stuff.
- Make the crust. Place 1 ½ cups of graham cracker crumbs in a medium bowl. Pour ½ cup of melted unsalted butter over the crumbs and stir with a fork until every crumb is coated. The mixture should look like wet sand and hold together when you press it between your fingers. If it seems too dry, add another tablespoon of melted butter. If it seems too wet, add a few more crumbs. Trust your instincts here.
- Press the crust. Transfer the crumb mixture to your prepared pan. Use the bottom of a measuring cup or a flat-bottomed glass to press it down firmly and evenly. Don’t skip this step—a loosely packed crust will fall apart when you cut the bars. Press hard, especially in the corners. Pop the pan in the refrigerator while you make the filling.
- Make the peanut butter filling. In a medium bowl, combine ¾ cup of creamy peanut butter, 1 ½ cups of sifted powdered sugar, 1 teaspoon of vanilla extract, and ¼ teaspoon of salt. Stir with a spatula until everything comes together. At first it will look crumbly and dry—don’t panic. Keep stirring, and it will eventually form a smooth, thick dough. If it’s too stiff, microwave it for 10 seconds and stir again. If it’s too soft, add a little more powdered sugar.
- Press the filling. Remove the pan from the refrigerator. Transfer the peanut butter filling to the pan and press it evenly over the crust. Use your hands or the bottom of that measuring cup again. Get it as flat and even as you can—this makes cutting clean squares much easier later. Place the pan back in the fridge.
- Melt the chocolate. In a microwave-safe bowl, combine 1 cup of semi-sweet chocolate chips and 1 teaspoon of coconut oil. Microwave in 30-second intervals, stirring after each, until the chocolate is completely smooth. This usually takes about 1 to 1 ½ minutes total. Be careful not to overheat—burnt chocolate is bitter and grainy.
- Pour the chocolate layer. Remove the pan from the fridge. Pour the melted chocolate over the peanut butter filling and spread it evenly with a spatula. Work quickly here—the cold filling will start to set the chocolate almost immediately.
- Create the spiderweb. Drop small spoonfuls of the remaining ¼ cup of peanut butter onto the chocolate layer. Space them out evenly—about 5 or 6 dollops should do it. Then take a toothpick and drag it through each dollop, pulling outward in a spiral motion. Wipe the toothpick clean between each swirl for the cleanest lines. Don’t over-swirl or the pattern will turn muddy. A few confident strokes are all you need.
- Chill and set. Place the pan in the refrigerator for at least 2 hours, or until the chocolate is completely firm. For best results, let it chill for 4 hours or even overnight. The longer it sets, the cleaner your cuts will be.
- Cut and serve. When the bars are fully set, lift them out of the pan using the parchment overhang. Place on a cutting board and use a sharp knife to cut into 16 squares. Wipe the knife clean between cuts for the neatest edges. Serve cold or at room temperature—both are delicious.
Cooking Tips & Techniques
I’ve made this recipe enough times to know exactly where things can go wrong. Here are the tips I wish I’d had from the beginning.
Press the crust firmly. This is the most common mistake I see. If your crust is too loose, the bars will fall apart when you try to cut them. Use the bottom of a glass or measuring cup and really lean into it. The crust should feel solid, not crumbly, when you touch it.
Let the butter cool slightly. If you pour piping hot butter into the graham cracker crumbs, it can make the crust greasy instead of buttery. Let it sit for a minute or two after melting. You want it warm, not hot.
Don’t overmix the filling. Stir just until everything comes together. Overmixing can make the filling too dense and almost greasy. Stop as soon as you don’t see any more powdered sugar streaks.
Use room temperature peanut butter. Cold peanut butter is stiff and hard to mix. If your peanut butter has been in the fridge, microwave it for 15 seconds before using it. This makes the filling much easier to press into the pan.
Chill between layers. I learned this trick after my first batch turned into a muddy mess. Chilling the crust before adding the filling, and the filling before adding the chocolate, keeps each layer distinct. It adds an extra 10 minutes to the process but makes a huge difference in the final look.
Wipe your knife between cuts. This is the secret to those beautiful, clean squares you see in food photos. After each cut, wipe the blade with a damp paper towel. Yes, it takes longer. Yes, it’s worth it.
My biggest failure: On test batch number three, I used natural peanut butter that had separated. The filling turned out grainy and oily, and the bars never set properly. I had to eat them with a spoon out of the pan—which wasn’t the worst thing in the world, but it wasn’t the bar experience I was going for. Stick with standard processed peanut butter for the best texture.
Variations & Adaptations
One of the best things about this recipe is how easy it is to change up. Here are some variations I’ve tried and loved.
Chocolate Peanut Butter Cup Bars: Chop up 4-5 Reese’s peanut butter cups and sprinkle them over the chocolate layer before it sets. Press them in gently with your fingers. Every bite has a little chunk of peanut butter cup in it—dangerously good.
Crunchy Peanut Butter Version: Use crunchy peanut butter in the filling instead of creamy. The little bits of peanut add texture and make the bars feel even more rustic. I made this version for a potluck and it disappeared faster than the original.
Gluten-Free Adaptation: Substitute the graham crackers with gluten-free graham crackers or crushed gluten-free vanilla cookies. I’ve used both and they work perfectly. Just make sure your chocolate chips are certified gluten-free if that’s a concern.
Halloween Funfetti Version: Stir 2 tablespoons of orange and black sprinkles into the peanut butter filling before pressing it into the pan. The sprinkles add a fun crunch and make these bars extra festive for Halloween parties. My niece loved this version—she said it looked like “spooky sprinkles.”
White Chocolate Spiderweb: Swap the semi-sweet chocolate chips for white chocolate chips. The white chocolate gives the bars a sweeter, creamier flavor, and the peanut butter swirl stands out beautifully against the pale background. Use a little more coconut oil with white chocolate since it can be thicker when melted.
Vegan Option: Use vegan butter, dairy-free chocolate chips, and ensure your graham crackers are vegan-friendly. The filling is naturally vegan since it’s just peanut butter, powdered sugar, and vanilla. I’ve made this version for my vegan friend Sarah and she said it was the best dessert she’d had in months.
Serving & Storage Suggestions
These bars are versatile when it comes to serving. Here’s how I like to enjoy them and how to keep them fresh.
Serving temperature: I prefer these bars straight from the refrigerator—the filling stays firm and the chocolate has that satisfying snap when you bite into it. But they’re also delicious at room temperature, where the filling softens slightly and gets almost fudge-like. Try both and see which you prefer.
Presentation ideas: For Halloween, cut the bars into squares and arrange them on a black platter or cake stand. Sprinkle a few candy eyeballs or orange sprinkles around the plate for a spooky touch. For regular occasions, a simple white plate lets the spiderweb pattern shine.
What to serve with them: A cold glass of milk is the classic pairing—the creaminess balances the richness of the bars. For a grown-up option, a cup of black coffee or espresso cuts through the sweetness beautifully. And if you’re feeling really indulgent, serve these bars warm with a scoop of vanilla ice cream on top. The cold ice cream melting into the chocolate layer is pure magic.
Storage instructions: Store the bars in an airtight container in the refrigerator for up to 1 week. Layer them between sheets of parchment paper so they don’t stick together. I’ve never had a batch last longer than 4 days in my house, but theoretically they’ll stay fresh for a full week.
Freezer instructions: These bars freeze beautifully. Place them in a single layer on a baking sheet and freeze for 1 hour, then transfer to a freezer-safe container or zip-top bag. They’ll keep for up to 3 months. Thaw in the refrigerator overnight before serving. I always keep a stash in my freezer for unexpected guests or late-night cravings.
Flavor development: Honestly, these bars taste even better the next day. The flavors meld together overnight, and the texture becomes more uniform. If you can wait that long, make them a day ahead of when you plan to serve them.
Nutritional Information & Benefits
Let’s be real—these are a treat, not a health food. But here’s the nutritional breakdown so you know what you’re working with.
Per serving (1 bar, based on 16 servings):
- Calories: 285
- Total Fat: 17g
- Saturated Fat: 7g
- Cholesterol: 15mg
- Sodium: 180mg
- Total Carbohydrates: 31g
- Dietary Fiber: 2g
- Sugars: 22g
- Protein: 5g
Health highlights: Peanut butter is a good source of protein and healthy fats, and it contains vitamin E, magnesium, and potassium. Dark chocolate (semi-sweet) has antioxidants called flavonoids that can support heart health. So while these bars aren’t exactly a superfood, they’re not completely empty calories either.
Dietary considerations: This recipe is vegetarian. For gluten-free, vegan, or dairy-free options, see the variations section above. These bars contain peanuts, dairy (butter, chocolate), and gluten (graham crackers), so they’re not suitable for those with allergies unless substitutions are made.
My personal take: I believe in balance. I eat these bars when I want something indulgent, and I don’t feel guilty about it. Life is too short to skip dessert. One bar satisfies my sweet tooth completely, and I find I don’t crave more sugary snacks later in the day. That’s a win in my book.
Conclusion
These Cozy No-Bake Peanut Butter Spiderweb Bars have become my go-to recipe for so many reasons. They’re quick enough for a Tuesday night craving, fancy enough for a Halloween party, and simple enough that anyone can make them—even on a day when you just don’t have the energy for a big kitchen project. The first time I made them, I stood in my kitchen eating a still-warm piece (okay, two pieces) and felt that little flutter of happiness that only a really good recipe can give you.
I hope you’ll make these bars your own. Add your favorite sprinkles, swap the chocolate for white chocolate, or leave the spiderweb off entirely and just enjoy them as simple peanut butter bars. There’s no wrong way to do this. And if you make them, I’d love to hear about it. Leave a comment below and tell me how they turned out, or share a photo of your spiderweb creation. Did you add something unexpected? Did your kids help with the toothpick swirls? Did you eat three pieces before they made it to the fridge? (No judgment here.)
Thank you for stopping by and spending a little time in my kitchen. Now go make some magic with peanut butter and chocolate. You deserve it.
Frequently Asked Questions
Can I use natural peanut butter in this recipe?
I don’t recommend it. Natural peanut butters that separate can make the filling grainy and oily. Stick with standard processed peanut butter like Jif or Skippy for the best texture. If you only have natural peanut butter, stir it very well before measuring and expect the filling to be a little softer.
How long do these bars need to set in the refrigerator?
At least 2 hours, but 4 hours is better. Overnight is ideal if you have the time. The longer they set, the cleaner your cuts will be. If you’re in a hurry, you can pop them in the freezer for 45 minutes, but watch them closely so the chocolate doesn’t get too hard.
Can I make these bars ahead of time for a party?
Absolutely! These bars are perfect for making ahead. They actually taste better the next day after the flavors have had time to meld. Make them up to 3 days in advance and store them in the refrigerator. Just keep them covered so they don’t pick up any fridge odors.
Why did my chocolate topping crack when I cut the bars?
This usually happens when the chocolate layer is too thick or too cold. Let the bars sit at room temperature for 5-10 minutes before cutting. Use a sharp knife and cut with a gentle sawing motion instead of pressing straight down. Wiping the knife between cuts also helps prevent cracking.
Can I double this recipe for a larger pan?
Yes! Double all the ingredients and use a 9×13-inch pan. The bars will be slightly thinner, so reduce the chilling time to about 1 ½ hours. You’ll get about 24 servings from a double batch. Perfect for parties or potlucks.
Pin This Recipe!
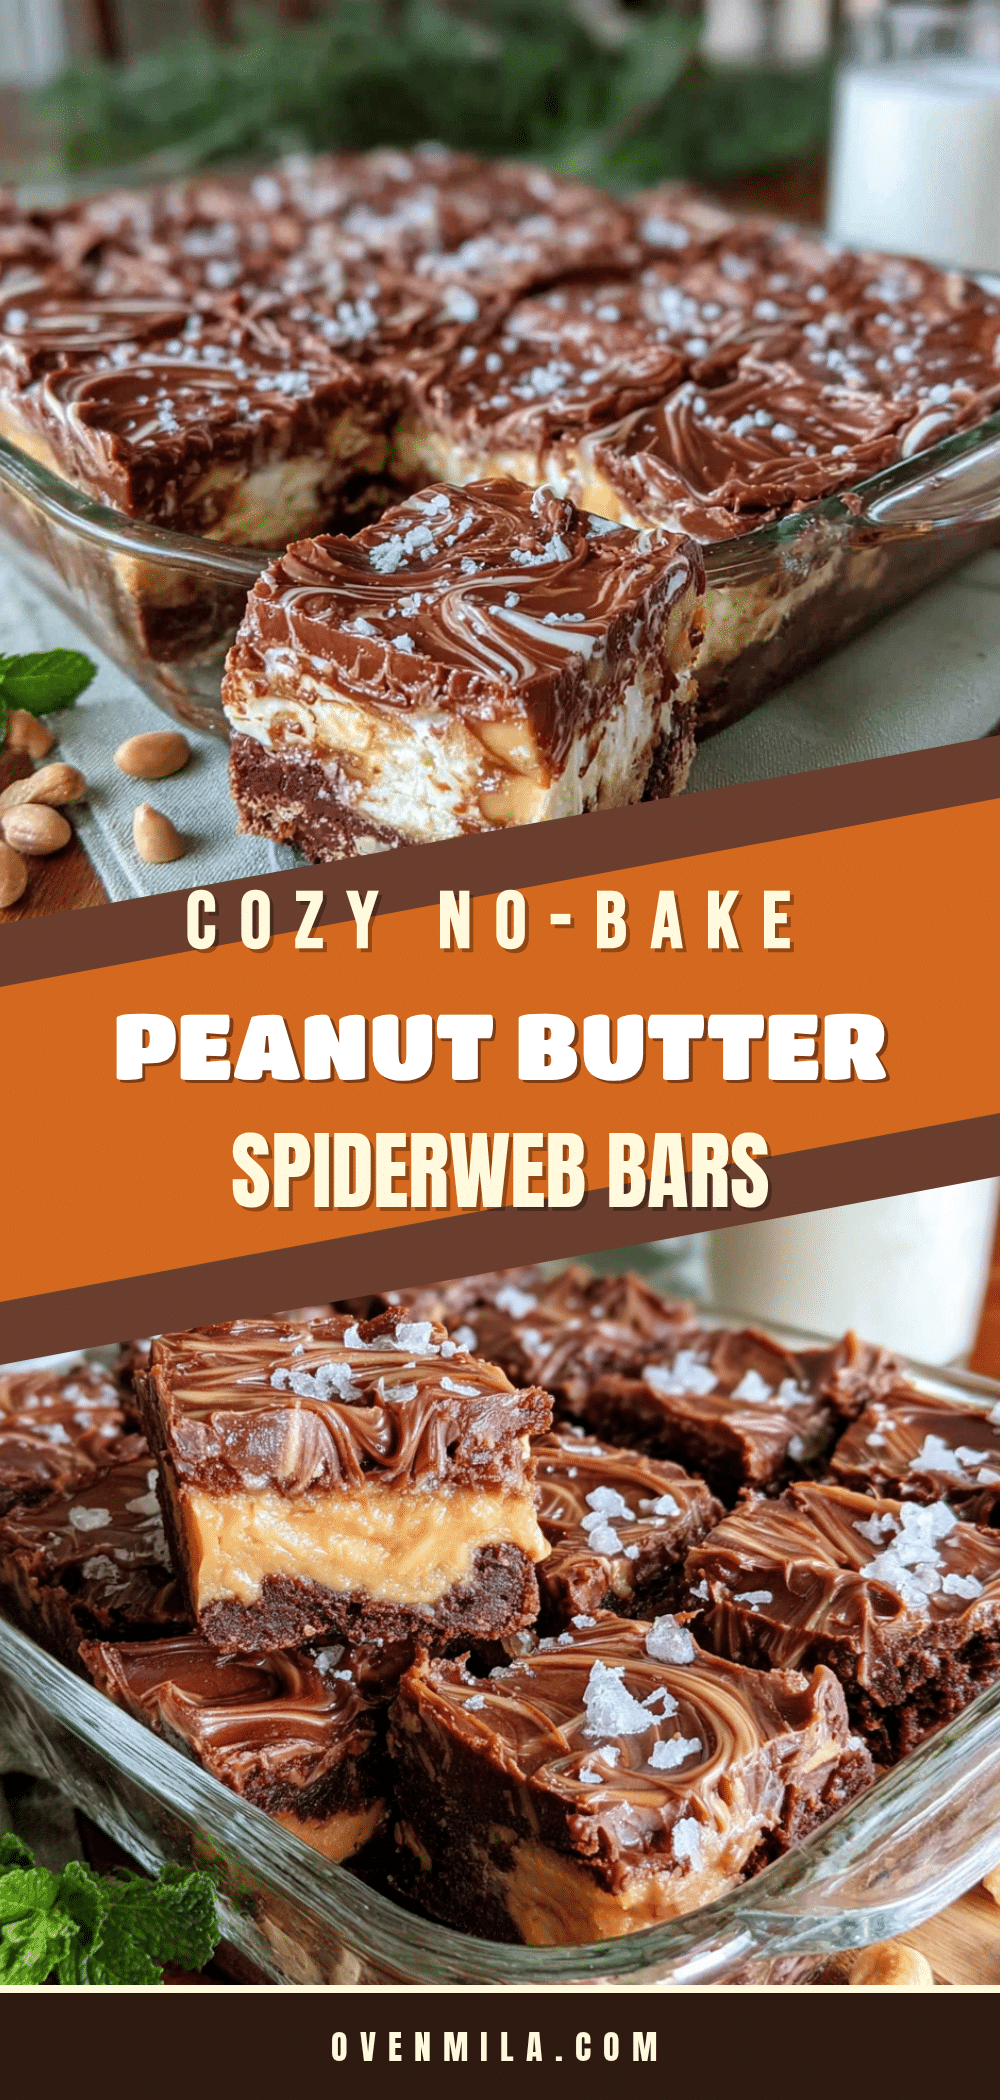
No-Bake Peanut Butter Spiderweb Bars
These no-bake peanut butter spiderweb bars are a quick and easy 15-minute treat, perfect for Halloween or any time you crave a peanut butter and chocolate dessert without turning on the oven. A buttery graham cracker crust is topped with a creamy peanut butter filling and a semi-sweet chocolate layer, finished with a decorative spiderweb swirl.
- Prep Time: 15 minutes
- Cook Time: 0 minutes
- Total Time: 2 hours 15 minutes (includes chilling)
- Yield: 16 servings 1x
- Category: Dessert
- Cuisine: American
Ingredients
- 1 ½ cups crushed graham crackers (about 9 full sheets)
- ½ cup unsalted butter, melted
- 1 cup creamy peanut butter, divided (¾ cup for filling, ¼ cup for swirl)
- 1 ½ cups powdered sugar, sifted
- 1 teaspoon vanilla extract
- ¼ teaspoon salt
- 1 cup semi-sweet chocolate chips
- 1 teaspoon coconut oil or vegetable oil
Instructions
- Line an 8×8-inch baking pan with parchment paper, leaving about 2 inches of overhang on two opposite sides. Lightly spray with non-stick cooking spray.
- In a medium bowl, combine 1 ½ cups graham cracker crumbs and ½ cup melted unsalted butter. Stir until every crumb is coated and the mixture resembles wet sand.
- Transfer the crumb mixture to the prepared pan. Press it down firmly and evenly using the bottom of a measuring cup or a flat-bottomed glass. Refrigerate while making the filling.
- In a medium bowl, combine ¾ cup creamy peanut butter, 1 ½ cups sifted powdered sugar, 1 teaspoon vanilla extract, and ¼ teaspoon salt. Stir until a smooth, thick dough forms. If too stiff, microwave for 10 seconds; if too soft, add more powdered sugar.
- Remove the pan from the refrigerator. Press the peanut butter filling evenly over the crust. Return to the fridge.
- In a microwave-safe bowl, combine 1 cup semi-sweet chocolate chips and 1 teaspoon coconut oil. Microwave in 30-second intervals, stirring after each, until completely smooth (about 1 to 1 ½ minutes total).
- Remove the pan from the fridge. Pour the melted chocolate over the peanut butter filling and spread evenly with a spatula.
- Drop small spoonfuls of the remaining ¼ cup peanut butter onto the chocolate layer (about 5-6 dollops). Use a toothpick to drag through each dollop in a spiral motion to create a spiderweb pattern. Wipe the toothpick clean between each swirl.
- Refrigerate for at least 2 hours, or until the chocolate is completely firm. For best results, chill for 4 hours or overnight.
- Lift the bars out of the pan using the parchment overhang. Place on a cutting board and cut into 16 squares with a sharp knife, wiping the knife clean between cuts.
Notes
For best texture, use standard processed peanut butter (like Jif or Skippy) rather than natural peanut butter. Press the crust firmly to prevent crumbling. Chill between layers for distinct results. Wipe knife between cuts for clean squares. Bars can be stored in an airtight container in the refrigerator for up to 1 week, or frozen for up to 3 months.
Nutrition
- Serving Size: 1 bar
- Calories: 285
- Sugar: 22
- Sodium: 180
- Fat: 17
- Saturated Fat: 7
- Carbohydrates: 31
- Fiber: 2
- Protein: 5
Keywords: no-bake, peanut butter, chocolate, spiderweb, Halloween, easy dessert, graham cracker, bars


