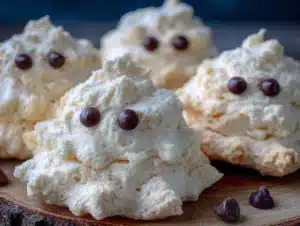
My neighbor’s eight-year-old, Leo, asked why I couldn’t just pipe the meringue straight up instead of spreading it. I started to explain that meringue cookies need to be piped in swirls or kisses to hold their shape—then stopped. He was holding a piping bag like it was a glue gun, and honestly, I had no good reason why standing them up wouldn’t work. So I let him try. He squeezed out a tall, wobbly blob that immediately flopped to one side, looking less like a ghost and more like a sad, melted snowman. I bit my tongue. But then he tried again, holding the bag perfectly straight and pulling it up quickly at the end. And you know what? It worked. That little blob stood up, all puffy and proud, and when it baked, it turned into the spookiest little ghost I’d ever seen. I mean, I’ve been making meringues for years, and this kid figured out a better technique in ten minutes. Let me tell you, it was a humbling Tuesday afternoon.
The thing is, these Spooky Ghost Meringue Cookies are exactly what Halloween baking should be—fun, a little bit messy, and surprisingly simple. They’re light, airy, and melt in your mouth with a sweet vanilla flavor. Plus, they look adorable sitting on a platter, all tiny and ghost-shaped. I’ve been making them every October since that afternoon, and they always steal the show at our neighborhood potluck. Honestly, I keep making them because they remind me that sometimes the best ideas come from someone who doesn’t know the “right” way to do something. Maybe you’ve been there—overthinking a recipe until a kid shows you a better way. These cookies are that better way.
Why You’ll Love This Recipe
I’ve tested this recipe about a dozen times to get the texture just right—crisp on the outside, chewy in the center, and perfectly ghost-shaped. Here’s why I think you’ll love it as much as I do:
- Quick & Easy: These come together in under 30 minutes of active time. Perfect for a last-minute Halloween treat or a fun weekend project with the kids.
- Simple Ingredients: You only need egg whites, sugar, cream of tartar, and vanilla extract. No fancy grocery trips required—you probably have everything in your kitchen right now.
- Perfect for Halloween: They’re spooky, cute, and totally Instagram-worthy. Great for classroom parties, potlucks, or just a cozy night in with a scary movie.
- Crowd-Pleaser: I’ve brought these to three different Halloween gatherings, and they disappear faster than the candy bowl. Kids love the ghost shape, and adults love the light, airy texture.
- Unbelievably Delicious: The combination of crispy edges and soft, marshmallow-like centers is next-level comfort food. Plus, they’re naturally gluten-free and low-fat.
What makes these different from other meringue cookies? It’s the technique. Most recipes tell you to pipe meringue in flat swirls or kisses, but I’ve found that piping them straight up—like a little ghost—creates the perfect shape every time. The key is holding the piping bag perfectly vertical and pulling it up quickly at the end. This creates a natural “head” and “body” that looks just like a ghost. I also add a tiny bit of cornstarch to the sugar mixture, which helps stabilize the meringue and gives it that signature chewy center.
This recipe isn’t just good—it’s the kind that makes you close your eyes after the first bite. It’s comfort food reimagined: lighter, faster, but with the same soul-soothing satisfaction. Perfect for impressing guests without stress, or turning a simple October evening into something memorable.
What Ingredients You Will Need
This recipe uses simple, pantry-friendly ingredients to create something truly magical. Here’s what you’ll need and why each ingredient matters:
- Egg whites (4 large, room temperature): The foundation of any meringue. Room-temperature egg whites whip up higher and more stable than cold ones. I recommend separating them while cold (it’s easier), then letting them sit on the counter for 30 minutes.
- Granulated sugar (1 cup / 200g): This gives the meringue its structure and sweetness. I’ve tried using superfine sugar, and it works beautifully, but regular granulated sugar is just fine if you beat it long enough to dissolve completely.
- Cream of tartar (1/2 teaspoon): This acidic powder stabilizes the egg whites and helps them hold their shape. If you don’t have it, you can substitute 1 teaspoon of lemon juice or white vinegar.
- Vanilla extract (1 teaspoon): For flavor. I use pure vanilla extract because it tastes richer, but imitation vanilla works in a pinch. You can also try peppermint or almond extract for a different twist.
- Cornstarch (1 tablespoon): This is my secret ingredient. It absorbs excess moisture and creates a slightly chewy center, which is the perfect contrast to the crispy exterior. (I learned this trick from a pastry chef friend.)
- Black gel food coloring (for the eyes): Optional, but highly recommended. You’ll use a toothpick to dot two tiny eyes on each ghost. Gel coloring works best because it doesn’t add extra liquid.
Substitution Notes:
- If you’re concerned about raw egg whites, you can use pasteurized egg whites from a carton. Just note that they may not whip up as stiffly as fresh ones.
- For a vegan version, you can try aquafaba (the liquid from a can of chickpeas). Use 1/2 cup of aquafaba in place of the 4 egg whites, and add an extra 1/4 teaspoon of cream of tartar.
- If you don’t have cream of tartar, use lemon juice or white vinegar as mentioned above. It works just as well.
I personally buy my eggs from a local farm when I can—the yolks are brighter, and the whites whip up beautifully. But honestly, any large eggs from the grocery store will work perfectly.
Equipment Needed
You don’t need much to make these ghost meringues, but having the right tools makes the process smoother:
- Stand mixer or hand mixer: A stand mixer is ideal because you can walk away while it whips, but a hand mixer works just fine. I’ve used both, and the key is just to be patient.
- Large glass or metal mixing bowl: Plastic bowls can hold onto grease, which prevents egg whites from whipping properly. Glass or metal is best.
- Piping bag: A disposable piping bag works great. If you don’t have one, you can use a zip-top bag with the corner snipped off. Just be careful not to cut too much—you want a small opening.
- Baking sheets: Line them with parchment paper or silicone baking mats. Parchment paper is my go-to because it’s cheap and disposable.
- Toothpick: For dotting the eyes with black gel food coloring. A skewer or the tip of a knife also works.
- Cooling rack: Meringues need to cool completely before storage, and a wire rack allows air to circulate around them.
If you don’t have a piping bag, don’t stress. I’ve made these using a zip-top bag, and they turned out just as cute. Just make sure the hole is small enough to control the flow of meringue.
Preparation Method
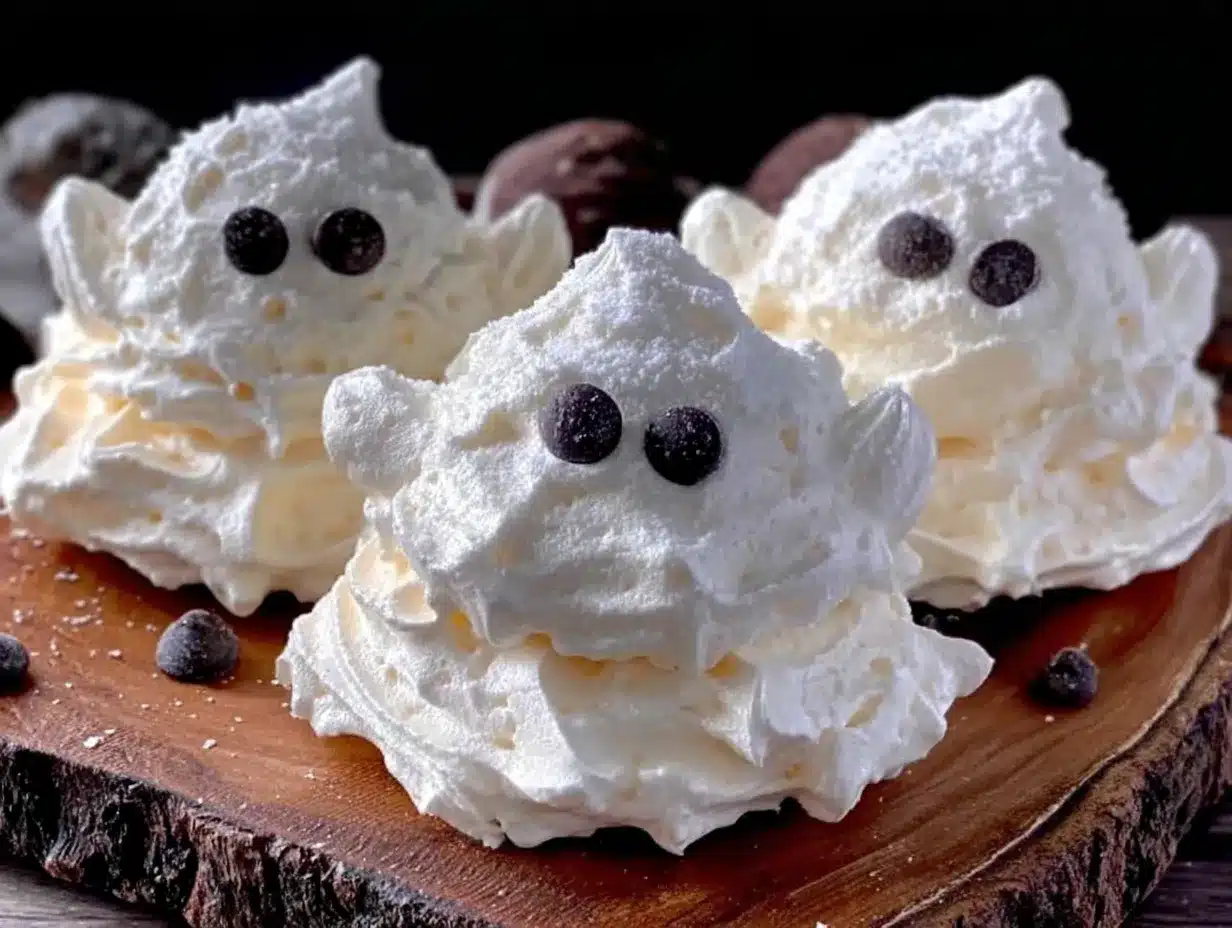
Follow these steps carefully, and you’ll have the cutest little ghosts on your Halloween dessert table. I’ve included sensory cues at each stage so you know exactly what to look for.
- Preheat your oven to 200°F (93°C). Yes, this is a low temperature—we’re drying the meringues, not baking them. Line two baking sheets with parchment paper.
- Separate the eggs: Crack each egg and separate the white from the yolk. Be careful not to get any yolk in the whites—even a tiny bit can prevent them from whipping. I separate each egg into a small bowl first, then transfer the white to the mixing bowl. This way, if one breaks, you don’t ruin the whole batch.
- Whip the egg whites: Add the cream of tartar to the egg whites. Beat on medium speed until frothy—about 1 minute. You’ll see lots of tiny bubbles forming. This is where the magic starts.
- Add the sugar slowly: With the mixer running on medium-high, add the sugar one tablespoon at a time. This takes about 3-4 minutes. Don’t rush it—adding the sugar too quickly can deflate the meringue. The mixture will start to look thick and glossy.
- Add the cornstarch and vanilla: Once all the sugar is incorporated, add the cornstarch and vanilla extract. Beat on high speed for another 2-3 minutes, until the meringue is stiff and glossy. How do you know it’s ready? Lift the whisk—the meringue should form a stiff peak that holds its shape without drooping. Also, rub a little between your fingers—if it feels smooth (not gritty), the sugar is fully dissolved.
- Prepare the piping bag: Fit your piping bag with a round tip (I use a 1/2-inch tip) or just snip the end off a zip-top bag. Fill the bag with the meringue. Work quickly—meringue can start to deflate if it sits too long.
- Pipe the ghosts: Hold the piping bag straight up and down, about 1/2 inch above the baking sheet. Squeeze gently to create a small blob (the body), then pull the bag straight up while squeezing to create a tall, pointy shape (the head). Release pressure and pull away quickly. Each ghost should be about 1-2 inches tall. Leave about 1 inch between each ghost—they don’t spread much, but you want air to circulate.
- Add the eyes: Dip a toothpick into the black gel food coloring. Gently dot two tiny eyes on each ghost. Don’t press too hard—you just want a small dot. I’ve found that placing the eyes about halfway up the “head” gives them the cutest, most ghost-like expression.
- Bake for 60-75 minutes: Place the baking sheets in the preheated oven. Bake for 60 minutes, then check them. The meringues should be dry to the touch and easily lift off the parchment paper. If they’re still sticky, bake for another 10-15 minutes. Every oven is different, so keep an eye on them after the 60-minute mark.
- Cool completely: Turn off the oven and leave the meringues inside with the door slightly ajar for about 30 minutes. This helps them dry out completely and prevents cracking. Then transfer them to a wire rack to cool completely—about another 15 minutes.
Pro tip: If your meringue is weeping (little beads of liquid forming on the surface), it means your sugar didn’t dissolve completely. Next time, beat it longer before piping.
Cooking Tips & Techniques
I’ve made these meringues at least a dozen times, and I’ve learned a few things the hard way. Here are my best tips for perfect ghost meringues every time:
- Don’t overmix the egg whites: I once walked away from my stand mixer for too long, and the meringue turned grainy and separated. The sweet spot is when the peaks are stiff but still glossy. If you see the mixture start to look dry or curdled, you’ve gone too far.
- Humidity is the enemy: Meringues hate humid days. If it’s raining or muggy outside, your cookies might end up sticky and soft. I learned this the hard way during a summer thunderstorm—my ghosts looked like they’d melted. Try to bake these on a dry day, or run a dehumidifier in your kitchen.
- Use a clean, grease-free bowl: Any trace of grease (or egg yolk) will prevent your egg whites from whipping. I wipe my bowl and whisk with a little lemon juice or vinegar before starting, just to be safe.
- Pipe straight up, not at an angle: This is the trick Leo taught me. Hold the piping bag perfectly vertical, and pull it straight up as you squeeze. If you pipe at an angle, your ghosts will look lopsided.
- Don’t open the oven door too often: I know it’s tempting to peek, but opening the oven door lets in cool air and can cause your meringues to crack. Use the oven light to check on them instead.
One more thing—if your meringues crack slightly during baking, don’t worry. It gives them a rustic, spooky look that’s perfect for Halloween. Honestly, my “ugly” ghosts are always the first ones to disappear.
Variations & Adaptations
These ghost meringues are endlessly customizable. Here are a few variations I’ve tried and loved:
- Chocolate ghosts: Replace 2 tablespoons of the granulated sugar with 2 tablespoons of unsweetened cocoa powder. Sift it in with the cornstarch for a rich, chocolatey flavor. I made these for a friend’s Halloween party, and they looked like little chocolate ghosts—so cute.
- Peppermint ghosts: Swap the vanilla extract for 1/2 teaspoon of peppermint extract. The minty flavor is refreshing and festive. Just be careful—peppermint extract is strong, so don’t use more than 1/2 teaspoon.
- Vegan ghosts: Use aquafaba (the liquid from a can of chickpeas) instead of egg whites. Whip it with the cream of tartar until stiff peaks form, then proceed with the recipe as written. The texture is slightly less crisp, but still delicious.
- Colorful ghosts: Add a drop of gel food coloring to the meringue before piping. Purple, green, or orange ghosts are perfect for Halloween. I made a batch of purple ghosts last year, and my niece insisted they were “ghost grapes.”
- Gluten-free: This recipe is naturally gluten-free, so no adjustments needed. Just make sure your vanilla extract and food coloring are certified gluten-free if that’s a concern.
I’ve also tried adding a pinch of cinnamon or pumpkin pie spice to the meringue for a fall twist. It’s subtle but adds a warm, cozy flavor that pairs beautifully with the vanilla.
Serving & Storage Suggestions
These ghost meringues are best served at room temperature, right after they’ve cooled. They’re light and airy, with a satisfying crunch that gives way to a soft, marshmallow-like center. Here’s how to serve and store them:
- Serving temperature: Room temperature is ideal. If you’ve stored them in the fridge (not recommended), let them sit out for 10-15 minutes before serving.
- Presentation ideas: Arrange the ghosts on a platter with some fake spiderwebs or plastic spiders for a spooky effect. You can also stick them into a bowl of Halloween candy for a festive centerpiece. I once served them with a bowl of chocolate dip, and they were a hit.
- Complementary dishes: These pair beautifully with hot cocoa, coffee, or a glass of cold milk. For a Halloween party, serve them alongside pumpkin cupcakes or caramel apples for a full dessert spread.
- Storage instructions: Store the meringues in an airtight container at room temperature for up to 2 weeks. Do not refrigerate them—the moisture will make them sticky. If you live in a humid climate, add a silica gel packet to the container to absorb excess moisture.
- Freezer instructions: You can freeze these meringues for up to 3 months. Place them in a single layer in a freezer-safe container, with parchment paper between layers. Thaw at room temperature for about 30 minutes before serving.
One thing I’ve noticed—the flavors actually develop a bit after a day or two. The vanilla becomes more pronounced, and the texture evens out. So if you can resist eating them all on day one, they’ll be even better on day two.
Nutritional Information & Benefits
Here’s the approximate nutritional breakdown for one ghost meringue cookie (based on a batch of 24):
- Calories: 35
- Fat: 0g
- Carbohydrates: 8g
- Sugar: 8g
- Protein: 1g
These are a relatively low-calorie treat, especially compared to traditional Halloween cookies. They’re also naturally fat-free and gluten-free, making them a great option for people with dietary restrictions. The egg whites provide a small amount of protein, and the sugar gives you a quick energy boost—perfect for a Halloween sugar rush.
That said, they are still a sweet treat, so enjoy them in moderation. I like to think of them as a “healthier” indulgence because they’re so light and airy—you can eat a few without feeling overly full or guilty.
Conclusion
These Spooky Ghost Meringue Cookies are everything I love about Halloween baking: simple, fun, and just a little bit spooky. They come together with basic ingredients you probably already have, and they look adorable sitting on a platter. Plus, the technique is so forgiving—even if your ghosts look a little lopsided, they’ll still taste amazing.
I encourage you to make these your own. Experiment with different flavors, colors, or decorations. Add a sprinkle of edible glitter for a magical touch, or pipe on tiny little arms using black icing. The possibilities are endless, and that’s what makes this recipe so special.
Honestly, these cookies have become a Halloween tradition in my house. Every October, I pull out my piping bag and whip up a batch of these little ghosts, and they never fail to make me smile. I hope they bring you the same joy. If you try them, let me know how they turn out in the comments below—I’d love to see your ghost creations!
Frequently Asked Questions
Can I make these ghost meringues without a piping bag?
Absolutely! If you don’t have a piping bag, use a zip-top plastic bag with the corner snipped off. Just make sure the hole is small enough to control the flow of meringue. You can also use a spoon to drop small dollops of meringue onto the baking sheet, though they won’t have the same ghost-like shape.
Why did my meringues crack in the oven?
Cracking can happen if the oven temperature is too high or if the meringue is overmixed. Make sure your oven is at 200°F (93°C) and that your meringue is stiff but still glossy. Also, avoid opening the oven door while they’re baking—sudden temperature changes can cause cracking.
How do I know when the meringues are done?
The meringues are done when they’re dry to the touch and easily lift off the parchment paper. They should feel firm but not hard. If they’re still sticky, bake for another 10-15 minutes and check again.
Can I use liquid food coloring instead of gel?
I don’t recommend it. Liquid food coloring adds extra moisture to the meringue, which can make it weep or deflate. Gel food coloring is thicker and more concentrated, so it won’t affect the texture. If you only have liquid coloring, use it sparingly and add a tiny bit more cornstarch to compensate.
How long do these meringues stay fresh?
Stored in an airtight container at room temperature, these meringues will stay fresh for up to 2 weeks. Keep them away from moisture and humidity to maintain their crisp texture. If they start to get sticky, you can re-crisp them in a 200°F oven for 10 minutes.
Pin This Recipe!
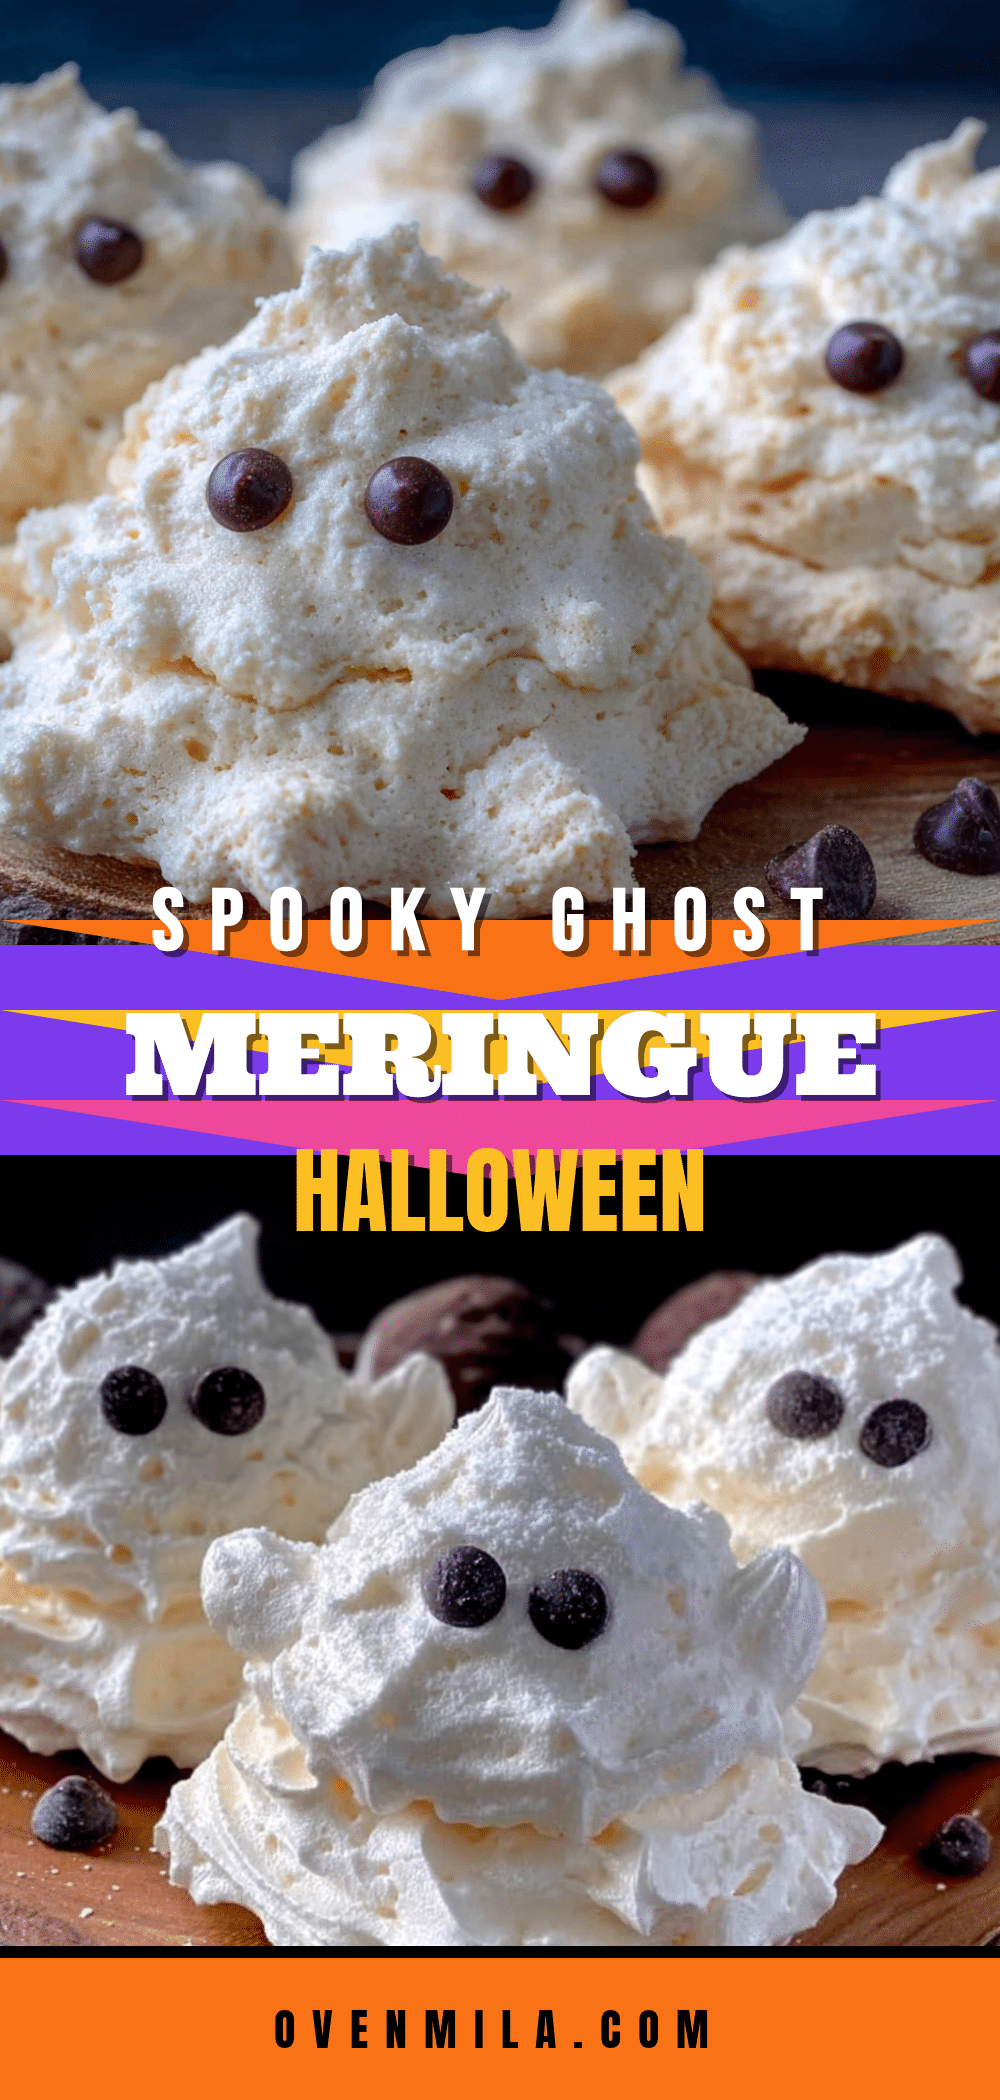
Perfect Ghost Meringue Cookies: Easy Halloween Treats
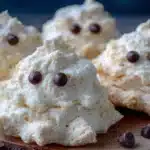
These Spooky Ghost Meringue Cookies are light, airy, and melt in your mouth with a sweet vanilla flavor. They’re fun, a little bit messy, and surprisingly simple to make, perfect for Halloween baking.
- Prep Time: 20 minutes
- Cook Time: 60 minutes
- Total Time: 1 hour 20 minutes
- Yield: 24 servings 1x
- Category: Dessert
- Cuisine: American
Ingredients
- 4 large egg whites, room temperature
- 1 cup (200g) granulated sugar
- 1/2 teaspoon cream of tartar
- 1 teaspoon vanilla extract
- 1 tablespoon cornstarch
- Black gel food coloring (for eyes)
Instructions
- Preheat your oven to 200°F (93°C). Line two baking sheets with parchment paper.
- Separate the eggs, being careful not to get any yolk in the whites. Transfer the whites to a large glass or metal mixing bowl.
- Add the cream of tartar to the egg whites. Beat on medium speed until frothy, about 1 minute.
- With the mixer running on medium-high, add the sugar one tablespoon at a time, taking about 3-4 minutes. The mixture will become thick and glossy.
- Add the cornstarch and vanilla extract. Beat on high speed for another 2-3 minutes until stiff and glossy peaks form. The meringue should hold its shape without drooping and feel smooth between your fingers.
- Fit a piping bag with a round tip (or snip the corner off a zip-top bag) and fill with meringue.
- Hold the piping bag straight up and down, about 1/2 inch above the baking sheet. Squeeze gently to create a small blob (the body), then pull the bag straight up while squeezing to create a tall, pointy shape (the head). Release pressure and pull away quickly. Each ghost should be about 1-2 inches tall, spaced 1 inch apart.
- Dip a toothpick into black gel food coloring and gently dot two tiny eyes on each ghost, about halfway up the head.
- Bake for 60-75 minutes, until the meringues are dry to the touch and easily lift off the parchment paper. If sticky, bake for another 10-15 minutes.
- Turn off the oven and leave the meringues inside with the door slightly ajar for about 30 minutes to dry completely. Then transfer to a wire rack to cool completely, about 15 minutes.
Notes
For best results, use room-temperature egg whites and a clean, grease-free bowl. Avoid humid days. If meringue weeps, sugar didn’t dissolve completely. Cracking is normal and adds a rustic look. Store in an airtight container at room temperature for up to 2 weeks.
Nutrition
- Serving Size: 1 ghost meringue coo
- Calories: 35
- Sugar: 8
- Sodium: 10
- Carbohydrates: 8
- Protein: 1
Keywords: ghost meringue cookies, Halloween cookies, meringue cookies, easy Halloween treats, spooky cookies