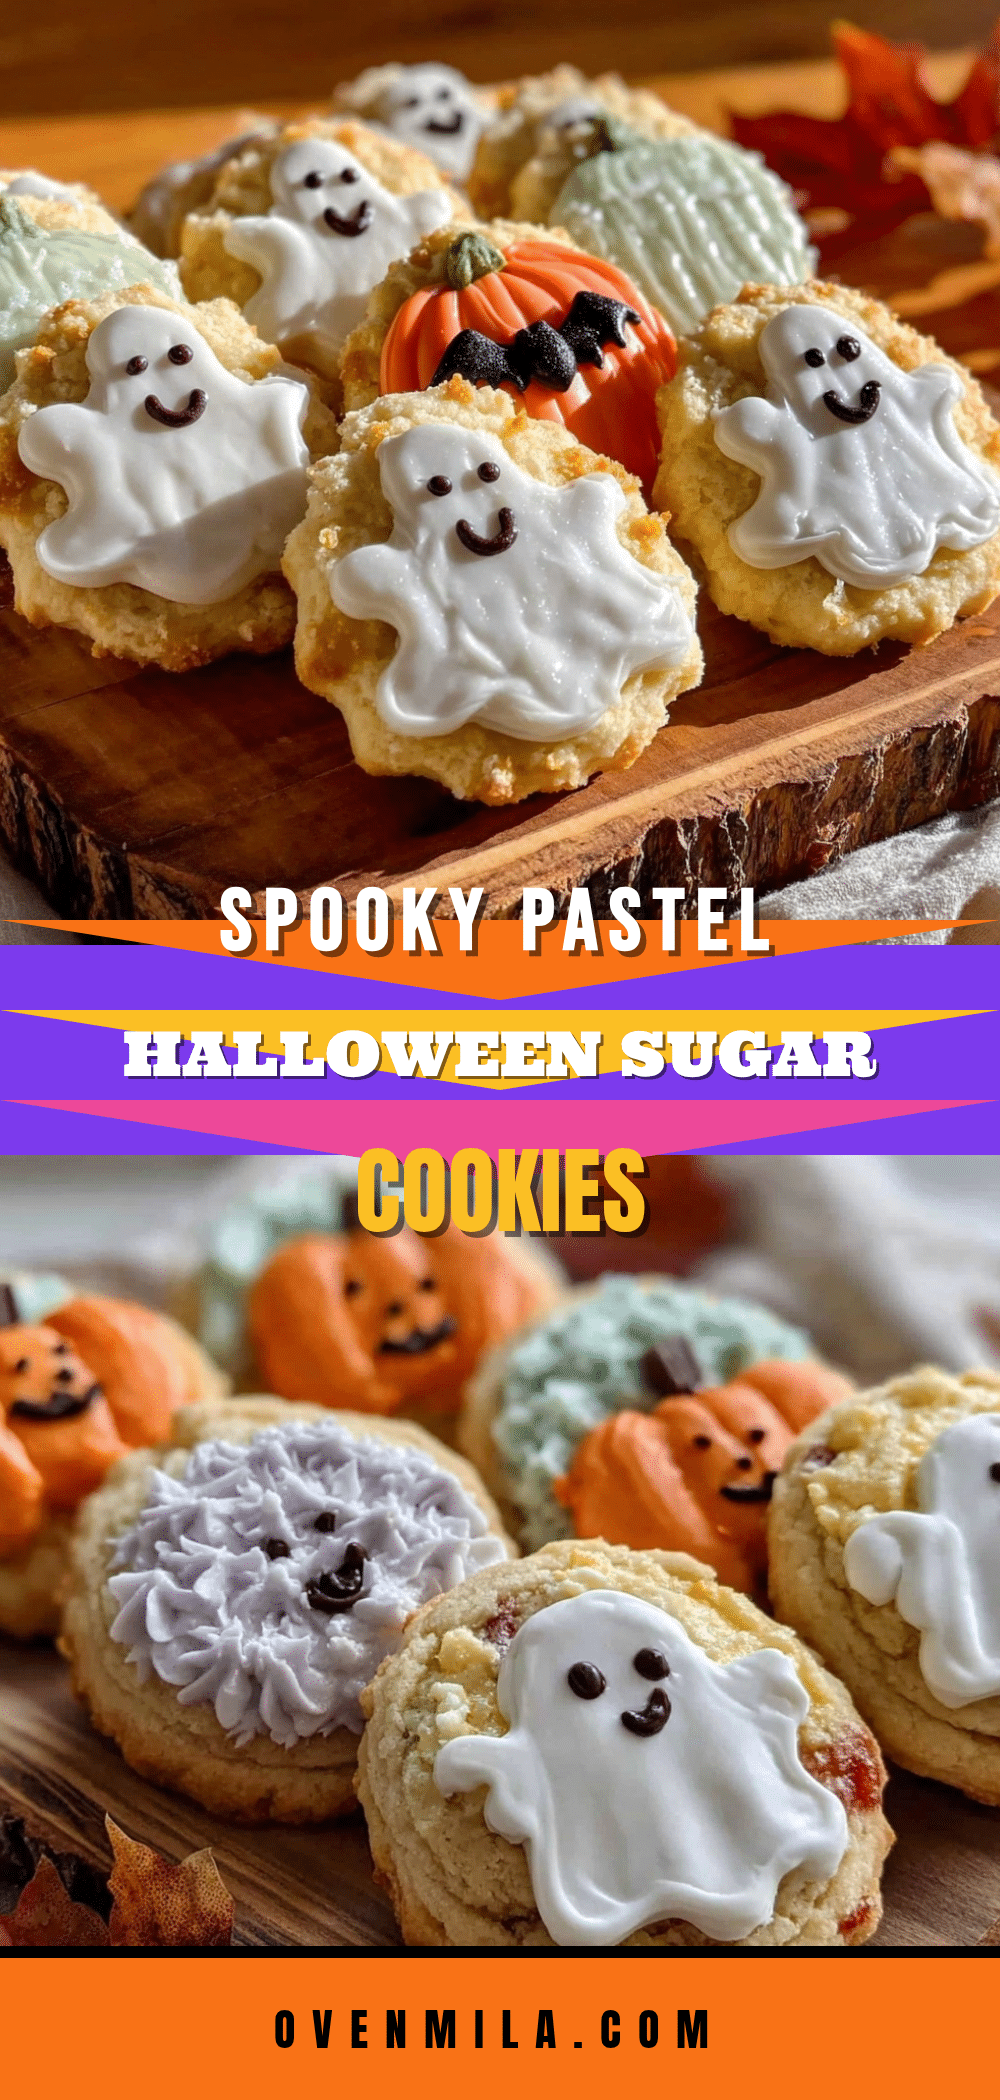
October mornings have a way of feeling hushed before the day truly wakes up—when the crisp air slips through cracked windows and the quiet hum of the neighborhood is just beginning. That’s when I found myself pulling out the sugar cookie dough, drawn not by a rush or a plan, but by the gentle thought of soft pastel ghosts dancing on a plate. The idea of perfect pastel Halloween sugar cookies with royal icing ghosts came to me slowly, almost as a secret ritual to ease into the season’s spookier side without the usual fuss.
There’s something calming about measuring flour by the spoonful in the stillness, the dough taking shape between my fingers like it was meant for this moment. The royal icing, smooth and glossy, reminds me of early attempts at decorating—tentative swirls and shy little ghosts that somehow felt like tiny companions in the quiet kitchen. I never wanted Halloween to be all orange and black noise; instead, I wished for something softer, a pastel whisper of the holiday that fits just right with the slow turning of autumn leaves outside.
Honestly, the first batch wasn’t perfect. Some ghosts looked more like sleepy clouds; a few cookies cracked or browned too much around the edges. But the feeling of holding that first iced cookie, cool and sweet, made me realize this recipe was less about flawless shapes and more about the comforting rhythm of baking itself. These pastel sugar cookies with royal icing ghosts have stuck around ever since, a gentle tradition that feels like a quiet nod to the season’s softer side. If you’re the kind who loves Halloween but craves a little calm in the chaos, this might be your kind of treat.
Why You’ll Love This Perfect Pastel Halloween Sugar Cookies Recipe
After many tries and tweaks, this recipe has settled into something that feels just right—an easy, joyful way to bring pastel charm to Halloween treats. Here’s why it might become your go-to sugar cookie recipe for the season:
- Quick & Easy: The dough comes together in about 20 minutes, and the royal icing is straightforward to mix, so you can have cookies ready to decorate in under an hour.
- Simple Ingredients: You likely have everything on hand—basic pantry staples like flour, sugar, butter, and eggs, plus powdered sugar and meringue powder for the icing.
- Perfect for Halloween Parties & Cozy Evenings: These cookies fit both a kids’ party and a quiet night with tea—soft, sweet, and just a little spooky.
- Crowd-Pleaser: The pastel colors and friendly ghost shapes charm everyone, from little ones who love the gentle look to adults who appreciate the subtle sweetness.
- Unbelievably Delicious: The sugar cookies have a tender crumb with a slightly crisp edge, perfectly balanced by the smooth, melt-in-your-mouth royal icing.
What sets this recipe apart is the careful balance of texture and flavor—no gritty sugar crystals, no overly sweet icing. Plus, the pastel royal icing ghosts bring a fresh, unexpected twist to Halloween baking, steering clear of the usual orange and black palette. I’ve also tested this recipe with almond flour swaps for gluten-free baking, and it still holds up beautifully. Whether you’re impressing guests or quietly treating yourself, these cookies offer a comforting sweetness that feels like a little celebration of the season’s softer moments.
What Ingredients You Will Need
This recipe uses simple, wholesome ingredients to create pastel Halloween sugar cookies that are both flavorful and visually charming. Most are pantry staples, and a few tips can help you get the best results.
- For the Sugar Cookies:
- All-purpose flour – 2 ¾ cups (345 g), sifted for a tender texture
- Baking powder – 1 teaspoon (adds a light rise)
- Salt – ½ teaspoon
- Unsalted butter – 1 cup (227 g), softened (I recommend Kerrygold for richness)
- Granulated sugar – 1 ¼ cups (250 g), for sweetness and crisp edges
- Large eggs – 2, room temperature (helps with dough binding)
- Pure vanilla extract – 2 teaspoons (real vanilla is key for flavor depth)
- Almond extract – ½ teaspoon (optional, but adds a lovely subtle note)
- For the Royal Icing Ghosts:
- Powdered sugar – 4 cups (480 g), sifted to avoid lumps
- Meringue powder – 3 tablespoons (for that perfect stiff icing)
- Water – about 6 tablespoons (adjust for consistency)
- Pastel gel food coloring – pink, lavender, mint green, and pale blue (adds gentle color without thinning the icing)
- Black edible marker or black gel icing – for ghost eyes and mouths
When picking your ingredients, fresh eggs and good-quality butter make a noticeable difference. For the pastel colors, gel food coloring works best since it won’t mess with the icing’s texture. If you want a dairy-free version, swap the butter for a plant-based alternative and choose a vegan meringue powder. And if you prefer, you can find almond flour in this avocado and smoked salmon crostini recipe as a handy ingredient example to keep your pantry stocked for baking experiments.
Equipment Needed
Making these pastel Halloween sugar cookies requires just a few basic kitchen tools, nothing too fancy:
- Stand mixer or hand mixer – for creaming butter and mixing dough smoothly
- Mixing bowls – at least two, one for dough and one for icing
- Rolling pin – a must for evenly rolling out the dough
- Cookie cutters – ghost-shaped for the theme; if you don’t have one, a small rounded cutter works too
- Baking sheets lined with parchment paper – prevents sticking and helps with even baking
- Cooling racks – to let cookies cool completely before icing
- Small bowls or containers – for dividing and coloring the royal icing
- Piping bags or resealable plastic bags – for decorating with the royal icing
- Toothpicks or fine paintbrushes – for adjusting icing details and smoothing edges
I’ve tried decorating with spoons and knives when piping bags weren’t handy, but the control just isn’t the same. If you’re on a budget, simple plastic piping bags or even a zip-top bag with a corner snipped off will do just fine. Keeping your rolling pin lightly floured helps prevent sticking, and I like to gently warm my icing bowls in a warm water bath if the royal icing gets too stiff. If you’re curious about more kitchen gadget tips, you might enjoy my thoughts on crockpot cooking from the maple bourbon pulled jackfruit sliders post, which also highlights some time-saving equipment tricks.
Preparation Method

- Mix the dry ingredients: In a medium bowl, whisk together 2 ¾ cups (345 g) sifted all-purpose flour, 1 teaspoon baking powder, and ½ teaspoon salt. Set aside. This step ensures even distribution and prevents clumps.
- Cream the butter and sugar: Using a stand or hand mixer, beat 1 cup (227 g) softened unsalted butter and 1 ¼ cups (250 g) granulated sugar on medium speed until light and fluffy, about 3-4 minutes. The texture should be pale and airy—this is key for tender cookies.
- Add eggs and extracts: Beat in 2 large eggs one at a time, followed by 2 teaspoons pure vanilla extract and ½ teaspoon almond extract (optional). Mix until fully incorporated but don’t overmix, or the dough may become tough.
- Combine wet and dry: Gradually add the dry ingredients to the wet, mixing on low speed until just combined. The dough should be soft but not sticky. If it feels too wet, toss in a tablespoon more flour.
- Chill the dough: Flatten the dough into a disk, wrap in plastic wrap, and refrigerate for at least 1 hour. This resting period helps the dough firm up for easier rolling and keeps the cookies from spreading too much during baking.
- Preheat oven and prepare pans: Preheat your oven to 350°F (175°C). Line baking sheets with parchment paper.
- Roll and cut out shapes: Lightly flour your work surface and rolling pin. Roll chilled dough to about ¼ inch (6 mm) thickness. Use ghost-shaped cookie cutters to cut out shapes, transferring them carefully to baking sheets.
- Bake the cookies: Bake for 8-10 minutes, or until edges just begin to turn golden. Watch carefully; overbaking leads to dry cookies. Let cool on baking sheets for 5 minutes, then transfer to wire racks to cool completely.
- Make the royal icing: In a clean bowl, combine 4 cups (480 g) sifted powdered sugar, 3 tablespoons meringue powder, and 6 tablespoons water. Beat on high for about 5-7 minutes until stiff peaks form. Adjust water to reach a thick but pipeable consistency.
- Divide and color the icing: Divide icing into small bowls, tint each with pastel gel food coloring—think soft pinks, lavenders, mint greens, and pale blues. Stir gently to keep the icing fluffier.
- Decorate the cookies: Fill piping bags with the pastel royal icing. Outline and flood the ghost shapes, using a toothpick to smooth edges and pop any bubbles. Let the base layer dry for at least an hour.
- Add details: Use a black edible marker or a fine tip with black gel icing to draw eyes and mouths on each ghost. Let the icing set completely, ideally overnight, before stacking or storing.
Pro tip: If your dough warms too much during rolling, pop it back in the fridge for 10 minutes to keep the shapes crisp. I’ve learned that patience here pays off in clean edges and fewer misshapen ghosts. You might find the icing flows easier if you warm the bowl slightly in a warm water bath before dividing and coloring. Baking time can vary slightly with your oven, so keep an eye on those edges!
Cooking Tips & Techniques for Perfect Pastel Halloween Sugar Cookies
Getting these sugar cookies just right takes a bit of practice, but a few insider tips can save you some trial and error:
- Don’t overmix the dough: Once the flour is added, mix just enough to combine. Overworking activates gluten and can toughen the cookies.
- Chill the dough thoroughly: This step is crucial for easier handling and preventing cookies from spreading too much in the oven. I’ve skipped this before and regretted it.
- Roll evenly: Aim for a uniform ¼ inch thickness. I sometimes use rolling pin rings or guides to help keep the dough flat and consistent.
- Use parchment paper or silicone mats: Avoids sticking and makes cleanup easier.
- Cool cookies completely before icing: Warm cookies melt the royal icing, leading to a messier finish.
- Start with the flood icing consistency: The base layer of royal icing should spread easily but not be runny. Adjust with small amounts of water as needed.
- Use a toothpick to pop bubbles: This little trick ensures a smooth, glass-like finish on your ghosts.
- Let the icing dry fully: I usually leave decorated cookies on a cooling rack overnight to harden, which helps stacking and storing later.
One lesson I learned the hard way was rushing the drying time—rushing leads to smudged designs and a sticky mess. Also, piping too thickly can cause the icing to crack as it hardens, so thin lines for details work best. Multitasking by preparing the dough while the oven preheats or coloring the icing while cookies cool can shave some time off your process. For more inspiration on balancing efficiency and flavor, check out my fresh quinoa salad recipe post, where timing and layering flavors go hand in hand.
Variations & Adaptations of Pastel Halloween Sugar Cookies
These sugar cookies are versatile, and you can tweak them to suit your taste or dietary needs:
- Flavor twists: Swap vanilla and almond extracts with lemon or orange zest for a citrusy note. I once tried a lavender extract variation that paired beautifully with the pastel colors.
- Gluten-free option: Replace all-purpose flour with a 1:1 gluten-free baking blend. I’ve had good results with Bob’s Red Mill blend for a tender crumb.
- Dairy-free adaptation: Use vegan butter and a plant-based egg replacer like flaxseed “egg” (1 tablespoon flaxseed meal + 3 tablespoons water per egg). The texture shifts slightly but remains delightful.
- Color and theme variations: Instead of ghosts, try pastel pumpkins or bats using different cutters. You can also add edible glitter or shimmer dust for sparkle.
- Alternative decorating methods: If royal icing isn’t your thing, try dipping cookies in pastel-colored melted white chocolate or using a simple glaze of powdered sugar and milk.
I personally love the pastel ghost theme because it’s different from the usual Halloween colors—soft but still festive. If you prefer more autumnal vibes, you might enjoy experimenting with the miso-glazed cod recipe I shared earlier for a flavorful twist on fall dining. Adjusting the cookie and icing colors to match your mood or party theme makes these treats endlessly customizable.
Serving & Storage Suggestions
These pastel Halloween sugar cookies are best served at room temperature, letting the royal icing’s subtle sweetness shine through. Arrange them on a simple white plate or a pastel-colored platter to highlight the gentle hues and ghostly shapes.
They pair wonderfully with a warm cup of tea or a lightly spiced cider, perfect for a cozy afternoon treat. If you’re hosting a Halloween gathering, these cookies add a soft contrast to more traditional spooky snacks.
For storage, place the cookies in an airtight container separated by parchment paper layers to prevent sticking. They keep well at room temperature for up to 5 days. If you want to store them longer, freezing is your friend—wrap cookies individually in plastic wrap and freeze in a sealed container for up to 3 months. When ready to eat, let them thaw at room temperature to avoid condensation messing with the icing.
Reheating isn’t necessary, but if you want a slightly softer bite, a few seconds in the microwave (10-15 seconds) works wonders. Note that flavors often deepen and the cookie becomes more tender after resting a day or two, so baking ahead can pay off.
Nutritional Information & Benefits
These sugar cookies are an occasional treat, but here’s a general nutritional idea per cookie (based on 24 cookies): approximately 150 calories, 7 grams fat, 22 grams carbohydrates, 1 gram fiber, and 2 grams protein.
The recipe uses real butter and eggs, providing some beneficial fats and protein, while the royal icing’s meringue powder adds egg whites without extra fat. Using real vanilla extract adds flavor without added sugar.
If you choose the gluten-free or dairy-free adaptations, the cookies can fit specific dietary needs, though keep in mind the sugar content remains moderate. For a lighter option, you can reduce the sugar slightly or experiment with natural sweeteners, but that will alter texture.
From a wellness perspective, I appreciate recipes like this that balance indulgence with simplicity—no artificial colors or preservatives, just classic ingredients and a bit of baking love. It’s a treat meant to be savored, not rushed.
Conclusion
These perfect pastel Halloween sugar cookies with royal icing ghosts have become a quiet tradition for me—a peaceful way to mark the season that feels both festive and gentle. They’re the kind of cookie that invites you to slow down, enjoy the process, and savor the moment, whether you’re decorating alone or sharing with friends.
Feel free to play with the colors, flavors, and decorations to make this recipe your own. I’m always delighted when these cookies spark a little joy on an otherwise ordinary day, and I hope you find the same calm happiness in baking and eating them.
If you try the recipe, I’d love to hear how your pastel ghosts turned out or any creative twists you added. Sharing those stories is part of the fun, isn’t it? So go ahead—bake slowly, decorate gently, and enjoy every bite.
Frequently Asked Questions
Can I make the cookie dough ahead of time?
Yes! You can prepare the dough up to 3 days in advance and keep it wrapped in the fridge, or freeze it for up to 2 months. Just thaw in the refrigerator before rolling out.
What if I don’t have ghost-shaped cookie cutters?
No worries! You can use any simple shape like circles or ovals and decorate them as ghosts with the royal icing. A small rounded cutter or even a glass rim works well.
How do I store decorated cookies without ruining the icing?
Store in an airtight container with parchment paper layers, and avoid stacking until the icing is completely dry (preferably overnight). Keep them at room temperature away from humidity.
Can I use food coloring other than pastel shades?
Absolutely! Darker or brighter colors work fine, but pastel tones give these cookies their unique soft Halloween look. Use gel colors to avoid thinning the icing.
Is royal icing necessary, or can I use another frosting?
Royal icing gives a smooth, hard finish that’s perfect for detailed decorating and stacking. If you prefer, a simple glaze or melted white chocolate can be used, but they won’t harden the same way.
Pin This Recipe!
Perfect Pastel Halloween Sugar Cookies Recipe with Royal Icing Ghosts

Soft pastel Halloween sugar cookies decorated with smooth royal icing ghosts, offering a gentle and festive treat perfect for the season.
- Prep Time: 20 minutes
- Cook Time: 10 minutes
- Total Time: 1 hour 30 minutes
- Yield: 24 cookies 1x
- Category: Dessert
- Cuisine: American
Ingredients
- 2 ¾ cups (345 g) all-purpose flour, sifted
- 1 teaspoon baking powder
- ½ teaspoon salt
- 1 cup (227 g) unsalted butter, softened
- 1 ¼ cups (250 g) granulated sugar
- 2 large eggs, room temperature
- 2 teaspoons pure vanilla extract
- ½ teaspoon almond extract (optional)
- 4 cups (480 g) powdered sugar, sifted
- 3 tablespoons meringue powder
- about 6 tablespoons water (adjust for consistency)
- Pastel gel food coloring (pink, lavender, mint green, pale blue)
- Black edible marker or black gel icing for ghost eyes and mouths
Instructions
- In a medium bowl, whisk together sifted all-purpose flour, baking powder, and salt. Set aside.
- Using a stand or hand mixer, beat softened unsalted butter and granulated sugar on medium speed until light and fluffy, about 3-4 minutes.
- Beat in eggs one at a time, followed by pure vanilla extract and almond extract (if using). Mix until fully incorporated but do not overmix.
- Gradually add the dry ingredients to the wet mixture, mixing on low speed until just combined. If dough feels too wet, add a tablespoon more flour.
- Flatten dough into a disk, wrap in plastic wrap, and refrigerate for at least 1 hour.
- Preheat oven to 350°F (175°C). Line baking sheets with parchment paper.
- Lightly flour work surface and rolling pin. Roll chilled dough to about ¼ inch (6 mm) thickness.
- Use ghost-shaped cookie cutters to cut out shapes and transfer to baking sheets.
- Bake for 8-10 minutes or until edges just begin to turn golden. Let cool on baking sheets for 5 minutes, then transfer to wire racks to cool completely.
- In a clean bowl, combine sifted powdered sugar, meringue powder, and water. Beat on high for 5-7 minutes until stiff peaks form. Adjust water for thick but pipeable consistency.
- Divide icing into small bowls and tint each with pastel gel food coloring. Stir gently to keep icing fluffy.
- Fill piping bags with pastel royal icing. Outline and flood ghost shapes, using a toothpick to smooth edges and pop bubbles. Let base layer dry for at least 1 hour.
- Use black edible marker or black gel icing to draw eyes and mouths on each ghost. Let icing set completely, ideally overnight, before stacking or storing.
Notes
Chill dough thoroughly to prevent spreading. Use gel food coloring to avoid thinning icing. Let icing dry completely overnight for best results. If dough warms during rolling, refrigerate again for 10 minutes. Adjust water in royal icing for desired consistency. Use parchment paper or silicone mats to prevent sticking.
Nutrition
- Serving Size: 1 cookie
- Calories: 150
- Fat: 7
- Carbohydrates: 22
- Fiber: 1
- Protein: 2
Keywords: Halloween sugar cookies, pastel sugar cookies, royal icing ghosts, Halloween treats, soft sugar cookies, pastel Halloween cookies


