There used to be a little bakery tucked between a laundromat and a nail salon on Grand Avenue that made the most incredible pumpkin pie bars. When they closed three years ago—literally just locked up and disappeared overnight—I was devastated. I mean, I actually stood there staring at the “For Lease” sign like I’d lost a friend. That first autumn without their version of pumpkin pie bars, nothing else felt right. After maybe seven or eight tries—honestly, I lost count somewhere around attempt five—I finally cracked it. These pumpkin pie bars with graham cracker crust are that exact recipe, and let me tell you, the satisfaction of nailing it was something else.
The thing is, these aren’t just another pumpkin dessert. They’re the kind of bars that disappear before you’ve even finished pouring yourself a coffee. I brought a tray to a neighborhood potluck last fall, and someone actually asked if I’d cater their Thanksgiving. (I politely declined—I’m not that brave.) The graham cracker crust is buttery and sturdy, the filling is spiced just right, and there’s no fussing with pie dough or worrying about a soggy bottom. Maybe you’ve been there—staring at a pumpkin pie recipe and thinking, “That looks great but I don’t have the patience for a crust today.” I get it completely.
What makes these pumpkin pie bars so special is how they manage to feel both familiar and surprising. The first bite hits you with that warm pumpkin spice, and then the buttery crust kicks in. It’s comfort food at its finest, but in a format that’s actually easier than traditional pie. No rolling pins, no crimping edges, no blind baking drama. Just mix, press, pour, bake, and watch them disappear. Honestly, this is the dessert that made me realize sometimes the simpler path leads to something even better.
Why You’ll Love This Recipe
Let’s be real for a second—I’ve tested this recipe more times than I care to admit. Some batches were too runny, others too dry, and one memorable attempt ended up tasting more like pumpkin scrambled eggs than pie bars. But after all that trial and error, I can confidently say this version is the one. Here’s why these pumpkin pie bars with graham cracker crust will become your new fall favorite:
- Quick & Easy: From start to finish, you’re looking at about 45 minutes of active time. The oven does most of the work while you get on with your life—or prep the rest of your dinner party menu.
- Simple Ingredients: You probably already have most of these in your pantry. No hunting down obscure spices or specialty flours. Just good, honest ingredients that work.
- Perfect for Entertaining: These bars are made for gatherings. They slice cleanly, travel well, and look impressive on a dessert table without any last-minute fuss.
- Crowd-Pleaser: I’ve served these to pumpkin lovers and pumpkin skeptics alike. The skeptics always come back for seconds. Always.
- Unbelievably Delicious: The texture is where these bars really shine. Silky smooth filling against that crunchy, buttery crust—it’s the kind of contrast that makes you close your eyes after the first bite.
What sets these pumpkin pie bars apart from every other recipe out there is the technique. I spent weeks perfecting the ratio of eggs to pumpkin to evaporated milk so the filling sets up firm but stays creamy. No cracking on top, no weeping around the edges, just perfect bars every single time. And that graham cracker crust? It’s pre-baked just long enough to stay crisp without burning. This isn’t just another pumpkin bar recipe—it’s the result of genuine obsession and way too many dishes.
What Ingredients You Will Need
This recipe uses simple, honest ingredients to create something genuinely special. Most of these are pantry staples, especially once fall rolls around and pumpkin spice cravings kick in. Let me walk you through each one and why it matters.
For the Graham Cracker Crust
- 2 cups graham cracker crumbs (about 14-16 full sheets)—I prefer using whole graham crackers and crushing them myself. The texture is more consistent, and honestly, it tastes fresher. Pulse them in a food processor or crush them in a zip-top bag with a rolling pin. Both work fine.
- 1/2 cup unsalted butter, melted—Salted butter works too if that’s what you have, just reduce the added salt slightly. I use Kerrygold when I’m feeling fancy, but any good unsalted butter does the job.
- 1/4 cup granulated sugar—This adds just enough sweetness to balance the salty butter. Don’t skip it—the crust needs that little hit of sugar.
- 1/4 teaspoon salt—A tiny pinch makes all the difference. It keeps the crust from tasting flat.
For the Pumpkin Filling
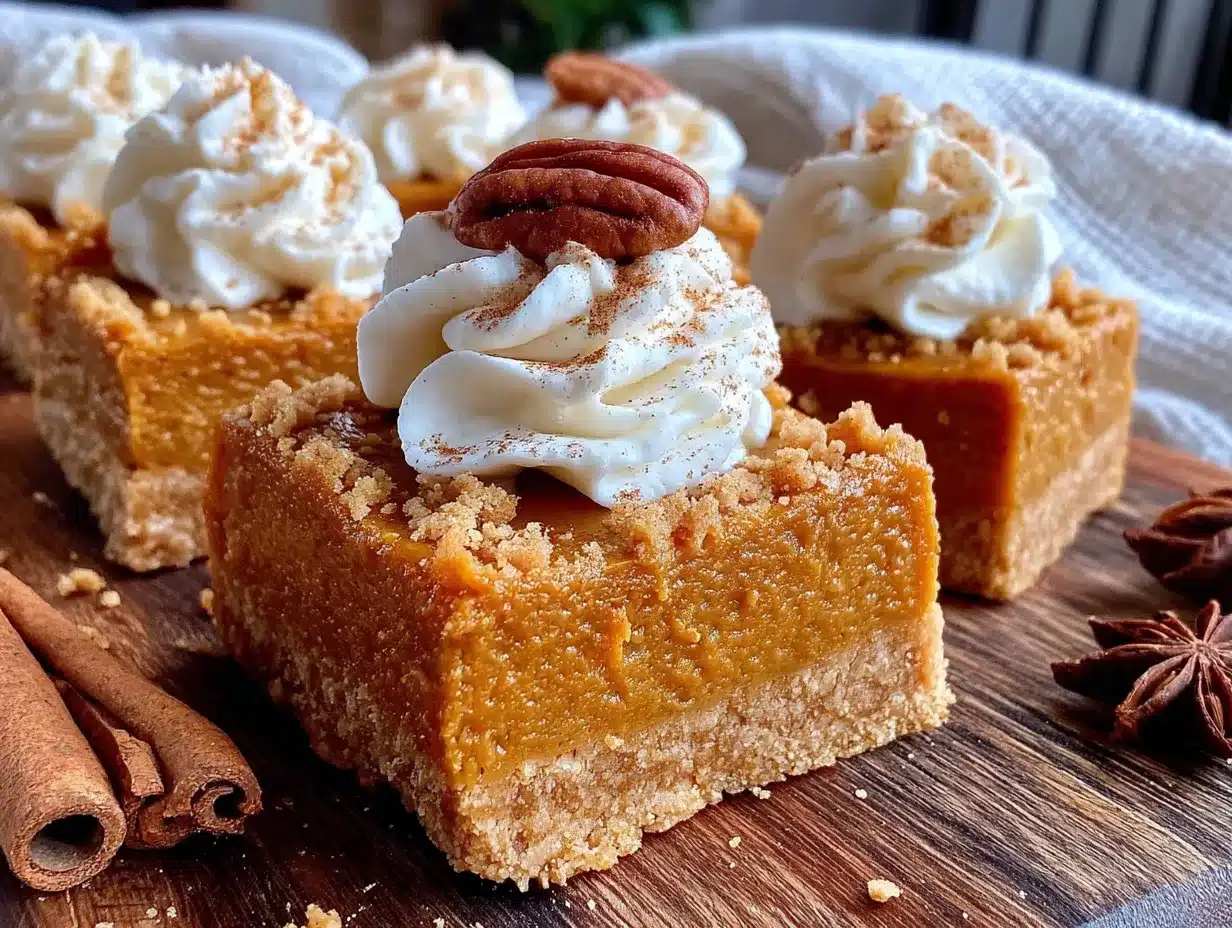
- 1 can (15 oz) pumpkin puree—Make sure you’re buying pure pumpkin, not pumpkin pie filling. They look similar but are very different. Libby’s is my go-to brand, but store brands work fine too.
- 1 can (12 oz) evaporated milk—This is the secret to that silky, creamy texture. Don’t substitute regular milk or heavy cream—evaporated milk has a concentrated creaminess that nothing else quite matches.
- 3 large eggs—Room temperature eggs incorporate more smoothly into the filling. If you forgot to take them out ahead of time, place them in a bowl of warm water for 5 minutes.
- 3/4 cup granulated sugar—Just enough sweetness without overwhelming the pumpkin flavor.
- 1/4 cup brown sugar, packed—This adds a subtle molasses note that deepens the overall flavor. Light or dark brown sugar both work—dark gives a richer taste.
- 2 teaspoons pumpkin pie spice—You can buy it pre-mixed or make your own. I’ll share my blend in the tips section.
- 1 teaspoon ground cinnamon—Because you can never have too much cinnamon in a pumpkin dessert.
- 1/2 teaspoon salt—Salt is crucial here. It balances the sweetness and makes the spices pop.
For the Optional Topping
- Whipped cream or whipped topping—Not strictly necessary, but highly recommended. The contrast of cold, creamy topping against the spiced bars is heavenly.
- Extra cinnamon for dusting—A light sprinkle right before serving makes everything look prettier.
Equipment Needed
You don’t need a professional kitchen to make these pumpkin pie bars with graham cracker crust. Here’s what you’ll need:
- 9×13-inch baking pan—This is the perfect size for crowd-friendly bars. Glass, ceramic, or metal all work, though metal tends to brown the crust more evenly.
- Large mixing bowls—You’ll need one for the crust and one for the filling. Nothing fancy required.
- Whisk—A standard wire whisk is perfect for smoothing out the filling. No electric mixer needed.
- Measuring cups and spoons—Accuracy matters in baking, so use proper measuring tools rather than guessing.
- Food processor or zip-top bag—For crushing graham crackers. A food processor gives the most consistent crumbs, but a bag and rolling pin work perfectly too.
- Spatula—For pressing the crust into the pan and scraping every last bit of filling out of the bowl.
- Parchment paper—This is optional but makes lifting the bars out of the pan so much easier. I highly recommend it.
If you don’t have a food processor, don’t worry. I’ve made this crust countless times using the bag method, and it turns out great. Just make sure you crush the crackers into fine, even crumbs—no big chunks allowed.
Preparation Method
Alright, let’s get to the good part. These pumpkin pie bars come together in stages, but none of it is complicated. Here’s exactly how to make them:
Step 1: Preheat and Prep
Preheat your oven to 350°F (175°C). While it’s heating up, line your 9×13-inch baking pan with parchment paper, leaving some overhang on the long sides. This creates handles that make lifting the bars out later a breeze. If you don’t have parchment, you can grease the pan well with butter or non-stick spray.
Step 2: Make the Crust
In a medium bowl, combine the graham cracker crumbs, melted butter, sugar, and salt. Stir with a fork until the mixture looks like wet sand and holds together when you squeeze it. Pour the mixture into your prepared pan and press it down firmly and evenly. I use the bottom of a measuring cup to get it really compact—this prevents the crust from crumbling when you cut the bars later. Bake for 10 minutes, then set aside to cool slightly while you make the filling. The crust should be lightly golden and smell amazing.
Step 3: Make the Filling
In a large bowl, whisk together the pumpkin puree, evaporated milk, and eggs until smooth. Add both sugars, the pumpkin pie spice, cinnamon, and salt. Whisk until everything is completely combined and no streaks of dry spices remain. The mixture should be smooth, glossy, and a beautiful deep orange color. Don’t over-whisk—you just want it combined, not aerated.
Step 4: Assemble and Bake
Pour the filling over the pre-baked crust. It will spread out naturally, but give the pan a gentle tilt if needed to make sure it reaches all the corners. Bake at 350°F (175°C) for 40-45 minutes. The bars are done when the edges are set and the center jiggles just slightly when you gently shake the pan. A knife inserted an inch from the center should come out mostly clean. If the center still looks very liquid, give it another 5 minutes and check again.
Step 5: Cool and Chill
Let the bars cool completely at room temperature, then refrigerate for at least 4 hours, preferably overnight. I know the waiting is hard—trust me, I’ve been tempted to cut into a warm pan more times than I’d like to admit. But chilling is crucial for clean slices. The filling continues to set as it cools, and those cold bars will cut into perfect squares without any mess.
Step 6: Slice and Serve
Once fully chilled, use the parchment overhang to lift the entire block of bars out of the pan. Place it on a cutting board and use a sharp knife to slice into squares. Wipe the knife clean between cuts for the neatest edges. Serve cold or at room temperature, topped with whipped cream and a dusting of cinnamon if desired.
Cooking Tips & Techniques
After making these pumpkin pie bars more times than I can count, I’ve picked up a few tricks that make a real difference. Here’s what I’ve learned the hard way:
Don’t over-bake. This is the most common mistake I see. The filling will continue to set as it cools, so pull it out when the center still has a slight wobble. Over-baked pumpkin bars develop cracks and a rubbery texture. Trust the jiggle test.
Press that crust firmly. I cannot stress this enough. A loosely packed crust will crumble into a thousand pieces when you try to cut the bars. Use the bottom of a glass or measuring cup and really lean into it. Even, firm pressure is the goal.
Make your own pumpkin pie spice. It’s incredibly easy and tastes so much fresher than the jarred stuff. Mix 2 teaspoons cinnamon, 1 teaspoon ginger, 1/2 teaspoon nutmeg, 1/2 teaspoon allspice, and 1/4 teaspoon cloves. Store any extra in a small jar for future baking projects.
Room temperature ingredients matter. Cold eggs can cause the filling to seize up slightly, leading to a less smooth texture. Let your eggs sit on the counter for 30 minutes before starting, or warm them in a bowl of lukewarm water for 5 minutes.
Use a sharp knife for cutting. A dull blade will drag through the filling and mess up those clean edges. Run your knife under hot water, dry it off, and make one smooth cut. Wipe the blade clean between each cut for the best results.
I once forgot to add the sugar to a batch of these bars. Let me tell you—unsweetened pumpkin bars are not a pleasant surprise. Always double-check your ingredients before you start mixing. Learn from my mistakes, friends.
Variations & Adaptations
One of the best things about this recipe is how adaptable it is. Here are some variations I’ve tried and loved:
Gluten-Free Version: Use gluten-free graham crackers or gluten-free ginger snaps for the crust. The filling is naturally gluten-free, so this swap is easy and delicious. I’ve tested this with several brands, and they all work beautifully.
Dairy-Free Adaptation: Substitute the butter in the crust with melted coconut oil or a dairy-free butter alternative. For the filling, use full-fat coconut milk instead of evaporated milk. The coconut flavor is subtle and actually complements the pumpkin nicely.
Spiced-Up Variation: Add 1/4 teaspoon of cayenne pepper or chipotle powder to the filling for a sweet-heat combination that’s surprisingly addictive. I made this version for a Friendsgiving gathering, and it was the first thing to disappear.
Nutty Crust Option: Replace half the graham cracker crumbs with finely ground pecans or walnuts. Toast the nuts first for extra flavor. This adds a lovely richness that pairs beautifully with the pumpkin.
Individual Portions: Make these in a muffin tin for perfectly portioned bars. Line 12 muffin cups with paper liners, press the crust into each one, fill, and bake for about 20-25 minutes. These are great for parties or grab-and-go desserts.
Chocolate Drizzle: Melt some semi-sweet chocolate chips with a teaspoon of coconut oil and drizzle it over the chilled bars. The chocolate-pumpkin combination is absolutely divine, if I do say so myself.
Serving & Storage Suggestions
These pumpkin pie bars with graham cracker crust are incredibly versatile when it comes to serving. Here’s how to make the most of them:
Serving Temperature: I prefer these bars cold, straight from the refrigerator. The filling is firmer, the crust is crunchier, and the flavors taste cleaner. But they’re also delicious at room temperature if you prefer a softer texture. For parties, I usually take them out of the fridge about 15 minutes before serving.
Presentation Tips: Arrange the bars on a large platter and garnish with a dollop of whipped cream on each one. A light dusting of cinnamon or pumpkin pie spice adds a beautiful finishing touch. For holiday gatherings, I like to add a few fresh cranberries and mint leaves for color.
What to Serve Alongside: These bars pair wonderfully with hot coffee, spiced apple cider, or a warm chai latte. For a full dessert spread, serve them alongside classic pumpkin pie, apple crisp, or pecan bars.
Storage Instructions: Store the bars in an airtight container in the refrigerator for up to 5 days. Place parchment paper between layers to prevent sticking. The flavors actually deepen and improve after a day or two, so don’t hesitate to make them ahead.
Freezing Tips: These bars freeze beautifully. Wrap individual slices tightly in plastic wrap, then place them in a freezer-safe bag or container. They’ll keep for up to 3 months. Thaw in the refrigerator overnight before serving. I always keep a stash in my freezer for unexpected guests or late-night pumpkin cravings.
Reheating: These bars are meant to be served cold or at room temperature, but if you prefer them warm, pop a slice in the microwave for 10-15 seconds. Just know that the crust will soften slightly.
Nutritional Information & Benefits
While these pumpkin pie bars are definitely a treat, they do offer some nutritional perks worth noting. Here’s an approximate breakdown per serving (based on 24 servings):
- Calories: 185
- Total Fat: 9g
- Saturated Fat: 5g
- Cholesterol: 45mg
- Sodium: 180mg
- Total Carbohydrates: 24g
- Dietary Fiber: 1g
- Sugars: 16g
- Protein: 4g
Pumpkin is a nutritional powerhouse, packed with vitamin A, fiber, and antioxidants. It’s one of those rare ingredients that feels indulgent but actually does your body some good. The eggs add protein, and the graham cracker crust provides a bit of energy from carbohydrates. Of course, this is still a dessert—but it’s one that’s a little kinder to your body than most.
If you’re watching your sugar intake, you can reduce the granulated sugar to 1/2 cup. The bars will be less sweet but still delicious. For a lower-fat option, use low-fat evaporated milk and reduce the butter in the crust to 1/3 cup. The texture will be slightly different, but still satisfying.
Conclusion
These pumpkin pie bars with graham cracker crust are the dessert that keeps on giving. They’re easy enough for a weekday baking project, impressive enough for Thanksgiving dinner, and portable enough for potlucks and parties. After that little bakery on Grand Avenue closed, I never thought I’d find a replacement for their pumpkin bars. But honestly? I think my version is even better.
What I love most about this recipe is how it brings people together. Every time I bring a tray of these bars somewhere, someone asks for the recipe. It’s become my signature fall dessert, and I’m genuinely proud of that. The combination of that buttery, crunchy crust and the silky, spiced filling is just unbeatable.
I’d love to hear how these turn out for you. Did you try any of the variations? Did your guests go back for seconds? Drop a comment below and let me know—I read every single one. And if you’re feeling generous, share this recipe with a friend who needs a little pumpkin in their life. Happy baking, friends!
Frequently Asked Questions
Can I use fresh pumpkin instead of canned?
Absolutely, but you’ll need to roast and puree the pumpkin first. Make sure to drain off any excess liquid, as fresh pumpkin can be more watery than canned. You’ll want the puree to be thick and smooth, similar to the consistency of canned pumpkin.
Why did my pumpkin pie bars crack on top?
Cracking usually happens when the bars are over-baked or when the oven temperature is too high. The filling expands and then contracts as it cools, causing cracks. To prevent this, bake at the recommended temperature and pull the bars out when the center still has a slight jiggle.
Can I make these bars ahead of time?
Yes, and I actually recommend it! These bars taste even better after a day or two in the refrigerator because the flavors have time to meld. You can make them up to 3 days in advance and store them covered in the fridge.
How do I get clean, neat slices?
Patience is key here. Make sure the bars are fully chilled—at least 4 hours, but overnight is better. Use a sharp knife and wipe it clean between each cut. Run the knife under hot water and dry it before making each slice for the cleanest edges.
Can I use a different crust?
Definitely! Ginger snap cookies make an amazing crust that adds a spicy kick. Shortbread cookies or vanilla wafers also work well. Just adjust the butter slightly if needed—you want the crust mixture to hold together when pressed.
Pin This Recipe!
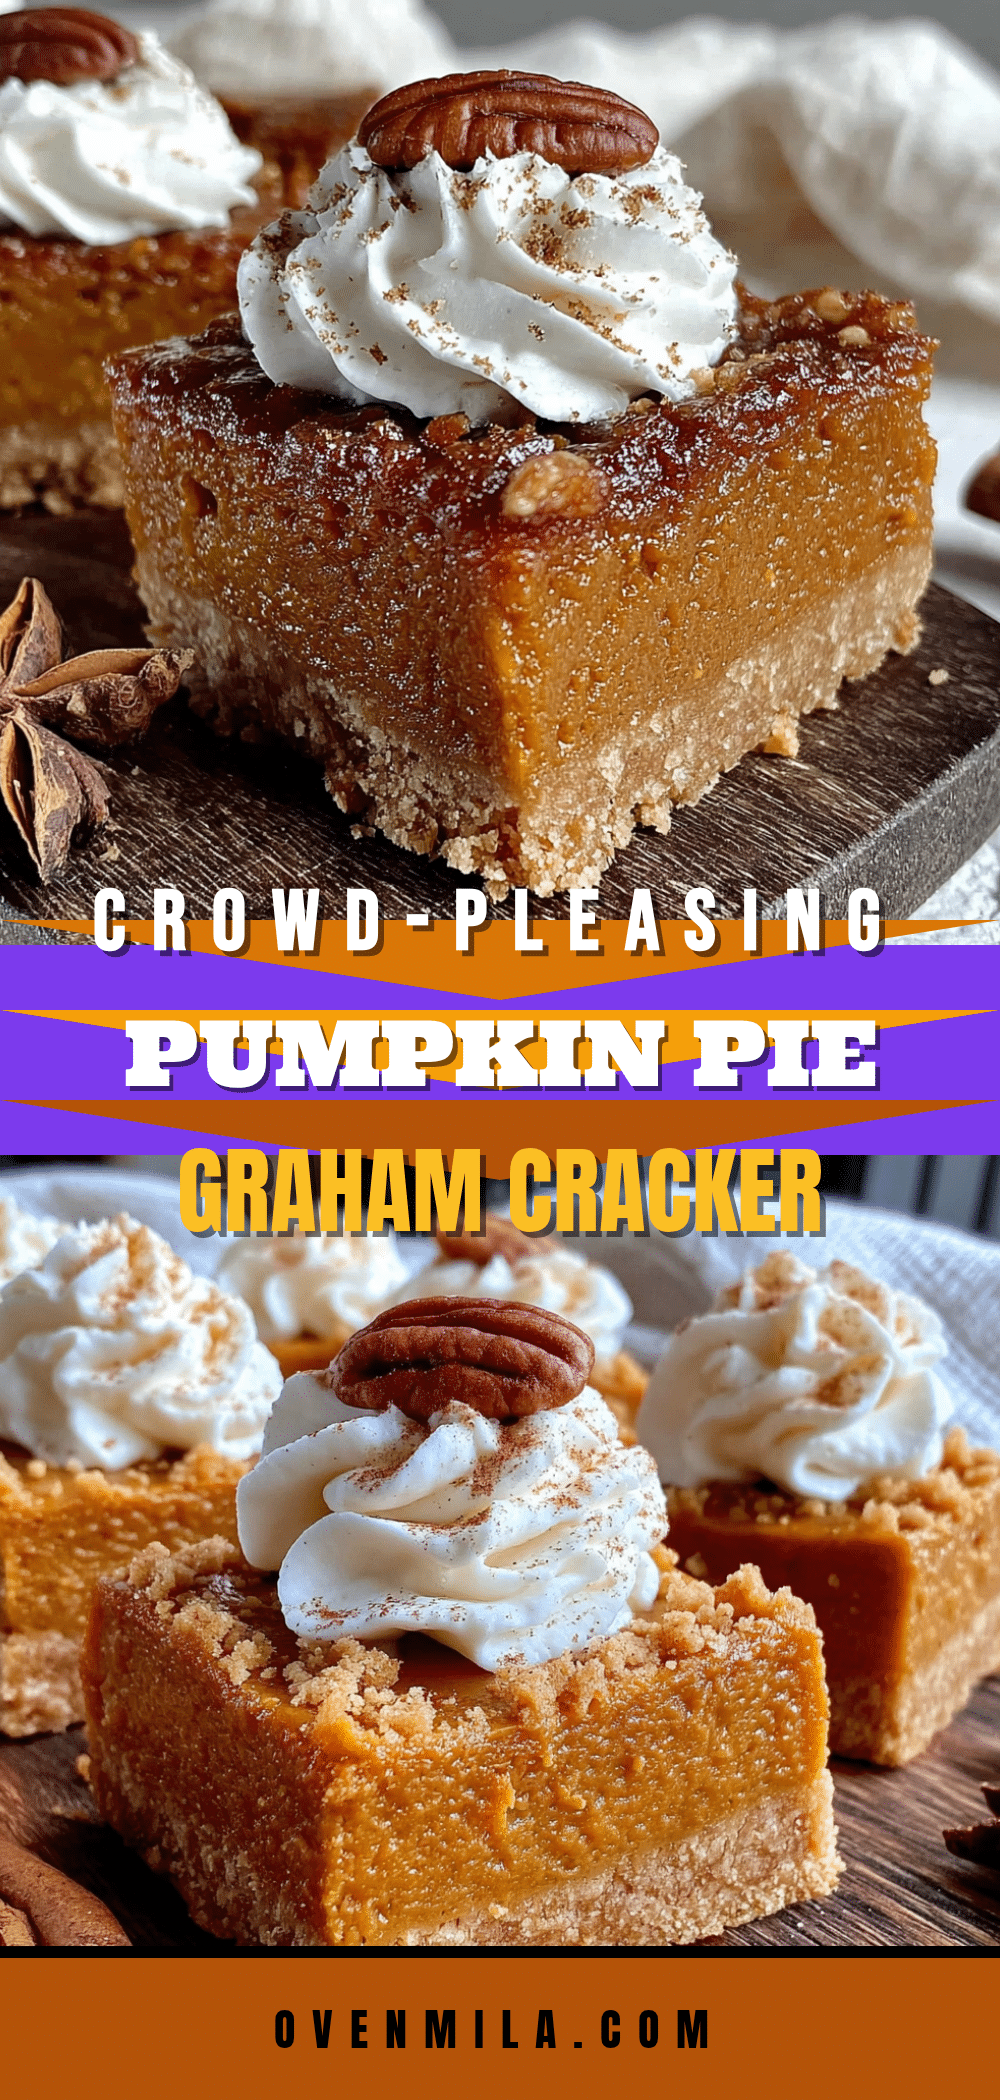
Pumpkin Pie Bars with Graham Cracker Crust (Easy Fall Dessert)
These pumpkin pie bars with graham cracker crust are the perfect easy fall dessert. With a buttery, crunchy crust and a silky, spiced pumpkin filling, they’re simpler than traditional pie but just as delicious—ideal for entertaining or a cozy treat.
- Prep Time: 15 minutes
- Cook Time: 45 minutes
- Total Time: 5 hours (includes chilling time)
- Yield: 24 servings 1x
- Category: Dessert
- Cuisine: American
Ingredients
- 2 cups graham cracker crumbs (about 14–16 full sheets)
- 1/2 cup unsalted butter, melted
- 1/4 cup granulated sugar
- 1/4 teaspoon salt
- 1 can (15 oz) pumpkin puree
- 1 can (12 oz) evaporated milk
- 3 large eggs, room temperature
- 3/4 cup granulated sugar
- 1/4 cup brown sugar, packed
- 2 teaspoons pumpkin pie spice
- 1 teaspoon ground cinnamon
- 1/2 teaspoon salt
- Whipped cream or whipped topping (optional, for serving)
- Extra cinnamon for dusting (optional)
Instructions
- Preheat oven to 350°F (175°C). Line a 9×13-inch baking pan with parchment paper, leaving overhang on the long sides.
- In a medium bowl, combine graham cracker crumbs, melted butter, 1/4 cup granulated sugar, and 1/4 teaspoon salt. Stir until mixture resembles wet sand and holds together when squeezed.
- Press the crust mixture firmly and evenly into the prepared pan. Bake for 10 minutes, then set aside to cool slightly.
- In a large bowl, whisk together pumpkin puree, evaporated milk, and eggs until smooth.
- Add 3/4 cup granulated sugar, brown sugar, pumpkin pie spice, cinnamon, and 1/2 teaspoon salt. Whisk until completely combined and smooth.
- Pour the filling over the pre-baked crust. Gently tilt the pan to spread evenly.
- Bake at 350°F (175°C) for 40-45 minutes, until edges are set and center jiggles slightly when shaken. A knife inserted an inch from the center should come out mostly clean.
- Let bars cool completely at room temperature, then refrigerate for at least 4 hours, preferably overnight.
- Once fully chilled, use parchment overhang to lift bars out of pan. Slice into squares with a sharp knife, wiping blade clean between cuts.
- Serve cold or at room temperature, topped with whipped cream and a dusting of cinnamon if desired.
Notes
Don’t over-bake; the center should still jiggle slightly. Press the crust firmly for clean slices. Room temperature ingredients ensure a smooth filling. For best results, chill overnight before slicing.
Nutrition
- Serving Size: 1 bar
- Calories: 185
- Sugar: 16
- Sodium: 180
- Fat: 9
- Saturated Fat: 5
- Carbohydrates: 24
- Fiber: 1
- Protein: 4
Keywords: pumpkin pie bars, graham cracker crust, fall dessert, easy pumpkin bars, pumpkin dessert, Thanksgiving dessert


