The way the black cocoa dust settles on your fingers—fine as powdered shadow, staining the creases of your palms a soft, smoky gray—that’s the first thing you notice. That, and the faint, almost bitter smell of deep chocolate that isn’t sweet at all. I made these Adorable Black Cat Halloween Sugar Cookies for a party last October, and honestly, I wasn’t prepared for how much the dough would feel like velvet. It’s not a normal sugar cookie dough. It’s darker, denser, and a little bit moody, which is exactly the point when you’re trying to shape a batch of tiny, mischievous black cats.
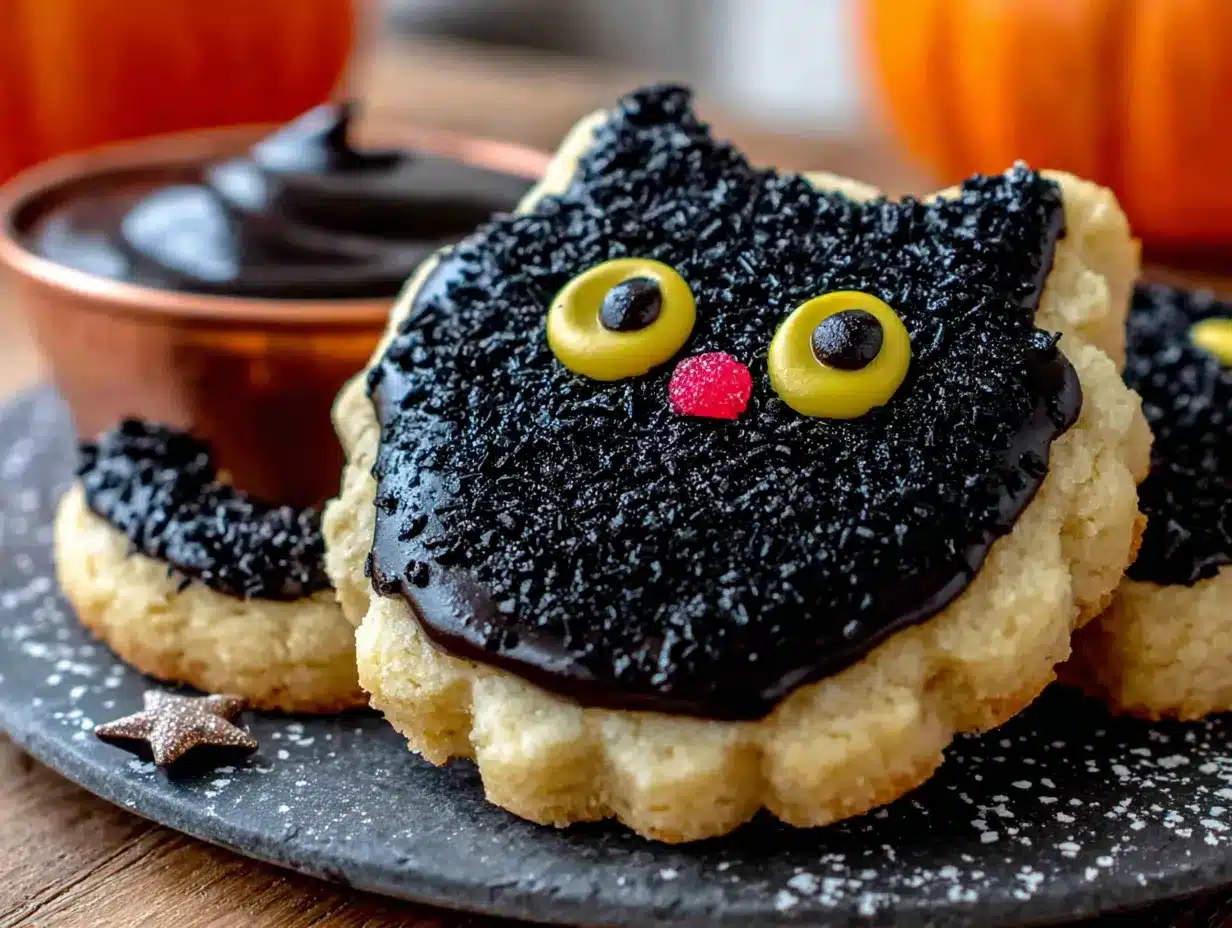
I spent a good hour just pressing the little ears into place, using the tip of a chopstick to poke whisker holes, and realizing that the orange icing—just a tiny dot for eyes—made all the difference. It’s that one pop of color against all that darkness that makes them feel alive, you know? Like they’re about to blink. The whole kitchen smelled like Halloween night: cold air from the open window, the warm vanilla undertone fighting through the black cocoa, and a little bit of powdered sugar floating around like fog.
These aren’t fussy cookies. They don’t need royal icing piping bags or steady hands. They just need a little patience and a willingness to get your hands dirty—literally, with black dough under your fingernails. That’s the part I love most. It feels like you’re making something from a storybook, not just a recipe. And when you pull them out of the oven, the black color deepens into something almost velvety, like a cat’s coat in the moonlight. I think that’s why this recipe stuck with me. It’s not about perfection; it’s about character.
Why You’ll Love This Recipe
Let’s be real—Halloween baking can get complicated. Between shaping mummies and dealing with sticky fondant, sometimes you just want a cookie that looks impressive without the stress. That’s where these black cat cookies come in. They’re simple enough for a weeknight baking session but cute enough to steal the show at any party.
- No Chilling Required: The dough comes together fast and rolls out immediately. No waiting around for it to firm up in the fridge.
- Bold Black Color: Using black cocoa powder gives you that deep, dramatic color without needing artificial food coloring. It tastes like Oreo crumbs, too.
- Kid-Friendly Fun: My niece helped me press the ears on and she kept giggling at how “grumpy” the cats looked before they got their eyes. It’s a perfect activity for little hands.
- Make-Ahead Magic: You can bake the cookies plain and decorate them days later. The undecorated cookies freeze beautifully for up to a month.
- Customizable Faces: Want a spooky cat? Use white icing for big, staring eyes. Want a cute one? Tiny orange dots for a friendly Halloween vibe. You decide.
What makes these different from every other sugar cookie out there is the texture. The black cocoa gives them a slightly crumbly, almost shortbread-like bite that pairs perfectly with the soft buttercream. It’s not just another sugar cookie—it’s a Halloween experience. I’ve made these for two years straight now, and every time I hand a plate to someone, they pause. They look at the little cat faces. They smile. That’s the whole reason I keep making them.
What Ingredients You Will Need
This recipe uses simple baking staples, but the star of the show is definitely the black cocoa powder. It’s what gives these cookies their signature look and a subtle, rich flavor that’s more like a dark chocolate cookie than a traditional sugar cookie.
- Unsalted Butter (1 cup, 226g, softened): Make sure it’s truly soft—room temperature, not melted. This creates the right base for creaming. I always use Kerrygold for its rich flavor.
- Granulated Sugar (1 cup, 200g): Standard white sugar. No need for anything fancy here.
- Large Egg (1, room temperature): Bring it to room temp by setting it in warm water for 5 minutes if you forgot to take it out early.
- Vanilla Extract (2 teaspoons): Pure vanilla, not imitation. It cuts through the darkness of the cocoa beautifully.
- All-Purpose Flour (2 ½ cups, 312g): Spoon and level your flour—don’t scoop directly from the bag or you’ll end up with dry cookies.
- Black Cocoa Powder (⅓ cup, 40g): This is non-negotiable for the color. Regular cocoa will give you a brown cat, not a black one. I use the brand from King Arthur Baking or Rodelle.
- Baking Powder (1 teaspoon): For a little lift so the cookies aren’t hockey pucks.
- Salt (½ teaspoon): Balances the bitterness of the black cocoa.
- For the Orange Eyes: Powdered sugar (1 cup, 120g), orange gel food coloring (I use Americolor), and a splash of milk or water to thin the icing.
- For the Buttercream (optional but recommended): Unsalted butter (½ cup, 113g, softened), powdered sugar (2 cups, 240g), vanilla extract (1 teaspoon), milk (2-3 tablespoons).
One quick note on the black cocoa: it’s naturally more bitter than Dutch-process or natural cocoa. Don’t be alarmed when you taste the dough—it mellows out once baked, especially with the sweet buttercream on top. If you can’t find black cocoa, you can substitute Dutch-process cocoa and add a tiny bit of black food coloring, but the flavor won’t be quite the same.
Equipment Needed
You don’t need a ton of fancy tools for these cookies, which is part of the appeal. Here’s what I use:
- Stand Mixer or Hand Mixer: A hand mixer works fine, but a stand mixer with the paddle attachment makes creaming the butter and sugar effortless.
- Rolling Pin: I prefer a wooden one with thickness rings (I set mine to ¼ inch) for even cookies.
- Cat Cookie Cutter: You can find these at any craft store or online. I use a 3-inch cat face cutter, but any size works—just adjust baking time slightly.
- Baking Sheets: Two standard half-sheet pans. Line them with parchment paper or a silicone baking mat.
- Piping Bags or Small Zip-Top Bags: For the orange eye icing. You can snip a tiny corner off a zip-top bag if you don’t have piping tips.
- Cooling Rack: Essential for letting the cookies cool completely before decorating. I learned that lesson the hard way—melted buttercream everywhere.
If you don’t have a cat cutter, you can freehand the shape with a knife, but honestly, the cutter saves so much time. I’ve also used a small round cutter for the head and then pinched the ears on by hand—works in a pinch!
Preparation Method
- Cream the Butter and Sugar: In a large bowl (or stand mixer bowl), beat the softened butter and granulated sugar together on medium speed for about 2-3 minutes, until light and fluffy. Scrape down the sides once. You want it pale and airy.
- Add the Egg and Vanilla: Crack in the egg and add the vanilla extract. Beat on low until just combined. Don’t overmix here—you don’t want to incorporate too much air.
- Whisk the Dry Ingredients: In a separate bowl, whisk together the flour, black cocoa powder, baking powder, and salt. This step is crucial because black cocoa is clumpy—whisking breaks up the lumps.
- Combine Wet and Dry: Gradually add the dry mixture to the wet mixture, mixing on low speed. Stop as soon as the dough comes together. It will look dark and slightly crumbly at first, but keep mixing—it will form a soft, cohesive dough.
- Roll Out the Dough: Lightly flour your work surface and rolling pin. Roll the dough to about ¼-inch thickness. If the dough feels sticky, dust with a little extra flour. I like to roll between two sheets of parchment paper for zero mess.
- Cut the Cat Shapes: Press your cat cutter firmly into the dough and lift straight up. Transfer the shapes to your prepared baking sheets, spacing them about 1 inch apart. Gather the scraps, re-roll, and cut again.
- Bake: Preheat your oven to 350°F (175°C). Bake the cookies for 8-10 minutes. They will look slightly puffy and dry on top—don’t wait for them to brown (they won’t, because they’re black!). Let them cool on the baking sheet for 5 minutes, then transfer to a cooling rack.
- Make the Orange Eyes: In a small bowl, whisk together the powdered sugar and 1 tablespoon of milk until smooth. Add orange gel food coloring drop by drop until you reach a bright, pumpkin-orange shade. The icing should be thick enough to hold its shape but thin enough to pipe.
- Pipe the Eyes: Transfer the orange icing to a piping bag or zip-top bag. Snip a tiny tip off the corner. Pipe two small dots for eyes on each cooled cookie. Let the icing set for about 20 minutes.
- Add Buttercream (Optional): If you want to sandwich the cookies or pipe a little collar of buttercream, beat the softened butter with powdered sugar, vanilla, and milk until fluffy. Pipe a small dollop on the back of each cookie or use it to “glue” two cookies together for a stuffed version.
Pro Tip: The dough will feel softer than a typical sugar cookie dough because of the black cocoa. Don’t panic—this is normal. If it gets too sticky while rolling, pop it in the fridge for 10 minutes. Also, these cookies puff slightly more than regular sugar cookies, so keep an eye on them at the 8-minute mark.
Cooking Tips & Techniques
I’ve made a lot of mistakes with black cocoa cookies, so let me save you the trouble. First, don’t overbake them. Black cocoa makes it nearly impossible to see when they’re done because they don’t turn golden. The trick is to look for the edges to look slightly dry and the center to feel just barely firm to the touch. They will continue to set on the hot baking sheet.
Second, the dough can be a little crumbly when you first mix it. That’s okay—just use your hands to press it together at the end. The warmth from your palms will bring it together beautifully. I’ve also learned that chilling the cut-out shapes on the baking sheet for 5 minutes before baking helps them hold their shape better, especially the little ears.
Another thing: black cocoa powder is messy. It gets everywhere. Wear an apron if you care about your clothes, and be prepared for your counter to look like a crime scene. It wipes up easily with a damp cloth, though. And if you’re piping the orange eyes, make sure the cookies are completely cool. I once piped onto slightly warm cookies and the icing ran right off the edges, turning my black cats into orange-faced disasters. Let them cool fully—about 30 minutes on the rack.
Finally, if you want a glossy finish on the eyes, add a tiny drop of light corn syrup to the orange icing. It gives them a nice shine that makes the cats look almost glassy-eyed and magical.
Variations & Adaptations
One of the best things about this recipe is how easy it is to change up. Here are a few ways I’ve adapted it over the years:
- Vegan Version: Swap the butter for a high-quality vegan butter stick (I like Miyoko’s) and use a flax egg (1 tablespoon ground flaxseed mixed with 3 tablespoons water, let sit for 5 minutes). The texture will be slightly more tender but still delicious.
- Gluten-Free Option: Use a 1:1 gluten-free baking flour blend that contains xanthan gum. I’ve tested this with Bob’s Red Mill 1:1 and it worked perfectly—just don’t overmix the dough.
- Spooky White Eyes: Instead of orange, use white royal icing for a classic “ghost cat” look. Add a tiny black dot in the center of each white eye for a truly spooky stare.
- Cat Shapes into Pumpkins: Don’t have a cat cutter? Use a pumpkin cutter and follow the same recipe. The black cocoa makes for a dramatic black pumpkin that looks amazing with orange icing vines.
- Stuffed Cookies: Sandwich two cookies with a layer of cream cheese frosting or chocolate ganache. It’s decadent and perfect for Halloween parties.
I once made a batch with a pinch of cayenne pepper added to the dough for a spicy kick. It was subtle—just a little warmth at the end—and paired surprisingly well with the dark chocolate flavor. My friends called them “spicy black cats” and they disappeared fast.
Serving & Storage Suggestions
These cookies are best served at room temperature, ideally within a day or two of baking. The texture is at its peak—crisp on the edges, soft in the center. I love setting them out on a black cake stand with a few candy eyeballs scattered around for effect. They also look amazing on a wooden board with some mini pumpkins and a few of my Black Velvet Halloween Cupcakes for a full spooky spread.
For storage, keep undecorated cookies in an airtight container at room temperature for up to 5 days. If you’ve already piped the orange eyes, place a sheet of parchment paper between layers so the icing doesn’t smudge. You can also freeze the baked, undecorated cookies for up to 3 months. Just wrap them tightly in plastic wrap and then foil. When you’re ready to decorate, thaw them at room temperature for about an hour.
If you’re making the buttercream version, I recommend assembling them the day you serve them. The buttercream can soften the cookies if left overnight. But honestly, I’ve eaten them the next day and they were still fantastic—just a little softer, like a cookie-cake hybrid.
Flavor-wise, these cookies actually get better after a day. The black cocoa flavor deepens and the bitterness mellows out. It’s like the cookies need a little time to settle into themselves. If you can resist eating them all immediately, give them 24 hours—you’ll be glad you did.
Nutritional Information & Benefits
Per cookie (based on 24 cookies, without buttercream): approximately 145 calories, 7g fat, 20g carbohydrates, 1g fiber, 9g sugar, 2g protein. With buttercream, add about 60 calories per cookie.
While these are definitely a treat, there are a few bright spots. Black cocoa powder is rich in antioxidants called flavonoids, which are great for heart health. It also contains less sugar than milk chocolate, so the cookies aren’t overly sweet. Plus, using real butter gives you a good dose of vitamin A and healthy fats.
For those with dietary concerns, this recipe contains gluten and dairy. The vegan and gluten-free adaptations I mentioned earlier work well for most sensitivities. These cookies are also nut-free if you skip any optional nut-based decorations. As always, check your specific ingredient labels if you have allergies.
I personally love that this recipe doesn’t rely on artificial food coloring. The black cocoa does all the work naturally, which feels better for my body and my conscience. Plus, it’s a great conversation starter at parties—people are always shocked to learn the color comes from cocoa, not dye.
Conclusion
These Adorable Black Cat Halloween Sugar Cookies are more than just a pretty face. They’re the kind of recipe that brings people together—whether you’re making them with your kids on a rainy October afternoon or bringing a plate to a friend’s costume party. The deep, dark color, the soft crumb, and those tiny orange eyes staring up at you… it’s hard not to smile.
I encourage you to make these your own. Change the eye color, add a little collar of buttercream, or stuff them with ganache. The base recipe is forgiving and fun. And honestly, even if your cats come out a little lopsided or the ears break off (which happened to me my first time), they’ll still taste incredible. Imperfect cookies have the most personality, right?
I’d love to hear how yours turn out. Drop a comment below with your favorite variation or tag me in your photos. And if you’re looking for another spooky treat to round out your Halloween baking, try my Cozy Pumpkin Sourdough Bread for a savory-sweet balance. Happy baking, and may your cats be ever so slightly mischievous!
Frequently Asked Questions
Can I use regular cocoa powder instead of black cocoa?
You can, but your cookies will be dark brown instead of black. The flavor will also be less intense and more like a standard chocolate cookie. If you want that dramatic black color, stick with black cocoa powder—it’s worth the hunt.
Why did my cookies spread too much?
This usually happens if the butter was too soft or melted, or if the dough wasn’t chilled before baking. Next time, make sure your butter is just softened—not greasy—and pop the cut-out cookies in the fridge for 10 minutes before baking.
Can I freeze the dough?
Absolutely. Wrap the disk of dough tightly in plastic wrap and freeze for up to 3 months. Thaw in the fridge overnight before rolling and cutting. You can also freeze the baked, undecorated cookies for the same amount of time.
How do I get the orange eyes to look uniform?
Practice makes perfect, but a simple trick is to pipe the eyes using a steady, even pressure. If you want them perfectly round, use a small round piping tip (like a #2 or #3). You can also dip a toothpick in the icing and dot it onto the cookie for more control.
Can I make these cookies ahead for a party?
Yes! Bake the cookies up to a week in advance and store them in an airtight container. Pipe the orange eyes the day before the party. Assemble any buttercream sandwiches the morning of your event for the best texture.
Pin This Recipe!
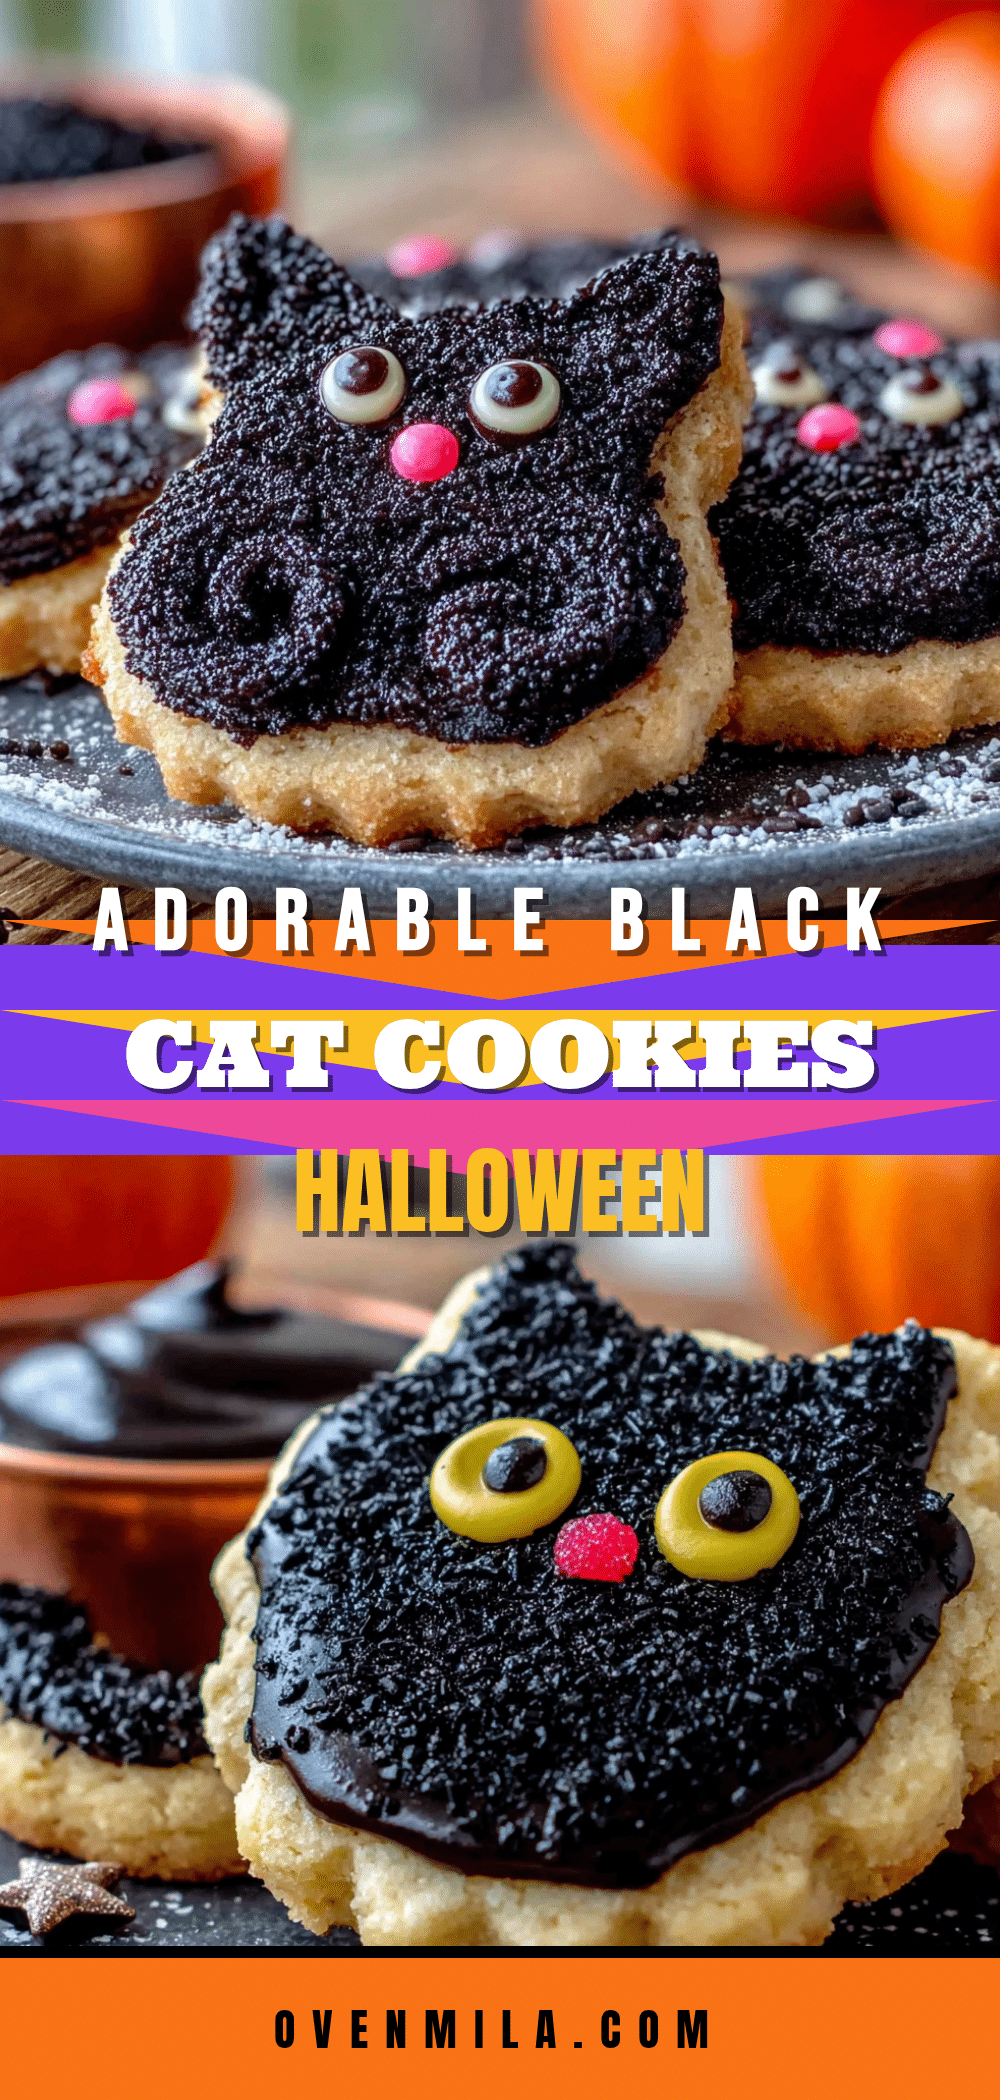
50+ Adorable Black Cat Halloween Sugar Cookies – Easy & Spooky

These Adorable Black Cat Halloween Sugar Cookies are simple enough for a weeknight baking session but cute enough to steal the show at any party. With a deep, dark color from black cocoa powder and tiny orange icing eyes, they’re a Halloween experience that brings people together.
- Prep Time: 20 minutes
- Cook Time: 10 minutes
- Total Time: 30 minutes
- Yield: 24 servings 1x
- Category: Dessert
- Cuisine: American
Ingredients
- 1 cup (226g) unsalted butter, softened
- 1 cup (200g) granulated sugar
- 1 large egg, room temperature
- 2 teaspoons vanilla extract
- 2 ½ cups (312g) all-purpose flour
- ⅓ cup (40g) black cocoa powder
- 1 teaspoon baking powder
- ½ teaspoon salt
- For the Orange Eyes: 1 cup (120g) powdered sugar, orange gel food coloring, milk or water to thin
- For the Buttercream (optional): ½ cup (113g) unsalted butter, softened, 2 cups (240g) powdered sugar, 1 teaspoon vanilla extract, 2-3 tablespoons milk
Instructions
- Cream the butter and sugar together on medium speed for 2-3 minutes until light and fluffy.
- Add the egg and vanilla extract, beat on low until just combined.
- In a separate bowl, whisk together flour, black cocoa powder, baking powder, and salt.
- Gradually add dry mixture to wet mixture, mixing on low until dough comes together.
- Roll dough to ¼-inch thickness on a lightly floured surface.
- Cut cat shapes with a cat cookie cutter and place on prepared baking sheets.
- Bake at 350°F (175°C) for 8-10 minutes. Cool on baking sheet for 5 minutes, then transfer to a cooling rack.
- Make orange icing by whisking powdered sugar with milk and orange gel food coloring until smooth and pipeable.
- Pipe two small dots for eyes on each cooled cookie. Let icing set for 20 minutes.
- Optional: Make buttercream by beating softened butter with powdered sugar, vanilla, and milk until fluffy. Pipe on cookies as desired.
Notes
The dough will feel softer than typical sugar cookie dough due to black cocoa. If too sticky, chill for 10 minutes. Don’t overbake—look for dry edges and barely firm center. Black cocoa is naturally bitter but mellows when baked. Cookies can be frozen undecorated for up to 3 months.
Nutrition
- Serving Size: 1 cookie
- Calories: 145
- Sugar: 9
- Sodium: 85
- Fat: 7
- Saturated Fat: 4
- Carbohydrates: 20
- Fiber: 1
- Protein: 2
Keywords: Halloween cookies, black cat cookies, sugar cookies, black cocoa cookies, Halloween baking, spooky cookies, easy Halloween cookies


