I grabbed the wrong bag of flour. It sounds ridiculous, I know. I was making a batch of classic, buttery cheese straws for a Halloween party—something simple, something I’d made a hundred times before. But my kitchen was a war zone of half-unpacked grocery bags, the dog was whining at the back door, and I was already running twenty minutes late. I reached into the pantry, yanked out a bag, and started mixing. It wasn’t until I saw the dough—stiff, almost crumbly, refusing to come together—that I looked at the bag. Almond flour. Not all-purpose. I was doomed.
Honestly, I almost threw the whole mess in the trash. But I hate wasting food, and I had already grated a block of sharp cheddar. So I started adding things—a splash of cold water, an extra egg, a pinch more salt—trying to salvage what I could. The dough was sticky and weird, and when I tried to roll it out, it cracked at the edges. I cut them into thin strips anyway, thinking they’d be a total disaster. I popped them in the oven and slumped against the counter, ready to accept defeat.
Twenty minutes later, the smell hit me. It wasn’t the usual cheesy, toasty scent. It was richer, nuttier, almost savory in a way I couldn’t place. I pulled the tray out and froze. The strips had puffed up just enough, turning golden at the edges, but they had also twisted slightly—curling at the tips like little crooked fingers. I grabbed one, burned my tongue, and took a bite anyway. And let me tell you, that accidental batch of cheese straws was the best thing I had ever made. They were crisp, buttery, and had this deep, almost roasted flavor from the almond flour. They looked like tiny, gnarled fingers. And that’s how my severed finger cheese straws were born—a happy accident that I’ve been making every Halloween since.
Why You’ll Love This Recipe
These aren’t just another cheese straw. I’ve tested this recipe more times than I can count, tweaking the ratios and the bake time to get that perfect snap. My neighbor, who is a professional baker, tried them and demanded the recipe. My picky nephew ate an entire batch in one sitting. They’ve been approved by a table of skeptical adults at a costume party and a group of sugar-crazed kids looking for something savory. This is the version that works every single time.
- Quick & Easy: From start to finish, these take about 30 minutes. Perfect for last-minute party snacks or a fun weekend project with the kids.
- Simple Ingredients: You probably have everything you need in your pantry and fridge right now. No weird, hard-to-find stuff.
- Perfect for Halloween: They look genuinely creepy—like a pile of severed fingers—but taste like pure, buttery comfort. They’re the star of any spooky spread.
- Crowd-Pleaser: Savory snacks always disappear fast at parties. These are no exception. Kids love the gross-out factor, and adults love the flavor.
- Unbelievably Delicious: The combination of sharp cheddar, a hint of cayenne, and the nutty richness from the almond flour creates a flavor that’s way more complex than you’d expect from a simple cheese straw.
What makes this recipe different? It’s the texture. The almond flour gives them a delicate, almost shortbread-like crumble that melts in your mouth, while the cheese keeps them savory and satisfying. This isn’t a dry, cracker-like straw. It’s a rich, buttery, slightly nutty treat that just happens to look like a horror movie prop.
These are the kind of snacks that make you close your eyes after the first bite. They’re comfort food with a creepy twist—perfect for a cozy night in, a scary movie marathon, or a Halloween party where you want to impress without spending hours in the kitchen.
What Ingredients You Will Need
This recipe uses simple, wholesome ingredients to deliver a bold, savory flavor and a satisfyingly crisp texture. Most of these are pantry staples, which makes this a great recipe to whip up on a whim.
- Sharp Cheddar Cheese, 8 oz, grated (about 2 cups, packed). Use a block of good-quality cheddar and grate it yourself. Pre-shredded cheese has anti-caking agents that can make the dough dry. I like Cabot or Tillamook for their sharp, tangy flavor.
- Unsalted Butter, ½ cup (1 stick), cold and cut into small cubes. Cold butter is key for a flaky texture. Don’t let it soften!
- Almond Flour, 1 cup (not almond meal). Almond flour is finer and will give you a smoother dough. I use Bob’s Red Mill Super-Fine Almond Flour.
- All-Purpose Flour, 1 cup. This gives the straws structure. For a gluten-free version, you can substitute with a 1:1 gluten-free baking flour blend.
- Salt, ½ teaspoon. I use fine sea salt. If you use kosher salt, you might need a bit more.
- Cayenne Pepper, ¼ teaspoon (or more if you like heat). This adds a subtle warmth, not a fiery kick. It balances the richness of the cheese beautifully.
- Garlic Powder, ½ teaspoon. For a savory, savory depth. Don’t use garlic salt, or you’ll throw off the salt balance.
- Cold Water, 2-4 tablespoons. You’ll add this gradually until the dough just comes together. The amount you need will vary based on the humidity and your flour.
- Optional for Decoration: Sliced almonds (for fingernails), a dash of paprika (for a “dried blood” effect), or a sprinkle of flaky sea salt on top.
Equipment Needed
You don’t need a lot of fancy gear for this recipe, which is part of the charm. Here’s what you’ll need:
- Food Processor: This is the easiest way to cut the butter into the flour. A pastry cutter or two forks will work, but the food processor is faster and gives you a more consistent texture. I’ve used a $30 model for years, and it works perfectly.
- Box Grater: For grating your block of cheddar. A microplane works too, but a box grater is faster for this amount of cheese.
- Baking Sheet: A standard half-sheet pan is ideal. Line it with parchment paper for easy cleanup.
- Parchment Paper: Non-negotiable. It prevents sticking and makes the straws easy to remove.
- Sharp Knife or Pizza Cutter: For cutting the dough into strips. A pizza cutter makes quick work of it.
- Ruler: Optional, but helpful if you want your fingers to be uniform in size. I just eyeball it—imperfect fingers look more realistic anyway.
- Cooling Rack: Allows the straws to cool evenly and stay crisp. If you don’t have one, let them cool on the baking sheet for a few minutes, then transfer to a plate.
Preparation Method
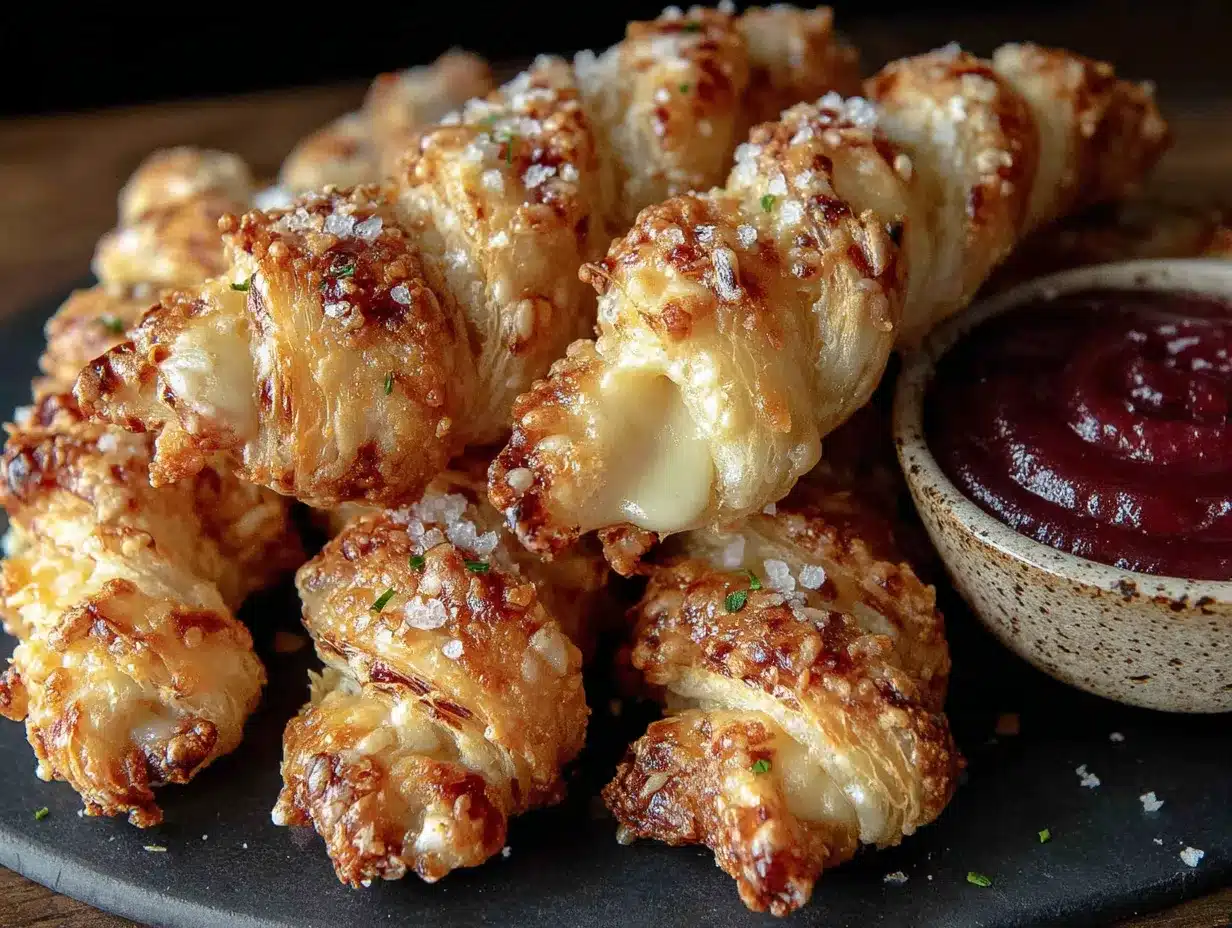
Here is how to make these creepy, delicious cheese straws. Follow these steps, and you’ll have a batch of severed fingers in no time.
- Preheat and Prep: Preheat your oven to 350°F (175°C). Line two baking sheets with parchment paper. This is important—don’t skip the parchment.
- Pulse the Dry Ingredients: In the bowl of your food processor, combine the almond flour, all-purpose flour, salt, cayenne pepper, and garlic powder. Pulse 3-4 times to mix everything evenly.
- Add the Butter: Scatter the cold, cubed butter over the flour mixture. Pulse 8-10 times, until the mixture looks like coarse meal with some pea-sized butter pieces still visible. This is the key to a flaky texture. Don’t over-process!
- Add the Cheese: Add the grated cheddar cheese to the food processor. Pulse 4-5 times, just until the cheese is distributed. You don’t want to pulverize it.
- Add the Water: With the food processor running, add the cold water 1 tablespoon at a time. Stop as soon as the dough starts to clump together and form a ball. You might not need all the water. The dough should be moist but not sticky.
- Chill the Dough: Turn the dough out onto a lightly floured surface. Gently pat it into a disc, wrap it in plastic wrap, and refrigerate for at least 20 minutes. This makes the dough much easier to handle. (I’ve skipped this step in a hurry, and the dough was a sticky mess. Don’t be like me.)
- Roll and Cut: On a lightly floured surface, roll the dough out to about ¼-inch thickness. Use a sharp knife or pizza cutter to cut the dough into strips about 4 inches long and ½ inch wide. For a more realistic look, make some strips slightly thicker at one end (like a finger) and taper the other end.
- Shape the Fingers: Transfer the strips to your prepared baking sheets, spacing them about 1 inch apart. Gently press a sliced almond onto the thicker end of each strip to look like a fingernail. Use the back of a knife to make a few shallow crosswise slits near the “knuckle” area for an extra creepy touch.
- Bake: Bake for 14-18 minutes, or until the straws are golden brown at the edges and firm to the touch. The exact time will depend on your oven. I like to rotate the pans halfway through for even baking.
- Cool: Let the cheese straws cool on the baking sheet for 5 minutes. They will be very fragile when hot. Then, carefully transfer them to a cooling rack to cool completely. They will crisp up as they cool.
Cooking Tips & Techniques
I’ve made a lot of mistakes with these little guys so you don’t have to. Here are my best tips for perfect severed finger cheese straws every time.
- Keep Everything Cold: This is the number one rule for flaky pastries. If your butter starts to melt, the dough will be tough. If your kitchen is warm, chill your bowl and food processor blade for 10 minutes before starting.
- Don’t Overwork the Dough: Pulse, don’t run. Overworking the dough develops gluten, which will make your cheese straws tough and chewy instead of tender and crisp. You want them to snap when you bite them.
- Grate Your Own Cheese: I know it’s tempting to buy the pre-shredded bag, but trust me on this one. The anti-caking agents in pre-shredded cheese (like potato starch and cellulose) will absorb moisture and make your dough dry and crumbly. Freshly grated cheese melts better and tastes better.
- Check Your Oven Temperature: Ovens can be liars. An oven that runs hot will burn your straws before they’re cooked through. I use a cheap oven thermometer to make sure my oven is actually at 350°F. It’s a game-changer.
- Make Them in Advance: You can prepare the dough a day ahead and keep it in the fridge. You can also freeze the unbaked straws on a baking sheet, then transfer them to a freezer bag. Bake them straight from frozen, adding 2-3 minutes to the bake time.
- My Biggest Failure: The first time I tried to double the recipe, I crammed everything into my food processor at once. The butter never got properly cut in, and the dough was a greasy, uneven mess. Lesson learned: work in batches if you’re making a large quantity.
Variations & Adaptations
This recipe is a great base for experimentation. Here are a few ways to change it up.
- Spicy Bloody Fingers: Add a full teaspoon of cayenne pepper or a finely chopped chipotle pepper in adobo sauce for a serious kick. The heat pairs wonderfully with the rich cheese.
- Everything Bagel Fingers: Before baking, brush the straws with a little beaten egg and sprinkle them with everything bagel seasoning (sesame seeds, poppy seeds, dried garlic, dried onion, and salt). The savory crunch is incredible.
- Herby Zombie Fingers: Add 1 tablespoon of finely chopped fresh rosemary or thyme to the dough. The earthy, savory herbs make these feel a bit more sophisticated—like something a fancy zombie would eat.
- Gluten-Free Version: I’ve tested this with a 1:1 gluten-free flour blend (the one with xanthan gum), and it works perfectly. Just use the same amount as the all-purpose flour. The texture is a tiny bit more delicate, but the flavor is identical.
- Dairy-Free Version: This is a bit trickier, but possible. Use a high-quality vegan butter (like Miyoko’s) and a sharp vegan cheddar shreds. The texture won’t be quite as flaky, but they’ll still be delicious and creepy. I found that adding an extra tablespoon of cold water helps the dairy-free dough come together.
Serving & Storage Suggestions
These cheese straws are best served at room temperature. The texture is perfect—crisp and snappy—when they’ve had a chance to cool completely. I like to arrange them on a platter in a pile, like a gruesome harvest. You can also stand them up in a jar for a truly unsettling centerpiece.
They pair beautifully with a cold beer, a glass of crisp white wine, or a bloody mary. For a party, serve them alongside a bowl of spicy marinara sauce or a creamy ranch dip for “dipping the fingers” (my nephew loves this). They’re also fantastic crumbled over a bowl of tomato soup for a fun, textural garnish.
Storage: Store any leftovers (if there are any!) in an airtight container at room temperature for up to 3 days. Do not refrigerate them—the fridge will make them lose their crispness.
Freezing: You can freeze the baked cheese straws for up to a month. Place them in a single layer in a freezer-safe bag or container. To re-crisp them, pop them in a 300°F (150°C) oven for 5-7 minutes. They’ll taste freshly made.
Reheating: If they’ve gone a bit soft (which can happen in humid weather), just spread them on a baking sheet and warm them in a 300°F oven for 3-5 minutes. They’ll crisp right back up.
Nutritional Information & Benefits
While these are a treat, they do offer some nutritional perks thanks to the almond flour. Here’s the estimated breakdown per serving (about 3 straws):
- Calories: ~180
- Fat: 14g (mostly from the cheese and butter, plus healthy fats from the almonds)
- Carbohydrates: 9g
- Fiber: 1g
- Protein: 6g
Almond flour is a great source of vitamin E, magnesium, and healthy monounsaturated fats. It also has a lower glycemic index than white flour, meaning it won’t spike your blood sugar as much. The cheese provides calcium and protein, making these a more satisfying snack than a plain cracker. Of course, they are still a buttery, cheesy indulgence—and that’s perfectly fine for a Halloween treat!
Dietary Considerations: This recipe is naturally low-carb and gluten-free (if you use the gluten-free flour blend). It contains dairy, tree nuts (almonds), and eggs (if you use an egg wash).
Conclusion
These severed finger cheese straws are more than just a Halloween novelty. They are genuinely, unexpectedly delicious. The happy accident that created them taught me that sometimes the best recipes come from our biggest kitchen blunders. They’re a reminder to relax, to experiment, and to not take cooking (or myself) too seriously.
I love making these because they always get a reaction. People laugh, they grimace, and then they take a bite and their eyes go wide. They’re a conversation starter and a crowd-pleaser rolled into one. I hope you give them a try, whether it’s for a spooky party, a scary movie night, or just because you want a really good cheese straw with a story.
If you make these, I’d love to hear about it! Leave a comment below and tell me how they turned out. Did you add your own creepy twist? Did your kids love them? Share your photos and tag me on social media. And if you’re looking for more fun, savory snacks, check out my crispy garlic chicken for another crowd-pleasing recipe. Happy haunting, and happy snacking!
Frequently Asked Questions
Can I use all-purpose flour instead of almond flour?
Yes, you can. If you want to skip the almond flour, use 2 cups of all-purpose flour total. The texture will be a bit more like a traditional cracker—still good, but not as tender and nutty. You might need an extra tablespoon of cold water to bring the dough together.
Why did my cheese straws spread out in the oven?
This usually happens if the dough was too warm when it went into the oven. Make sure you chill the dough for at least 20 minutes before rolling and cutting. If your kitchen is very hot, you can even chill the cut straws on the baking sheet for 10 minutes before baking.
Can I make these without a food processor?
Absolutely. You can use a pastry cutter or two forks to cut the butter into the dry ingredients. It takes a little more elbow grease, but it works just as well. Just make sure you work quickly so the butter doesn’t warm up too much.
How do I make the “fingernails” stay on?
Gently press the sliced almond into the dough. If it still seems loose, you can dab a tiny bit of water on the back of the almond before pressing it on. They will stay put once baked.
Can I add other types of cheese?
Yes! You can swap the sharp cheddar for a mix of cheeses. I’ve made a great version with half cheddar and half smoked gouda. A sharp parmesan or pecorino would also work beautifully. Just make sure the cheese is dry and not too soft (avoid fresh mozzarella).
Pin This Recipe!

Best Easy Homemade Severed Finger Cheese Straws Recipe
These creepy, delicious cheese straws look like severed fingers but taste like pure, buttery comfort. Made with sharp cheddar and almond flour, they’re a perfect Halloween party snack that’s quick, easy, and guaranteed to be a crowd-pleaser.
- Prep Time: 15 minutes
- Cook Time: 16 minutes
- Total Time: 31 minutes
- Yield: 8 servings 1x
- Category: Appetizer
- Cuisine: American
Ingredients
- 8 oz sharp cheddar cheese, grated (about 2 cups, packed)
- 1/2 cup (1 stick) unsalted butter, cold and cut into small cubes
- 1 cup almond flour (super-fine)
- 1 cup all-purpose flour
- 1/2 teaspoon fine sea salt
- 1/4 teaspoon cayenne pepper
- 1/2 teaspoon garlic powder
- 2–4 tablespoons cold water
- Sliced almonds (for fingernails, optional)
- Dash of paprika (for ‘dried blood’ effect, optional)
- Flaky sea salt (for topping, optional)
Instructions
- Preheat oven to 350°F (175°C). Line two baking sheets with parchment paper.
- In a food processor, combine almond flour, all-purpose flour, salt, cayenne pepper, and garlic powder. Pulse 3-4 times to mix.
- Add cold, cubed butter. Pulse 8-10 times until mixture resembles coarse meal with some pea-sized butter pieces.
- Add grated cheddar cheese. Pulse 4-5 times just until distributed.
- With processor running, add cold water 1 tablespoon at a time until dough clumps together and forms a ball. Do not over-process.
- Turn dough onto a lightly floured surface, pat into a disc, wrap in plastic wrap, and refrigerate for at least 20 minutes.
- On a lightly floured surface, roll dough to 1/4-inch thickness. Cut into strips about 4 inches long and 1/2 inch wide. For realistic fingers, make some strips slightly thicker at one end.
- Transfer strips to prepared baking sheets, spacing 1 inch apart. Press a sliced almond onto the thicker end for a fingernail. Use a knife to make shallow crosswise slits near the ‘knuckle’ area.
- Bake for 14-18 minutes until golden brown at edges and firm to the touch. Rotate pans halfway through for even baking.
- Let cool on baking sheet for 5 minutes, then transfer to a cooling rack to cool completely. They will crisp up as they cool.
Notes
Keep all ingredients cold for flaky texture. Grate your own cheese—pre-shredded contains anti-caking agents that dry out the dough. Dough can be made a day ahead and refrigerated. Unbaked straws can be frozen; bake from frozen, adding 2-3 minutes. Baked straws can be frozen for up to a month; re-crisp in a 300°F oven for 5-7 minutes.
Nutrition
- Serving Size: 3 straws
- Calories: 180
- Sugar: 1
- Sodium: 220
- Fat: 14
- Saturated Fat: 7
- Carbohydrates: 9
- Fiber: 1
- Protein: 6
Keywords: cheese straws, Halloween, severed fingers, cheddar, almond flour, party snack, savory, creepy, easy


