I swore I wasn’t a pumpkin dessert person. For years, I’d side-eye the annual pumpkin spice takeover, muttering something about how squash belongs in soup, not in my cookie jar. It was a deeply held position, one I defended with the kind of stubbornness that only a person who has never actually tasted the right version can possess. Then, last October, a neighbor named Deb dropped off a pan of these pumpkin chocolate chip cookie bars on a random Tuesday, and I found myself, at 9 PM, eating a third piece cold from the Tupperware while standing over the kitchen sink. Caught in the act of proving myself wrong.
It wasn’t the pumpkin flavor I objected to, I realized. It was the dry, crumbly, spice-heavy cakes that masqueraded as cookies. But these bars? They were different. They were dense, almost fudgy, with a soft, tender crumb that held onto the moisture from the pumpkin without turning into a soggy mess. The chocolate chips—dark, melty pockets of richness—didn’t fight the pumpkin; they made it better, grounding that earthy sweetness with something familiar and comforting. Honestly, I think I was just mad that Deb was right and I was wrong.
Maybe you’ve been there, holding onto a food prejudice that you can’t even explain. I mean, I love pumpkin seeds. I love pumpkin soup. But pumpkin in a cookie? It felt like a gimmick. But this recipe, with its simple one-bowl method and the way the edges get just a little bit chewy while the center stays soft, completely flipped the script. Let me tell you, there’s something about the smell of cinnamon, nutmeg, and cloves filling your kitchen on a cool, gray afternoon that changes a person. This is the recipe that made me a convert, and I haven’t looked back since.
Why You’ll Love These Pumpkin Chocolate Chip Cookie Bars
These aren’t just another pumpkin dessert. They are the pumpkin dessert that will make you question every other recipe you’ve tried. Here’s why this version stands out from the crowd:
- Incredibly Easy & Fast: No chilling the dough, no rolling individual cookies. You mix everything in one bowl, spread it into a pan, and bake. From start to finish, you’re about 35 minutes away from a warm, gooey bar.
- Perfectly Soft & Chewy Texture: The secret is the pumpkin puree. It adds so much moisture that the bars stay incredibly soft for days. They have a texture that’s almost like a cross between a soft-baked cookie and a blondie. It’s absolutely addictive.
- Made with Simple, Real Ingredients: You don’t need a special trip to the store. Butter, sugar, eggs, pumpkin puree, flour, and chocolate chips. That’s it. No fancy extracts or hard-to-find spices (though we do use the classic pumpkin pie spice blend).
- The Ultimate Fall Crowd-Pleaser: I’ve brought these to potlucks, Halloween parties, and family dinners. They disappear every single time. Even the self-proclaimed “pumpkin haters” (like I used to be) go back for seconds. They’re approachable and undeniably delicious.
- Unbelievably Cozy: This is the taste of autumn in a pan. The warm spices, the rich pumpkin, the melted chocolate—it’s the kind of dessert you want to eat with a fork while wrapped in a blanket. It’s comfort food, plain and simple.
What makes this recipe different is the texture. I tested this about four times to get the ratio of pumpkin to flour just right. Too much pumpkin, and you get a pudding-like mess. Too little, and they’re dry. This version hits that sweet spot where the bar is dense, moist, and almost fudgy, with a delicate, cake-like crumb. It’s the perfect vehicle for the chocolate chips. I’ve also tested this with both melted butter and softened butter, and melted butter gives you a denser, chewier edge—which I prefer. This is my best version, and I’m so excited to share it with you.
What Ingredients You Will Need
This recipe uses simple, everyday ingredients to create something truly special. The beauty of these bars is that you probably have most of these in your pantry right now. Let’s break down what you need and why each ingredient matters.
- Unsalted Butter (1/2 cup / 1 stick, melted and slightly cooled): Butter is the foundation of the flavor and texture here. Using melted butter helps create a denser, chewier bar, which is exactly what we want. If you only have salted butter, just reduce the added salt in the recipe by a quarter teaspoon. I prefer using a good quality butter like Kerrygold for the best flavor, but any brand works.
- Granulated Sugar (3/4 cup): This provides sweetness and helps with the structure and spread of the bars. It also helps create those slightly crispy edges we all love.
- Light Brown Sugar (1/2 cup, packed): Brown sugar is key for moisture and a deeper, almost caramel-like flavor. The molasses in it complements the pumpkin and spices beautifully. Make sure you pack it firmly into your measuring cup for the right amount.
- Large Egg (1, at room temperature): The egg acts as a binder and adds richness. A room-temperature egg incorporates more easily into the melted butter, creating a smoother batter. Just take it out of the fridge 15 minutes before you start.
- Pure Pumpkin Puree (1 cup): This is the star of the show. Please, please use pure pumpkin puree, not pumpkin pie filling. The pie filling has added sugar and spices, which will throw off the recipe. I personally recommend Libby’s brand for its consistent texture and flavor. It’s thick, smooth, and not watery.
- Vanilla Extract (1 teaspoon): A good splash of vanilla enhances all the other flavors, making the chocolate and spices sing.
- All-Purpose Flour (1 1/2 cups): This gives structure to the bars. For a gluten-free option, you can substitute a 1:1 gluten-free baking flour blend. I’ve tested this with Bob’s Red Mill and it works great, though the texture is slightly more tender.
- Pumpkin Pie Spice (1 1/2 teaspoons): This is your shortcut to the perfect fall flavor profile. It usually contains cinnamon, nutmeg, ginger, and allspice. If you don’t have it, you can make your own by mixing 1 teaspoon cinnamon, 1/4 teaspoon nutmeg, 1/4 teaspoon ginger, and a pinch of cloves.
- Baking Soda (1/2 teaspoon): This helps the bars rise and become light and tender. It reacts with the acidity in the brown sugar and pumpkin.
- Salt (1/4 teaspoon): Don’t skip the salt! It balances the sweetness and enhances all the other flavors. It’s the secret to a well-rounded dessert.
- Semi-Sweet Chocolate Chips (1 cup): The chocolate chips are the perfect counterpart to the earthy pumpkin. Semi-sweet is my go-to because it’s not too sweet and not too bitter. You can use dark chocolate chips for a more intense flavor, or milk chocolate if you have a super sweet tooth. I’ve also used chopped-up dark chocolate bars, which create lovely puddles of melted chocolate. For a nutty twist, you can substitute half a cup of the chocolate chips with chopped pecans or walnuts.
Equipment Needed
You don’t need any fancy gadgets for this recipe, which is part of its charm. Here’s what you’ll need to get the job done.
- 8×8-inch Baking Pan: This is the perfect size for these bars. An 9×9-inch pan will work, but the bars will be thinner and may bake a few minutes faster. A metal pan will give you crispier edges, while a glass pan will result in a softer, more cake-like bar. I prefer a metal pan, personally.
- Parchment Paper: This is a non-negotiable for me. Lining the pan with parchment paper with overhanging edges creates “handles” that allow you to lift the entire block of bars out of the pan for easy cutting. It also makes cleanup a breeze. Trust me on this one.
- Large Mixing Bowl: A standard large bowl is all you need for mixing the wet and dry ingredients together.
- Whisk or Wooden Spoon: You can use a whisk to combine the wet ingredients and a sturdy wooden spoon or rubber spatula to fold in the flour and chips. No electric mixer required!
- Measuring Cups and Spoons: For accurate measurements. I cannot stress enough the importance of using the “spoon and level” method for flour: spoon it into your measuring cup and level it off with a knife. Don’t scoop directly from the bag, as that packs the flour and leads to dry bars.
- Cooling Rack: This allows air to circulate around the pan, preventing the bottom from getting soggy while the bars cool.
Preparation Method
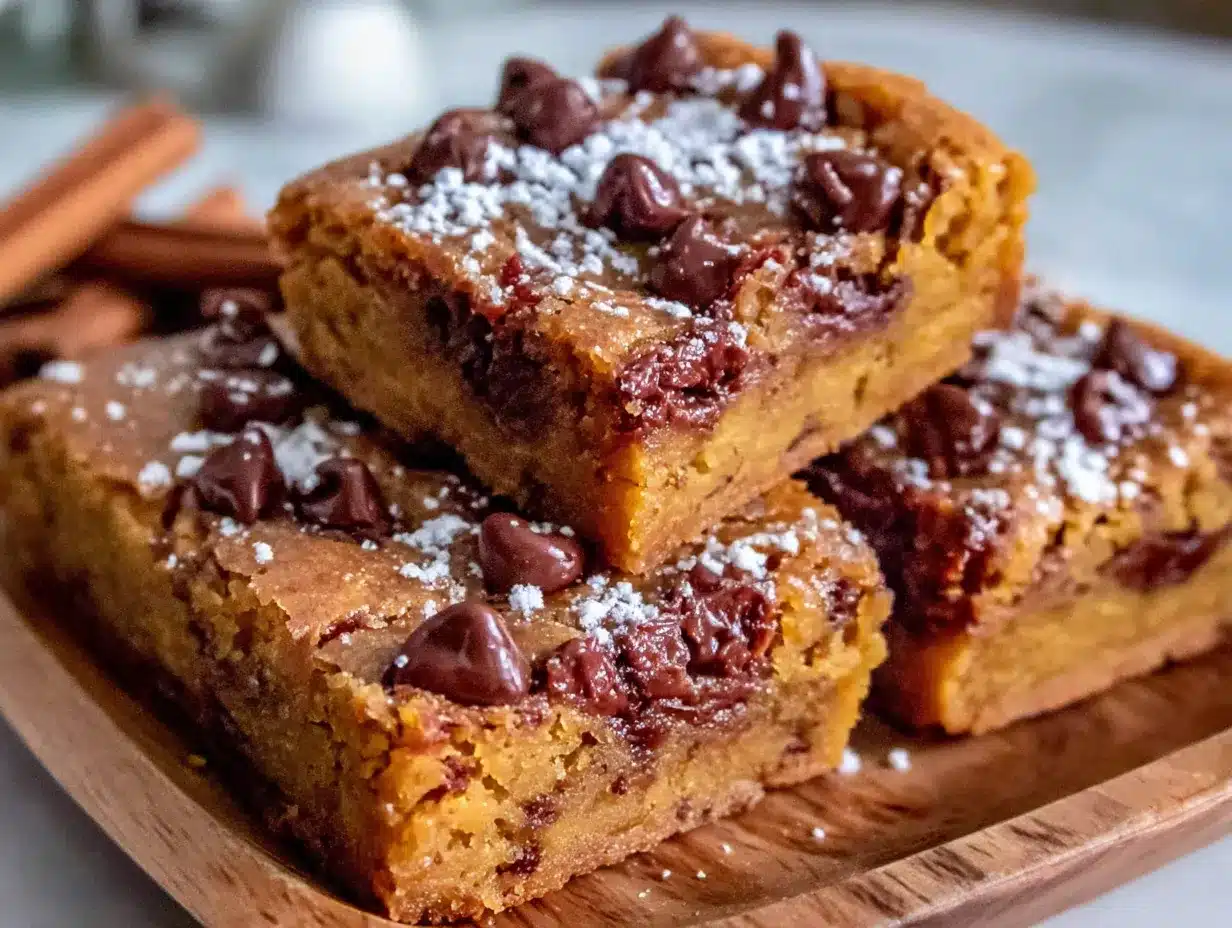
Alright, let’s get to the fun part. This is a one-bowl wonder, so the cleanup is almost as easy as the process itself. Follow these steps, and you’ll have a pan of perfect pumpkin bars in no time.
- Preheat and Prep (5 minutes): First things first, preheat your oven to 350°F (175°C). While it’s heating up, line your 8×8-inch baking pan with a sheet of parchment paper. Leave a couple of inches hanging over two opposite sides—these are your handles. Lightly grease the parchment and the exposed sides of the pan with a little butter or non-stick spray. This will give you perfectly clean edges.
- Melt the Butter (2 minutes): In your large mixing bowl, melt the 1/2 cup of unsalted butter. You can do this in the microwave in 30-second bursts or in a small saucepan on the stove. Let it cool for a minute or two—you don’t want it to be piping hot, or it might scramble the egg.
- Combine the Wet Ingredients (3 minutes): To the melted butter, add the 3/4 cup of granulated sugar and the 1/2 cup of packed light brown sugar. Whisk them together until the mixture is smooth and looks like wet sand. It should be glossy and well-combined. Then, crack in the 1 large egg and add the 1 teaspoon of vanilla extract. Whisk vigorously for about a minute until the mixture is light in color and slightly thickened. This is where the texture starts to build. Finally, add the 1 cup of pumpkin puree and whisk until it’s completely incorporated. The batter will look a little thin and separated—that’s totally normal.
- Add the Dry Ingredients (3 minutes): Now, switch to a rubber spatula or a wooden spoon. Add the 1 1/2 cups of all-purpose flour, 1 1/2 teaspoons of pumpkin pie spice, 1/2 teaspoon of baking soda, and 1/4 teaspoon of salt directly to the bowl. Gently fold the dry ingredients into the wet ones. Be careful not to overmix! Stir just until you see the last streaks of flour disappear. A few lumps are fine. Overmixing will develop the gluten and make the bars tough, so a gentle hand is key here.
- Fold in the Chocolate Chips (1 minute): Pour in the 1 cup of semi-sweet chocolate chips and fold them into the batter with a few gentle strokes. Make sure they are evenly distributed throughout the thick, gorgeous batter. At this point, the batter will be thick, glossy, and smell absolutely incredible.
- Spread the Batter (2 minutes): Scrape the batter into your prepared baking pan. Use your spatula to spread it into an even layer, pushing it into the corners. The batter is quite thick, so you might need to work it a little. Don’t worry if it’s not perfectly smooth on top—it will even out as it bakes. I like to sprinkle a few extra chocolate chips on top for a pretty presentation.
- Bake to Perfection (25-30 minutes): Place the pan in the preheated oven and bake for 25 to 30 minutes. The edges should be set and lightly golden, and the center should look just slightly underdone. A toothpick inserted into the center should come out with a few moist crumbs, not wet batter. The biggest mistake is overbaking. Because of the pumpkin, these bars can go from perfectly moist to dry very quickly. I usually start checking at the 22-minute mark.
- Cool Completely (2-3 hours): This is the hardest part! Place the pan on a cooling rack and let the bars cool completely in the pan. I know the smell is tempting, but if you cut into them while they are warm, they will be very soft and crumbly. Cooling allows them to set up properly. For the cleanest cuts, once they are cool, use the parchment handles to lift the entire block out of the pan and place it on a cutting board. Use a sharp, serrated knife to slice them into squares. I like to make 16 small bars or 9 larger, generous ones.
Cooking Tips & Techniques
I’ve made this recipe more times than I can count, and I’ve learned a few things the hard way. Here are my best tips to guarantee perfect bars every single time.
Don’t Overmix the Batter! This is the number one mistake I see. When you add the flour, you want to mix just until it’s combined. Overmixing develops gluten, which will make your tender, soft bars tough and bread-like. Use a gentle folding motion, and stop as soon as the flour disappears. A few small lumps are your friend.
Watch Your Oven Temperature. Every oven runs a little differently. Your oven might run hot, which means your bars could be done in 22 minutes. Or it might run cool, needing closer to 30. I always recommend using an oven thermometer to be sure. For this recipe, an accurate oven is crucial because the line between perfectly moist and overbaked-dry is thin. The top should look set and the edges should be pulling away from the pan slightly.
The “Jiggle” Test. When you take the pan out of the oven, the center should have a slight jiggle to it, like a brownie. It shouldn’t be liquidy, but it shouldn’t be completely firm either. It will continue to cook from the residual heat of the pan as it cools. This is called “carry-over cooking,” and it’s your secret to a perfectly soft, fudgy center.
Let Them Cool. Seriously. I know it’s painful, but this is the most important step for texture. If you cut into them while they’re warm, they will fall apart. The bars need time to set up and firm up. I’ve even popped the whole pan in the fridge for 30 minutes after they’ve cooled to room temperature to speed up the process. Cold bars cut much cleaner.
My Personal Failure: The first time I made these, I was in a rush. I used a 9×13 pan because I couldn’t find my 8×8. The bars came out so thin and dry, they were basically pumpkin crackers. It was a tragedy. I learned that pan size matters immensely for this recipe. Stick with the 8×8 for that perfect thick, soft bar.
Variations & Adaptations
One of the best things about this recipe is how flexible it is. Once you have the base down, you can make it your own in so many ways. Here are a few of my favorite twists.
- Double Chocolate Pumpkin Bars: For the serious chocolate lovers out there, replace 1/4 cup of the all-purpose flour with 1/4 cup of unsweetened cocoa powder. This will give you a rich, dark chocolate base that pairs beautifully with the pumpkin and spices. It’s like a brownie and a pumpkin bar had a delicious baby.
- Gluten-Free Pumpkin Bars: I’ve tested this with a high-quality 1:1 gluten-free baking blend (like King Arthur Flour Measure for Measure) and it works perfectly. The texture is slightly more tender and delicate, but the flavor is spot on. Just be sure your blend contains xanthan gum for structure.
- Spiced Cranberry & White Chocolate: Swap the semi-sweet chocolate chips for 1/2 cup of white chocolate chips and 1/2 cup of dried cranberries. The tartness of the cranberries and the sweetness of the white chocolate are a fantastic match for the warm pumpkin spices. This version feels a little more festive for Thanksgiving.
- Vegan & Dairy-Free Adaptation: This is a bit trickier, but doable. Use a flax egg (1 tablespoon ground flaxseed mixed with 3 tablespoons water, let sit for 5 minutes) and substitute the butter with a high-quality vegan butter stick (like Miyoko’s or Country Crock Plant Butter). Use dairy-free chocolate chips. The texture will be a bit more cake-like and less dense, but the flavor is still wonderful.
- Add a Crunchy Topping: Before baking, sprinkle the top of the batter with a streusel topping made from 2 tablespoons of cold butter, 1/4 cup of flour, and 2 tablespoons of brown sugar, crumbled together. It adds a lovely buttery crunch that contrasts with the soft bar.
Serving & Storage Suggestions
These bars are wonderful in their simplicity, but here’s how to make them a real showstopper.
Serving: These bars are delicious at room temperature, but I actually prefer them slightly chilled from the fridge. The texture firms up and becomes almost fudge-like. For an extra-special treat, warm a bar for about 10 seconds in the microwave and top it with a scoop of vanilla bean ice cream and a drizzle of caramel sauce. It’s the perfect cozy fall dessert. They’re also fantastic with a cup of hot coffee or a glass of cold milk.
Storage: Store any leftover bars in an airtight container at room temperature for up to 3 days. Because of the pumpkin, they are very moist and will stay soft. If you live in a very humid climate, I recommend storing them in the refrigerator to prevent them from getting too soft. The flavors actually get better on the second day as the spices have time to meld together.
Freezing: These bars freeze beautifully! Once they are completely cooled and cut, place them in a single layer on a baking sheet and freeze for about an hour. This is called a “flash freeze.” Then, transfer the frozen bars to a freezer-safe zip-top bag or container. They will keep for up to 3 months. To thaw, just leave them on the counter for about 30 minutes, or pop one in the microwave for 15-20 seconds for a warm treat. This is my secret for having a taste of fall ready to go at a moment’s notice.
Nutritional Information & Benefits
While these are a treat, they do have some surprising benefits, thanks to the star ingredient.
Estimated Nutritional Info (per bar, based on 16 servings): Calories: ~210, Fat: 10g, Carbohydrates: 29g, Fiber: 2g, Sugar: 18g, Protein: 3g.
- Pumpkin Power: Pumpkin is packed with Vitamin A (beta-carotene), which is great for your eyes and immune system. It’s also a good source of fiber, which helps you feel full and satisfied. It adds moisture and nutrients without a ton of calories.
- Antioxidant Boost: The dark chocolate chips are rich in antioxidants, which can help fight inflammation. Plus, the spices like cinnamon and nutmeg are also known for their anti-inflammatory properties.
- Dietary Considerations: As written, this recipe is vegetarian. We’ve provided options for gluten-free and vegan adaptations above. It is not low-carb or keto-friendly due to the sugars and flour. Please note that this recipe contains dairy (butter), gluten (flour), and eggs.
I believe in balance. These bars are a wonderful way to enjoy a seasonal treat that feels a little bit wholesome. They’re not health food, but they are made with real ingredients, and that counts for a lot.
Conclusion
So, there you have it. The recipe that turned me from a pumpkin dessert skeptic into a full-blown believer. These Cozy Pumpkin Chocolate Chip Cookie Bars are everything you want in a fall dessert: they’re incredibly easy to make, perfectly soft and chewy, and packed with that warm, nostalgic flavor that makes autumn feel so special.
Whether you’re a long-time pumpkin lover or a reluctant convert like I was, I really hope you give these a try. Don’t be afraid to play with the variations and make them your own. Add some nuts, swap the chocolate chips, or double the spice—the base is so forgiving.
I’d love to hear how they turn out for you! Please leave a comment below and let me know if you were team pumpkin all along, or if this recipe changed your mind. And if you share a photo on Pinterest or Instagram, be sure to tag me—I can’t wait to see your cozy creations. Happy baking, friends!
Frequently Asked Questions
Can I use pumpkin pie filling instead of pumpkin puree?
No, please do not! Pumpkin pie filling is pre-sweetened and pre-spiced, which will completely throw off the sugar and spice balance in this recipe. You need 100% pure pumpkin puree for the best results.
Why are my pumpkin bars so gooey in the middle?
This usually means they are slightly underbaked. Pumpkin has a lot of moisture, so these bars take a little longer to set than regular cookie bars. Make sure you bake them until the edges are set and a toothpick inserted in the center comes out with just a few moist crumbs, not wet batter. Also, make sure you let them cool completely before cutting.
Can I make these into regular cookies instead of bars?
You can, but the texture will be different. Because this is a bar recipe, the dough is much wetter and more delicate than a standard cookie dough. If you try to scoop it, the cookies will spread a lot. For best results, chill the dough for at least 2 hours, then scoop and bake at 350°F for 10-12 minutes. They will be more cake-like than a traditional cookie.
How do I get clean, sharp cuts on my bars?
The secret is patience! Let the bars cool completely in the pan. Then, use the parchment paper to lift them out. Use a long, sharp, serrated knife to cut them. Wipe the knife clean between each cut with a damp paper towel. For the absolute cleanest cuts, you can even chill the whole block of bars in the fridge for 30 minutes before slicing.
Can I add nuts to this recipe?
Absolutely! Chopped pecans or walnuts are a fantastic addition. I recommend adding about 1/2 cup of chopped nuts along with the chocolate chips. Toasting the nuts for 5 minutes in a dry skillet before adding them will bring out even more flavor.
Pin This Recipe!
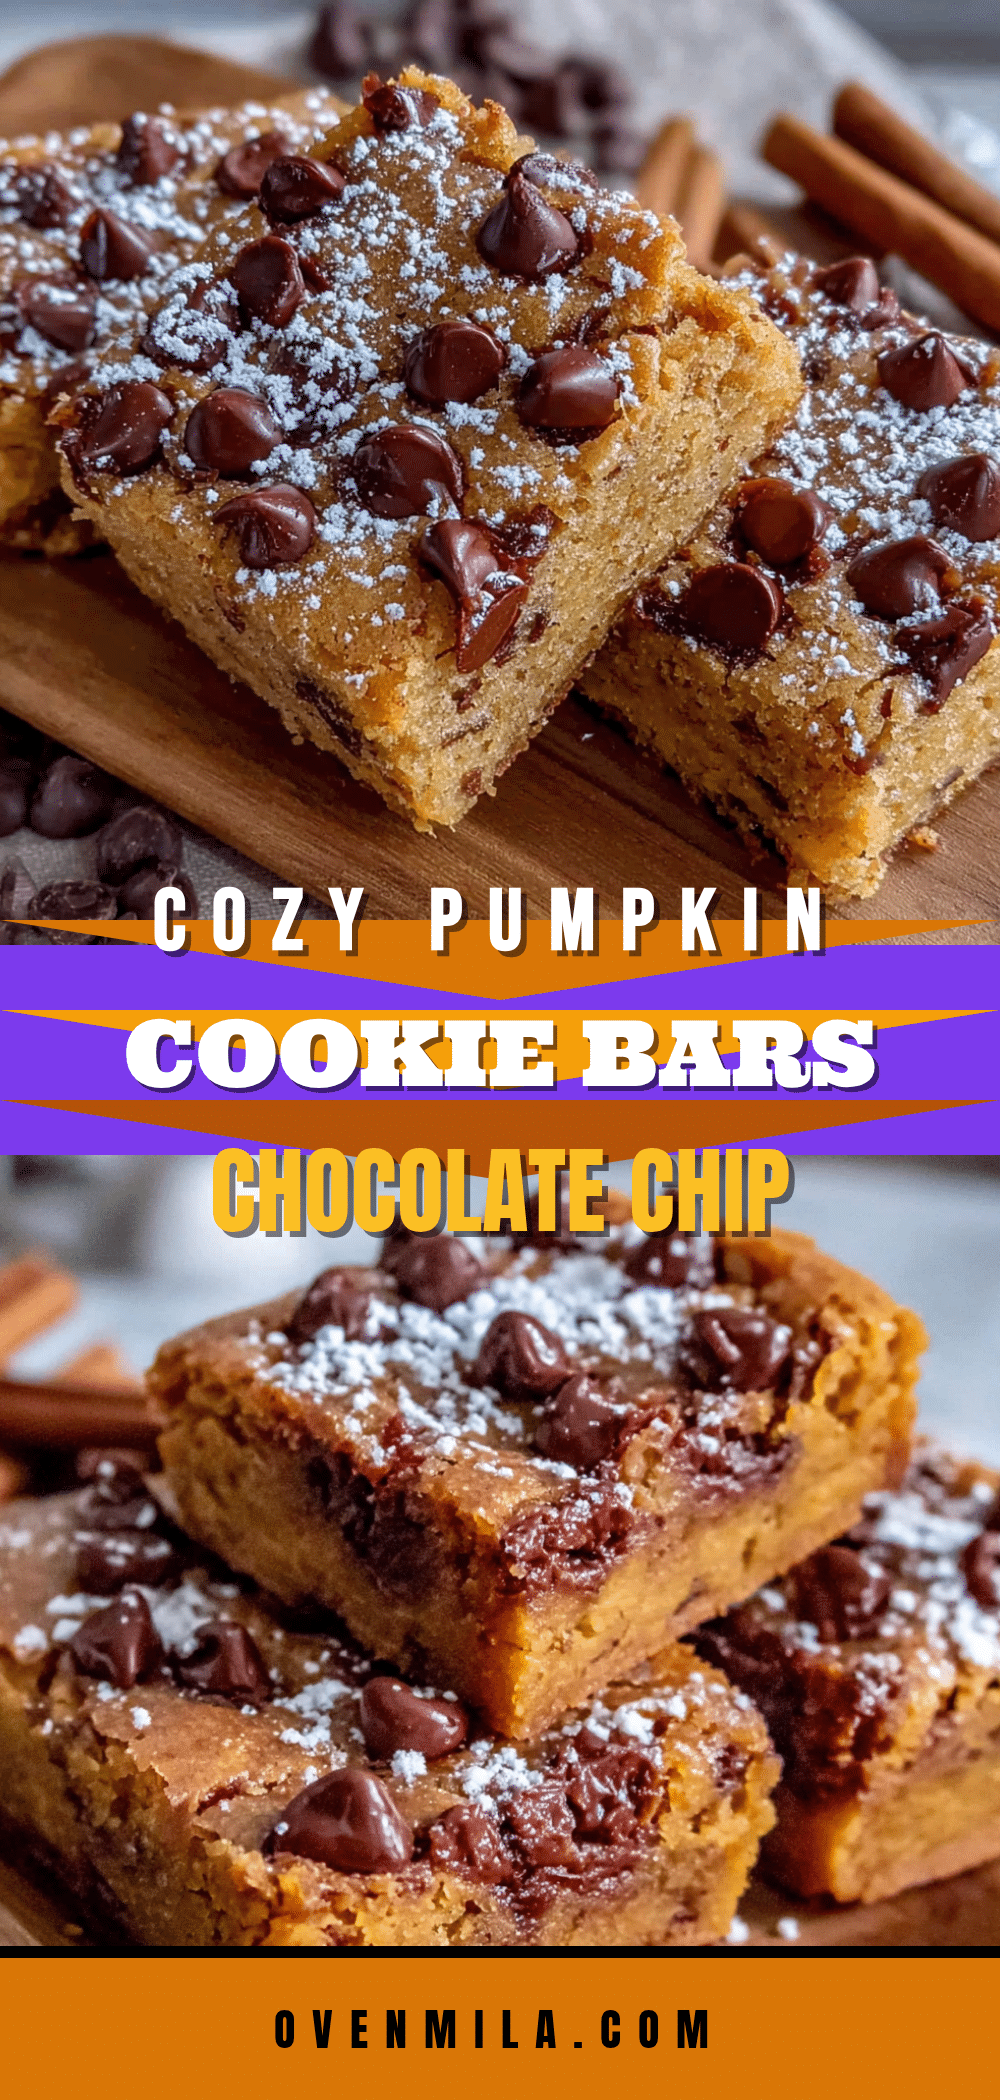
Best Easy Pumpkin Chocolate Chip Cookie Bar Recipe
These dense, fudgy pumpkin chocolate chip cookie bars are incredibly easy to make in one bowl. They have a soft, tender crumb and are packed with warm fall spices and melty chocolate chips.
- Prep Time: 15 minutes
- Cook Time: 30 minutes
- Total Time: 45 minutes
- Yield: 16 servings 1x
- Category: Dessert
- Cuisine: American
Ingredients
- 1/2 cup (1 stick) unsalted butter, melted and slightly cooled
- 3/4 cup granulated sugar
- 1/2 cup light brown sugar, packed
- 1 large egg, at room temperature
- 1 cup pure pumpkin puree (not pumpkin pie filling)
- 1 teaspoon vanilla extract
- 1 1/2 cups all-purpose flour
- 1 1/2 teaspoons pumpkin pie spice
- 1/2 teaspoon baking soda
- 1/4 teaspoon salt
- 1 cup semi-sweet chocolate chips
Instructions
- Preheat your oven to 350°F (175°C). Line an 8×8-inch baking pan with parchment paper, leaving overhang on two sides for handles. Lightly grease the parchment and exposed pan sides.
- In a large mixing bowl, melt the butter. Let it cool for a minute or two.
- Add the granulated sugar and brown sugar to the melted butter. Whisk until smooth and glossy.
- Add the egg and vanilla extract. Whisk vigorously for about a minute until the mixture is light and slightly thickened.
- Add the pumpkin puree and whisk until fully incorporated. The batter will look thin and separated.
- Switch to a rubber spatula or wooden spoon. Add the flour, pumpkin pie spice, baking soda, and salt. Gently fold until just combined. Do not overmix.
- Fold in the chocolate chips until evenly distributed.
- Spread the batter evenly into the prepared pan. Sprinkle a few extra chocolate chips on top if desired.
- Bake for 25-30 minutes, until the edges are set and lightly golden and the center looks slightly underdone. A toothpick inserted in the center should come out with a few moist crumbs.
- Cool the pan completely on a cooling rack (2-3 hours). For clean cuts, lift the bars out using the parchment handles, then slice with a sharp serrated knife.
Notes
Do not overmix the batter to avoid tough bars. Use an oven thermometer for accurate temperature. The center should have a slight jiggle when removed from the oven. Let bars cool completely before cutting for clean slices. For a vegan version, use a flax egg and vegan butter.
Nutrition
- Serving Size: 1 bar
- Calories: 210
- Sugar: 18
- Sodium: 120
- Fat: 10
- Saturated Fat: 6
- Carbohydrates: 29
- Fiber: 2
- Protein: 3
Keywords: pumpkin chocolate chip cookie bars, easy pumpkin bars, fall dessert, one bowl recipe, pumpkin dessert


