It was 11:47 PM on a random Tuesday in early November, and I had an unreasonable craving for pumpkin pie. Not the kind of craving you can talk yourself out of, either—the kind that makes you pace around your kitchen opening cabinets you’ve already opened, hoping new ingredients have magically appeared. I didn’t have a can of evaporated milk. I didn’t have the energy for a water bath. Honestly, I didn’t even have the patience for a proper crust. But I had a can of pumpkin puree, a jar of sweetened condensed milk that was somehow still in date, and three eggs that were judging me from the counter.
That’s when the idea arrived—the kind of reckless, late-night idea that feels genius at midnight and slightly questionable by morning. What if I just… skipped everything extra? No water bath, no fussy temperature management, no separate bowl for the wet and dry ingredients. Just the three things I had, plus a store-bought crust I found hiding in the freezer. I poured, I stirred, I poured again, and I slid that pie into the oven with absolutely no expectations.
Let me tell you—sometimes the best recipes come from being too tired to overthink them. That pie came out so silky, so perfectly spiced (thanks to the pumpkin puree already doing the heavy lifting), that I actually laughed out loud in my empty kitchen. I ate a slice standing at the counter at 1 AM, and it was one of the most satisfying moments of my cooking life. This cozy 3-ingredient pumpkin pie has been my go-to ever since, and I think you’re going to love how simple—and how genuinely good—it really is. No water bath, no stress, just pure pumpkin pie comfort when you need it most.
Why You’ll Love This Recipe
This isn’t just another pumpkin pie recipe—it’s the one you’ll actually make on a Tuesday night when the craving hits. I’ve tested this more times than I care to admit, tweaking the ratios and the baking time until it was absolutely foolproof. Here’s why this one stands out:
- Just 3 Ingredients: Pumpkin puree, sweetened condensed milk, and eggs. That’s it. No evaporated milk, no heavy cream, no complicated spice blends. The pumpkin puree does all the flavor work.
- No Water Bath Needed: Traditional pumpkin pies often require a fussy water bath to prevent cracking. This recipe skips that entirely—the sweetened condensed milk creates a texture so creamy it doesn’t need the extra moisture.
- Comes Together in Minutes: From pantry to oven in under 10 minutes. Seriously, the hardest part is opening the can of pumpkin.
- Perfect for Fall Gatherings: Whether it’s Thanksgiving, a cozy Friendsgiving, or just a random autumn evening, this pie delivers that nostalgic pumpkin flavor without keeping you in the kitchen all day.
- Crowd-Pleaser Every Time: I’ve brought this to three different gatherings now, and every single time someone asks for the recipe. They’re always shocked when I tell them it’s just three ingredients.
What makes this recipe different is the texture. Most simple pumpkin pies end up dense or rubbery, but the sweetened condensed milk creates this almost cheesecake-like silkiness that’s absolutely addictive. It’s comfort food stripped down to its purest form—no fuss, no pretense, just honest, delicious pie.
What Ingredients You Will Need
This recipe uses just three simple ingredients, but each one plays a crucial role in creating that perfect, silky texture. No fancy grocery trips required—you probably already have these in your kitchen.
- 1 can (15 oz) pumpkin puree: Not pumpkin pie filling—make sure you grab pure pumpkin puree. I prefer Libby’s for its consistent texture and deep flavor, but any brand works. The pumpkin provides all the body and that unmistakable autumn taste. If you’re feeling ambitious, you can roast and puree your own sugar pumpkins, but honestly? The canned stuff is perfectly fine and saves so much time.
- 1 can (14 oz) sweetened condensed milk: This is the secret to the no-water-bath magic. Sweetened condensed milk is thicker and richer than evaporated milk, and it creates a custard that sets beautifully without cracking. It also adds just the right amount of sweetness—no extra sugar needed. I use Eagle Brand, but store brands work well too. Just don’t accidentally grab evaporated milk—they look similar but behave very differently.
- 2 large eggs: Eggs provide structure and help the filling set into that perfect sliceable texture. Room temperature eggs blend more smoothly into the mixture, so let them sit out for about 15 minutes before starting. If you’re in a hurry, you can place them in a bowl of warm water for 5 minutes.
- 1 unbaked 9-inch pie crust: While technically not one of the three filling ingredients, you’ll need a crust. I use a store-bought refrigerated crust from Pillsbury on busy days, but a homemade pastry crust or even a graham cracker crust works beautifully. The filling is forgiving enough to work with almost any crust.
That’s really all you need. No vanilla extract, no spices, no complicated additions. The pumpkin puree and sweetened condensed milk do all the heavy lifting together. If you want to get fancy, you can add a teaspoon of pumpkin pie spice or cinnamon, but honestly, the pure simplicity of this version is what makes it so special.
Equipment Needed
You don’t need a professional pastry kitchen for this recipe, which is exactly why I love it. Here’s what you’ll need:
- Large mixing bowl: Any medium-to-large bowl works. I use my favorite ceramic mixing bowl, but glass or stainless steel is fine too.
- Whisk: A standard whisk is perfect for blending the filling until smooth. A fork works in a pinch, but a whisk gives you that silky texture with less effort.
- 9-inch pie dish: Standard glass or ceramic pie dishes work best. I prefer a glass dish so I can see when the crust is golden brown on the bottom. Avoid dark metal pans—they can cause the crust to over-brown before the filling is set.
- Measuring cups and spoons: Even though this is a 3-ingredient recipe, having accurate measurements ensures consistent results every time.
- Spatula: For scraping every last bit of filling into the crust. Waste not, want not.
- Cooling rack: Essential for letting the pie cool evenly so the filling sets properly.
That’s genuinely it. No mixer, no double boiler, no special equipment. If you have a whisk and a bowl, you can make this pie. I’ve made it in a borrowed kitchen with a fork and a Pyrex measuring cup, and it still came out beautifully.
Preparation Method
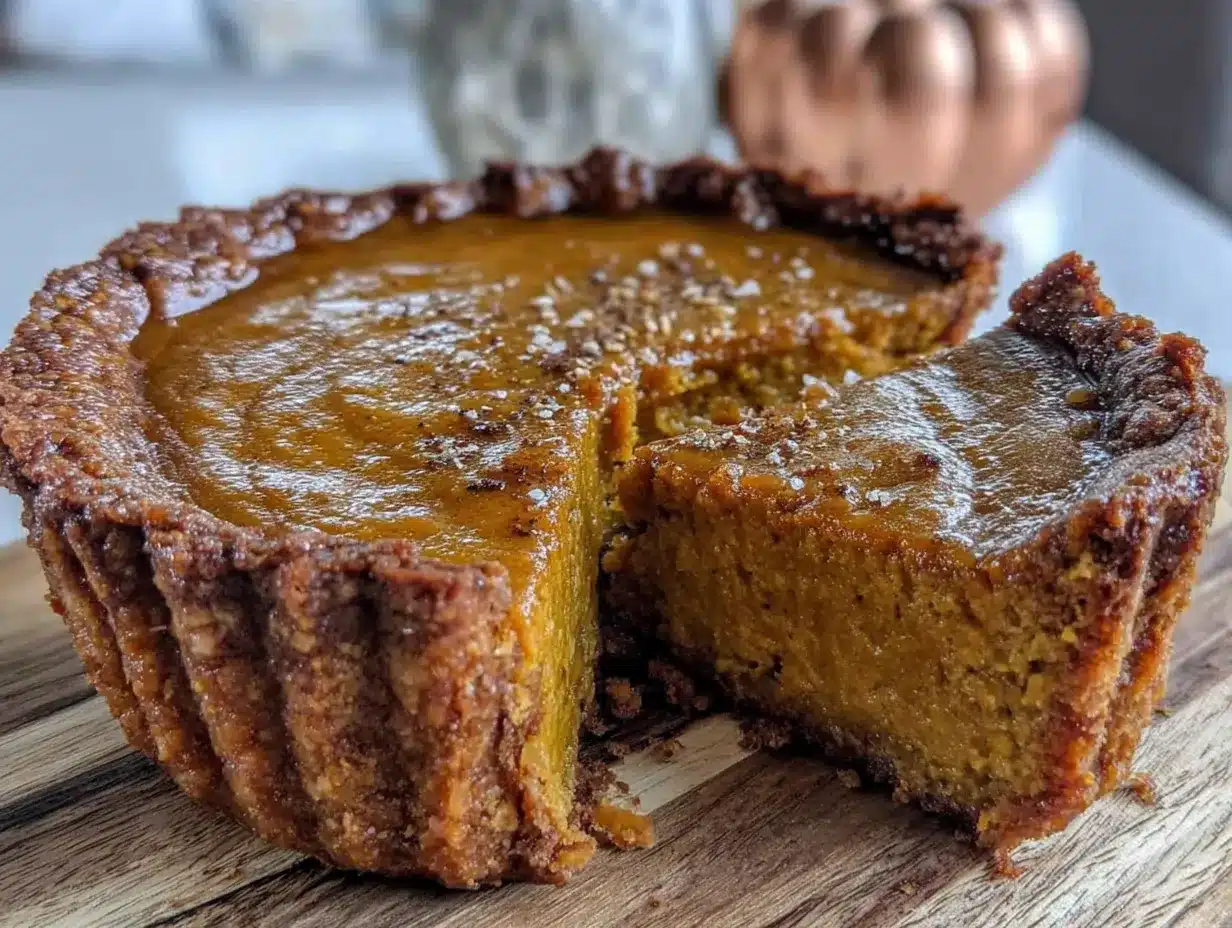
This is where the magic happens. Follow these steps, and you’ll have a perfect pumpkin pie with minimal effort.
- Preheat your oven to 425°F (220°C). Getting the oven hot before the pie goes in is crucial—that initial blast of heat helps the crust set and the filling start cooking properly. Place your oven rack in the center position.
- Prepare your pie crust. If using a store-bought refrigerated crust, let it sit at room temperature for about 10 minutes, then gently press it into your 9-inch pie dish. Crimp the edges however you like—I go for a simple fork press because I’m not trying to impress anyone at midnight. If using a frozen crust, no need to thaw it first.
- Whisk the eggs. In your large mixing bowl, crack both eggs and whisk them until they’re completely uniform in color and texture. This should take about 30 seconds of vigorous whisking. You want the yolks and whites fully incorporated so the filling sets evenly.
- Add the sweetened condensed milk. Pour the entire can into the bowl with the eggs. Whisk until smooth and well combined. The mixture will look pale and creamy at this point.
- Add the pumpkin puree. Spoon the entire can of pumpkin puree into the bowl. Whisk everything together until the filling is completely smooth and uniform in color. Don’t overmix—just stir until you don’t see any streaks of pumpkin or egg. The filling will be thick but pourable.
- Pour the filling into the crust. Slowly pour the filling into your prepared pie crust. Use a spatula to scrape every bit out of the bowl—this filling is too good to waste. Gently tap the pie dish on the counter a few times to release any air bubbles that might be trapped in the filling.
- Bake at 425°F for 15 minutes. This initial high heat helps set the crust and gives the filling a good start. Don’t skip this step—it’s what helps prevent a soggy bottom crust.
- Reduce the temperature to 350°F (175°C). Without opening the oven door, reduce the temperature and continue baking for another 35-40 minutes. The pie is done when the edges are set and slightly puffed, but the center still jiggles slightly when you gently shake the pan. It will continue to set as it cools.
- Cool completely on a wire rack. This is the hardest part—waiting. Let the pie cool at room temperature for at least 2 hours. The filling needs this time to fully set. If you cut into it too soon, you’ll get a runny mess. Trust me, I’ve learned this the hard way.
- Chill before serving. For the best texture, refrigerate the cooled pie for at least 4 hours, or overnight. Cold pumpkin pie slices so much more cleanly, and the flavors have time to meld together beautifully.
Cooking Tips & Techniques
I’ve made this pie probably two dozen times now, and I’ve made every mistake in the book so you don’t have to. Here are the tips that actually matter:
Don’t overmix the filling. I know it’s tempting to keep whisking until it’s perfectly smooth, but overmixing incorporates too much air into the filling. That extra air can cause the pie to puff up in the oven and then collapse, creating cracks on the surface. Mix just until everything is combined—about 30 seconds of gentle whisking after adding the pumpkin.
Watch for the jiggle test. This is the most reliable way to tell if your pie is done. After 35 minutes at 350°F, gently shake the pie dish. The edges should be firm and set, but the center should have a slight, gentle jiggle—like Jell-O that’s almost set. If the center is still liquidy, give it another 5 minutes and check again. If it’s completely firm with no jiggle at all, it’s slightly overbaked.
Cover the crust edges if needed. If you notice the crust edges browning too quickly, loosely tent them with aluminum foil or use a pie crust shield. I usually check at the 25-minute mark and add foil if the edges look darker than I’d like.
Let it cool completely—no shortcuts. I once tried to speed up the cooling process by putting the warm pie directly in the refrigerator. Big mistake. The rapid temperature change caused the filling to weep and separate. Let it cool on the counter for at least 2 hours before refrigerating. Your patience will be rewarded.
Room temperature ingredients matter. Cold eggs can cause the sweetened condensed milk to seize up slightly, creating lumps in your filling. Let your eggs sit out for 15-20 minutes before starting. If you forgot to plan ahead, place them in a bowl of warm water for 5 minutes.
Variations & Adaptations
One of the best things about this simple recipe is how easily it adapts to different tastes and dietary needs. Here are some variations I’ve tried and loved:
Spiced Pumpkin Pie: Add 1 teaspoon of pumpkin pie spice or a mix of ½ teaspoon cinnamon, ¼ teaspoon ginger, and ⅛ teaspoon nutmeg to the filling. Whisk it in with the pumpkin puree for a more traditional spiced flavor. I do this when I’m serving the pie at Thanksgiving alongside more traditional desserts.
Graham Cracker Crust Version: Swap the pastry crust for a store-bought or homemade graham cracker crust. The sweet, buttery flavor pairs beautifully with the creamy filling. Reduce the initial baking temperature to 375°F since graham cracker crusts brown faster, and skip the 425°F blast.
Dairy-Free Adaptation: Use a dairy-free sweetened condensed milk alternative—there are several good ones on the market now made from coconut milk or oat milk. The texture will be slightly different but still delicious. Pair with a vegan pie crust for a completely dairy-free dessert.
Mini Pumpkin Pies: Pour the filling into a muffin tin lined with mini pie crusts or even phyllo cups. Bake at 350°F for about 18-22 minutes. These are perfect for parties or when you want individual portions without the fuss of slicing a whole pie.
Chocolate Swirl Pumpkin Pie: Melt ¼ cup of semi-sweet chocolate chips and drizzle it over the filling before baking. Use a knife to gently swirl it into the top layer. The chocolate adds a rich, decadent twist that feels fancy but takes almost no extra effort.
Serving & Storage Suggestions
This pie is delicious at room temperature, but I honestly prefer it cold straight from the refrigerator. The filling firms up beautifully and slices like a dream when it’s well-chilled. If you’re serving it at a gathering, let it sit at room temperature for about 15-20 minutes before slicing—this takes the chill off without making the filling too soft.
For the ultimate presentation, top each slice with a generous dollop of whipped cream. I like using homemade whipped cream (just heavy cream, a touch of powdered sugar, and vanilla), but the canned stuff works in a pinch. A light dusting of cinnamon on top adds a beautiful finishing touch.
This pie pairs wonderfully with a hot cup of coffee or spiced apple cider. For a full fall dessert spread, serve it alongside a warm apple crisp or a slice of pecan pie.
Storage: Cover the pie loosely with plastic wrap or aluminum foil and store it in the refrigerator for up to 5 days. The flavor actually improves after a day or two as the ingredients meld together. I don’t recommend freezing this pie—the texture of the sweetened condensed milk filling can become grainy when thawed.
Reheating: If you prefer warm pie, microwave individual slices for about 15-20 seconds. Just be careful not to overheat it, or the filling can become runy. I’ve found that a quick zap is all it needs to take the chill off without compromising the texture.
Nutritional Information & Benefits
While this is definitely a treat, it’s worth noting that pumpkin itself is packed with nutrients. Pumpkin is rich in vitamin A, which supports eye health and immune function, and it’s also a good source of fiber and antioxidants. The eggs add high-quality protein, and the sweetened condensed milk provides calcium (though it does come with added sugar, of course).
Here are the approximate nutritional values per slice (based on 8 servings):
| Nutrient | Amount per Slice |
|---|---|
| Calories | 320 |
| Total Fat | 12g |
| Saturated Fat | 6g |
| Cholesterol | 65mg |
| Sodium | 220mg |
| Total Carbohydrates | 48g |
| Dietary Fiber | 3g |
| Sugars | 35g |
| Protein | 6g |
| Vitamin A | 190% DV |
This recipe contains dairy (milk, eggs) and gluten (if using a traditional pie crust). For a gluten-free version, use a gluten-free pie crust. For a lower-sugar option, look for a reduced-sugar sweetened condensed milk alternative.
I believe in balance—this pie is a celebration food, meant to be enjoyed without guilt. One slice with a mountain of whipped cream is absolutely worth it, especially when it’s this easy to make.
Conclusion
This cozy 3-ingredient pumpkin pie has become my secret weapon for fall gatherings, last-minute dessert needs, and those late-night cravings that just won’t quit. It’s proof that you don’t need a dozen ingredients or complicated techniques to create something genuinely delicious. Sometimes the simplest recipes are the ones that surprise you the most.
I love that this recipe meets you exactly where you are—whether you’re a seasoned baker or someone who’s never made a pie from scratch. There’s no judgment, no fuss, no special equipment required. Just three ingredients, one bowl, and the promise of a silky, satisfying pumpkin pie that tastes like you spent hours in the kitchen.
Now I want to hear from you! Have you tried this recipe? Did you add your own twist? Drop a comment below and let me know how it turned out. And if you loved how easy this was, share it with a friend who needs a little more cozy in their life. Happy baking, friends!
Frequently Asked Questions
Can I use pumpkin pie filling instead of pumpkin puree?
I wouldn’t recommend it. Pumpkin pie filling already has sugar and spices added, and it’s much thicker than pure pumpkin puree. Using it would throw off the texture and sweetness of the filling. Stick with 100% pure pumpkin puree for the best results.
Why doesn’t this recipe need a water bath?
The sweetened condensed milk is the secret here. It’s thicker and richer than evaporated milk or heavy cream, which means it creates a custard that sets evenly and smoothly without the extra moisture a water bath provides. The texture comes out perfectly silky every time.
How do I know when the pie is fully baked?
Use the jiggle test. Gently shake the pie dish—the edges should be firm and set, but the center should have a slight wobble. It will continue to set as it cools. If the center is still liquidy, bake for another 5 minutes and check again.
Can I make this pie ahead of time?
Absolutely! In fact, I prefer making it a day ahead. The pie needs to cool completely and then chill in the refrigerator for at least 4 hours anyway, so making it the day before is perfect. The flavors meld together beautifully overnight.
My pie cracked on top. What went wrong?
Don’t worry—cracks are purely cosmetic and don’t affect the taste. Cracking usually happens from overbaking or from the filling cooling too quickly. Next time, try removing the pie from the oven when the center still has a slight jiggle, and let it cool gradually on the counter before refrigerating.
Pin This Recipe!
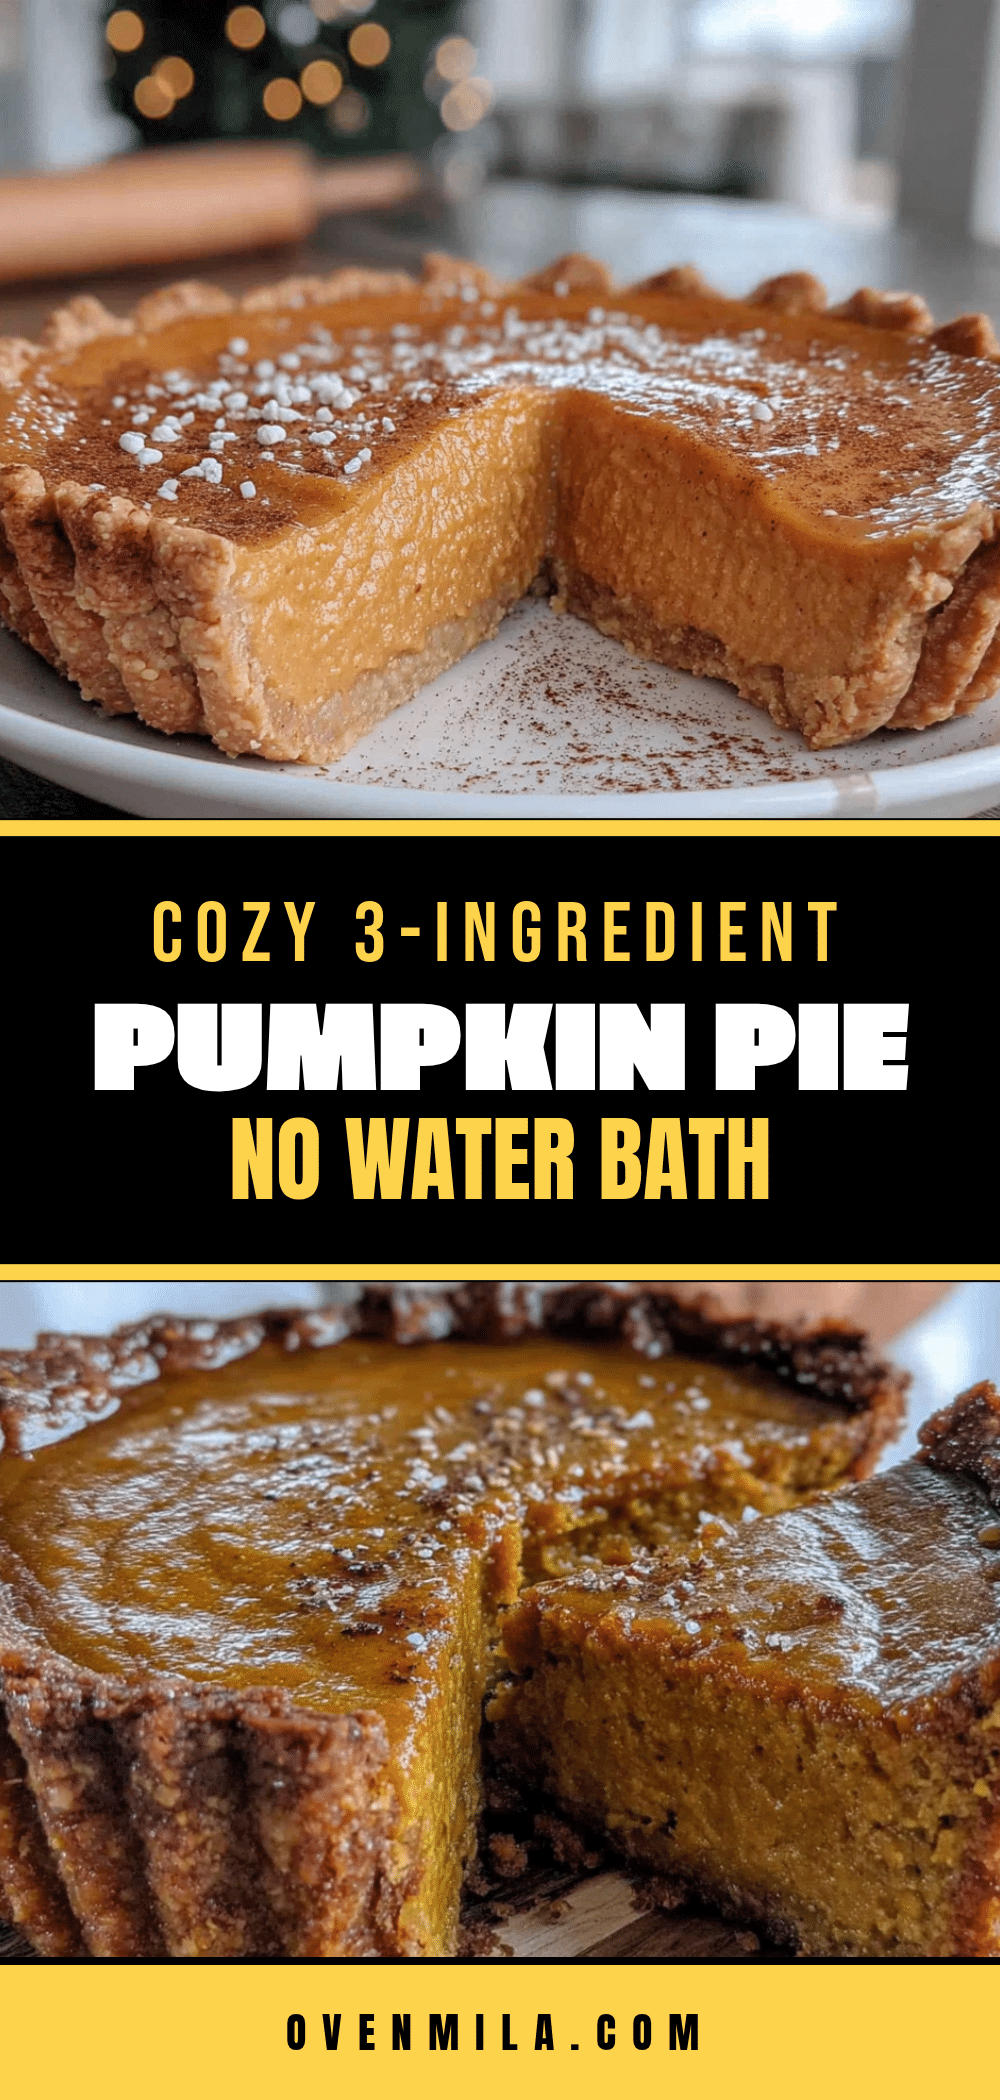
Cozy 3-Ingredient Pumpkin Pie: Best Easy No-Fuss Recipe
This incredibly simple pumpkin pie uses just three ingredients and requires no water bath, making it perfect for last-minute cravings or fall gatherings. The sweetened condensed milk creates a silky, cheesecake-like texture that’s absolutely addictive.
- Prep Time: 10 minutes
- Cook Time: 50 minutes
- Total Time: 5 hours (includes cooling and chilling time)
- Yield: 8 servings 1x
- Category: Dessert
- Cuisine: American
Ingredients
- 1 can (15 oz) pumpkin puree (not pumpkin pie filling)
- 1 can (14 oz) sweetened condensed milk
- 2 large eggs, room temperature
- 1 unbaked 9-inch pie crust
Instructions
- Preheat your oven to 425°F (220°C). Place oven rack in the center position.
- Prepare your pie crust: If using a store-bought refrigerated crust, let it sit at room temperature for about 10 minutes, then gently press it into your 9-inch pie dish. Crimp the edges as desired.
- In a large mixing bowl, whisk the eggs until completely uniform in color and texture, about 30 seconds.
- Add the entire can of sweetened condensed milk to the eggs and whisk until smooth and well combined.
- Add the entire can of pumpkin puree and whisk until the filling is completely smooth and uniform in color. Do not overmix.
- Pour the filling into the prepared pie crust. Gently tap the pie dish on the counter a few times to release any air bubbles.
- Bake at 425°F for 15 minutes.
- Reduce the oven temperature to 350°F (175°C) without opening the oven door, and continue baking for another 35-40 minutes. The pie is done when the edges are set and slightly puffed, but the center still jiggles slightly when gently shaken.
- Cool completely on a wire rack for at least 2 hours. The filling will continue to set as it cools.
- For best texture, refrigerate the cooled pie for at least 4 hours or overnight before serving.
Notes
Don’t overmix the filling to avoid cracks. Use the jiggle test to check doneness. Cover crust edges with foil if browning too quickly. Let pie cool completely at room temperature before refrigerating. Room temperature eggs blend more smoothly. For a spiced version, add 1 teaspoon pumpkin pie spice. For dairy-free, use dairy-free sweetened condensed milk alternative. Store covered in refrigerator for up to 5 days. Not recommended for freezing.
Nutrition
- Serving Size: 1 slice (1/8 of pie)
- Calories: 320
- Sugar: 35
- Sodium: 220
- Fat: 12
- Saturated Fat: 6
- Carbohydrates: 48
- Fiber: 3
- Protein: 6
Keywords: pumpkin pie, 3-ingredient pumpkin pie, easy pumpkin pie, no water bath pumpkin pie, simple pumpkin pie, fall dessert, Thanksgiving dessert


