My partner asked why I couldn’t just skip the oven entirely and press everything into a pan to chill. I started to explain why that wouldn’t work—something about texture, binding agents, the science of a proper granola bar. Then I stopped. Honestly, I had no good reason except that I’d always done it the other way. So I shrugged, handed him the spatula, and said, “Go for it.”
That was a Tuesday night last January. The kitchen was warm, the radio was playing something quiet, and I was absolutely certain I’d be scraping a crumbly mess out of the fridge the next morning. Let me tell you—I was wrong. Dead wrong. Those no-bake granola bar bites came out perfectly chewy, perfectly sturdy, and absolutely loaded with chocolate chips. I stood there eating one straight from the pan, trying to figure out how I’d missed this trick for so many years.
Maybe you’ve been there—stuck in your ways with a recipe, convinced there’s only one right path. This is the recipe that finally broke me of that habit. These cozy no-bake granola bar bites with chocolate chips have become my go-to for those evenings when you just need something sweet, something satisfying, and something you can make without turning on a single appliance. No oven, no stovetop, no fuss. Just a bowl, a spoon, and about ten minutes of your time.
They’re the kind of snack that makes you feel like you’ve got your act together, even on days when you definitely don’t. And honestly? That’s exactly what I needed that night.
Why You’ll Love This Recipe
Let me tell you why these little bites have earned a permanent spot in my kitchen. I’ve tested this recipe about seven times now—yes, seven—because I kept wanting to be absolutely sure it wasn’t a fluke. Each batch turned out just as good as the last, which is more than I can say for most of my experiments.
- Quick & Easy: These come together in under 15 minutes. No baking, no waiting for the oven to preheat, no complicated steps. Perfect for those evenings when a craving hits and you need satisfaction fast.
- Simple Ingredients: You probably have most of this stuff in your pantry right now. Oats, peanut butter, honey, chocolate chips—nothing fancy, nothing hard to find.
- Perfect for Cozy Nights: These are made for chilly evenings, rainy afternoons, or any time you need a little comfort. They’re the snack version of a warm blanket.
- Crowd-Pleaser: I brought a batch to a friend’s house last month, and they disappeared before the main course even hit the table. Kids love them, adults love them, everyone loves them.
- Unbelievably Delicious: The texture is exactly right—chewy but not sticky, firm but not hard. And the chocolate chips? They melt just slightly as you mix, creating little pockets of chocolatey goodness throughout.
What makes these different from every other granola bar recipe out there? It’s the ratio. I spent way too long figuring out the perfect balance of wet to dry ingredients so that these hold together without being overly sweet or sticky. They’re not too heavy, not too light—they’re just right. And that’s coming from someone who has eaten a lot of disappointing homemade granola bars over the years.
This is the kind of recipe that makes you close your eyes after the first bite. It’s comfort food, plain and simple—no baking required, no stress involved, just pure cozy satisfaction.
What Ingredients You Will Need
This recipe uses simple, wholesome ingredients that work together to create something truly special. I love that I can make these without a trip to the grocery store—everything is usually sitting right in my pantry, waiting to be turned into something delicious.
For the Base
- Rolled oats, 2 cups (use old-fashioned oats, not instant—they give the best texture)
- Creamy peanut butter, 1 cup (I prefer natural peanut butter with no added sugar, but any kind works)
- Honey, ½ cup (local honey adds a lovely floral note, but any honey will do)
- Coconut oil, ¼ cup (melted; this helps everything bind together beautifully)
- Vanilla extract, 1 teaspoon (pure vanilla makes a difference, but imitation works in a pinch)
- Salt, ¼ teaspoon (just a pinch to balance the sweetness)
For the Mix-Ins
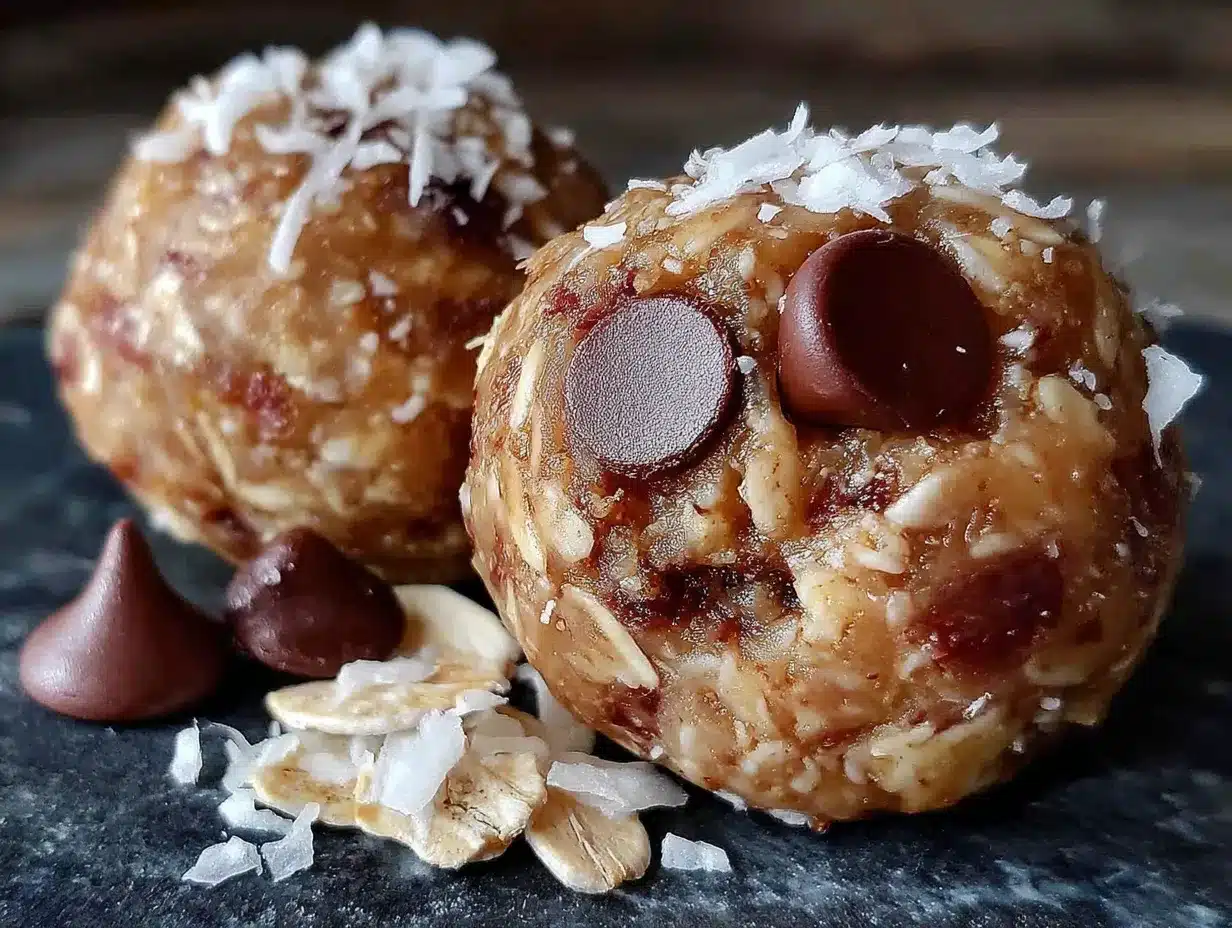
- Semi-sweet chocolate chips, ½ cup (I like Ghirardelli for the best melt, but any brand works)
- Chopped almonds, ¼ cup (optional, but adds a nice crunch)
- Shredded coconut, ¼ cup (unsweetened keeps things from getting too sweet)
Let me talk about a few of these ingredients because they really matter. The peanut butter is the star here—it’s what holds everything together and gives these bites their rich, satisfying flavor. If you’re using natural peanut butter that separates, make sure you stir it really well before measuring. Nobody wants oily granola bars.
The honey acts as both sweetener and binder. I’ve tried maple syrup instead, and it works, but the bars come out a little softer. Honey gives the best texture, hands down.
For the chocolate chips, go with something you actually enjoy eating on its own. The quality matters here because the chocolate is such a prominent flavor. I’ve made these with dark chocolate chips, milk chocolate, and even white chocolate—each version is delicious in its own way.
If you need a substitution, you can use almond butter instead of peanut butter for a different flavor profile. Sunflower seed butter works great for nut-free versions, though the color will be a little different. And if you’re out of coconut oil, melted butter works surprisingly well—just use unsalted so you can control the salt level.
Equipment Needed
You don’t need much for this recipe, which is part of why I love it so much. Here’s what you’ll need:
- Large mixing bowl—any size works, but bigger is better for mixing without making a mess
- Measuring cups and spoons—standard set will do
- Spatula or wooden spoon—for mixing everything together
- 8×8 inch baking pan—this is the perfect size for these bars; you can use a 9×9 if that’s what you have, the bars will just be slightly thinner
- Parchment paper—trust me on this one, it makes removal so much easier
- Refrigerator—for setting the bars (no oven needed!)
I’ve made these with a glass baking dish and a metal one, and both work fine. The key is lining it with parchment paper so you can lift the whole block out in one piece. I learned that lesson the hard way—my first batch had to be chiseled out of the pan with a butter knife. Not my finest moment.
If you don’t have an 8×8 pan, you can use a loaf pan and make thicker bars, or even press the mixture into a pie plate for a different shape. The recipe is forgiving that way.
Preparation Method
Alright, let’s get to the good part. Here’s how to make these cozy no-bake granola bar bites with chocolate chips. I’ll walk you through every step, including the little things I’ve learned from making this about a dozen times now.
- Line your pan. Cut a piece of parchment paper to fit your 8×8 pan, leaving some overhang on two sides. This creates little handles that’ll let you lift the whole block out later. Press it down so it sits flat against the bottom and sides.
- Melt the coconut oil. If your coconut oil is solid, pop it in the microwave for about 15-20 seconds until it’s liquid. You can also warm it on the stovetop in a small saucepan—just keep an eye on it so it doesn’t get too hot. You want it melted, not boiling.
- Mix the wet ingredients. In your large mixing bowl, combine the peanut butter, honey, melted coconut oil, and vanilla extract. Stir until everything is smooth and well combined. This should take about a minute. The mixture will look glossy and smell amazing—that’s the honey and vanilla doing their thing.
- Add the dry ingredients. Pour in the rolled oats, salt, chopped almonds (if using), and shredded coconut (if using). Stir everything together until the oats are fully coated and the mixture looks uniform. This takes a little elbow grease—don’t rush it. You want every oat to have a chance to get cozy with the peanut butter mixture.
- Fold in the chocolate chips. This is the moment of truth. Gently fold in the chocolate chips, making sure they’re distributed evenly throughout the mixture. The warmth from the peanut butter mixture might start to melt the chips slightly—that’s actually perfect. It creates those little chocolate swirls that make each bite special.
- Press into the pan. Transfer the mixture to your lined pan. Here’s where patience pays off: use the back of a spatula or your clean hands to press the mixture down firmly and evenly. I mean really press it—the more compact it is, the better the bars will hold together. Take your time with this step. Press into the corners, smooth out the top, make sure everything is level.
- Chill. Pop the pan into the refrigerator for at least 2 hours. I know, waiting is the hardest part. But trust me, this is essential. The bars need time to set up and become firm enough to cut cleanly. If you’re impatient like me, you can try them after an hour, but they’ll be a little soft. Two hours is the sweet spot.
- Cut and serve. Once the bars are firm, use the parchment paper handles to lift the whole block out of the pan. Place it on a cutting board and use a sharp knife to cut into bars or bites. I usually go for 16 squares, but you can make them bigger or smaller depending on your preference.
A few things I’ve learned: if the mixture seems too dry and crumbly, add another tablespoon of honey. If it seems too wet and sticky, add a few more oats. The texture should be like a slightly damp sand—it should hold together when you squeeze a handful, but not be gloppy.
Also, don’t skip the pressing step. I know it seems tedious, but this is what separates good granola bars from great ones. The more you press, the better they hold together. I usually press, then press again, then press one more time just to be sure.
Cooking Tips & Techniques
After making these cozy no-bake granola bar bites with chocolate chips more times than I care to count, I’ve picked up a few tricks that make the process smoother and the results better. Let me share what I’ve learned.
Don’t overmix. Once you add the oats, stir just until everything is combined. Overmixing can break down the oats and make the bars gummy. You want them to retain their texture.
Use room temperature ingredients. If your peanut butter and honey are cold, they won’t mix as smoothly. Let them sit out for about 15 minutes before you start. It makes a noticeable difference.
Wet your hands for pressing. If you’re using your hands to press the mixture into the pan (which I recommend), wet them slightly first. The mixture won’t stick to your hands as much, and you can get a more even press. It’s a little trick I picked up from making rice crispy treats, and it works perfectly here.
Chill the knife. For the cleanest cuts, chill your knife in the freezer for about 10 minutes before slicing. Run it under hot water between cuts if the chocolate starts to stick. This gives you those beautiful, clean edges that look so professional.
One mistake I made early on: I tried to cut the bars while they were still too warm. Big mistake. The chocolate smeared everywhere, and the bars fell apart into a crumbly mess. Now I always wait the full two hours, sometimes longer if I have the patience. The bars are much easier to handle when they’re fully set.
Storage tip: Keep these in the refrigerator. They’ll hold their shape better and last longer. At room temperature, they tend to soften and become a little messy, especially if you live in a warm climate. I learned this the hard way during a summer heatwave—let’s just say I ended up eating granola bar crumbles with a spoon.
Batch consistency: I’ve noticed that different brands of peanut butter can change the texture slightly. Thicker, more natural peanut butters make for firmer bars. If you’re using a runnier peanut butter, you might need to add a few extra tablespoons of oats to compensate.
Variations & Adaptations
One of the best things about this recipe is how easy it is to adapt. I’ve tried quite a few variations over the months, and here are some of my favorites. Feel free to experiment—these bars are forgiving and always delicious.
Chocolate Peanut Butter Dream
Add 2 tablespoons of cocoa powder to the wet ingredients before mixing. The chocolate flavor intensifies, and combined with the peanut butter, it tastes almost like a Reese’s cup in bar form. I made this version for a friend who’s a chocoholic, and she asked for the recipe before she finished her first bite.
Berry Bliss
Swap the chocolate chips for dried cranberries or chopped dried cherries. Add a teaspoon of orange zest to the wet ingredients for a bright, fruity twist. This version is less sweet and a little tart—perfect for mornings when you want something lighter.
Nut-Free Friendly
Use sunbutter (sunflower seed butter) instead of peanut butter, and skip the chopped almonds. The color will be a little greenish from the sunflower seeds reacting with the baking soda, but the taste is still fantastic. I’ve made this for school events where nuts aren’t allowed, and it’s always a hit.
Crunchy Seed Version
Replace the chocolate chips with pumpkin seeds, sunflower seeds, and a tablespoon of chia seeds. This version is incredibly nutritious and has a wonderful crunch. I like to add a pinch of cinnamon to the mix for warmth.
Vegan Option
Use maple syrup instead of honey, and make sure your chocolate chips are dairy-free. Everything else is already plant-based. The maple syrup gives a slightly different flavor—a little more caramel-y—but it’s absolutely delicious.
My personal favorite variation? I add a tablespoon of flax seeds and a sprinkle of sea salt on top before chilling. The salt balances the sweetness perfectly, and the flax adds a little extra nutrition without changing the taste. It’s become my go-to version.
Serving & Storage Suggestions
These cozy no-bake granola bar bites with chocolate chips are best served cold, straight from the refrigerator. The texture is firm but chewy, and the chocolate chips are perfectly set. I like to let them sit at room temperature for about 5 minutes before eating—just enough to soften slightly without getting messy.
For presentation, arrange them on a wooden board or a simple white plate. A sprinkle of flaky sea salt on top before serving makes them look fancy and adds a lovely savory contrast. They’re perfect for:
- Afternoon snack with a cup of tea or coffee
- Quick breakfast on busy mornings (grab and go!)
- Lunchbox treat for kids or adults
- Post-workout refuel (the protein from peanut butter helps)
- Dessert that doesn’t require turning on the oven
Storage: Keep these in an airtight container in the refrigerator. They’ll stay fresh for up to two weeks—if they last that long. I usually make a batch on Sunday and they’re gone by Wednesday. The flavors actually develop a bit over the first day or two, so they might taste even better on day two.
Freezer instructions: These freeze beautifully. Place the cut bars in a single layer on a baking sheet and freeze for an hour, then transfer to a freezer bag or container. They’ll keep for up to three months. To eat, just let them thaw in the refrigerator for about 30 minutes, or eat them frozen for a cold, crunchy treat. I actually love eating them straight from the freezer on a hot day.
Reheating: You don’t really need to reheat these, but if you want a softer texture, microwave a single bar for about 10 seconds. Be careful not to overheat or the chocolate will melt everywhere. I’ve done this and ended up with a puddle of chocolate and a very sad granola bar.
Nutritional Information & Benefits
Here’s the nutritional breakdown for one serving (based on 16 bars per batch). These numbers are approximate and will vary based on your specific ingredients.
| Nutrient | Amount Per Serving |
|---|---|
| Calories | 185 |
| Total Fat | 11g |
| Saturated Fat | 4g |
| Carbohydrates | 20g |
| Fiber | 3g |
| Sugar | 10g |
| Protein | 5g |
| Sodium | 85mg |
These bars are a good source of fiber from the oats and healthy fats from the peanut butter and coconut oil. The oats provide sustained energy, making these a great pre-workout or mid-afternoon snack. Peanut butter adds protein and healthy monounsaturated fats that keep you feeling full longer.
If you’re watching your sugar intake, you can reduce the honey to ⅓ cup and use sugar-free chocolate chips. The bars will be less sweet but still delicious. For a lower-carb version, try using chopped nuts and seeds instead of oats—though that changes the texture significantly.
Potential allergens: This recipe contains peanuts (if using peanut butter), tree nuts (if using almonds), and gluten (from oats, though certified gluten-free oats are available). Always check your labels if you’re cooking for someone with allergies.
Conclusion
These cozy no-bake granola bar bites with chocolate chips have become a staple in my kitchen for good reason. They’re simple, they’re satisfying, and they make me feel like I’ve done something good for myself every time I reach for one. No oven, no complicated steps, no fancy ingredients—just pure, uncomplicated comfort in every bite.
I love that this recipe came from a moment of being wrong. It reminds me that sometimes the best discoveries happen when we let go of what we think we know and just try something different. Maybe you’ll find your own twist on these bars—a new mix-in, a different nut butter, a sprinkle of something unexpected. That’s the beauty of a simple recipe like this: it’s a starting point, not a final destination.
I’d love to hear how yours turn out. Did you add something special? Did you make a substitution that worked perfectly? Drop a comment below and let me know—I read every single one, and your ideas might just inspire my next batch. Here’s to cozy evenings, chocolate chips, and the joy of a recipe that actually works.
Frequently Asked Questions
Can I use quick oats instead of rolled oats?
Yes, but the texture will be different. Quick oats are more finely processed, so they absorb moisture faster and create a softer, less chewy bar. I prefer rolled oats for the best texture, but quick oats work in a pinch.
Why are my granola bars falling apart?
This usually happens for one of two reasons: not enough binding ingredients (peanut butter and honey) or not pressing the mixture firmly enough into the pan. Try adding an extra tablespoon of honey and pressing down really hard next time. Also, make sure you’re chilling them for the full two hours.
Can I make these without peanut butter?
Absolutely. Any nut or seed butter will work—almond butter, cashew butter, sunflower seed butter, or even tahini. Each will give a different flavor, but they all work as binders. Just keep in mind that different butters have different consistencies, so you might need to adjust the amount slightly.
How long do these last at room temperature?
They’ll hold up for about a day at room temperature, but they’ll soften significantly. I recommend keeping them in the refrigerator for the best texture and longest shelf life. If you’re taking them on a picnic or to work, pack them in a cooler or eat them within a few hours.
Can I double this recipe?
Yes! Simply double all the ingredients and use a 9×13 inch pan instead of an 8×8. The chilling time might need to be increased by about 30 minutes since the mixture will be thicker. I do this all the time when I’m making a batch for a party or to share with neighbors.
Pin This Recipe!
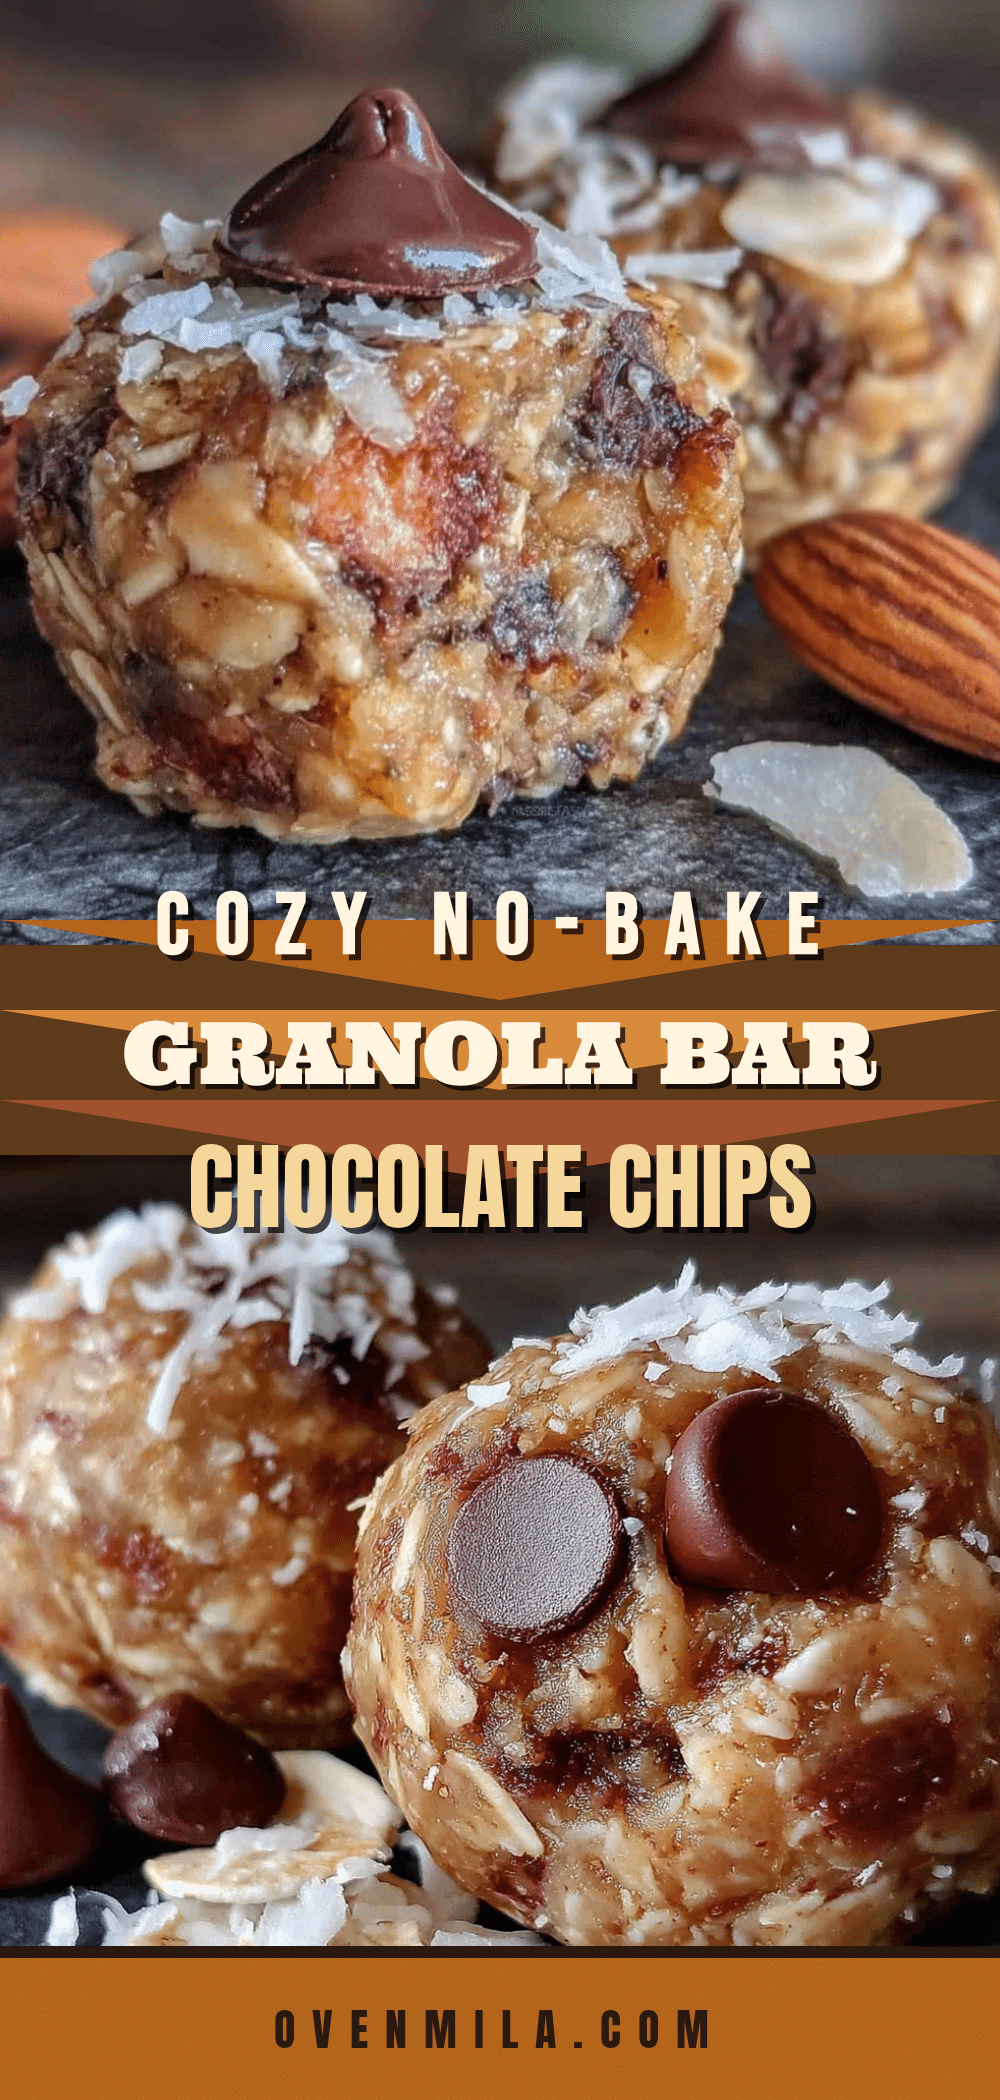
Cozy No-Bake Granola Bar Bites with Chocolate Chips
These no-bake granola bar bites are perfectly chewy, sturdy, and loaded with chocolate chips. Made in under 15 minutes with simple pantry ingredients, they’re the ultimate cozy snack for any time of day.
- Prep Time: 15 minutes
- Cook Time: 0 minutes
- Total Time: 2 hours 15 minutes (includes chilling)
- Yield: 16 servings 1x
- Category: Snack
- Cuisine: American
Ingredients
- 2 cups rolled oats (old-fashioned)
- 1 cup creamy peanut butter
- ½ cup honey
- ¼ cup coconut oil, melted
- 1 teaspoon vanilla extract
- ¼ teaspoon salt
- ½ cup semi-sweet chocolate chips
- ¼ cup chopped almonds (optional)
- ¼ cup shredded coconut, unsweetened (optional)
Instructions
- Line an 8×8 inch baking pan with parchment paper, leaving overhang on two sides for easy removal.
- If coconut oil is solid, melt it in the microwave for 15-20 seconds or on the stovetop until liquid.
- In a large mixing bowl, combine peanut butter, honey, melted coconut oil, and vanilla extract. Stir until smooth and well combined.
- Add rolled oats, salt, chopped almonds (if using), and shredded coconut (if using). Stir until oats are fully coated and mixture is uniform.
- Gently fold in chocolate chips until evenly distributed.
- Transfer mixture to the lined pan. Press down firmly and evenly using the back of a spatula or clean hands. Ensure mixture is compact and level.
- Refrigerate for at least 2 hours until firm.
- Use parchment paper handles to lift the block out of the pan. Place on a cutting board and cut into 16 squares or desired size.
Notes
For best results, use room temperature peanut butter and honey. Press mixture firmly into pan to ensure bars hold together. Chill knife before cutting for clean edges. Store in refrigerator for up to 2 weeks or freeze for up to 3 months.
Nutrition
- Serving Size: 1 bar
- Calories: 185
- Sugar: 10
- Sodium: 85
- Fat: 11
- Saturated Fat: 4
- Carbohydrates: 20
- Fiber: 3
- Protein: 5
Keywords: no-bake granola bars, chocolate chip granola bars, easy snack, no-bake recipe, peanut butter granola bars


