My neighbor Marco asked why I couldn’t just toss the chicken thighs in the air fryer without breading them first. I started to explain why that wouldn’t work—something about moisture barriers and crispiness science—then stopped. He had a point I wasn’t ready to admit.
Here’s the thing about being a recipe developer who thinks they know everything: you get humbled pretty regularly. I’ve spent years perfecting pan-seared chicken, oven-roasted chicken, even deep-fried chicken. But air fryer chicken? I had strong opinions about what worked and what didn’t.
Turns out, Marco was right. Those naked thighs came out with a crispy skin that shattered when you bit into it. The garlic and Parmesan clung to every crevice without any flour or breadcrumbs getting in the way. I stood there in my kitchen, fork in hand, genuinely annoyed at how good they were.
Maybe you’ve been there—someone suggests a cooking method that goes against everything you believe, and you try it just to prove them wrong. Only you don’t prove them wrong. You prove yourself wrong. Honestly, it’s a good feeling once you get past the pride.
These Crispy Air Fryer Chicken Thighs with Garlic Parmesan have become my go-to dinner for those evenings when I want something that tastes like I spent hours in the kitchen but actually took twenty minutes. The air fryer does all the heavy lifting, and the flavor combination is simple enough for a Tuesday but impressive enough for company. I keep making them because they remind me that sometimes the best cooking advice comes from the people who don’t overthink things.
Why You’ll Love This Recipe
Let me tell you why these chicken thighs are going to become a regular in your dinner rotation. I’ve tested this recipe at least a dozen times, tweaking temperatures and timing until every batch came out consistently perfect.
- Quick & Easy: From fridge to table in under 30 minutes. No marinating, no complicated steps, just straightforward cooking that fits into busy weeknights.
- Simple Ingredients: You probably have everything except the chicken already. Garlic, Parmesan, olive oil, salt, pepper—that’s it. No fancy grocery store trips needed.
- Perfect for Cozy Dinners: These thighs are made for those evenings when you need something warm and satisfying. Cold weather, rough day, or just a quiet Tuesday—they deliver comfort without the guilt.
- Crowd-Pleaser: I’ve served these to picky kids, health-conscious friends, and serious food lovers. Everyone asks for the recipe. Every single time.
- Unbelievably Delicious: The skin gets impossibly crispy while the meat stays juicy and tender. The garlic and Parmesan create this savory crust that’s honestly addictive.
What makes this recipe different from every other air fryer chicken out there? It’s the technique. Most recipes tell you to bread the chicken or use a wet batter, but that just steams the skin. By keeping the thighs dry and letting the air fryer work its magic, you get that shatter-crisp texture without any fuss. Plus, the Parmesan melts into the skin’s crevices, creating little pockets of crispy, cheesy goodness that you won’t get with any other method.
This isn’t just good chicken—it’s the kind that makes you close your eyes after the first bite. It’s comfort food reimagined for the air fryer era: faster, healthier, but with the same soul-soothing satisfaction. Perfect for impressing guests without stress, or turning a simple meal into something memorable.
What Ingredients You Will Need
This recipe uses simple, wholesome ingredients to deliver bold flavor and satisfying texture without the fuss. Everything is easy to find at any grocery store.
- Chicken Thighs (6 pieces, bone-in and skin-on): Bone-in thighs stay juicier during cooking, and the skin is essential for that crispy texture. I prefer thighs from local farms when available, but any good-quality supermarket brand works. Look for thighs with the skin still attached and intact.
- Parmesan Cheese (½ cup, finely grated): Use the real stuff, not the green can. Freshly grated Parmigiano-Reggiano melts better and has more flavor. I recommend grating it yourself for the best texture—pre-shredded cheese has anti-caking agents that prevent proper melting.
- Garlic (4 cloves, minced): Fresh garlic is non-negotiable here. The jarred stuff has a different flavor profile and won’t distribute as evenly. Mince it finely so it sticks to the chicken without burning.
- Olive Oil (2 tablespoons, extra virgin): Helps the seasoning stick and promotes browning. A good quality olive oil adds subtle fruity notes, but regular olive oil works fine too.
- Salt (1 teaspoon, kosher): I use Diamond Crystal kosher salt. If using table salt, reduce to ½ teaspoon since it’s more concentrated.
- Black Pepper (½ teaspoon, freshly ground): Freshly ground pepper makes a difference here—the pre-ground stuff lacks the aromatic punch.
- Paprika (1 teaspoon, smoked): Adds color and a subtle smoky depth. Regular paprika works too, but smoked really complements the garlic and Parmesan.
- Dried Oregano (½ teaspoon): Optional but recommended. It adds an Italian-inspired herbal note that pairs beautifully with the cheese.
- Fresh Parsley (2 tablespoons, chopped): For garnish. Adds freshness and color. Flat-leaf parsley is best, but curly works too.
Substitution Guidance: If you need a dairy-free option, use nutritional yeast instead of Parmesan—it won’t melt the same way but adds a similar savory flavor. For a milder garlic taste, roast the cloves first or use garlic powder instead. You can also swap the oregano for thyme or rosemary if that’s what you have on hand.
Equipment Needed
You don’t need much for this recipe, which is part of why I love it. Here’s what you’ll need:
- Air Fryer (6-quart or larger): A larger basket means you can cook all the thighs in one batch without overcrowding. I use a Cosori 5.8-quart model and it works perfectly. If yours is smaller, cook in batches to avoid steaming.
- Tongs: For flipping the chicken without piercing the skin. Silicone-tipped tongs are gentle on the air fryer basket’s non-stick coating.
- Mixing Bowl: Any medium bowl works for tossing the chicken with oil and seasonings.
- Microplane or Fine Grater: For grating the Parmesan. A box grater’s fine side works too, but a microplane gives you that powdery texture that clings best.
- Meat Thermometer: Not strictly necessary, but highly recommended for perfect doneness. An instant-read thermometer takes the guesswork out of cooking.
- Paper Towels: For patting the chicken dry. This step matters more than you think.
If you don’t have an air fryer, you can use a convection oven set to 400°F—just increase the cooking time by 5-10 minutes. A regular oven works too, but you won’t get quite the same level of crispiness. Trust me, the air fryer is worth it for this recipe.
Preparation Method
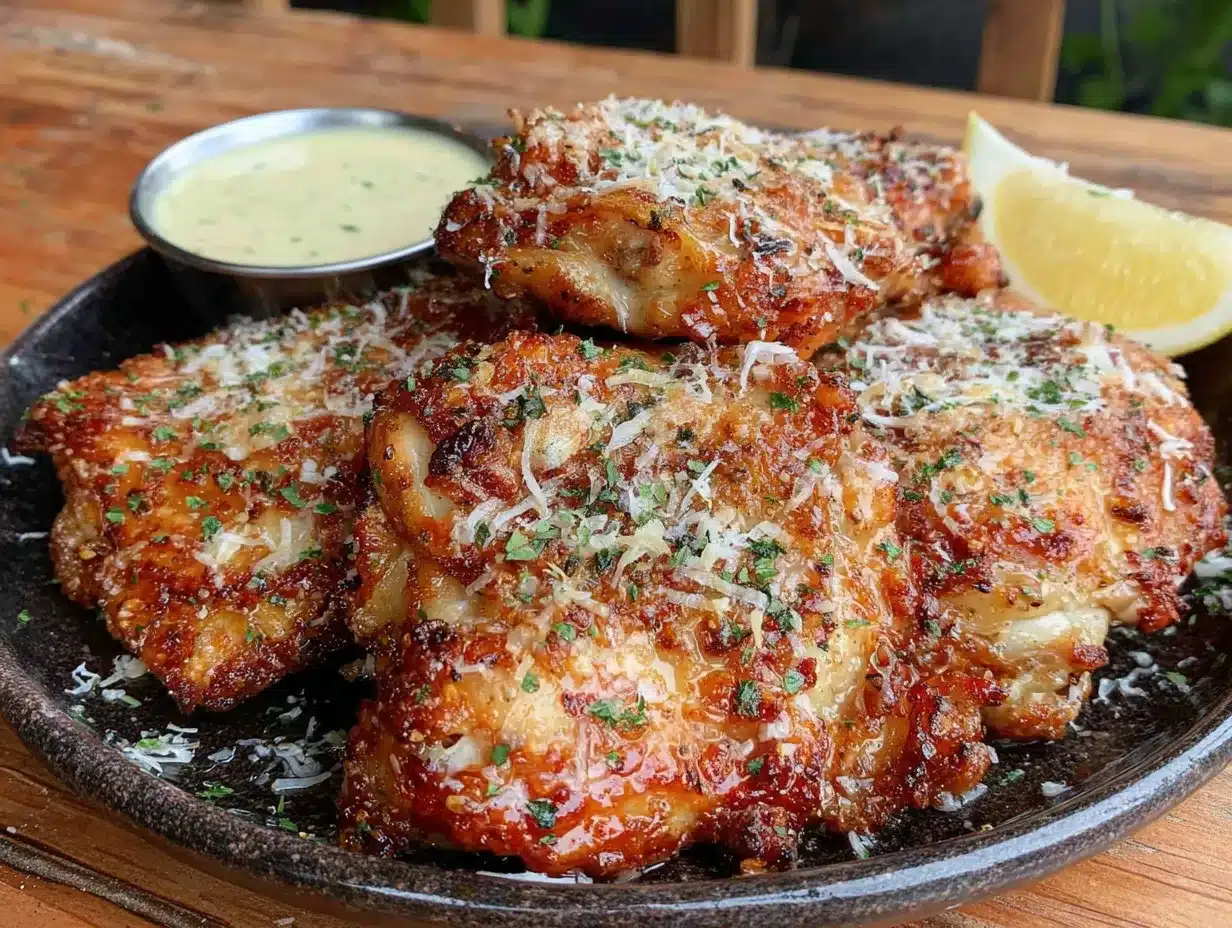
- Pat the chicken thighs dry with paper towels. This is the most important step for crispy skin. Remove as much moisture as possible—moisture is the enemy of crispiness. Let them sit uncovered on a plate for 5 minutes if you have time.
- Season the chicken with salt and pepper on both sides. Don’t be shy with the salt—it helps draw out moisture and seasons the meat all the way through.
- Mix the coating: In a small bowl, combine the grated Parmesan, minced garlic, smoked paprika, and dried oregano. Stir until everything is evenly distributed. The mixture should look like a coarse, fragrant powder.
- Oil the chicken: Drizzle the olive oil over the chicken thighs and use your hands to coat them evenly. Make sure every surface gets a thin layer—this helps the seasoning stick and promotes even browning.
- Apply the coating: Sprinkle the Parmesan mixture over the oiled chicken, pressing gently so it adheres. Don’t dump it all on at once—work in layers for even coverage. Flip and repeat on the other side.
- Preheat the air fryer to 400°F (200°C) for 3 minutes. A hot start ensures immediate sizzling, which sets the crust.
- Arrange the thighs in the air fryer basket in a single layer. Leave space between each piece—crowding traps steam and prevents crisping. Cook in batches if needed.
- Cook for 18-22 minutes, flipping halfway through at the 10-minute mark. The chicken is done when the internal temperature reaches 175°F (80°C) for dark meat. The skin should be golden brown and crispy to the touch.
- Rest for 5 minutes before serving. This allows the juices to redistribute, keeping the meat moist. Don’t skip this step—I learned the hard way that cutting too early releases all those delicious juices.
- Garnish with fresh parsley and extra Parmesan if desired. Serve immediately while the skin is still crackling.
Sensory Cues: At the 10-minute mark, you should smell the garlic and Parmesan becoming fragrant. The skin will look slightly puffed and golden. When you flip them, the bottom side should be lightly browned. At 18 minutes, tap the skin—it should sound hollow and feel firm. If it still feels soft, give it another 2 minutes.
Personal Tip: I always cook chicken thighs to 175°F instead of 165°F. Dark meat actually gets more tender at higher temperatures because the connective tissue breaks down. Going to 175°F gives you that fall-apart texture without drying out.
Cooking Tips & Techniques
I’ve made every mistake you can imagine with air fryer chicken. Let me save you the trouble.
Don’t skip the drying step. I once rushed through this and ended up with soggy skin that peeled off in sad, rubbery sheets. Pat those thighs dry like your dinner depends on it—because it does. Use fresh paper towels and press firmly.
Watch the garlic. Fresh garlic can burn quickly at high temperatures. That’s why we mix it with the Parmesan and oil—the cheese and fat buffer it from direct heat. If you’re worried, use garlic powder instead (1 teaspoon). It won’t have quite the same punch, but it won’t burn either.
Don’t overcrowd the basket. I know it’s tempting to cram all six thighs in there, but steam needs room to escape. Leave at least an inch between pieces. If your air fryer is small, cook in two batches and keep the first batch warm in a 200°F oven.
Flip carefully. Use tongs and be gentle. The coating is delicate when it’s still hot. If some Parmesan falls off, just sprinkle it back on top—it’ll crisp up during the remaining cooking time.
Let them rest. I know you’re hungry, but those five minutes of resting time are non-negotiable. The carryover cooking brings the internal temperature up a few more degrees, and the juices settle back into the meat. Slice too early and you’ll have dry chicken and a puddle on your plate.
Variations & Adaptations
This recipe is incredibly flexible. Here are some variations I’ve tried and loved:
- Spicy Version: Add ½ teaspoon of cayenne pepper or red pepper flakes to the Parmesan mixture. The heat cuts through the richness beautifully. I made this version for a Super Bowl party and it disappeared in minutes.
- Lemon Herb: Replace the oregano with fresh thyme and add the zest of one lemon to the coating. Squeeze fresh lemon juice over the finished chicken. Bright, fresh, and perfect for warmer months.
- Keto-Friendly: This recipe is naturally low-carb, but you can boost the fat content by adding an extra tablespoon of olive oil. Serve with roasted vegetables or a big green salad.
- Bone-Out Version: Use boneless, skin-on thighs for faster cooking. Reduce the time to 14-16 minutes and check for doneness at 165°F. The skin won’t get quite as crispy, but it’s still delicious.
- Dairy-Free: Substitute the Parmesan with nutritional yeast (3 tablespoons) and increase the salt slightly. The texture will be different—less melty—but the umami flavor is still there.
I personally love the spicy version for winter months when I need something warming. The cayenne combined with the garlic creates this deep, complex heat that lingers pleasantly.
Serving & Storage Suggestions
These chicken thighs are best served hot, straight from the air fryer. The skin stays crispy for about 10-15 minutes, so plan your timing accordingly.
Serving Ideas: Pair with roasted asparagus or a simple arugula salad with lemon vinaigrette. The peppery greens cut through the richness of the chicken. Mashed potatoes or roasted sweet potatoes also work beautifully—the creamy texture contrasts with the crispy skin. For a low-carb option, serve over cauliflower rice with a drizzle of the pan juices.
Storage: Leftover chicken keeps in the refrigerator for up to 4 days in an airtight container. The skin will soften, but the flavor remains excellent. To reheat, place back in the air fryer at 375°F for 3-4 minutes—this restores some of the crispiness. Microwaving will make the skin rubbery, so avoid it if you can.
Freezing: Cooked chicken thighs freeze well for up to 3 months. Wrap each piece individually in plastic wrap, then place in a freezer bag. Thaw overnight in the refrigerator and reheat in the air fryer at 375°F for 5-6 minutes.
Flavor Development: Honestly, these are even better the next day. The garlic and Parmesan flavors meld together overnight, creating a more complex taste. I sometimes make a double batch just for leftovers.
Nutritional Information & Benefits
Here’s the approximate nutritional breakdown per serving (1 thigh):
- Calories: 320
- Protein: 28g
- Fat: 22g
- Carbohydrates: 2g
- Fiber: 0g
- Sugar: 0g
Health Benefits: Chicken thighs are an excellent source of selenium, which supports thyroid function and immune health. They’re also rich in B vitamins, particularly B6 and B12, which help with energy metabolism. The Parmesan adds calcium and protein, while garlic offers allicin, a compound with anti-inflammatory properties.
Dietary Considerations: This recipe is naturally gluten-free, low-carb, and keto-friendly. It contains dairy from the Parmesan. For a dairy-free version, use the nutritional yeast substitution mentioned above. Always check your Parmesan label—some brands use animal rennet, which may not suit vegetarian diets.
Personal Wellness Perspective: I love that this recipe lets me enjoy crispy, satisfying chicken without deep frying. The air fryer uses a fraction of the oil, which means less fat and fewer calories without sacrificing texture. It’s comfort food that actually fits into a balanced diet.
Conclusion
These Crispy Air Fryer Chicken Thighs with Garlic Parmesan have become my weeknight hero. They’re fast enough for busy evenings, impressive enough for guests, and comforting enough for those days when only crispy chicken will do. The air fryer does the heavy lifting while you sit back and enjoy the incredible aroma filling your kitchen.
What I love most about this recipe is how forgiving it is. You can adjust the seasonings, swap the cheese, or change up the herbs, and it still comes out delicious. It’s the kind of recipe that builds confidence in the kitchen—proof that you don’t need complicated techniques to create something truly special.
I’d love to hear how these turn out for you. Did you try a variation? Did the skin get as crispy as you hoped? Drop a comment below and let me know—your feedback helps other readers (and me!) learn new tricks. And if you loved this recipe, share it with someone who needs a quick, comforting dinner idea.
Go ahead, give those thighs a pat dry and fire up your air fryer. Your taste buds will thank you.
Frequently Asked Questions
Can I use chicken breasts instead of thighs?
Yes, but adjust the cooking time. Boneless, skinless chicken breasts need about 14-16 minutes at 400°F. The skin won’t be as crispy since there’s less fat, so I recommend adding an extra tablespoon of oil. Check internal temperature at 165°F.
Why is my air fryer chicken not crispy?
Most likely, you skipped the drying step or overcrowded the basket. Moisture creates steam, which softens the skin. Always pat the chicken completely dry and leave space between pieces. Also, make sure your air fryer is fully preheated before adding the chicken.
Can I make this recipe ahead of time?
You can prep everything up to step 5 (coating the chicken) and refrigerate for up to 24 hours. When ready to cook, let the chicken sit at room temperature for 15 minutes, then air fry as directed. The coating might darken slightly, but the flavor will be even better.
How do I reheat leftovers without losing crispiness?
The air fryer is your best friend here. Reheat at 375°F for 3-4 minutes. If you don’t have an air fryer, use a conventional oven at 400°F for 5-7 minutes. Avoid the microwave—it turns the skin rubbery every time.
Can I use frozen chicken thighs?
Thaw them completely first. Frozen chicken releases too much moisture during cooking, which prevents crisping. Thaw overnight in the refrigerator, then pat dry thoroughly before proceeding with the recipe. Never put frozen chicken directly in the air fryer—the outside will burn before the inside cooks through.
Pin This Recipe!
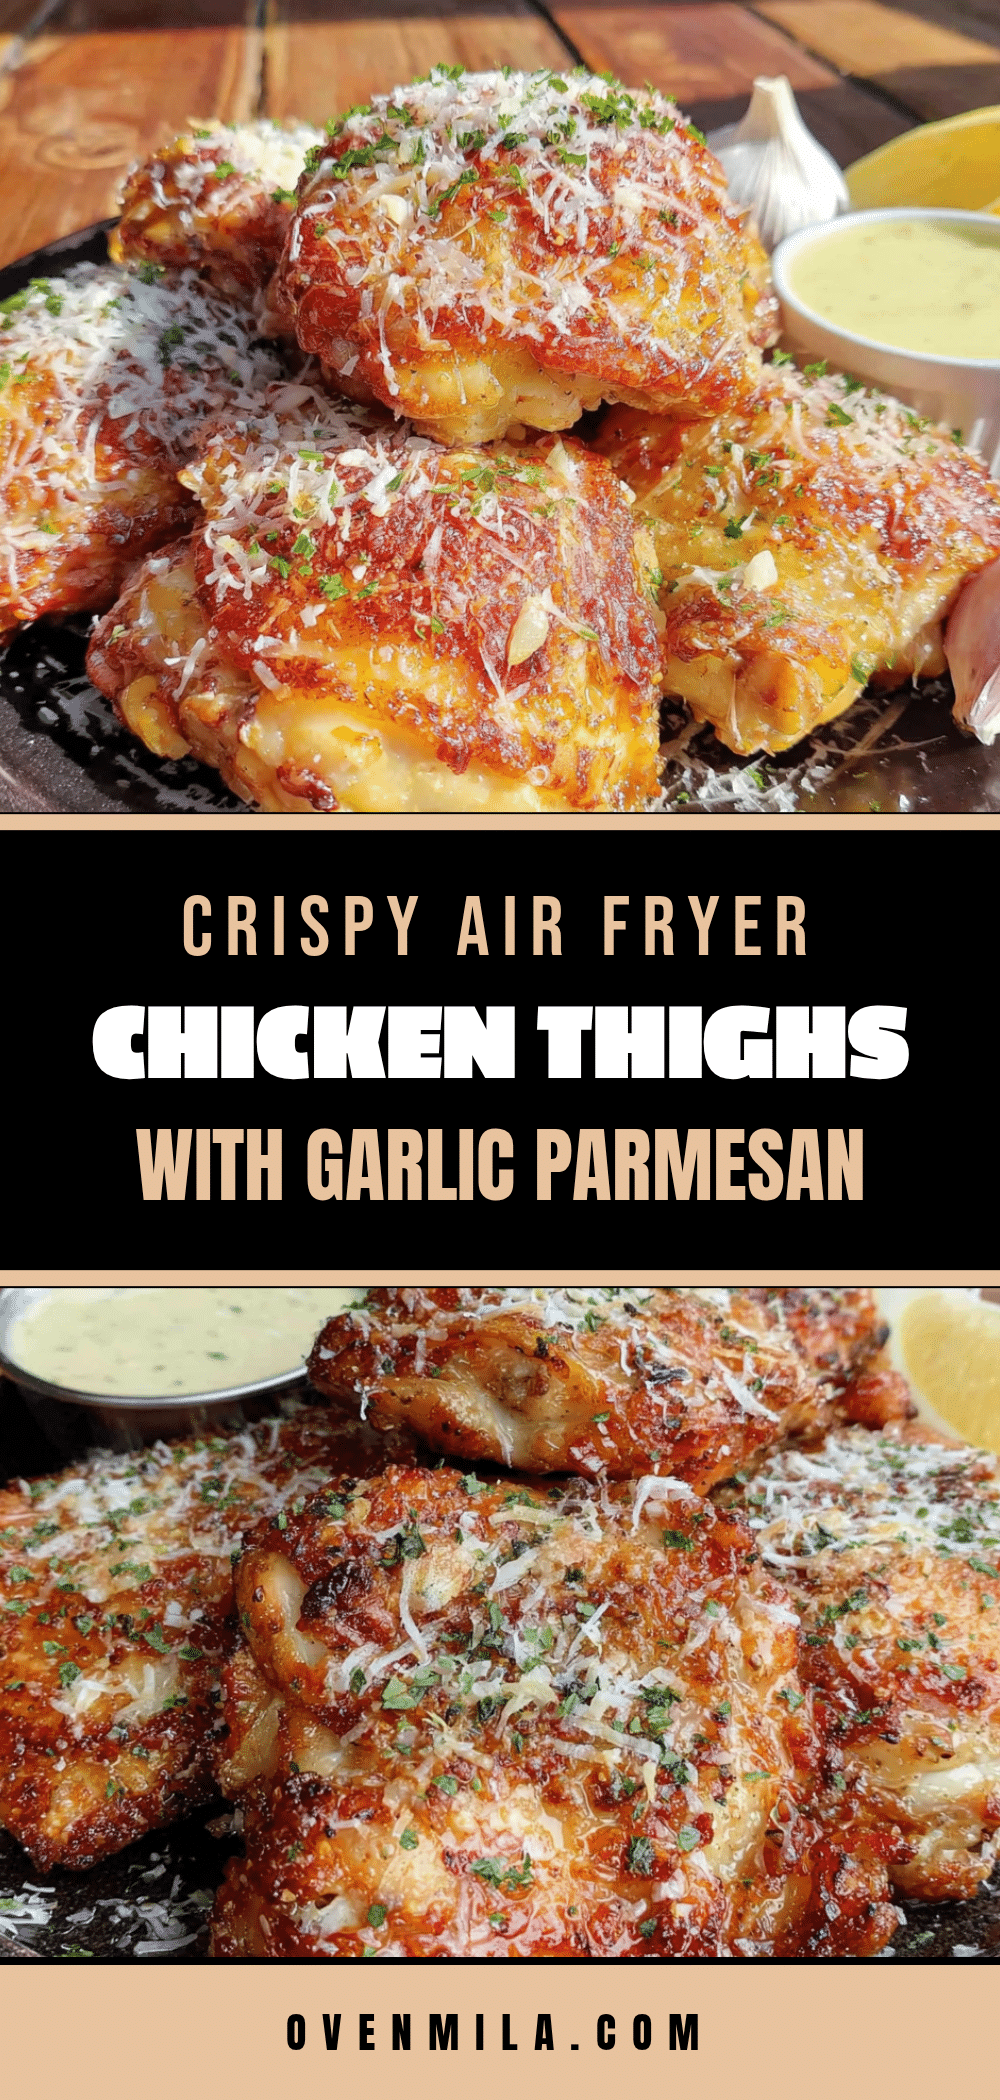
Crispy Air Fryer Chicken Thighs with Garlic Parmesan

These crispy air fryer chicken thighs with garlic Parmesan are quick, easy, and incredibly delicious. The skin gets shatter-crisp while the meat stays juicy, all in under 30 minutes.
- Prep Time: 10 minutes
- Cook Time: 20 minutes
- Total Time: 30 minutes
- Yield: 6 servings 1x
- Category: Main Course
- Cuisine: American
Ingredients
- 6 bone-in, skin-on chicken thighs
- ½ cup finely grated Parmesan cheese
- 4 cloves garlic, minced
- 2 tablespoons extra virgin olive oil
- 1 teaspoon kosher salt
- ½ teaspoon freshly ground black pepper
- 1 teaspoon smoked paprika
- ½ teaspoon dried oregano (optional)
- 2 tablespoons fresh parsley, chopped (for garnish)
Instructions
- Pat the chicken thighs dry with paper towels. Remove as much moisture as possible. Let them sit uncovered on a plate for 5 minutes if time allows.
- Season the chicken with salt and pepper on both sides.
- In a small bowl, combine the grated Parmesan, minced garlic, smoked paprika, and dried oregano. Stir until evenly distributed.
- Drizzle the olive oil over the chicken thighs and use your hands to coat them evenly.
- Sprinkle the Parmesan mixture over the oiled chicken, pressing gently so it adheres. Work in layers for even coverage. Flip and repeat on the other side.
- Preheat the air fryer to 400°F (200°C) for 3 minutes.
- Arrange the thighs in the air fryer basket in a single layer, leaving space between each piece. Cook in batches if needed.
- Cook for 18-22 minutes, flipping halfway through at the 10-minute mark. The chicken is done when the internal temperature reaches 175°F (80°C) for dark meat.
- Rest for 5 minutes before serving to allow juices to redistribute.
- Garnish with fresh parsley and extra Parmesan if desired. Serve immediately.
Notes
Pat the chicken thighs completely dry for the crispiest skin. Do not overcrowd the air fryer basket. Cook dark meat to 175°F for best texture. Let rest 5 minutes before serving. For dairy-free, substitute Parmesan with nutritional yeast.
Nutrition
- Serving Size: 1 thigh
- Calories: 320
- Sodium: 580
- Fat: 22
- Saturated Fat: 6
- Carbohydrates: 2
- Protein: 28
Keywords: air fryer chicken thighs, crispy chicken thighs, garlic parmesan chicken, easy chicken recipe, weeknight dinner, keto chicken, gluten-free chicken


