It was 11:47 PM on a random Tuesday, and a very specific craving hit me. Not for chocolate, not for chips, but for something salty, crunchy, and just a little bit spicy. I had just finished carving pumpkins with my niece, and there they were—a mountain of slippery, orange-stained seeds sitting in a colander in the sink. The normal recipe would have called for roasting them with just salt, but I didn’t have the patience for plain. I had a lime that was about to go bad and a bottle of chili powder that I bought on a whim last summer. And then the idea arrived: what if I made them taste like the best snack you’ve ever stolen from a fancy Mexican restaurant?
Honestly, I was tired. My back hurt from leaning over the kitchen counter, and there was pumpkin guts under my fingernails. But something about the late night loosened the usual rules. I stopped second-guessing myself and just went for it. I tossed those seeds with oil, squeezed that lime like I meant it, and shook in enough chili powder to make it interesting. The kitchen smelled like a whole different planet—bright, smoky, and warm. Let me tell you, by the time they came out of the oven, I was wide awake and eating them straight off the baking sheet.
Maybe you’ve been there—late at night, a little impulsive, and just needing to make something that feels like a win. That’s how these Crispy Chili Lime Baked Pumpkin Seeds were born. They’re the kind of snack that makes you forget you were tired in the first place. And now, I make them every single time I carve a pumpkin, or honestly, any time I see a bag of raw seeds at the store. They’re that good.
Why You’ll Love This Recipe
This isn’t just another seed recipe that gets soggy or burns before it’s done. I’ve tested this method at least a dozen times, tweaking the temperature, the soak time, and the spice ratio until it was just right. Here’s why this one actually works for real families:
- Kid-Approved Flavor: My niece, who usually picks around anything with a speck of green, ate these by the handful. The lime is bright but not sour, and the chili is warm without being hot. It’s a flavor combo that hits that sweet spot between savory and zesty.
- Budget-Friendly Snacking: Pumpkin seeds are one of the cheapest snacks you can make from scratch. A single pumpkin gives you a bowlful, and even buying them raw in bulk costs pennies compared to a bag of chips.
- Comes Together Fast: While the seeds do need a quick boil to get that perfect crunch, the active prep time is only about 10 minutes. Pop them in the oven, set a timer, and walk away.
- Perfect for Lunchboxes: These hold up beautifully in a container. No sogginess, no mess. They’re sturdy enough to survive a backpack and still taste amazing at lunchtime.
- Naturally Good for You: Pumpkin seeds are packed with magnesium, zinc, and healthy fats. You can feel good about handing a bowl of these to your kids instead of processed snacks.
What makes this recipe different from every other pumpkin seed recipe out there is the secret step: boiling the seeds in salted water before baking. I know, it sounds weird. But trust me, it’s the trick that makes them crispy all the way through instead of chewy in the middle. It’s a game-changer, and once you try it, you’ll never go back to plain roasted seeds again.
This recipe isn’t just good—it’s the kind of snack that makes you close your eyes after the first bite. It’s comfort food reimagined: healthier, faster, and with the same soul-soothing satisfaction. Perfect for movie nights, road trips, or just quiet Tuesday nights when you need a little crunch.
What Ingredients You Will Need
This recipe uses simple, wholesome ingredients to deliver bold flavor and satisfying crunch without any fuss. Most of these are probably already in your pantry, which makes this a perfect last-minute snack idea.
- 1 cup raw pumpkin seeds (straight from a pumpkin or store-bought; look for greenish, unhulled seeds for the best texture)
- 2 cups water (for boiling; tap water is fine)
- 1 tablespoon salt (for the boiling water; I use fine sea salt for even distribution)
- 1 tablespoon olive oil (or avocado oil for a higher smoke point; adds richness and helps the seasoning stick)
- 1 tablespoon fresh lime juice (about half a lime; bottled lime juice works in a pinch, but fresh really makes the flavor pop)
- 1 teaspoon chili powder (I prefer a mild chili powder like ancho for a gentle warmth; adjust up if your family likes more heat)
- 1/2 teaspoon garlic powder (adds a savory depth that balances the citrus)
- 1/2 teaspoon smoked paprika (optional, but it gives a lovely smoky undertone that makes these taste extra special)
- 1/4 teaspoon cayenne pepper (omit for little kids who are sensitive to spice; I leave it out when making them for my nephew)
Ingredient Selection Tips: When buying raw pumpkin seeds, look for ones that are still in their hulls (the white-ish outer shell). They roast better and stay crunchier. If you’re scooping them fresh from a pumpkin, rinse them really well to remove all the stringy pulp. I recommend using Spice Islands chili powder for its consistent heat and flavor, but any brand works.
Substitution Guidance: If you’re out of fresh limes, use 1 teaspoon of bottled lime juice mixed with 1/2 teaspoon of lime zest (if you have it). For a dairy-free or vegan option, this recipe is already perfect. Swap olive oil with melted coconut oil for a slightly different flavor profile. If you want a salt-free version for health reasons, skip the salt in the boiling water and just season the seeds after baking.
Storage Note: These seeds keep well in an airtight container at room temperature for up to two weeks—if they last that long. I’ve never seen a batch survive more than three days in my house.
Equipment Needed
You don’t need a fancy kitchen to make these. Here’s what you’ll need:
- Medium saucepan (for boiling the seeds; any pot you use for pasta will work)
- Colander (for draining and rinsing)
- Kitchen towel or paper towels (for drying the seeds thoroughly)
- Mixing bowl (medium size, for tossing seeds with oil and seasoning)
- Baking sheet (a rimmed sheet pan works best to keep seeds from rolling off)
- Parchment paper or silicone baking mat (optional but recommended for easy cleanup)
- Spatula or wooden spoon (for stirring)
If you don’t have a silicone baking mat, parchment paper is your next best friend. I’ve used both, and honestly, the seeds come out just as crispy either way. A cheap baking sheet from the dollar store works fine—just make sure it’s not warped so the seeds cook evenly. I learned that lesson the hard way after a batch slid to one side and burned!
Preparation Method
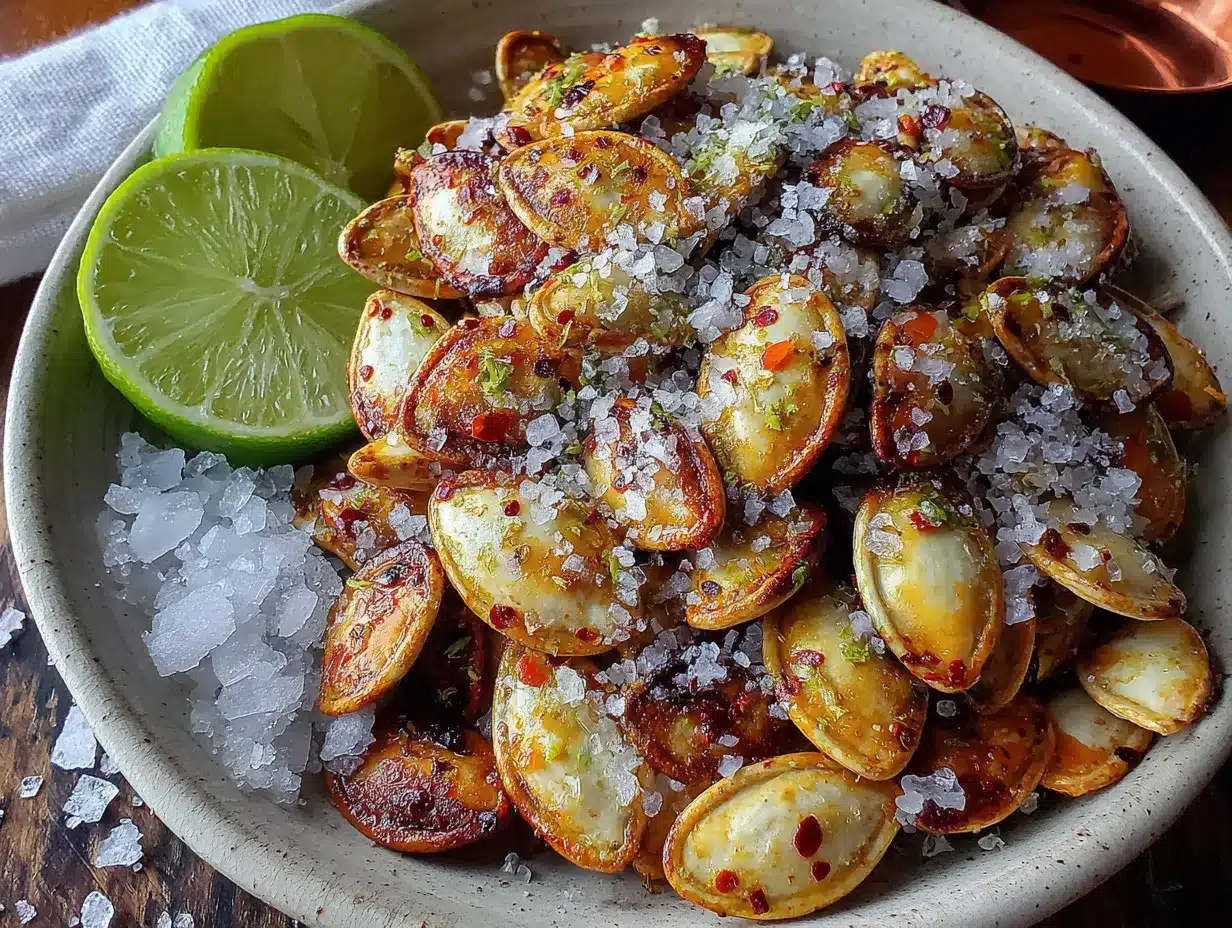
Follow these steps carefully, and you’ll have perfectly crispy chili lime pumpkin seeds every single time. I’ve included all the little details that make a big difference.
- Preheat your oven to 350°F (175°C). This might seem obvious, but letting it preheat fully while you prep saves time and ensures even cooking. Line a baking sheet with parchment paper if you’re using it.
- Rinse the pumpkin seeds thoroughly. Place them in a colander and run cold water over them. Use your fingers to rub off any remaining pumpkin strings or pulp. This step is important—leftover pulp can burn in the oven and give the seeds a bitter taste. I usually spend about two minutes on this.
- Boil the seeds in salted water. In a medium saucepan, bring 2 cups of water and 1 tablespoon of salt to a rolling boil. Add the rinsed seeds and boil for exactly 10 minutes. This is the secret step! Boiling softens the outer hull just enough so the seeds become crispy all the way through instead of staying chewy. Don’t skip this—I once did, and the seeds came out like little rubbery pebbles.
- Drain and dry the seeds. Pour the boiled seeds back into the colander and let them cool for a minute. Then, spread them out on a clean kitchen towel or a layer of paper towels. Pat them very dry. This is crucial—any moisture left on the seeds will steam them in the oven instead of roasting them. I press another towel on top and let them sit for 5 minutes while I prep the seasoning.
- Toss with oil and seasoning. In a medium mixing bowl, whisk together the olive oil, lime juice, chili powder, garlic powder, smoked paprika, and cayenne pepper (if using). Add the dried seeds and toss until every seed is coated. Use your hands for this—it’s faster and you can feel if any seeds are still dry.
- Spread seeds in a single layer on the baking sheet. Make sure no seeds are overlapping. If they’re piled on top of each other, they’ll steam instead of roast. I use a spatula to spread them evenly, then shake the pan gently to settle them.
- Bake for 20-25 minutes, stirring halfway through. Set a timer for 10 minutes, then pull the pan out and give the seeds a good stir with a spatula. This ensures even browning. Return to the oven and bake for another 10-15 minutes. The seeds are done when they’re golden brown and you can hear them rattle on the pan. They’ll crisp up more as they cool, so don’t overbake them.
- Cool completely before eating. Transfer the baking sheet to a wire rack and let the seeds cool for at least 15 minutes. I know it’s hard to wait, but they really do get crunchier as they cool. Taste one after 10 minutes—if it’s still a little soft, give them more time. Patience pays off here.
My personal tip: I always make a double batch because these disappear fast. The second batch goes straight into a jar for school lunches the next day. Also, if you’re making these with kids, let them help with the rinsing and tossing steps—it’s a great way to get them excited about healthy snacks.
Cooking Tips & Techniques
I’ve made enough batches of pumpkin seeds to fill a swimming pool, and I’ve learned a few things the hard way. Here are my best tips for perfect results every time:
Don’t skip the boil. I know it adds an extra step, but boiling the seeds in salted water is the single most important technique for crispy seeds. The salt penetrates the hull, seasoning the seed from the inside out, and the heat starts the drying process. I once skipped this step because I was in a hurry, and the seeds came out pale, chewy, and bland. Never again.
Dry them like you mean it. Wet seeds are the enemy of crispiness. After boiling, I spread them on a towel and roll them up like a burrito, then press firmly to absorb moisture. Then I let them sit for a few minutes before tossing with oil. If you see steam rising from the baking sheet in the first 5 minutes of baking, they weren’t dry enough.
Watch the oven like a hawk. Pumpkin seeds can go from perfectly golden to burnt in about 90 seconds. Every oven runs a little differently. My old oven used to take a full 25 minutes, but my current one does the job in 18. Start checking at the 15-minute mark. The seeds should be a deep golden brown and smell toasty, not smoky.
Let them cool completely. This is where most people mess up. The seeds continue to crisp as they cool, so if you eat them warm, they’ll seem softer than they actually are. I’ve had friends tell me their seeds were “okay but not crispy,” and when I asked, they admitted they ate them straight out of the oven. Give them 15-20 minutes on the pan, then transfer to a bowl. The difference is night and day.
My biggest failure? I once tried to roast a huge batch without stirring them halfway through. The seeds on the edges were almost black while the ones in the middle were still pale. I salvaged what I could, but it was a sad, uneven mess. Now I set a timer on my phone for 10 minutes and never skip the stir.
Variations & Adaptations
One of the best things about this recipe is how easy it is to switch up. Here are a few variations I’ve tried and loved:
Sweet & Spicy: Add 1 tablespoon of brown sugar or maple syrup to the oil mixture. The sweetness balances the chili and lime beautifully, and it caramelizes on the seeds for an extra crunch. My kids go crazy for this version—it’s like a healthier version of candied nuts.
Garlic Lovers: Double the garlic powder and add 1/2 teaspoon of onion powder. This makes them taste almost like a savory cracker. I’ve served these at parties and watched people go back for thirds. Pair them with a cold beer or a margarita for an adult snack.
Cheesy Ranch: After baking, toss the hot seeds with 2 tablespoons of nutritional yeast (for a cheesy flavor without dairy) and 1 teaspoon of dried dill. This is my go-to for kids who are picky about spices. It tastes like ranch dressing but without any artificial ingredients.
Dietary Adaptations: This recipe is naturally gluten-free and dairy-free. For a lower-sodium version, skip the salt in the boiling water and just season the seeds lightly after baking. For a nut-free snack (if you’re serving them alongside other foods), these are perfectly safe.
Different Cooking Methods: If you’re short on time, you can air fry these at 300°F (150°C) for 12-15 minutes, shaking the basket halfway through. They come out even crispier, honestly. I’ve also tried them on the stovetop in a dry skillet over medium heat, stirring constantly for about 8 minutes—they work, but they’re not as evenly toasted.
Serving & Storage Suggestions
These crispy chili lime pumpkin seeds are incredibly versatile. Here’s how I serve and store them:
Serving Temperature: They’re best at room temperature, but I’ve eaten them warm straight off the pan and cold from the fridge the next day. They’re delicious at any temperature. For a fun presentation, pile them in a wooden bowl or a mason jar on the snack table.
Complementary Dishes: These seeds are amazing on their own, but they also make a fantastic topping for soups and salads. Sprinkle them over a creamy butternut squash soup or a simple green salad with avocado. They add crunch and a burst of flavor. I also love them crumbled over a bowl of black bean soup or chili.
Storage Instructions: Store the cooled seeds in an airtight container at room temperature. They’ll stay crispy for up to 2 weeks. Do not refrigerate them—the moisture in the fridge will make them soft. If you live in a humid climate, add a silica gel packet (the kind that comes in shoe boxes) to the container to absorb excess moisture. It sounds weird, but it works.
Reheating Tips: If your seeds lose their crunch after a few days, spread them on a baking sheet and pop them in a 300°F (150°C) oven for 5 minutes. Let them cool completely, and they’ll be crispy again. I’ve done this twice with the same batch, and it works like a charm.
Flavor Development: These seeds actually taste better the next day. The lime and chili flavors mellow and blend together overnight. I always make them a day ahead if I’m serving them for a party. It’s one less thing to worry about on the day of.
Nutritional Information & Benefits
Pumpkin seeds are a nutritional powerhouse, and this recipe keeps them healthy while making them taste like a treat. Here’s the breakdown per 1/4 cup serving (about 30g):
| Nutrient | Amount |
|---|---|
| Calories | 180 |
| Protein | 8g |
| Fat | 15g (mostly healthy unsaturated fats) |
| Carbohydrates | 5g |
| Fiber | 2g |
| Sodium | 180mg (varies with salt used) |
| Magnesium | 37% of the Daily Value |
| Zinc | 23% of the Daily Value |
Health Benefits: Pumpkin seeds are one of the best natural sources of magnesium, which supports muscle function and sleep quality. They’re also rich in zinc, which is great for immune health—perfect for school season. The healthy fats and fiber make them a satisfying snack that won’t spike blood sugar.
Dietary Considerations: This recipe is naturally gluten-free, dairy-free, and vegan. It’s also low-carb and keto-friendly (about 3g net carbs per serving). The only potential allergen is the seeds themselves, which are tree nut-free and safe for most nut allergy sufferers. Always check labels if you’re serving someone with severe allergies.
Conclusion
These Crispy Chili Lime Baked Pumpkin Seeds are more than just a snack—they’re a little triumph of late-night creativity. They prove that you don’t need fancy ingredients or complicated techniques to make something truly special. With just a handful of pantry staples and a little bit of patience, you can turn a humble pumpkin seed into a crunchy, zesty, kid-approved treat that everyone will love.
I hope you give these a try and make them your own. Maybe you’ll add a little extra lime, or skip the cayenne for the little ones, or double the batch because one is never enough. That’s the beauty of this recipe—it’s forgiving, flexible, and always delicious. I’d love to hear how they turn out for you. Drop a comment below and let me know your favorite variation, or share a photo of your batch. Honestly, seeing your creations makes my day.
So go ahead—carve a pumpkin, save those seeds, and give this recipe a whirl. Your kitchen is about to smell amazing, and your family is about to get very, very happy. Happy snacking!
Frequently Asked Questions
Can I use store-bought pumpkin seeds instead of fresh from a pumpkin?
Absolutely! Store-bought raw pumpkin seeds (often labeled as pepitas) work perfectly. Just skip the rinsing step and go straight to boiling. The process is exactly the same, and they’ll come out just as crispy and flavorful.
Why did my pumpkin seeds turn out chewy instead of crispy?
This usually happens for one of three reasons: you skipped the boiling step, you didn’t dry them thoroughly enough before baking, or you didn’t bake them long enough. Make sure to boil for the full 10 minutes, pat them very dry, and bake until they’re golden brown and you can hear them rattle on the pan.
Can I make these without chili powder for sensitive palates?
Yes, definitely. Simply omit the chili powder and cayenne pepper. The lime and garlic still give them plenty of flavor. You can also replace the chili powder with a teaspoon of dried herbs like oregano or thyme for a different but equally delicious snack.
How long do these stay fresh, and can I freeze them?
Stored in an airtight container at room temperature, they stay fresh and crispy for up to 2 weeks. I don’t recommend freezing them—the moisture from the freezer can make them soft when thawed. If you need to make them ahead, just bake them a day or two before you plan to serve them.
Can I use this recipe for other types of seeds?
Yes! This method works beautifully for sunflower seeds, sesame seeds, and even flax seeds (though flax needs a shorter baking time). Adjust the boiling time to 5 minutes for smaller seeds, and keep a close eye on them in the oven since they can burn faster.
Pin This Recipe!

Crispy Chili Lime Baked Pumpkin Seeds

These crispy chili lime baked pumpkin seeds are the perfect easy kid snack, combining bright lime and warm chili for a crunchy, addictive treat. Made with simple pantry ingredients, they’re budget-friendly, healthy, and come together in under an hour.
- Prep Time: 10 minutes
- Cook Time: 25 minutes
- Total Time: 35 minutes
- Yield: 4 servings 1x
- Category: Snack
- Cuisine: Mexican-inspired
Ingredients
- 1 cup raw pumpkin seeds
- 2 cups water
- 1 tablespoon salt
- 1 tablespoon olive oil
- 1 tablespoon fresh lime juice
- 1 teaspoon chili powder
- 1/2 teaspoon garlic powder
- 1/2 teaspoon smoked paprika (optional)
- 1/4 teaspoon cayenne pepper (optional)
Instructions
- Preheat your oven to 350°F (175°C). Line a baking sheet with parchment paper if desired.
- Rinse the pumpkin seeds thoroughly in a colander under cold water, removing any pumpkin strings or pulp.
- In a medium saucepan, bring 2 cups of water and 1 tablespoon of salt to a rolling boil. Add the rinsed seeds and boil for exactly 10 minutes.
- Drain the boiled seeds in a colander and let cool for a minute. Spread them on a clean kitchen towel or paper towels and pat very dry.
- In a medium mixing bowl, whisk together olive oil, lime juice, chili powder, garlic powder, smoked paprika, and cayenne pepper (if using). Add the dried seeds and toss until every seed is coated.
- Spread the seeds in a single layer on the prepared baking sheet, ensuring no seeds overlap.
- Bake for 20-25 minutes, stirring halfway through at the 10-minute mark. Seeds are done when golden brown and you can hear them rattle on the pan.
- Cool completely on the baking sheet on a wire rack for at least 15 minutes before eating. They will crisp up as they cool.
Notes
Boiling the seeds in salted water is the secret to achieving a crispy texture throughout. Ensure seeds are thoroughly dried before baking to prevent steaming. For a sweeter version, add 1 tablespoon of brown sugar or maple syrup to the oil mixture. Store in an airtight container at room temperature for up to 2 weeks. If seeds lose crunch, reheat at 300°F (150°C) for 5 minutes and cool completely.
Nutrition
- Serving Size: 1/4 cup (about 30g)
- Calories: 180
- Sugar: 1
- Sodium: 180
- Fat: 15
- Saturated Fat: 2
- Carbohydrates: 5
- Fiber: 2
- Protein: 8
Keywords: pumpkin seeds, chili lime, crispy snack, kid snack, healthy snack, easy snack, baked pumpkin seeds


