It was 11:47 PM on a random Tuesday in December, and I had this ridiculous urge to bake something that looked like it belonged at the North Pole. I didn’t have a fancy cookie stamp or any of those specialty Christmas sprinkles that every baking blogger swears by. But I did have a box of red velvet cake mix that was about to expire, a bag of white chocolate chips I’d stashed for emergencies, and a very bad idea that was starting to feel like the only good idea I’d had all week.
The thing about late-night baking is that your brain stops overthinking. You stop worrying about whether the cookies will be too cakey or too flat or too anything. You just start mixing, and honestly, that’s when the magic happens. I was standing there in my pajamas, covered in red food coloring (note to self: wear an apron next time), and I thought, “What if I made these look like the Grinch’s heart?” Because let’s face it, the Grinch’s whole story is about a heart that’s two sizes too small that ends up growing—and what better way to celebrate that than with a cookie that’s bright red on the inside with little white chips that look like snow?
I’ll be honest with you: the first batch came out looking more like angry red blobs than Grinch cookies. But by the third try, something clicked. They had that perfect crackly top, that deep red color against the creamy white chips, and a texture that was soft in the middle with just a little chew around the edges. Maybe you’ve been there—that moment when a recipe you made up at midnight actually works, and you feel like you’ve discovered something the world needs to know about. That’s these cookies.
Why You’ll Love These Grinch Red Velvet Cookies
These aren’t just another red velvet cookie recipe. I’ve tested this one at three different holiday parties, and I’m telling you, they disappear faster than anything else on the dessert table. Here’s what makes them special:
- Perfect for Hosting: You can make the dough ahead of time and bake them fresh when your guests arrive. The smell alone will get everyone in the holiday spirit.
- Simple Ingredients: No hunting down fancy extracts or specialty flours. If you’ve got a box of red velvet cake mix and some white chocolate chips, you’re already 80% there.
- Crowd-Pleaser Status: Kids love the Grinch connection, adults love the nostalgia, and everyone loves that they’re not your basic sugar cookie.
- Unbelievably Easy: From start to finish, you’re looking at about 20 minutes of active work. The hardest part is waiting for them to cool.
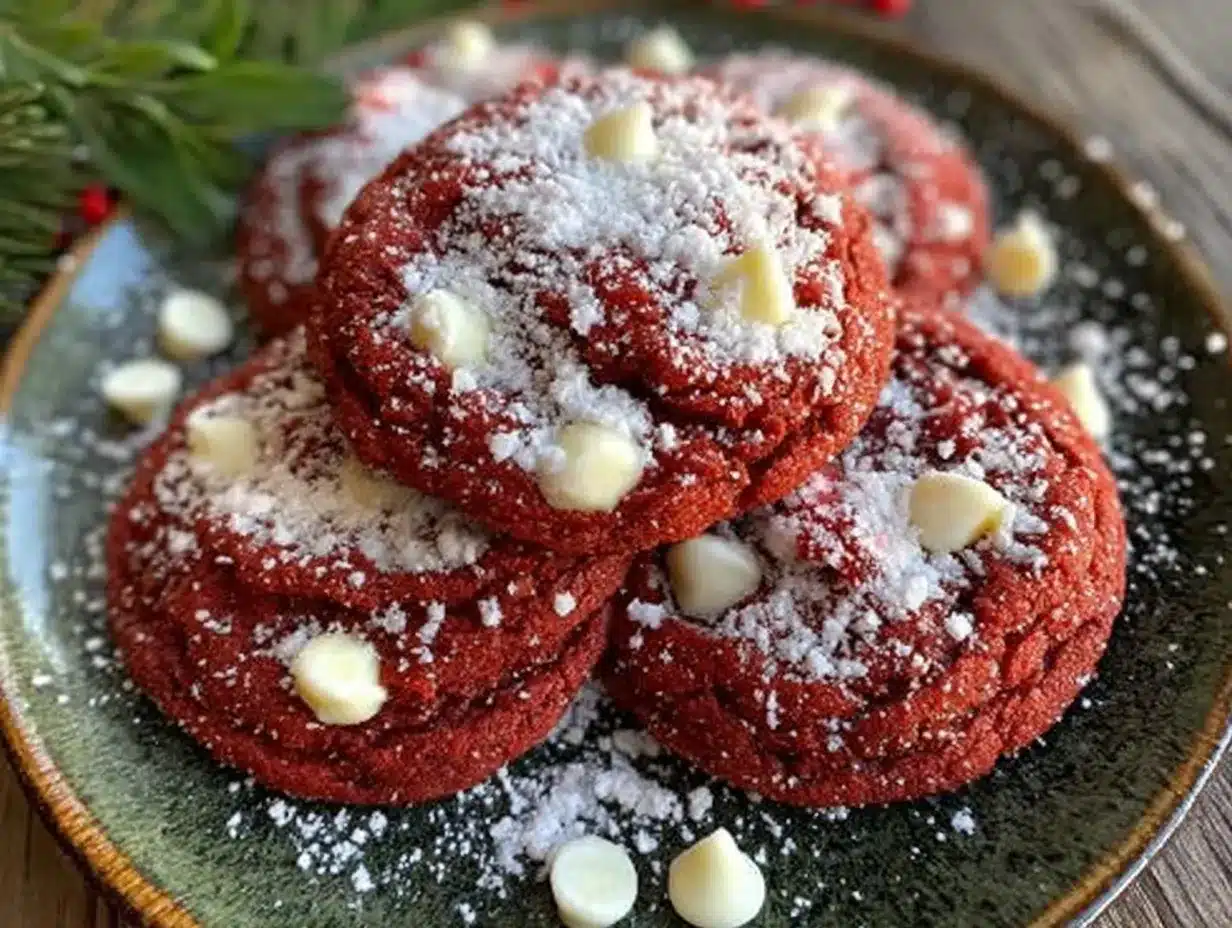
- Stunning Presentation: The bright red color with the white chips makes these cookies look like you spent hours on them. Pro tip: dust them with a little powdered sugar for that “snow-covered” effect.
What really sets these apart is the texture. I’ve had red velvet cookies that were either too cakey (basically a flat cupcake) or too crunchy (basically a red biscuit). These hit that sweet spot—soft, chewy, with just enough structure to hold their shape. The white chocolate chips melt into little pockets of sweetness that balance the subtle cocoa flavor of the red velvet.
What Ingredients You Will Need
This recipe keeps things simple because, honestly, when you’re hosting a party, you don’t have time to hunt down 47 ingredients. Here’s what you’ll need and why each one matters:
For the Cookie Dough
- 1 box (15.25 oz) red velvet cake mix: This is your shortcut to that perfect color and flavor. I prefer Duncan Hines for the best texture, but Betty Crocker works great too. The cake mix already has the right balance of flour, sugar, and leavening agents, so you don’t have to guess.
- 2 large eggs, room temperature: Room temperature eggs mix in more evenly, giving you a smoother dough. If you forgot to take them out ahead of time, place them in a bowl of warm water for 5 minutes.
- 1/3 cup vegetable oil: Oil keeps these cookies soft and tender. You can use canola or melted coconut oil if that’s what you have.
- 1 teaspoon vanilla extract: This deepens the flavor and rounds out the cocoa notes. Pure vanilla is better, but imitation works fine for this recipe.
- 1 cup white chocolate chips: The star of the show! The creamy sweetness of white chocolate is the perfect contrast to the deep red cookie. I recommend Ghirardelli for the best melt quality.
- Optional: 1-2 tablespoons all-purpose flour: If your dough feels too sticky to handle, add a little flour to make it more manageable.
For the Grinch Heart Decoration
- 1/4 cup powdered sugar: For that snowy dusting that makes the cookies look like they came straight from Whoville.
- Optional: Red sanding sugar or sprinkles: If you want to go all out, a little extra red sparkle never hurt anyone.
- Optional: Green food coloring for the “Grinch” touch: You could add a tiny bit of green to the powdered sugar for a fun twist, but I prefer keeping it classic.
Ingredient Tips from My Kitchen
I’ve made these cookies about eight times now, and I’ve learned a few things. First, don’t use a “red velvet” mix that has pudding in it—those tend to make the cookies too soft and they spread too much. Also, if you can find the small “mini” white chocolate chips, use those. They distribute more evenly so every bite has some. And here’s a weird one: if your kitchen is really warm, chill the dough for 15 minutes before baking. It helps the cookies keep their shape better.
Equipment Needed
You don’t need a fancy kitchen to pull these off. Here’s what I use:
- Large mixing bowl: Any bowl will do, but I prefer a wide one so I can really get in there with my hands if the dough gets stiff.
- Electric hand mixer or stand mixer: You can mix by hand, but a mixer makes it way easier. I’ve done both, and honestly, the hand mixer is faster and gives a more consistent dough.
- Baking sheets: Two standard half-sheet pans work perfectly. Line them with parchment paper or silicone baking mats for easy cleanup.
- Cookie scoop (1.5 tablespoon size): This is my secret weapon for uniform cookies. If you don’t have one, use two spoons to portion the dough.
- Cooling rack: Letting the cookies cool on a rack prevents them from getting soggy on the bottom.
- Small fine-mesh strainer: For dusting the powdered sugar evenly. A tea strainer works too.
If you don’t have a cookie scoop, just roll the dough into balls with your hands. They won’t be perfectly round, but honestly, the imperfect ones have more character. And that’s very Grinch-like if you think about it.
Preparation Method
- Preheat your oven to 350°F (175°C). Line two baking sheets with parchment paper or silicone mats. This step is non-negotiable—these cookies have a lot of sugar and will stick to bare pans.
- In your large mixing bowl, combine the red velvet cake mix, eggs, vegetable oil, and vanilla extract. Mix on low speed for about 30 seconds, then increase to medium and beat for 2 minutes. The dough should be thick, glossy, and a deep red color. Scrape down the sides of the bowl halfway through.
- Fold in the white chocolate chips. Use a rubber spatula for this. Don’t overmix—you just want the chips evenly distributed. The dough will be quite sticky at this point, and that’s exactly what you want.
- If the dough feels too sticky to handle, add 1-2 tablespoons of flour. Mix it in gently. You should be able to roll the dough into balls without it sticking to your hands like glue. If it’s still too sticky, pop the bowl in the fridge for 10 minutes.
- Scoop the dough into 1.5 tablespoon-sized balls. Roll them between your palms until they’re smooth. Place them on the prepared baking sheets, spacing them about 2 inches apart. These cookies spread, so don’t crowd them.
- Bake for 9-11 minutes. Here’s the trick: take them out when the edges are set but the centers still look slightly underdone and puffy. The cookies will continue to bake on the hot pan as they cool. If you wait until the centers look fully baked, they’ll be too hard.
- Let the cookies cool on the baking sheet for 5 minutes. This is critical. If you try to move them too soon, they’ll fall apart. After 5 minutes, transfer them to a cooling rack to cool completely.
- Once completely cool, dust with powdered sugar. Place the powdered sugar in your fine-mesh strainer and tap it gently over the cookies. Go for an even, light dusting—you want them to look like they’ve been touched by a light snowfall, not buried in an avalanche.
A quick sensory note: when these cookies are done, your kitchen will smell like vanilla and cocoa with a hint of something festive. The cookies should be crackled on top, with the white chocolate chips peeking through like little snow patches. The edges will be just slightly darker than the centers, and the whole thing should feel soft when you press it gently.
Cooking Tips & Techniques
I’ve made every mistake you can imagine with these cookies, so let me save you some trouble. The biggest issue people run into is overbaking. I know it’s tempting to leave them in an extra minute because the centers look soft, but trust me—pull them out at the 10-minute mark. They’ll look underdone, but that’s exactly what you want.
Another thing I learned the hard way: don’t use dark baking sheets unless you reduce the temperature by 25°F. Dark pans absorb more heat and will burn the bottoms of your cookies before the tops are done. If that’s all you have, line them with a double layer of parchment paper for insulation.
For the best results, make the dough a day ahead. The flavors meld together overnight, and the cookies come out even more flavorful. Just wrap the dough tightly in plastic wrap and refrigerate. When you’re ready to bake, let it sit at room temperature for 15 minutes so it’s soft enough to scoop.
One more thing: if you’re baking for a crowd, stagger your baking sheets. Don’t put both pans in the oven at the same time unless you have a convection setting. The heat circulates better with one pan at a time, and your cookies will bake more evenly.
Variations & Adaptations
These cookies are surprisingly flexible. Here are some fun ways to change them up:
- Gluten-Free Version: Use a gluten-free red velvet cake mix. I’ve tried this with King Arthur’s gluten-free mix and it worked perfectly. Just add an extra tablespoon of oil to compensate for the different flour blend.
- Vegan Adaptation: Replace the eggs with flax eggs (1 tablespoon ground flaxseed mixed with 3 tablespoons water per egg) and use dairy-free white chocolate chips. Enjoy Life makes a great option. The texture will be slightly more cake-like, but still delicious.
- Extra Grinch-y: Add 1/2 cup of finely chopped green candy melts or green M&Ms to the dough. It gives the cookies a pop of green that makes the red stand out even more.
- Peppermint Twist: Crush up 1/4 cup of candy canes and fold them in with the white chocolate chips. The minty crunch is amazing with the red velvet.
- Sandwich Cookies: Make the cookies slightly smaller (use a 1-tablespoon scoop) and sandwich them with cream cheese frosting. It’s like a red velvet whoopie pie situation, and it’s incredible.
I personally love the peppermint twist version for Christmas parties. Something about that minty freshness with the rich cookie just works. Plus, the little red and white candy cane pieces make the cookies look even more festive.
Serving & Storage Suggestions
These cookies are best served at room temperature, but honestly, they’re pretty amazing straight out of the oven when the white chocolate is still melty. If you’re hosting a party, bake them the day before and store them in an airtight container at room temperature. They actually get better after a day—the flavors settle and the texture softens just a bit.
For presentation, arrange them on a festive platter or tiered stand. A dusting of powdered sugar right before serving makes them look fresh. If you want to get really fancy, add a few sprigs of rosemary or cranberries around the plate for a holiday touch.
Storage is simple: keep them in an airtight container at room temperature for up to 5 days. If you stack them, put a piece of parchment paper between layers to prevent sticking. These cookies also freeze beautifully. Place them in a single layer on a baking sheet, freeze for 2 hours, then transfer to a freezer bag. They’ll keep for up to 3 months. Thaw at room temperature for about 30 minutes before serving.
One thing I love about these cookies is that the flavor actually improves over time. The cocoa notes deepen, and the white chocolate seems to get creamier. So don’t stress about making them the same day you’re serving them—they’re actually better the next day.
Nutritional Information & Benefits
Let’s be real: these are cookies, not health food. But here’s the breakdown per cookie (based on 24 cookies):
- Calories: Approximately 180
- Fat: 8g
- Carbohydrates: 26g
- Sugar: 16g
- Protein: 2g
The white chocolate chips do add some calcium, and the cocoa in the red velvet mix contains antioxidants. But honestly, the real benefit here is the joy factor. These cookies make people smile. They’re the kind of treat that brings a little magic to a holiday gathering, and I think that counts for something.
If you’re watching your sugar intake, you can reduce the white chocolate chips to 1/2 cup. The cookies will still be sweet, just a little less indulgent. And if you’re serving a crowd with dietary restrictions, the gluten-free and vegan variations work really well without sacrificing flavor.
Conclusion
These Grinch Red Velvet Cookies have become my go-to for every holiday party, and I think they’ll become yours too. They’re easy enough for a beginner baker but impressive enough to make you look like a pro. The bright red color, the melty white chocolate, that perfect soft texture—everything about them just works.
What I love most is how they make people feel. There’s something about the Grinch connection that brings out the kid in everyone. People see them and smile. They pick one up and say, “Oh, these are so cute!” And then they take a bite and their eyes widen because, surprise, they actually taste amazing. That’s the kind of recipe worth keeping around.
So go ahead and make a batch for your next gathering. Play around with the variations, add your own twist, and don’t forget to dust them with that snowy powdered sugar right before serving. And if you come up with a fun variation I haven’t tried, drop it in the comments—I’m always looking for new ideas. Happy baking, and may your heart grow three sizes this holiday season!
Frequently Asked Questions
Can I use a homemade red velvet recipe instead of a cake mix?
Absolutely! If you have a favorite red velvet cake recipe, you can adapt it for cookies. Just reduce the liquid slightly and add an extra egg for structure. But honestly, the cake mix version is so much easier and consistently turns out great.
Why did my cookies spread too much?
This usually happens if the dough is too warm or if you used a dark baking sheet. Chill the dough for 15-20 minutes before baking, and make sure your oven is fully preheated. Also, check that you’re using the correct amount of cake mix—some boxes have slightly different weights.
Can I make these cookies ahead of time for a party?
Yes! You can make the dough up to 3 days ahead and keep it refrigerated. Or bake the cookies up to 5 days ahead and store them in an airtight container. Just dust with powdered sugar right before serving so it doesn’t melt into the cookies.
How do I get that crackly top?
The crackly top comes from the sugar in the cake mix crystallizing on the surface as the cookies bake. To encourage this, make sure your dough isn’t too wet. If it feels sticky, add a little extra flour. Also, don’t flatten the dough balls—let them bake as round balls and they’ll crack naturally as they spread.
Can I freeze the baked cookies?
Definitely! Freeze them in a single layer on a baking sheet, then transfer to a freezer bag. They’ll keep for up to 3 months. Thaw at room temperature for about 30 minutes, then dust with fresh powdered sugar before serving.
Pin This Recipe!

Easy Grinch Red Velvet Cookies with White Chocolate Chips
These Grinch Red Velvet Cookies are soft, chewy, and packed with white chocolate chips. Perfect for holiday parties, they’re easy to make with a cake mix and look stunning with a snowy powdered sugar dusting.
- Prep Time: 20 minutes
- Cook Time: 10 minutes
- Total Time: 30 minutes
- Yield: 24 servings 1x
- Category: Dessert
- Cuisine: American
Ingredients
- 1 box (15.25 oz) red velvet cake mix
- 2 large eggs, room temperature
- 1/3 cup vegetable oil
- 1 teaspoon vanilla extract
- 1 cup white chocolate chips
- 1–2 tablespoons all-purpose flour (optional, if dough is too sticky)
- 1/4 cup powdered sugar (for dusting)
- Red sanding sugar or sprinkles (optional)
- Green food coloring (optional)
Instructions
- Preheat your oven to 350°F (175°C). Line two baking sheets with parchment paper or silicone mats.
- In a large mixing bowl, combine the red velvet cake mix, eggs, vegetable oil, and vanilla extract. Mix on low speed for 30 seconds, then increase to medium and beat for 2 minutes until thick, glossy, and deep red. Scrape down the sides halfway through.
- Fold in the white chocolate chips with a rubber spatula until evenly distributed. The dough will be sticky.
- If the dough feels too sticky to handle, add 1-2 tablespoons of flour and mix gently. If still too sticky, refrigerate for 10 minutes.
- Scoop the dough into 1.5 tablespoon-sized balls and roll them smooth. Place on prepared baking sheets, spacing 2 inches apart.
- Bake for 9-11 minutes. Remove when edges are set but centers still look slightly underdone and puffy.
- Let cookies cool on the baking sheet for 5 minutes, then transfer to a cooling rack to cool completely.
- Once completely cool, dust with powdered sugar using a fine-mesh strainer for an even, light snowfall effect.
Notes
For best results, make dough a day ahead and refrigerate. If using dark baking sheets, reduce oven temperature by 25°F. Do not overbake; cookies should look slightly underdone when removed from oven. Dust with powdered sugar just before serving to prevent melting.
Nutrition
- Serving Size: 1 cookie
- Calories: 180
- Sugar: 16
- Sodium: 180
- Fat: 8
- Saturated Fat: 3
- Carbohydrates: 26
- Protein: 2
Keywords: Grinch cookies, red velvet cookies, white chocolate chips, Christmas cookies, easy cookie recipe, holiday baking, cake mix cookies


