It was 10:47 PM on a random Tuesday, and I had a very specific, almost urgent craving for something peanut buttery and chocolatey. The problem? I didn’t have any of the stuff you’d normally need for a fancy cookie—no brown sugar that wasn’t a solid brick, no softened butter because I forgot to take it out, and honestly, no energy for a multi-step baking project. But I had a half-empty jar of peanut butter, a bag of flour, and a bag of Hershey Kisses that was staring at me from the back of the pantry. That’s when the idea arrived, fully formed and slightly desperate: could I make these classic cookies, but faster? Without the fuss?
Let me tell you, I was skeptical. Maybe you’ve been there—standing in your kitchen at a ridiculous hour, wanting a homemade treat but refusing to wait for butter to soften or dough to chill. I pulled out my go-to peanut butter cookie base, took a few shortcuts I’d never tried before, and crossed my fingers. The result? The most perfectly chewy, peanut-buttery cookies topped with a shiny chocolate kiss that came together in under 30 minutes. I mean, I almost cried. Not because it was hard, but because it was so easy and so good. I ate three before they even cooled. That night, I knew this version was a keeper.
Why You’ll Love This Recipe
These Quick Peanut Butter Blossom Cookies are my weeknight hero. They’re the kind of recipe that makes you look like a baking superstar without actually doing much work. Here’s why they’ll become your go-to, too:
- Quick & Easy: From start to finish, these cookies are ready in about 25 minutes. No chilling the dough, no waiting for butter to soften. Just mix, roll, bake, and press a kiss on top. Perfect for those “I need cookies NOW” moments.
- Simple Ingredients: You probably have everything in your pantry right now. Flour, sugar, peanut butter, an egg, baking soda—and of course, a bag of Hershey Kisses. No fancy grocery store trips required.
- Perfect for Last-Minute Cravings: Whether it’s a late-night snack attack, a sudden need for a potluck contribution, or a rainy afternoon with the kids, these cookies deliver. They’re a crowd-pleaser that never fails.
- Crowd-Pleaser: I’ve brought these to parties, work events, and family gatherings, and they disappear every single time. Kids and adults alike can’t resist the classic peanut butter and chocolate combo.
- Unbelievably Delicious: The texture is spot-on—crispy edges with a soft, chewy center. The salty-sweet peanut butter cookie pairs perfectly with the smooth, rich chocolate kiss. It’s next-level comfort food in a single bite.
What makes this recipe different from the rest? It’s the technique. I skip the step of rolling the dough in sugar twice, and I use a slightly warmer dough that spreads just enough to create the perfect cookie-to-chocolate ratio. This isn’t just another version of peanut butter blossoms—it’s the quickest, most reliable version I’ve ever made.
What Ingredients You Will Need
This recipe uses simple, pantry-friendly ingredients to deliver that classic flavor and texture without any fuss. Here’s what you’ll need to grab:
For the Cookie Dough
- 1/2 cup unsalted butter, softened (I use Kerrygold for the best flavor, but any brand works. If you forgot to soften it, microwave it for 10 seconds—don’t melt it!)
- 1/2 cup creamy peanut butter (I prefer Skippy or Jif for their consistent texture. Natural peanut butter can be too oily and cause the cookies to spread too much.)
- 1/2 cup granulated sugar, plus extra for rolling (Regular white sugar is perfect. The extra sugar gives the cookies that lovely crackly top.)
- 1/2 cup packed light brown sugar (Adds moisture and a hint of molasses flavor. Make sure it’s packed firmly into the measuring cup.)
- 1 large egg, room temperature (Helps bind the dough. If you’re in a hurry, place the egg in a bowl of warm water for 5 minutes.)
- 1 teaspoon vanilla extract (Pure vanilla extract is best, but imitation works in a pinch.)
- 1 1/2 cups all-purpose flour (Spoon and level it—don’t scoop directly from the bag or you’ll get too much flour.)
- 1 teaspoon baking soda (Make sure it’s fresh—test it by dropping a bit in vinegar; it should fizz.)
- 1/2 teaspoon salt (Enhances the peanut butter flavor and balances the sweetness.)
For the Topping
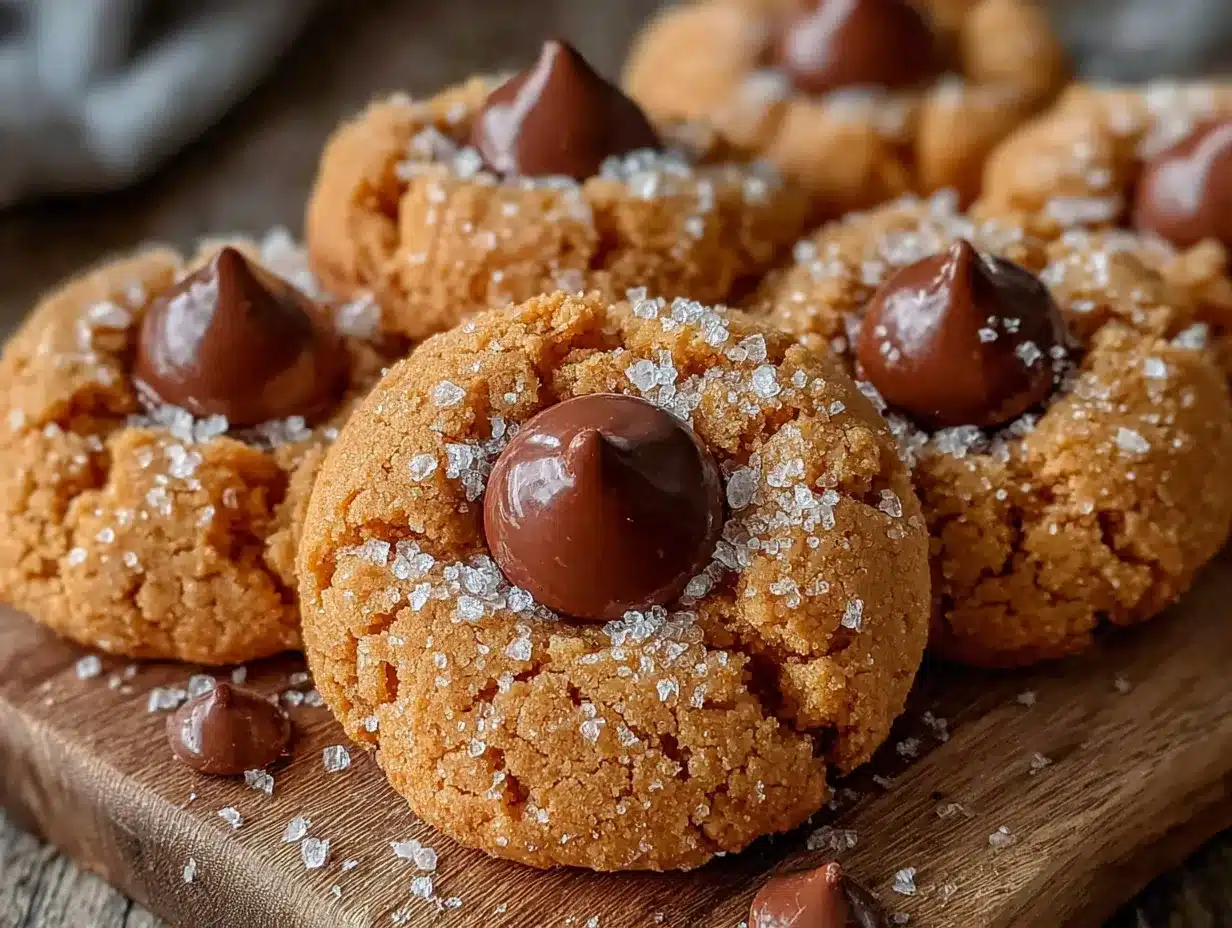
- 1 bag (about 36) Hershey Kisses, unwrapped (Milk chocolate is classic, but dark chocolate or white chocolate kisses work beautifully too. I recommend unwrapping them while the cookies bake to save time.)
Substitution Guidance: If you need a gluten-free option, swap the all-purpose flour with a 1:1 gluten-free baking blend. For a dairy-free version, use a plant-based butter stick (like Miyoko’s) and make sure your peanut butter doesn’t contain dairy. I haven’t tried it with almond butter, but I imagine it would work—just expect a slightly different flavor and texture.
Equipment Needed
You don’t need a fancy kitchen to make these cookies. Here’s what you’ll need:
- Large mixing bowl (Any bowl will do, but a wide one makes mixing easier.)
- Electric hand mixer or stand mixer (A hand mixer is perfect for this. You can also mix by hand with a wooden spoon, but it’ll take a bit more elbow grease.)
- Measuring cups and spoons (For accuracy—baking is a science, after all.)
- Baking sheet (A standard 13×18-inch sheet works well. I like using a light-colored one for even browning.)
- Parchment paper or silicone baking mat (Non-stick is a must. Parchment paper is cheap and makes cleanup a breeze.)
- Small bowl (For the extra granulated sugar to roll the dough in.)
- Wire cooling rack (Essential for cooling the cookies properly so the chocolate sets.)
- Offset spatula (optional) (Helpful for transferring cookies, but a regular spatula works fine.)
Budget-Friendly Tip: If you don’t have a hand mixer, you can cream the butter, peanut butter, and sugars together with a strong fork or a spatula. It takes a few extra minutes, but it’s totally doable. Just make sure your butter is very soft.
Preparation Method
Let’s get baking! Follow these steps carefully, and you’ll have warm, gooey cookies in no time.
- Preheat your oven to 350°F (175°C). Line your baking sheet with parchment paper or a silicone mat. This is non-negotiable—the cookies will stick without it.
- Cream the butter, peanut butter, and sugars. In your large mixing bowl, beat together the softened butter, creamy peanut butter, granulated sugar, and packed brown sugar. Use your hand mixer on medium speed for about 2 minutes, until the mixture is light, fluffy, and well-combined. Scrape down the sides of the bowl with a spatula halfway through. (I once forgot to scrape and ended up with chunks of butter in my dough—not ideal!)
- Add the egg and vanilla. Crack the egg into the bowl and add the vanilla extract. Beat on low speed until just combined, about 30 seconds. Don’t overmix here—you don’t want to incorporate too much air.
- Mix the dry ingredients. In a separate small bowl, whisk together the all-purpose flour, baking soda, and salt. This ensures the baking soda is evenly distributed so your cookies rise uniformly.
- Combine wet and dry ingredients. Gradually add the flour mixture to the wet mixture, beating on low speed. Mix until just combined—you should see no more streaks of flour. Be careful not to overmix, or your cookies will be tough. The dough will be soft and slightly sticky, which is perfect.
- Prepare the sugar for rolling. Pour about 1/4 cup of extra granulated sugar into a small bowl. This is for rolling the dough balls.
- Shape the cookies. Using a tablespoon or a small cookie scoop, portion out about 1.5 tablespoons of dough. Roll it between your palms to form a smooth ball. (Your hands will get a little greasy—that’s okay.) Roll the ball in the sugar until it’s completely coated.
- Place on the baking sheet. Arrange the sugared dough balls on the prepared baking sheet, spacing them about 2 inches apart. I fit 12 cookies on a standard sheet. Don’t press them down—they’ll spread naturally as they bake.
- Bake. Pop the sheet into the preheated oven and bake for 10-12 minutes, or until the cookies are puffed and lightly golden around the edges. The centers will still look slightly soft and underdone—that’s exactly what you want. Overbaking will give you dry cookies. For a chewier texture, aim for 10 minutes. For slightly crisper edges, go to 12.
- Add the Hershey Kiss. As soon as the cookies come out of the oven, immediately press a Hershey Kiss into the center of each cookie. Do this gently but firmly—the chocolate will soften from the heat. If the cookie cracks a little around the edges, that’s part of the charm.
- Cool. Let the cookies cool on the baking sheet for about 5 minutes. This allows the chocolate to set slightly and the cookies to firm up. Then transfer them to a wire cooling rack to cool completely. (Resist the urge to eat one immediately—the chocolate will be molten and burn your mouth. I speak from experience.)
Cooking Tips & Techniques
After making these cookies more times than I can count, I’ve learned a few tricks that make the process even smoother. Here’s what I wish I knew from the start:
- Don’t skip the creaming step. I know it’s tempting to just dump everything together, but properly creaming the butter, peanut butter, and sugar creates air pockets that give the cookies their tender texture. Two minutes of your time makes a real difference.
- Use a cookie scoop for uniform sizes. This ensures even baking. If you have a 1.5-tablespoon scoop, use it. If not, just try to make each ball roughly the same size. I’ve had batches where some cookies were tiny and others were huge—the small ones burned while the big ones were underdone.
- Bake one sheet at a time. If you try to cram two sheets in the oven, the heat distribution will be uneven, and your cookies might not bake properly. I learned this the hard way when I was rushing for a party. Just be patient and bake in batches.
- Work quickly when adding the kisses. The cookies start to set as they cool, so you need to press the kisses in while they’re still hot and pliable. If you wait too long, the chocolate won’t stick, and the cookie might crack. I sometimes unwrap all the kisses before I start baking so I’m ready to go.
- Let them cool completely on the rack. This allows the chocolate to fully harden. If you store them while they’re still warm, the chocolate might smear, and the cookies can become soggy. Patience, my friend.
A personal failure: The first time I made these, I used natural peanut butter that had separated. The dough was too oily, the cookies spread into flat discs, and the kisses sank right through. Stick with processed peanut butter for the best results—it’s the only time I’ll say that!
Variations & Adaptations
One of the best things about this recipe is how versatile it is. Here are some of my favorite ways to switch it up:
- Chocolate Peanut Butter Blossoms: Swap the regular dough for a chocolate version by replacing 1/4 cup of the flour with unsweetened cocoa powder. The chocolate-peanut butter combo is divine.
- Dark Chocolate Kisses: Use dark chocolate Hershey Kisses instead of milk chocolate. The slightly bitter chocolate balances the sweet peanut butter cookie perfectly. My husband’s favorite version.
- Gluten-Free Version: Substitute the all-purpose flour with a 1:1 gluten-free baking blend that contains xanthan gum. I’ve used King Arthur’s Measure for Measure flour with great success. The texture is slightly more delicate, but the flavor is spot-on.
- Holiday Twist: For Christmas, use the white chocolate or candy cane Hershey Kisses. Roll the dough in colored sugar for a festive touch. I made these for a cookie exchange last year, and they were the first to go.
- Nut-Free Option: If you need to avoid peanuts, use sunflower seed butter (like SunButter) instead of peanut butter. The flavor is different but still delicious. Just note that the dough might be a bit darker in color.
A personal variation I love: Sometimes I’ll add a pinch of cinnamon to the dough. It sounds weird, but the warm spice really complements the peanut butter and chocolate. Try it once—you might be surprised.
Serving & Storage Suggestions
These cookies are best served slightly warm, when the chocolate is still a little soft and the cookie is tender. But they’re also fantastic at room temperature—honestly, I’ve never met a peanut butter blossom I didn’t like.
Presentation tip: Arrange them on a pretty plate or a cake stand for a party. The shiny chocolate kisses against the golden cookies make for a beautiful display. For a bake sale, I like to place them in a clear bag tied with a ribbon—they look professional and gift-worthy.
What to serve with them: A cold glass of milk is the classic pairing, and for good reason. The creamy milk cuts through the richness of the peanut butter and chocolate. For a grown-up treat, try them with a cup of black coffee or a glass of cold brew. The bitterness of the coffee is a perfect contrast.
Storage instructions: Store the cookies in an airtight container at room temperature for up to 5 days. Place a sheet of wax paper between layers to prevent the kisses from sticking together. Do not refrigerate them—the fridge will dry out the cookies and make the chocolate bloom (turn white and chalky).
Freezing instructions: You can freeze the baked cookies for up to 3 months. Place them in a single layer on a baking sheet and freeze until solid, then transfer to a freezer-safe bag or container. To thaw, leave them at room temperature for about 30 minutes. You can also freeze the unbaked dough balls. Roll them in sugar, place them on a baking sheet, freeze until solid, then store in a bag. Bake from frozen, adding 2-3 minutes to the baking time.
Flavor development note: These cookies actually taste even better the next day. The flavors meld together, and the texture becomes perfectly chewy. So if you can wait, make them a day ahead!
Nutritional Information & Benefits
Let’s be real—these are cookies, not health food. But they do have some redeeming qualities! Here’s an estimated nutritional breakdown per cookie (based on 36 cookies):
- Calories: 120
- Total Fat: 7g
- Saturated Fat: 3g
- Cholesterol: 15mg
- Sodium: 80mg
- Total Carbohydrates: 14g
- Sugars: 9g
- Protein: 3g
Health benefits of key ingredients: Peanut butter is a good source of protein and healthy monounsaturated fats. It also contains vitamin E, magnesium, and potassium. The dark chocolate version offers antioxidants called flavonoids. And the egg provides a small amount of vitamin D and B12.
Dietary considerations: This recipe is vegetarian. For a lower-sugar option, you can reduce the sugar by 1/4 cup, but the texture will be slightly less tender. For a lower-fat version, you can use reduced-fat peanut butter, but I don’t recommend it—the cookies will be drier and less flavorful.
Potential allergens: This recipe contains peanuts, wheat (gluten), dairy, and eggs. Please check your Hershey Kisses for any allergen warnings if you have severe allergies.
Conclusion
These Quick Peanut Butter Blossom Cookies are the kind of recipe that saves the day. They’re fast, they’re foolproof, and they deliver that nostalgic flavor we all crave. Whether you’re baking for a holiday party, a school event, or just because it’s Tuesday and you deserve a treat, these cookies never disappoint.
I love this recipe because it reminds me that you don’t need to spend hours in the kitchen to create something special. Sometimes the best things come from a late-night craving and a willingness to improvise. So go ahead—preheat your oven, unwrap those kisses, and make a batch. Your kitchen will smell amazing, and your taste buds will thank you.
I’d love to hear how yours turn out! Leave a comment below and let me know if you tried any variations or if these became your new go-to cookie recipe. Happy baking!
Frequently Asked Questions
Can I use crunchy peanut butter instead of creamy?
Yes, you can! The texture will be slightly different with little bits of peanuts in the cookie. Just keep in mind that the dough might be a bit more crumbly. I’ve done it before, and it’s still delicious—just not as smooth.
Why did my cookies spread too much?
This usually happens if the butter was too soft or melted, or if the dough was too warm. Make sure your butter is softened but not melted. If your kitchen is hot, you can chill the dough balls for 10 minutes before baking. Also, double-check that you used the correct amount of flour—too little flour can cause spreading.
Can I make the dough ahead of time?
Absolutely! You can prepare the dough, roll it into balls, and store them in the refrigerator for up to 2 days. Just roll them in sugar right before baking. You can also freeze the dough balls for up to 3 months—bake from frozen, adding a couple of minutes to the baking time.
How do I keep the Hershey Kisses from melting completely?
The key is to press the kisses in immediately after baking, while the cookies are still hot but not straight out of a blazing oven. Let the cookies cool on the baking sheet for about 5 minutes—this allows the chocolate to soften without melting into a puddle. If your kitchen is very warm, you can even pop the cookies in the fridge for 5 minutes after adding the kisses to help them set.
Can I use a different type of chocolate?
Definitely! While Hershey Kisses are classic, you can use any small chocolate candy. Try dark chocolate kisses, white chocolate kisses, or even chocolate stars. I’ve also used mini peanut butter cups, but they’re a bit trickier to press in without breaking the cookie. Experiment and find your favorite!
Pin This Recipe!
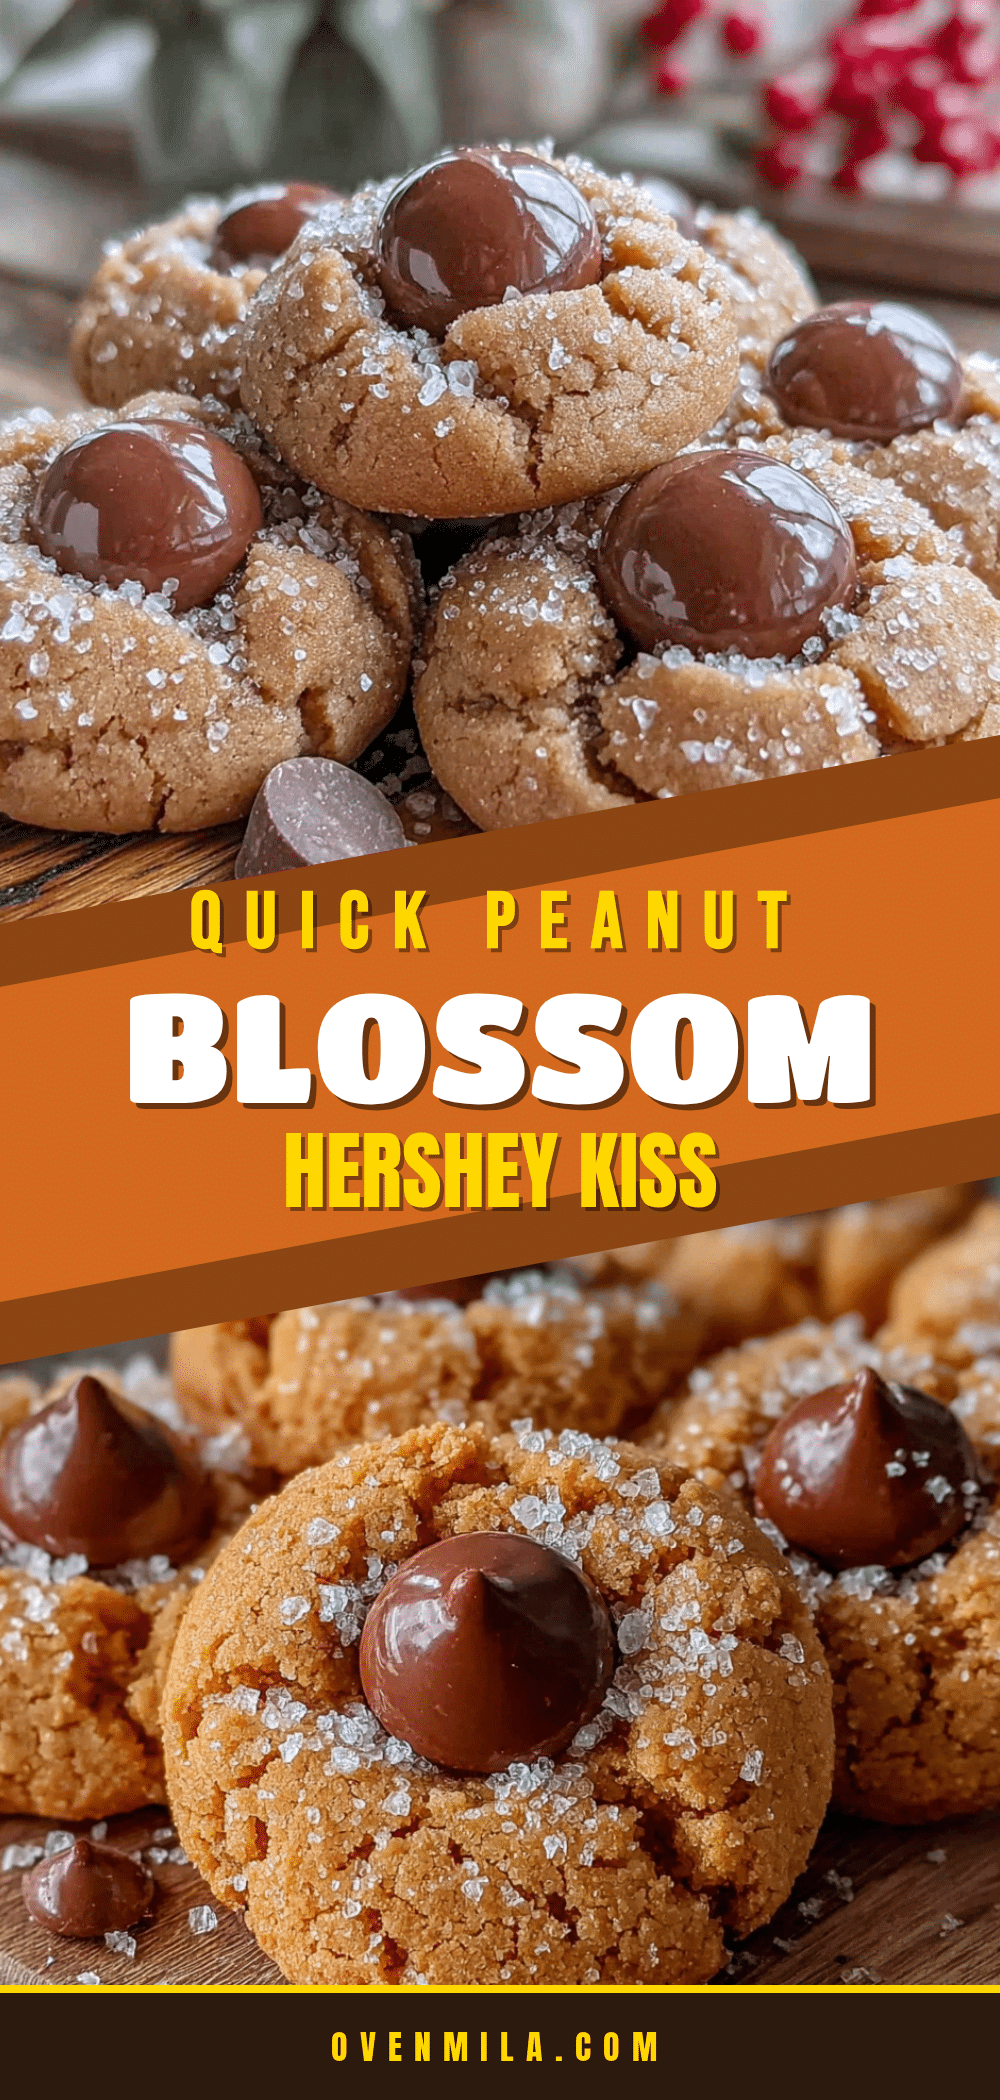
Quick Peanut Butter Blossom Cookies with Hershey Kiss
These quick and easy peanut butter blossom cookies come together in under 30 minutes with no chilling required. Perfect for last-minute cravings, they feature a soft, chewy peanut butter cookie topped with a classic Hershey Kiss.
- Prep Time: 15 minutes
- Cook Time: 10 minutes
- Total Time: 25 minutes
- Yield: 36 cookies 1x
- Category: Dessert
- Cuisine: American
Ingredients
- 1/2 cup unsalted butter, softened
- 1/2 cup creamy peanut butter
- 1/2 cup granulated sugar, plus extra for rolling
- 1/2 cup packed light brown sugar
- 1 large egg, room temperature
- 1 teaspoon vanilla extract
- 1 1/2 cups all-purpose flour
- 1 teaspoon baking soda
- 1/2 teaspoon salt
- 1 bag (about 36) Hershey Kisses, unwrapped
Instructions
- Preheat your oven to 350°F (175°C). Line your baking sheet with parchment paper or a silicone mat.
- In a large mixing bowl, beat together the softened butter, creamy peanut butter, granulated sugar, and packed brown sugar with a hand mixer on medium speed for about 2 minutes until light and fluffy. Scrape down the sides halfway through.
- Add the egg and vanilla extract. Beat on low speed until just combined, about 30 seconds.
- In a separate small bowl, whisk together the all-purpose flour, baking soda, and salt.
- Gradually add the flour mixture to the wet mixture, beating on low speed until just combined. Do not overmix. The dough will be soft and slightly sticky.
- Pour about 1/4 cup of extra granulated sugar into a small bowl for rolling.
- Using a tablespoon or small cookie scoop, portion out about 1.5 tablespoons of dough. Roll into a smooth ball, then roll in the sugar until completely coated.
- Place the sugared dough balls on the prepared baking sheet, spacing them about 2 inches apart. Do not press them down.
- Bake for 10-12 minutes, until the cookies are puffed and lightly golden around the edges. The centers will still look slightly soft.
- As soon as the cookies come out of the oven, immediately press a Hershey Kiss into the center of each cookie gently but firmly.
- Let the cookies cool on the baking sheet for about 5 minutes, then transfer to a wire cooling rack to cool completely.
Notes
For best results, use processed peanut butter like Skippy or Jif, not natural peanut butter. The dough does not need chilling. Bake one sheet at a time for even baking. Work quickly when adding the kisses while cookies are still hot. Store in an airtight container at room temperature for up to 5 days. Freeze baked cookies for up to 3 months.
Nutrition
- Serving Size: 1 cookie
- Calories: 120
- Sugar: 9
- Sodium: 80
- Fat: 7
- Saturated Fat: 3
- Carbohydrates: 14
- Protein: 3
Keywords: peanut butter blossom cookies, Hershey Kiss cookies, quick cookies, easy cookies, no chill cookies, peanut butter cookies


